Merchants with an existing Lightspeed Retail store don’t need to start fresh when setting up a new store location. Learn how to add a new store to your existing account, copy inventory and customers, and complete setup of the new location.
Table of Contents
Create a New Linked Store
Request a new linked store be added to your existing Lightspeed Retail account if you are opening a new location and want to use multi-location features. Fill out the setup form in BackOffice to tell our team the number of locations to create and whether to copy inventory items from the existing location to the new one(s).
IMPORTANT: Once a new store is linked to your account, it cannot be unlinked.
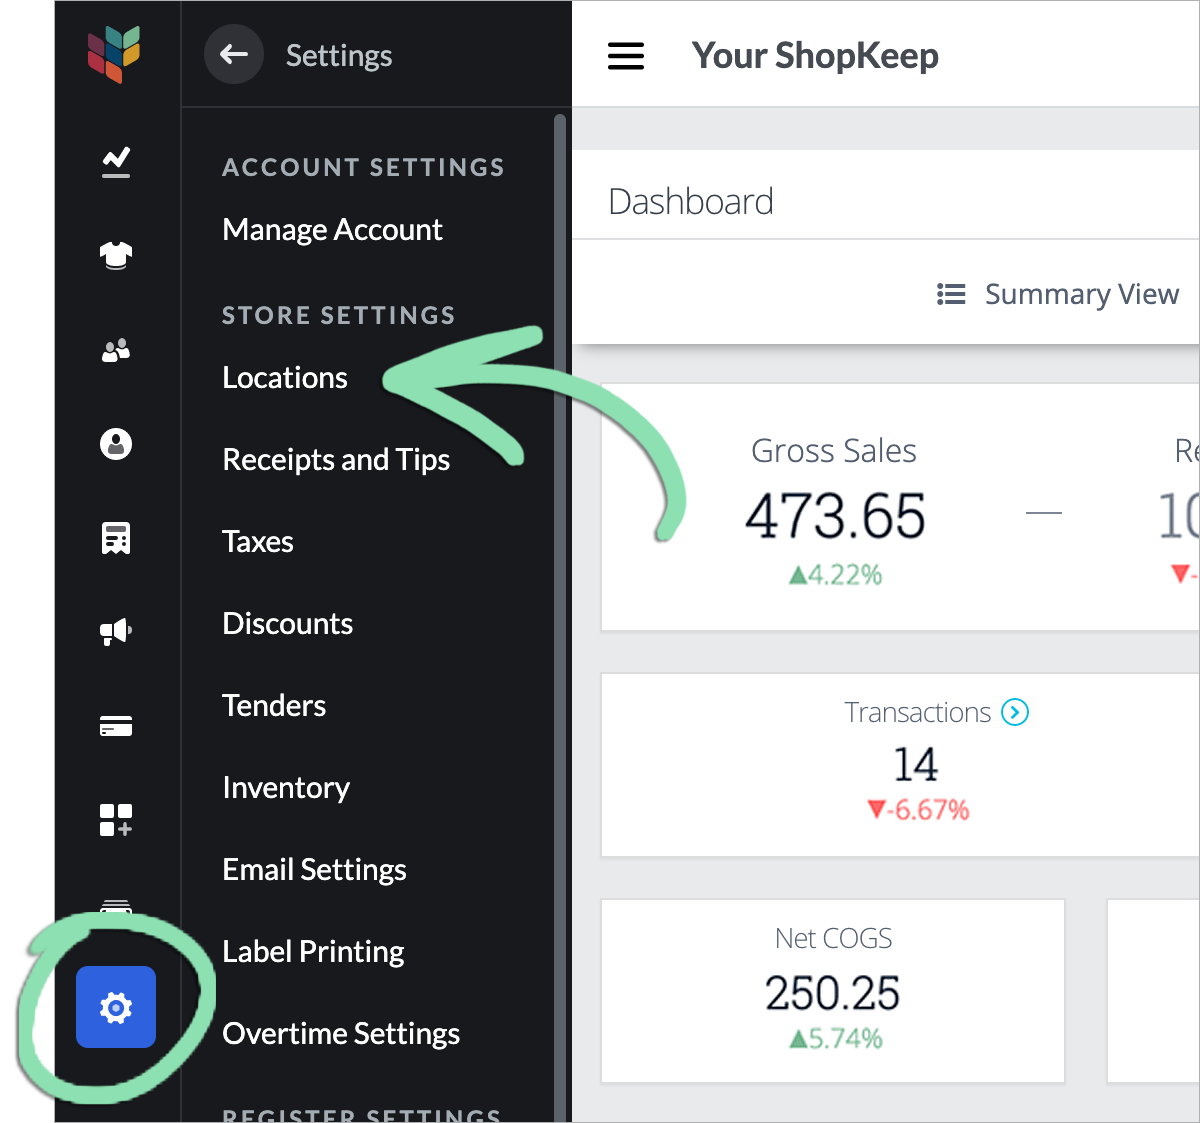
Sign in to BackOffice as the Business Owner for your existing Lightspeed Retail store.
Click 'Add New' to open the additional location setup form.
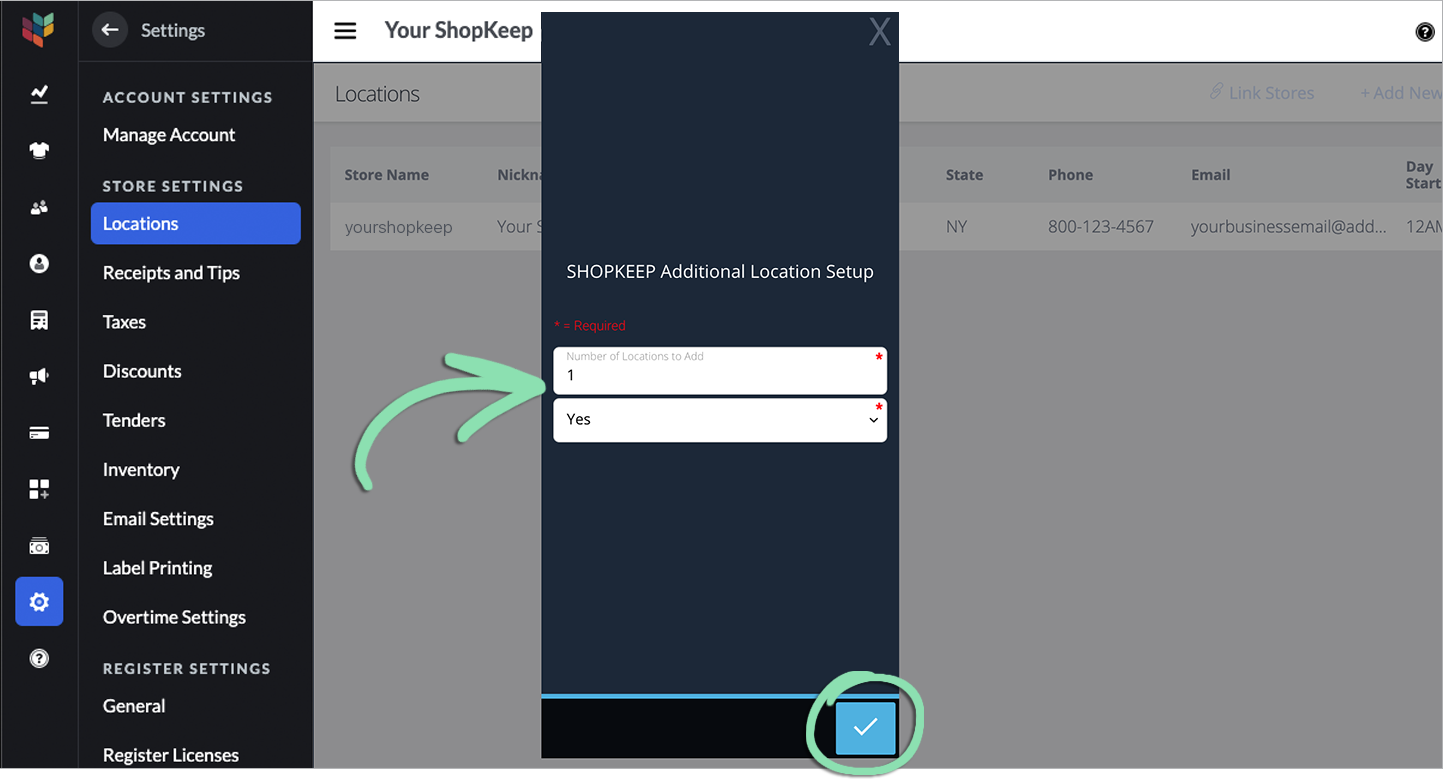
Enter the number of new locations needed, and select whether to copy inventory items to the new location(s), then click the checkmark to submit the form.
Click to Enlarge
Wait for a call or email from Lightspeed Retail confirming the new location(s) have been created.
Follow the steps in the email or call from the previous step to complete setup of the new location(s).
If our team copied inventory to the new location(s), switch to a new store and finish setting up its items.
Each step below is optional. Do only what matches your business needs.
aUse Bulk Management to update quantity on hand and other item properties that are different for the new store (e.g. price changes, reorder triggers, etc.)
Copied items are not synced between stores. Each store’s inventory is separate and must be managed independently from that location’s BackOffice.
bEnter the default tax rate, set up additional tax rates and tax groups, and assign items to taxes.
If the new store sells the same products as the existing one and inventory was not automatically copied while creating the new store, manually copy over inventory from your existing store. First review the limitations of this process, then start importing items into the new store.
It is only necessary to copy inventory using the process in this section if you did not have our team copy inventory while creating the new linked store.
Limitations
Most items and item settings can be copied between stores without difficulty, but there are limitations to be aware of before starting this process.
These items and item settings cannot be copied and must be manually set up in each new store:
Modifiers can be copied to the new store by Customer Care when initially opening the new account. Please make sure to mention this prior to creating the new store.
Barcode labels printed with SKUs from the existing store must be reprinted with SKUs from the new store. Item SKUs do not copy over, so barcode labels from one store cannot be scanned in another.
Copied items are not synced between locations. Each store’s inventory is separate and must be managed independently from that location’s BackOffice.
How to Manually Copy Inventory
From exporting your stock items to importing them into the new store, follow the steps below to learn how to manually copy your inventory using Bulk Management.
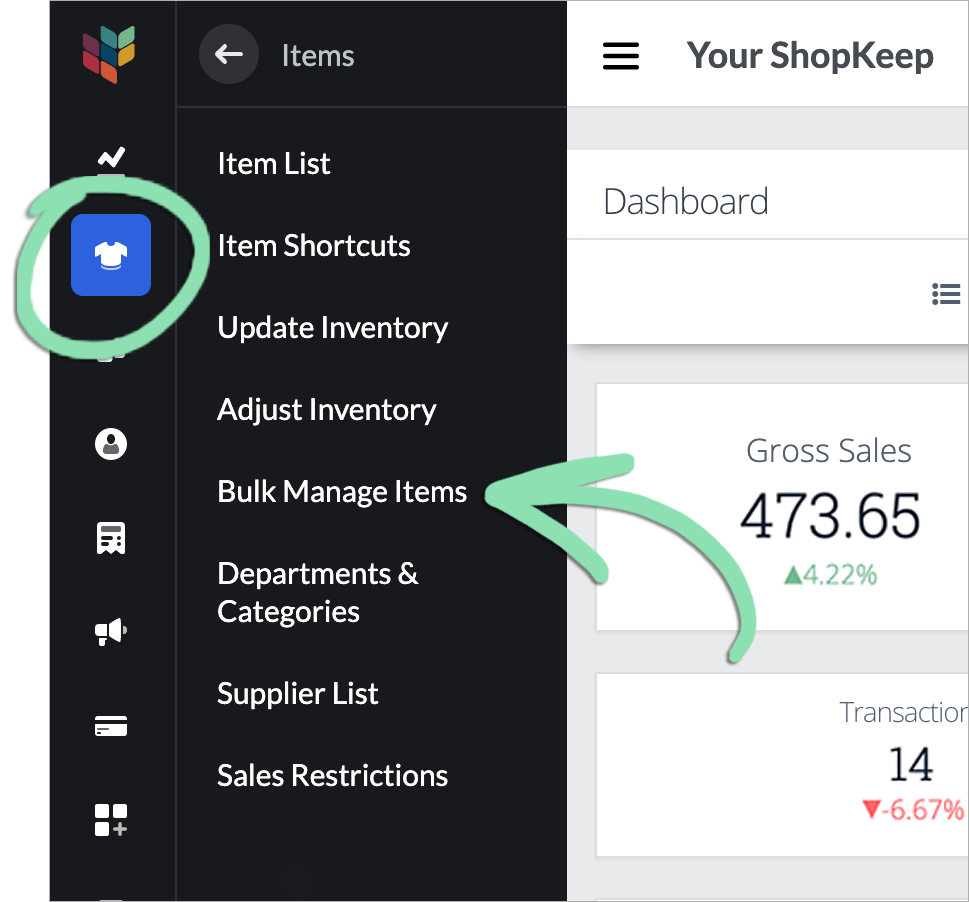
In the existing store's BackOffice, click 'Items' and select 'Bulk Manage Items'.
Click to Enlarge
Delete all rows that contain items with variants or liabilities.
You must manually add these items to the new store in a separate process.
Items with variants have text in the Option Name and Option Value columns.
Liabilities are items used to issue gift cards, gift certificates, or deposits. Look for items with names like Gift Card or Bottle Deposit.
Check the formatting of the 'UPC' column.
Some spreadsheet software removes leading 0s or converts numbers to scientific notation. If UPC codes are not 2 – 55 digits long, adjust the formatting of the cells in this column.
With your inventory imported into the new store, follow these steps to finish setting up the items. Each step is optional, so do only what matches your business needs.
Labels printed using SKUs from the original store will not scan at the new store and must be reprinted.
Manually Copy Customers
If your existing store has customers that visit the new location, manually copy over your customer list to the new store. First review the limitations of this process, then start importing customers.
Limitations
Most customer information can be copied between stores without difficulty, but there are limitations to be aware of before starting this process.
The following customer information cannot be copied to the new store:
Copied customers and their purchases are not synced between locations. Each store’s customer list is separate and must be managed independently from that location’s BackOffice.
How to Manually Copy Customers
The process of manually copying customers is similar to copying inventory with Bulk Management and can easily be done with a customer export spreadsheet from your existing store.
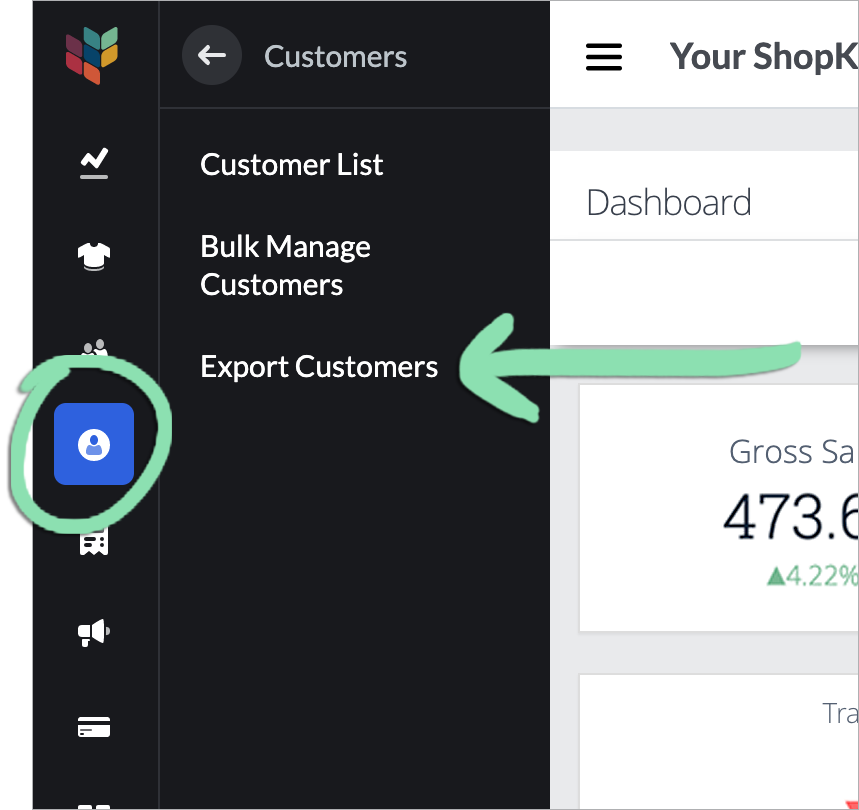
In the existing store's BackOffice, click ‘Customers’ and select ‘Export Customers’.
Click to Enlarge
Click ‘Export Customers’ to export a spreadsheet of the store's customers.
Open the customer export in any spreadsheet software.
If there are customers you do not want to copy to the new store, delete those rows from the spreadsheet.
Steps 5-7 are only required if you have tax exempt customers. Skip to step 8 if this does not apply.
Add a column called ‘Tax Exempt’.
In the ‘Tax Exempt’ column, enter ‘TRUE’ for customers with a ‘Sales Tax Number’ and ‘FALSE’ for customers without one.
Check the formatting of the 'Sales Tax Number' column.
Some spreadsheet software removes leading 0s or converts numbers to scientific notation. You may need to adjust the formatting of this column so sales tax numbers save properly.