Epson TM-U220B
Ticket Printer Setup
Use the Epson TM-U220B Kitchen/Ticket Printer to print tickets that tell staff what to prepare for orders. Commonly used in restaurants and bars, tickets list the items ordered, modifiers selected, guest count entered, and any notes entered by the cashier. Learn how to set up the Epson printer, create printer groups to manage items for ticket printing, and print tickets at the register.
Setting up a Star Micronics SP700 Kitchen/Ticket Printer? Visit this article instead.
Watch our setup video below:
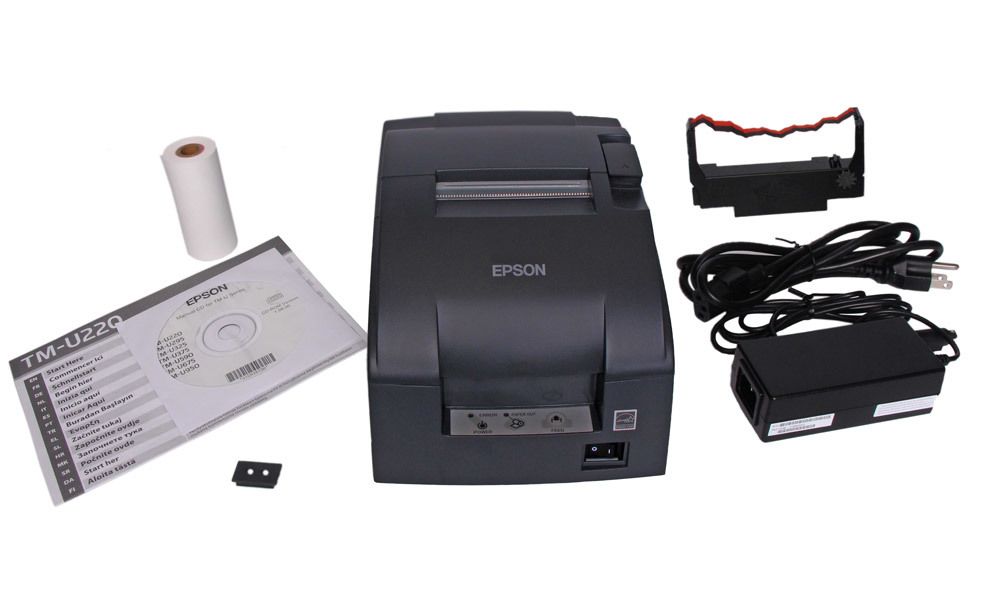
In the Box
The Epson TM-U220B Kitchen/Ticket Printer ships with the parts listed below.
Printer Hardware Setup
Complete the basic steps of connecting the printer to power, plugging it into your router, and loading the ink ribbon and paper. After setup, the printer can be connected to Lightspeed Retail for use at the register.
You must have Wi-Fi at the location and access to the router to set up this printer. The printer must be plugged into a router via ethernet cable to connect with the iPad.
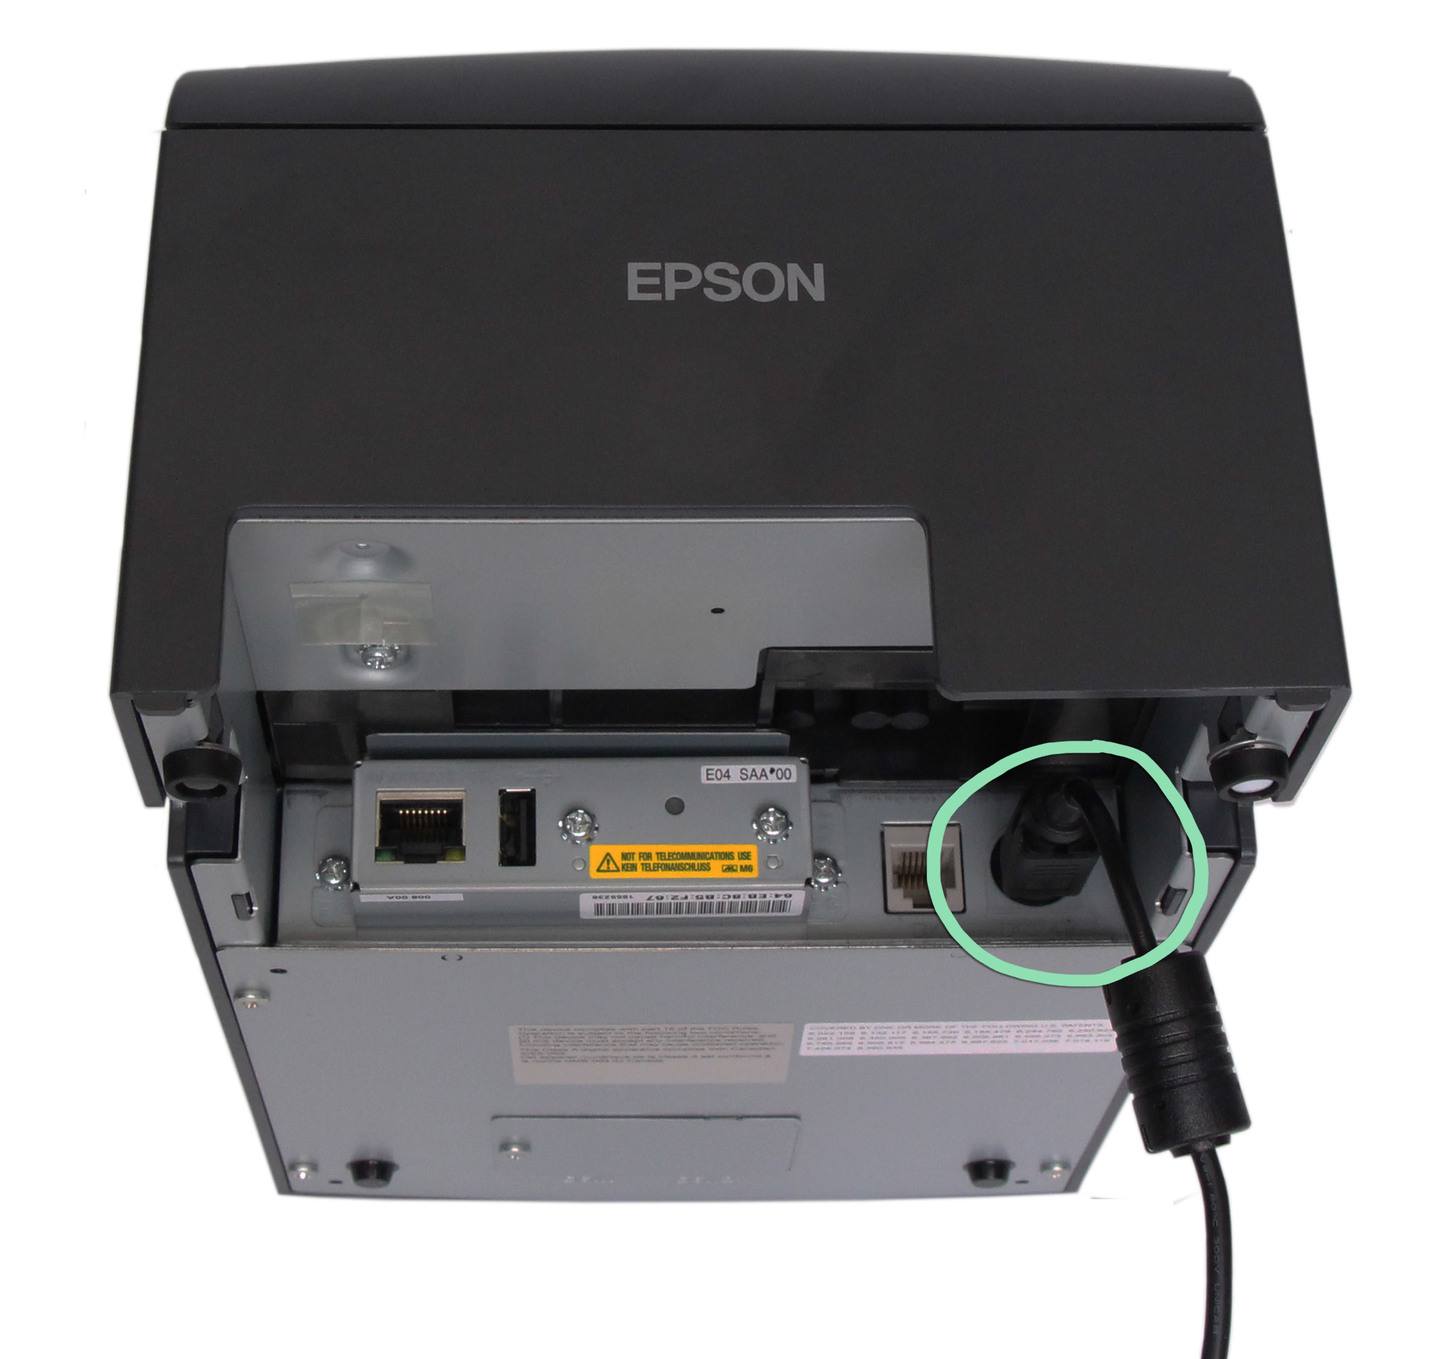
- Plug the power cable into the adapter.

- Connect the power adapter to the printer and plug the other end into a power outlet.
If your printer looks different than ours below, you may have a Star ticket printer. If so, visit our Star SP700 article for setup help.
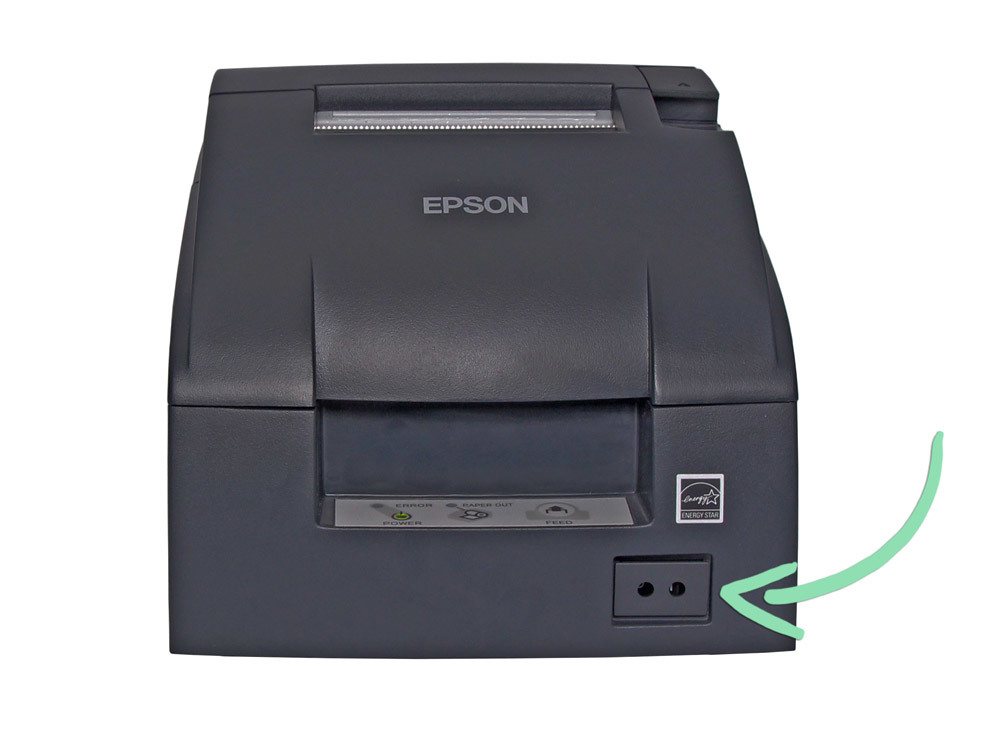
- Connect an ethernet cable to the printer port labeled '100/10 BASE'.
*An ethernet cable is not included with the printer and must be purchased separately.
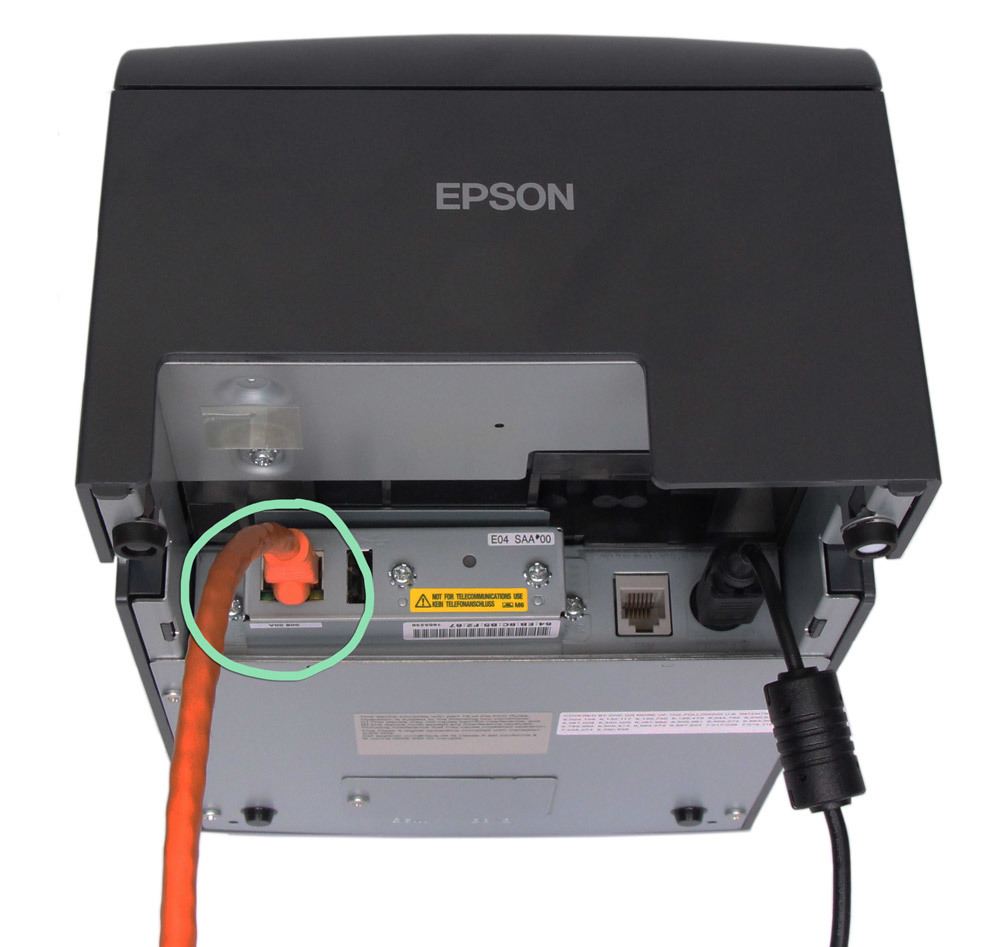
- Plug the other end of the ethernet cable into an open numbered port on the router.
- Turn the knob on the ink ribbon clockwise to tighten the slack.

- Lift open the printer's front lid.
- Insert the ink ribbon cartridge, then press down to lock it in place.
Position the red and black ribbon behind the grey metal plate.
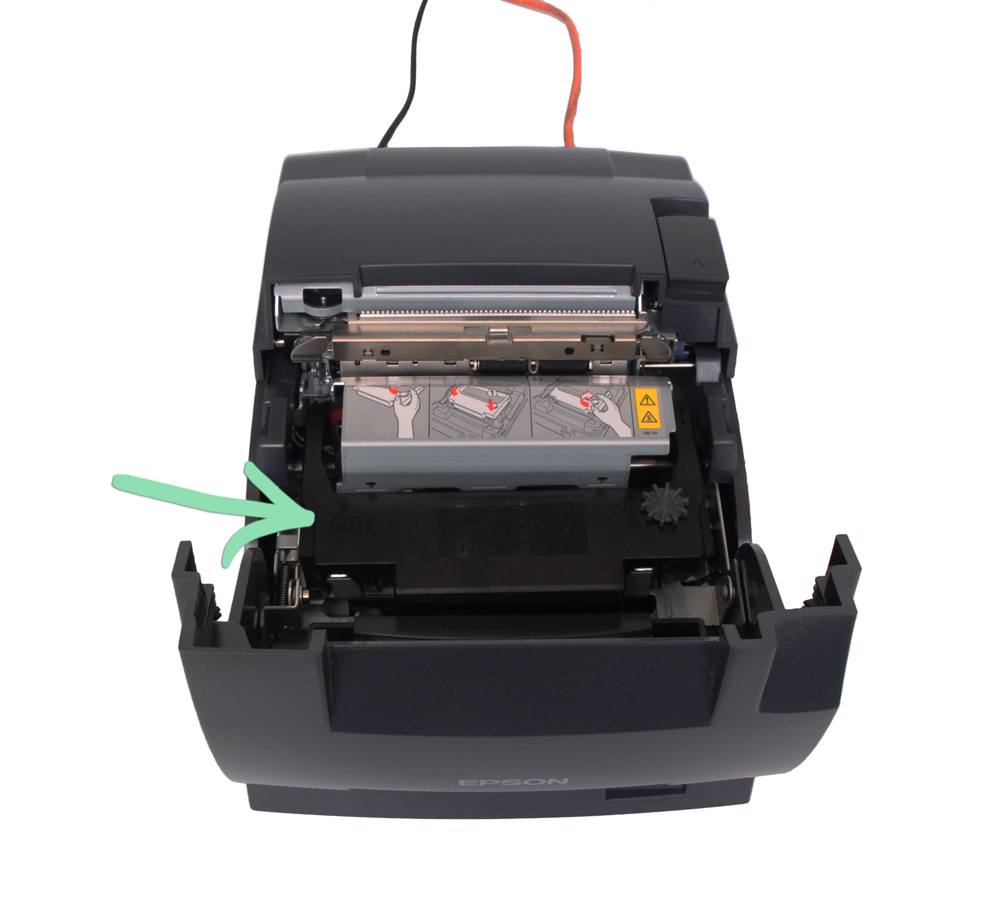
- Turn the ink ribbon's knob a couple of times, then close the front lid.
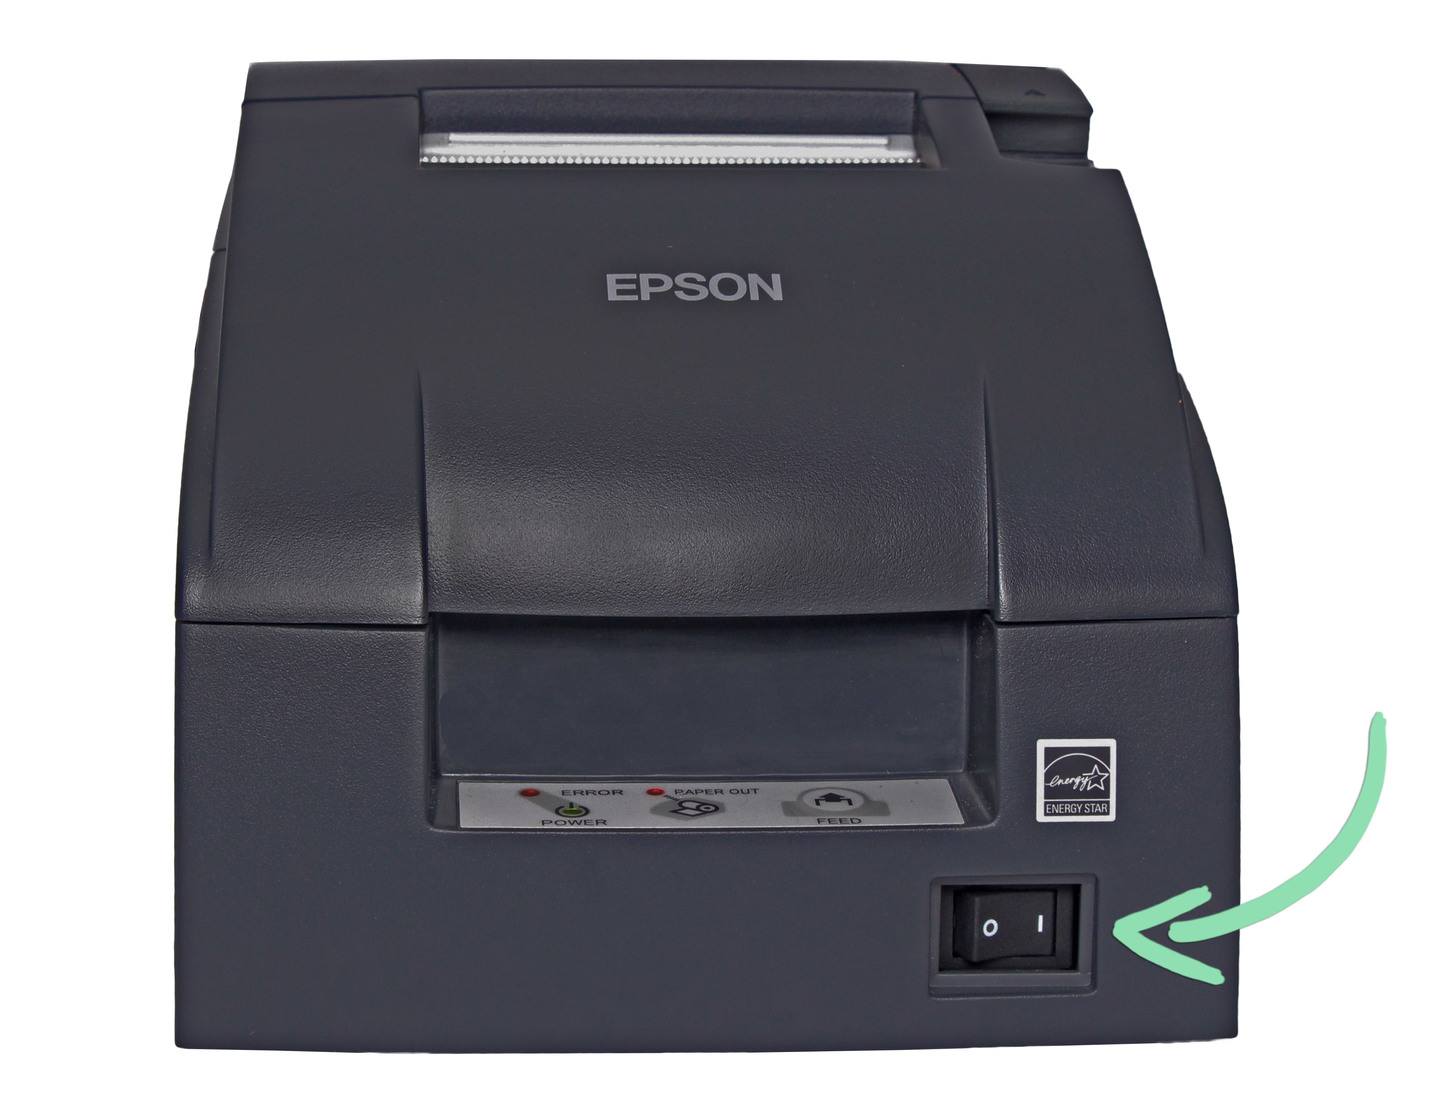
- Flip the power switch to turn on the printer.
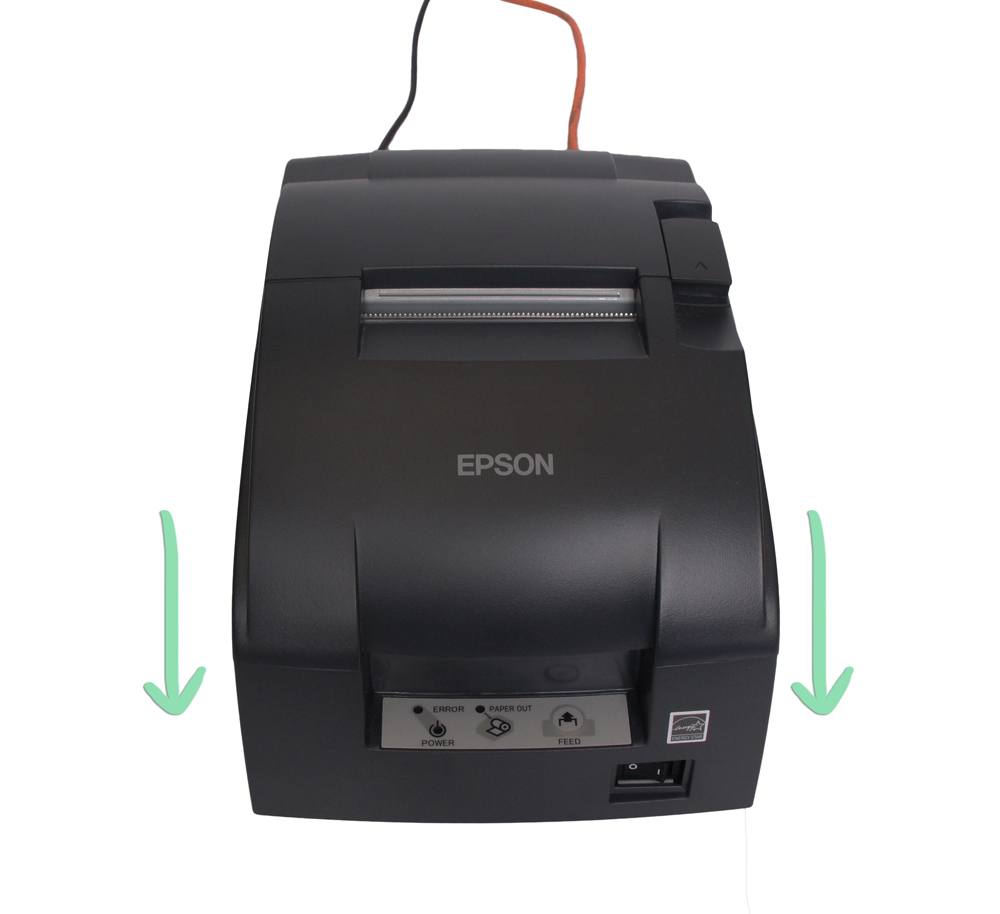
- Push the lever to open the back cover.

- Load the paper so it feeds up from the bottom of the roll.
Running low on paper? Purchase 1-ply or 2-ply bond paper from the Lightspeed Store. Thermal paper is not compatible with the printer.
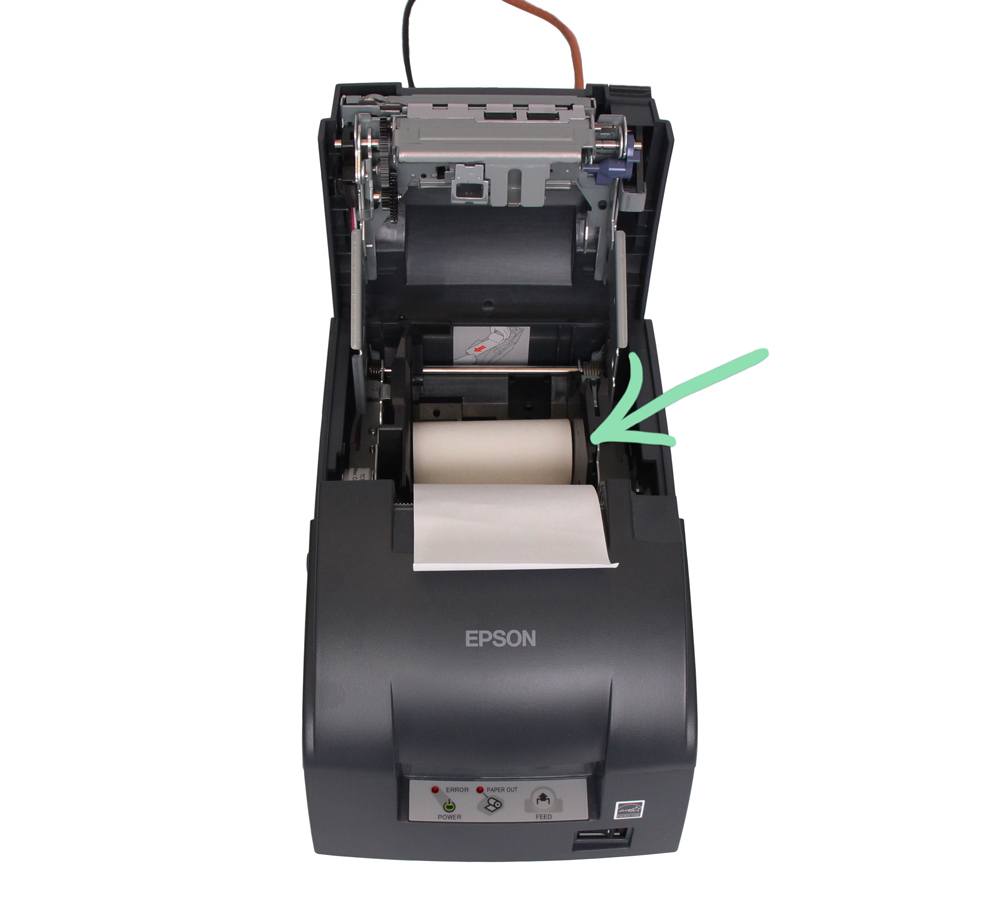
- Close the cover on the paper.
- Wait for the red lights to turn off and for the POWER light to turn solid green.
If the red lights do not turn off, visit our troubleshooting guide for help.

- (Optional) Snap the cover over the power switch to prevent the printer from accidentally being turned off.
- Follow the steps below to connect the printer to Lightspeed Retail.
Connect to Lightspeed
With the printer hardware set up, connect the printer to the Retail POS (S-Series) app to activate it for use with the register.
- In the Retail POS (S-Series) app, open the Main Menu and tap 'Integrated Hardware'.

- Tap 'Printers'.

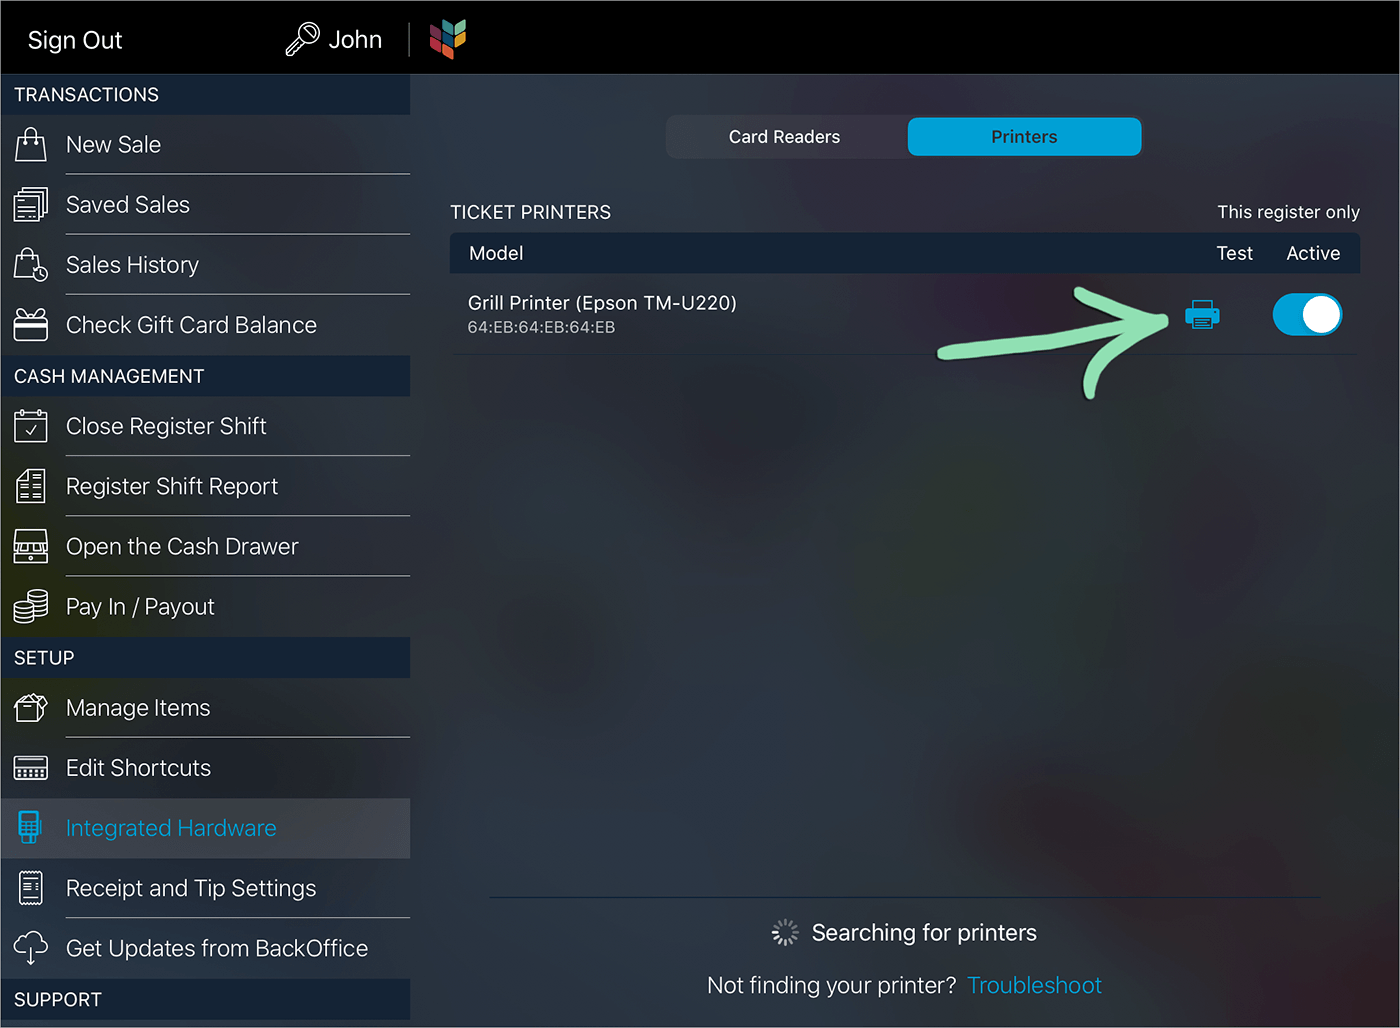
- Under 'Ticket Printers', toggle the switch next to 'Epson TM-U220' on.
Don’t see the printer listed? Visit our troubleshooting guide for help.
- If the printer also appears in a ‘Cash Drawers’ section, do not toggle it on there.
- Printers can be toggled on and off at each register to change the status of printers at that register.

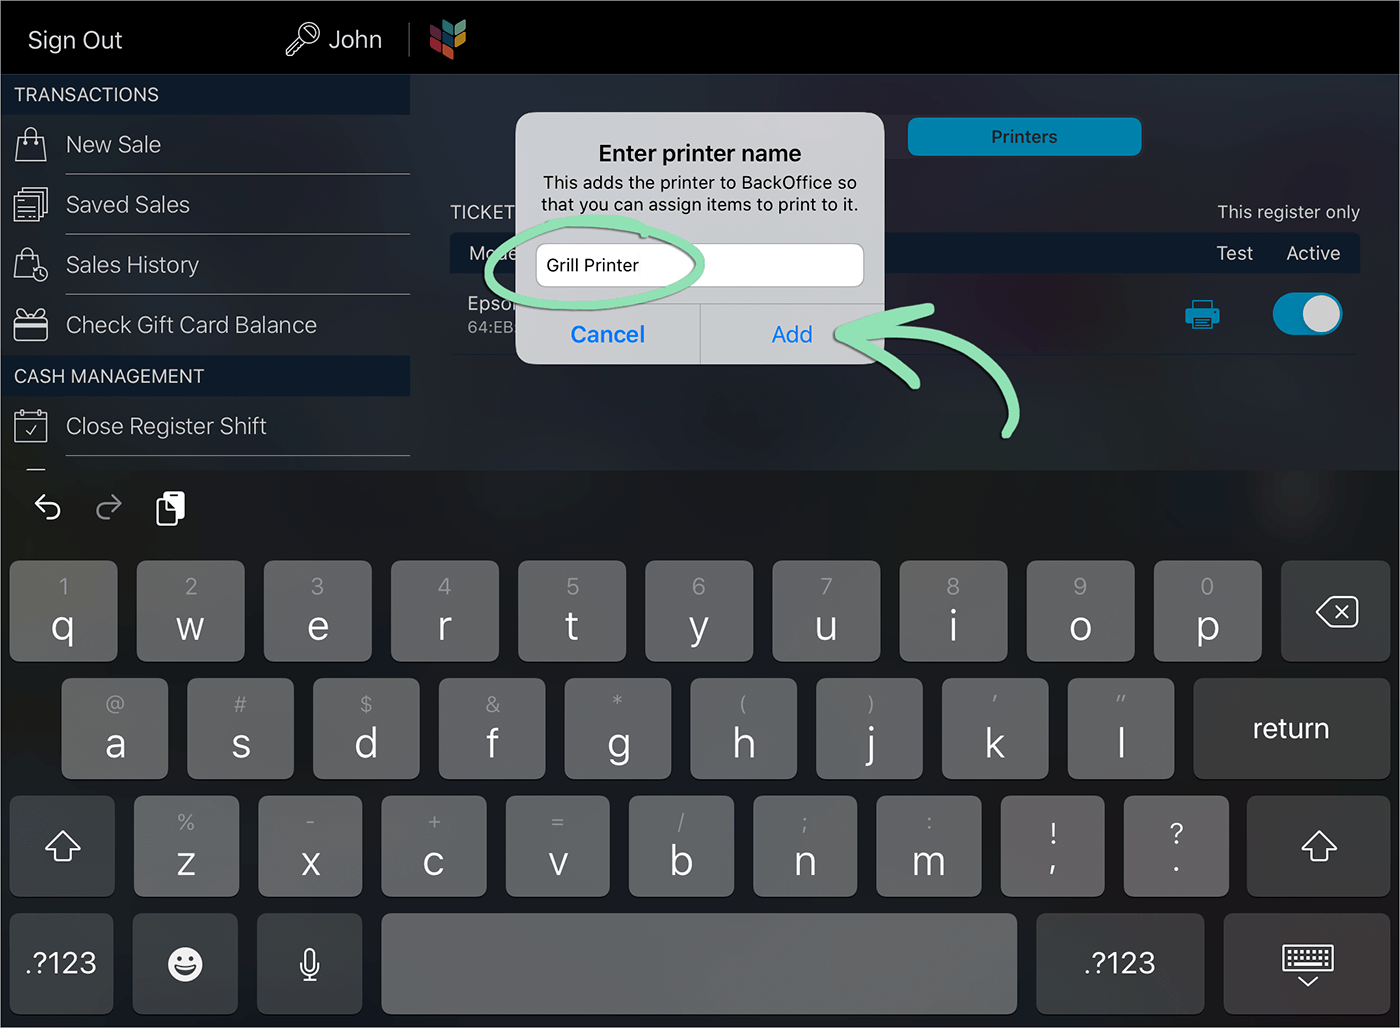
- Enter a name for the printer, then tap 'Add'.
- (Optional) Tap the printer icon to test the connection between the register and the printer.
If successful, this prints a slip of paper with the printer’s name, MAC address, and the date and time.

- (Optional) Repeat steps 3 - 5 to connect an ethernet receipt printer for use as a ticket or fallback printer.
BackOffice Printer Assignments
In BackOffice, learn how to assign groups of items to the printer for ticket printing, manage ticket printing on the individual item level, and set up a fallback printer to print tickets if the primary ticket printer fails.
Printer Group Setup
Printer groups allow you to manage which departments and categories of items print to each ticket printer. Select entire departments or categories and assign them to one or multiple printers.
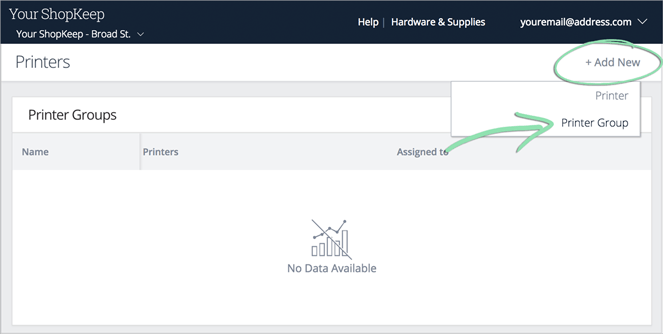
- In BackOffice, click ‘Settings’ and select ‘Printers’.

- Click ‘Add New’ and select ‘Printer Group’.
Or, select an existing printer group to edit the items or printers assigned to it.
- Enter a ‘Name’ for the printer group.
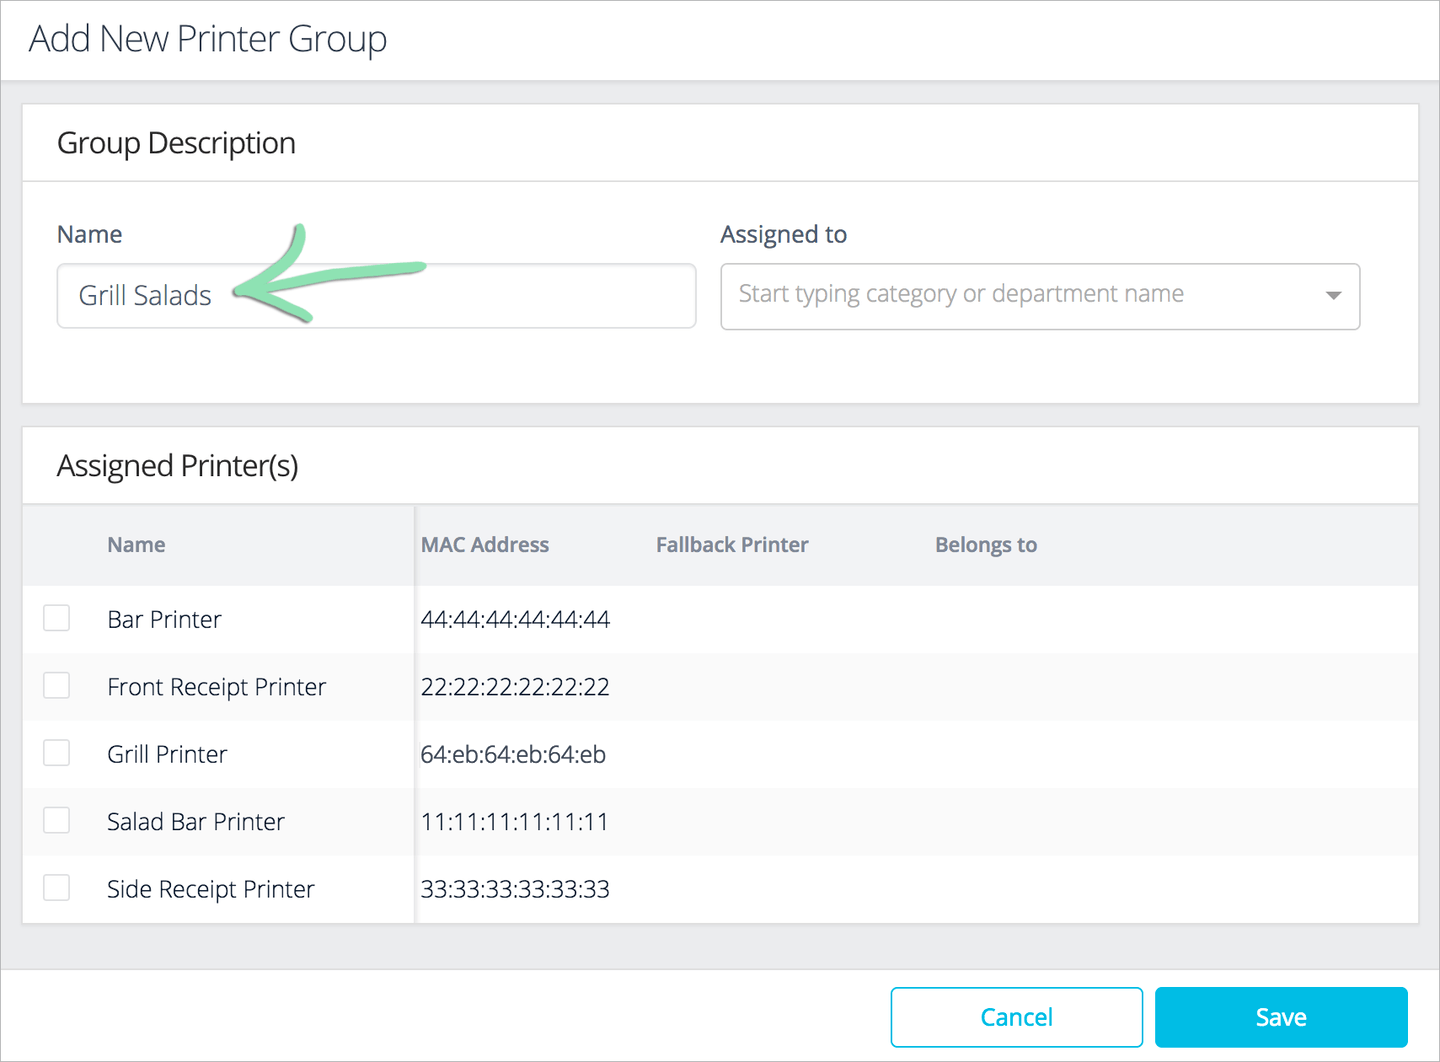
- Select departments and/or categories of items to assign to the group.
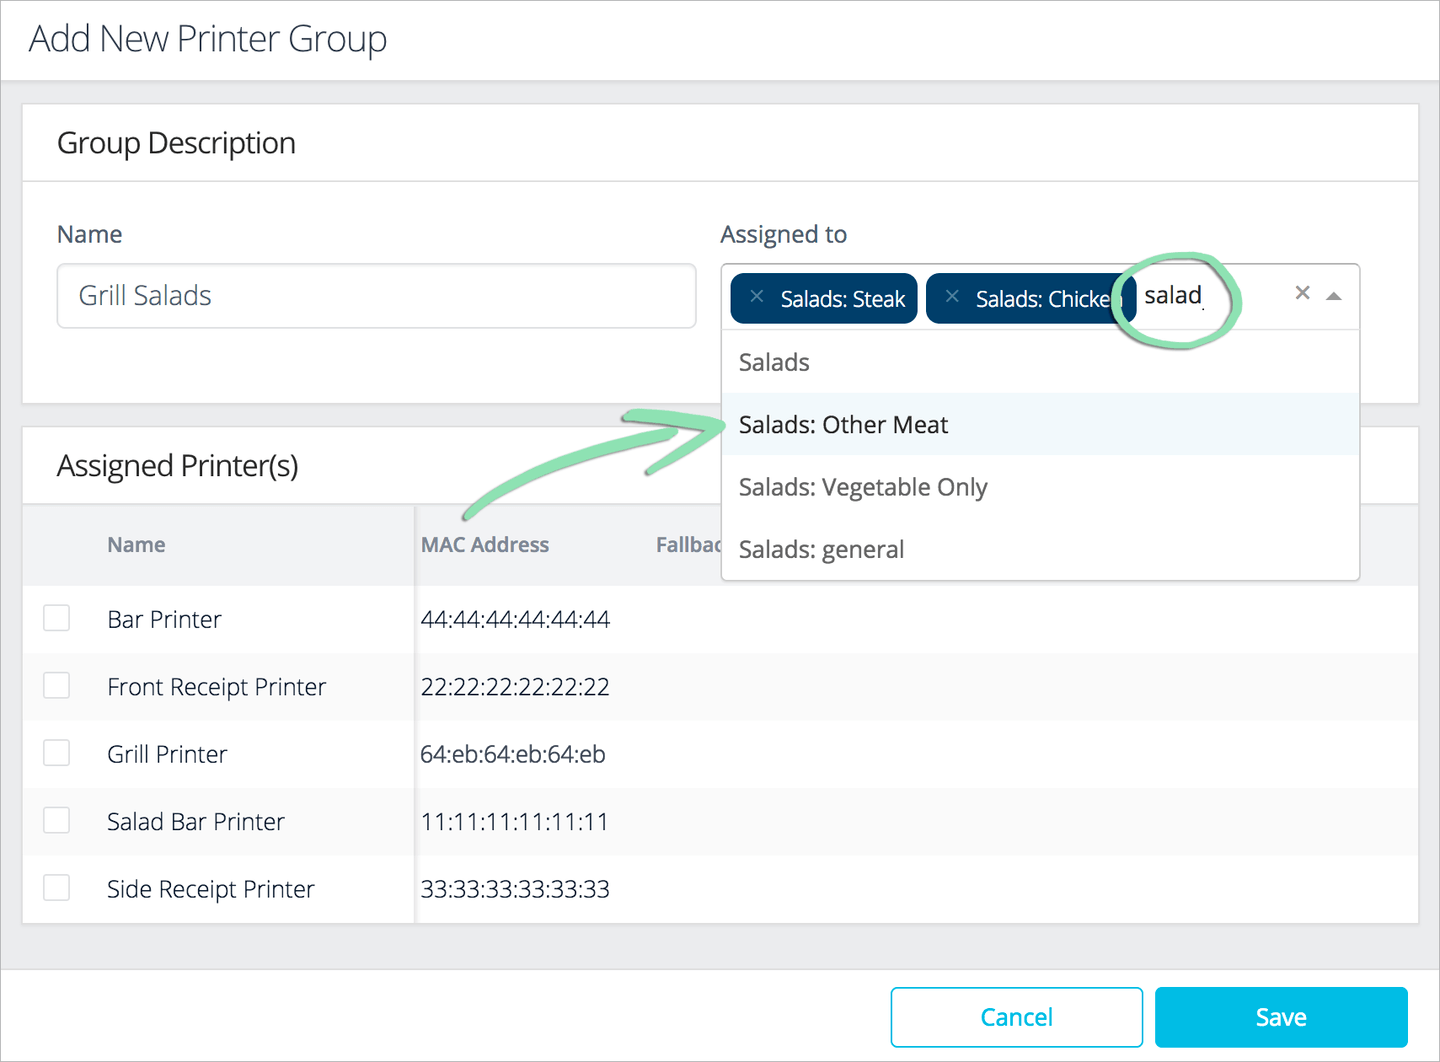
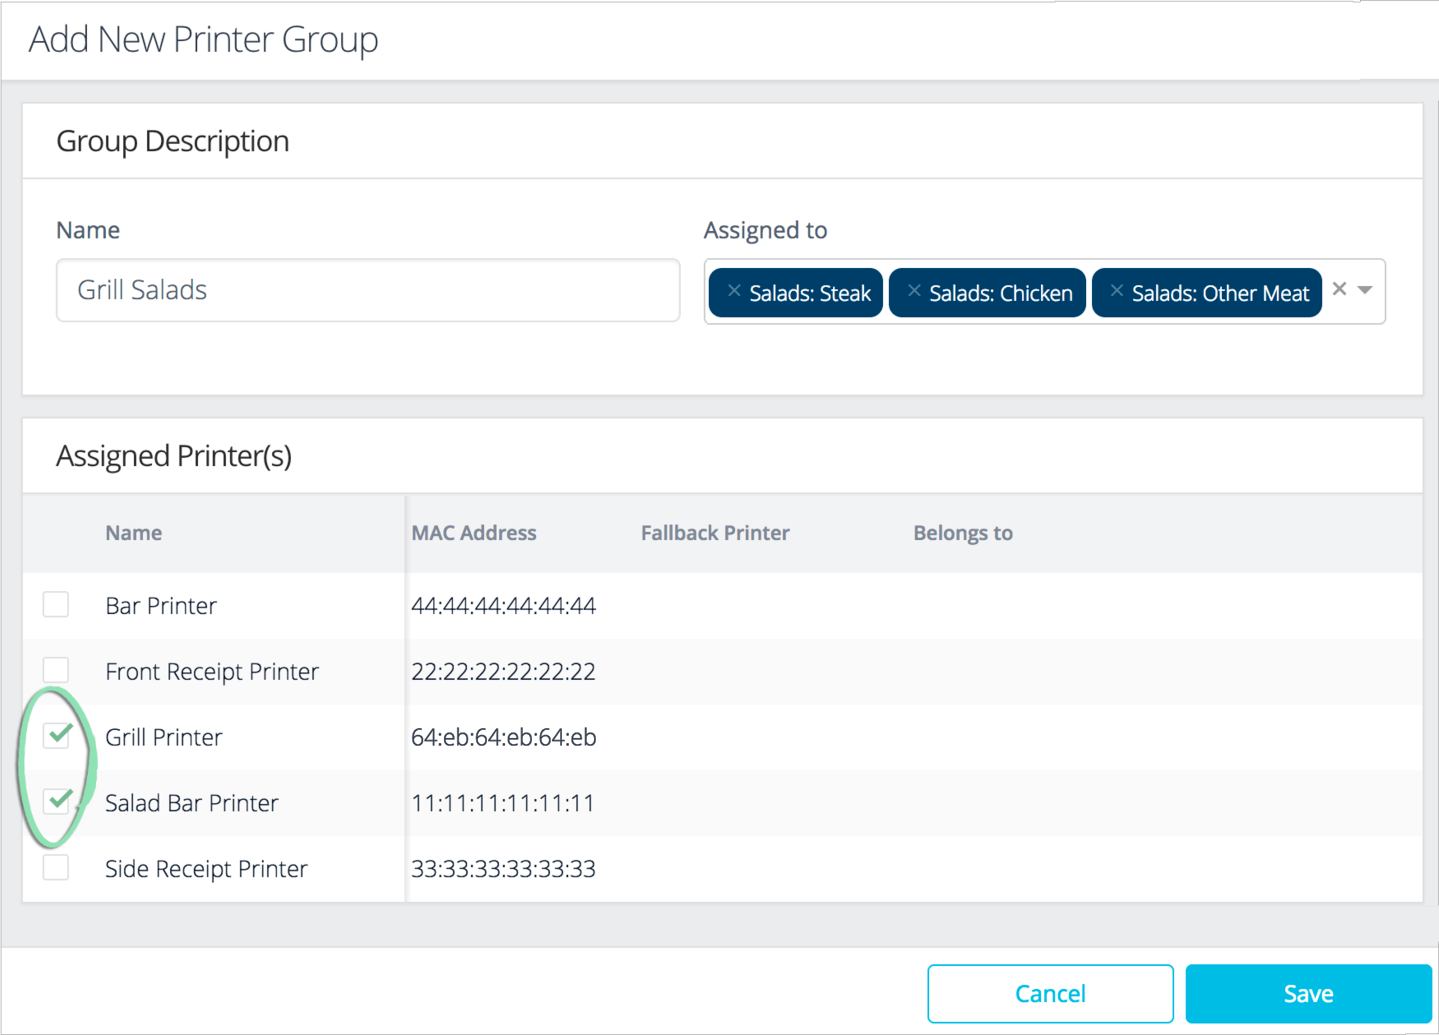
- Select the printer(s) that will print tickets for the group's items.
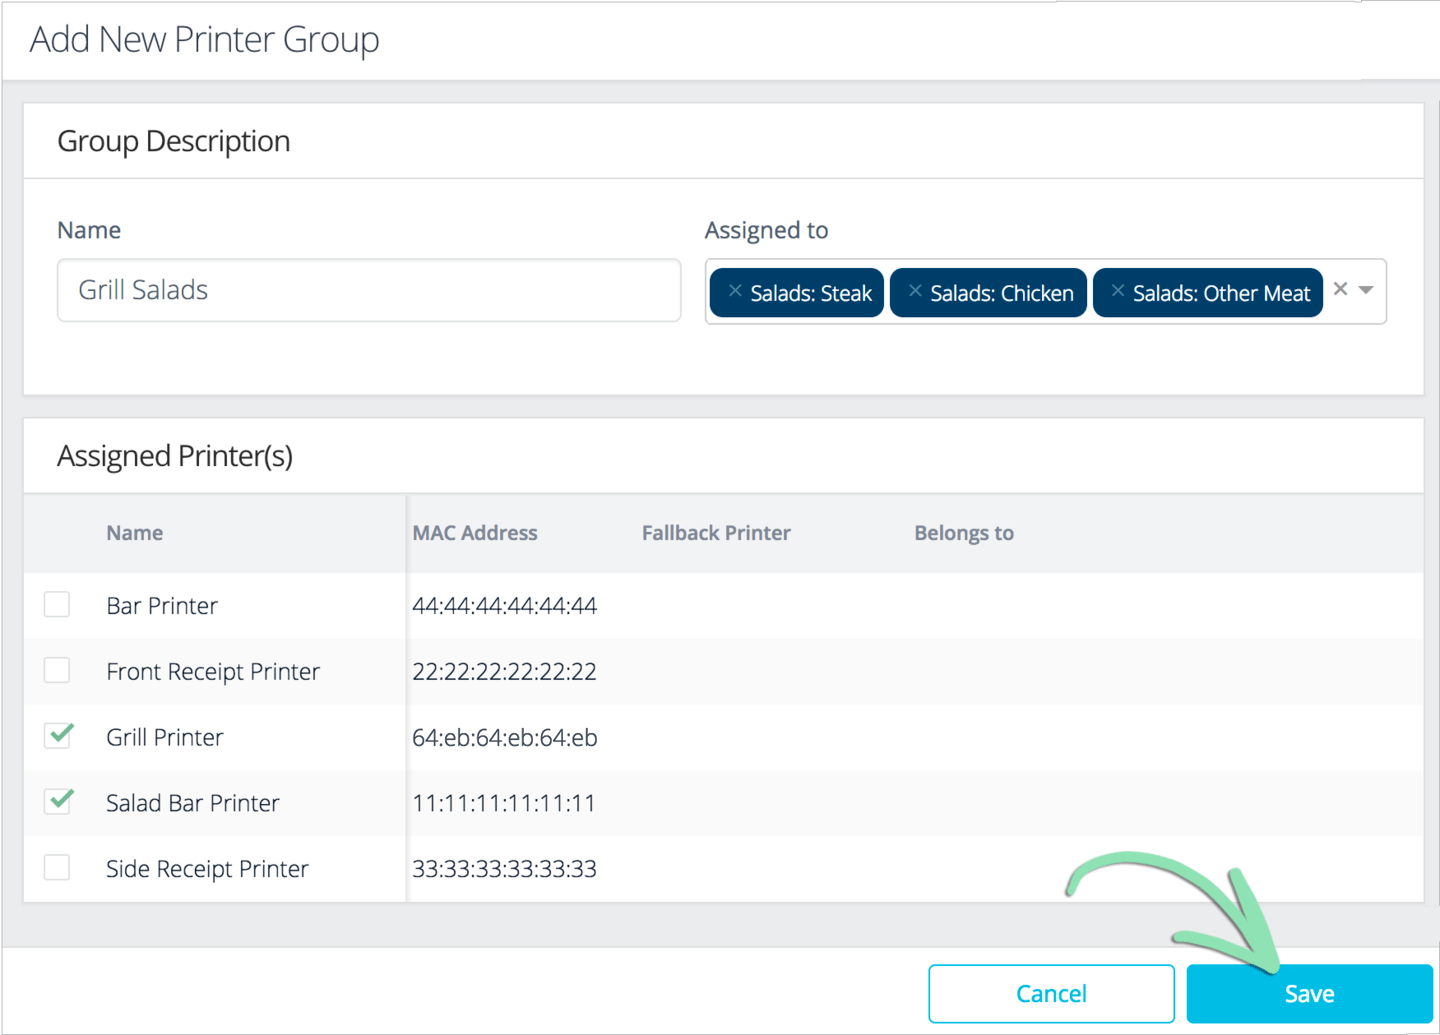
- Click ‘Save’ to save changes.
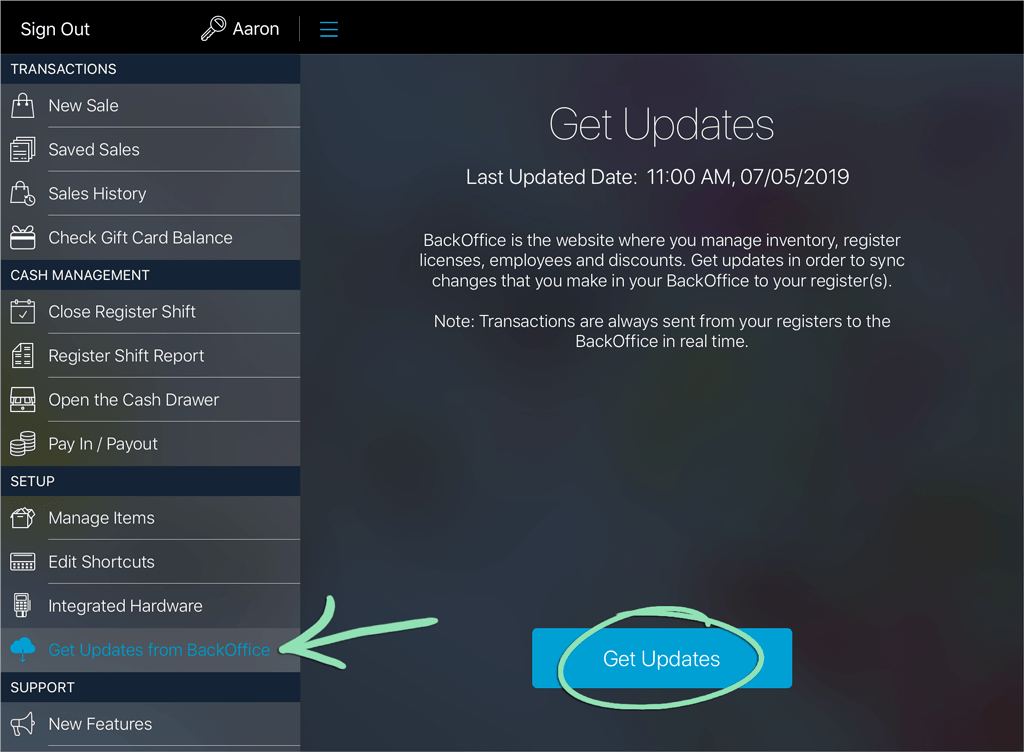
- Get updates on the iOS or Android register to sync the changes to the register.
If you receive an error while getting updates, visit our troubleshooting guide for help.
Manage Printed Items
Manage ticket printing for individual items to assign single items to or unassign them from printer groups.
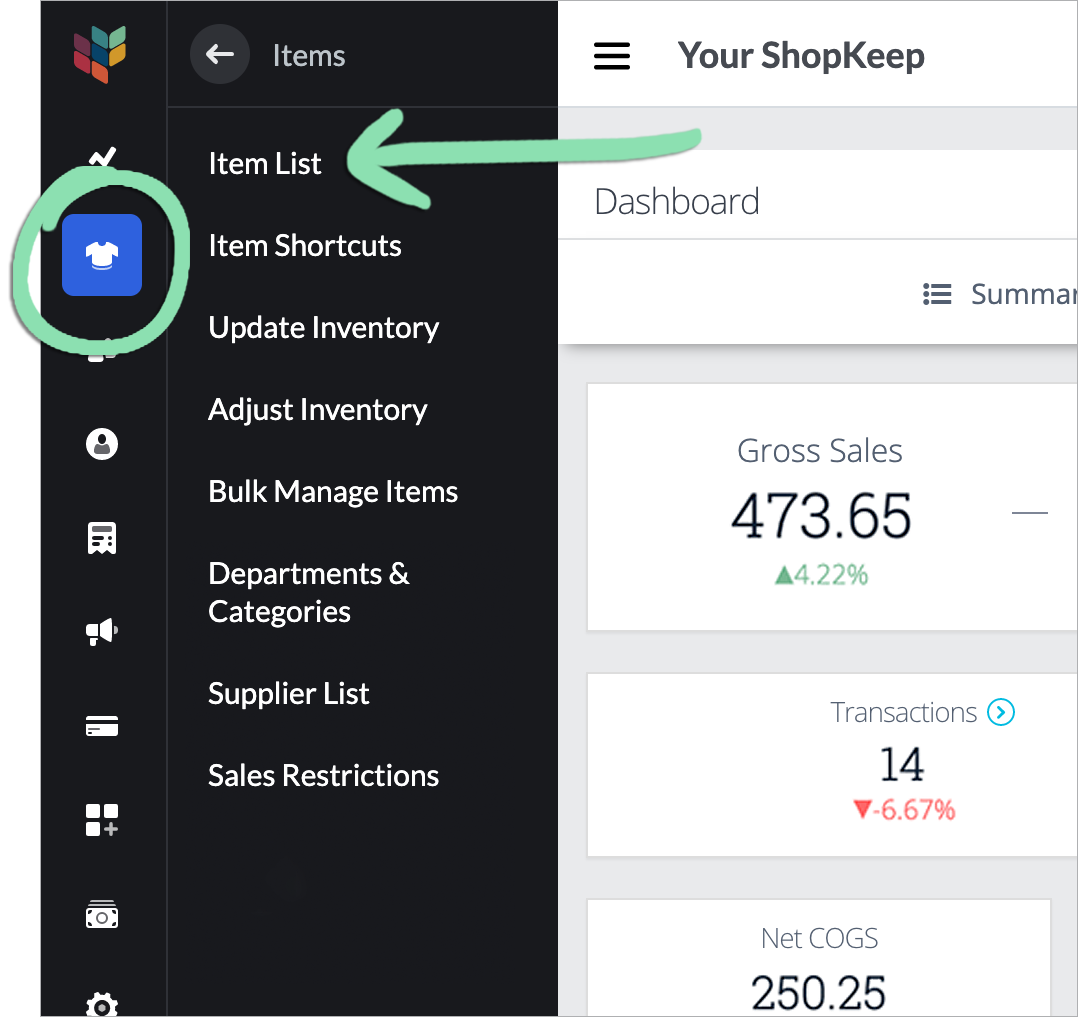
- Open the Item List in BackOffice or from the Retail POS (S-Series) app (employees with BackOffice permissions only).
- In BackOffice, click ‘Items’ and select ‘Item List’.
- In the Retail POS (S-Series) app for iOS, tap ‘Manage Items’ on the Main Menu. For the Retail POS (S-Series) app for Android, tap ‘Setup’ on the register menu, then select ‘Manage Items’.
Retail POS (S-Series) app for iOS Retail POS (S-Series) app for Android
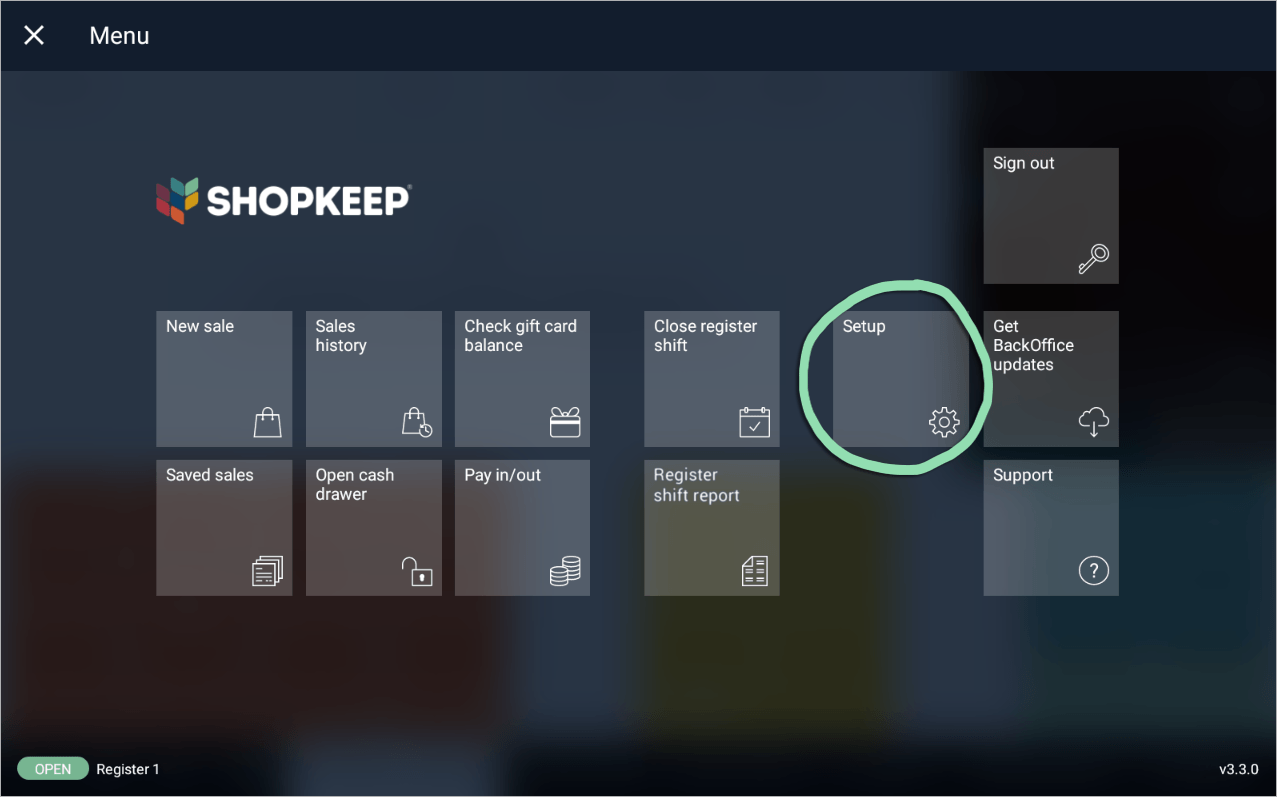
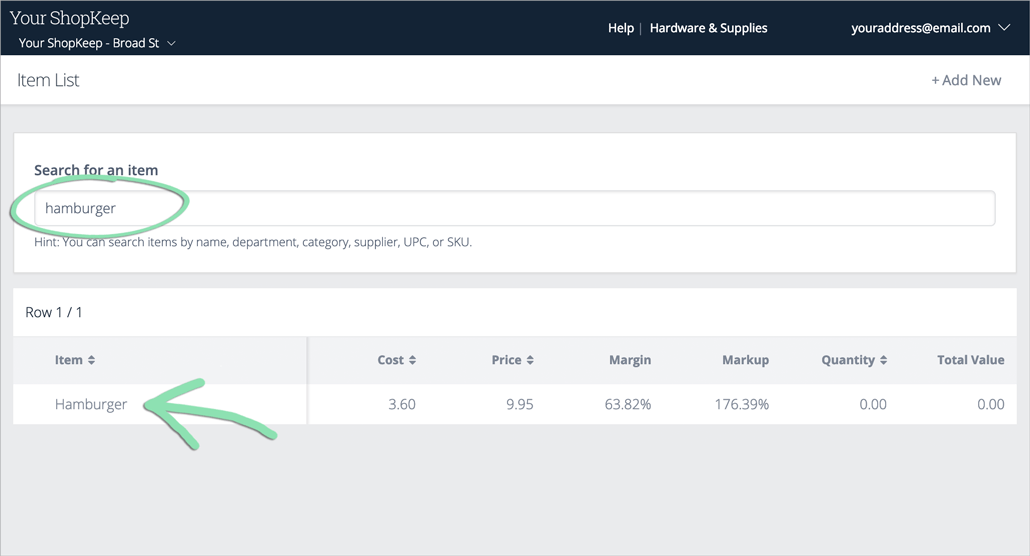
- Search for and select an item.
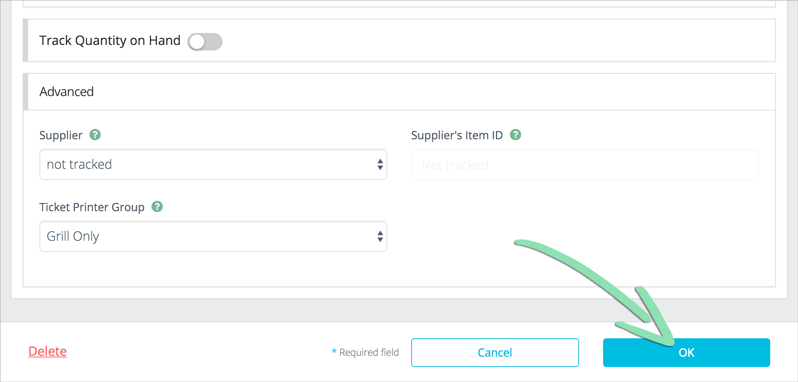
- Select a ‘Ticket Printer Group’ from the drop-down or ‘No Printer Group’ to unassign the item.
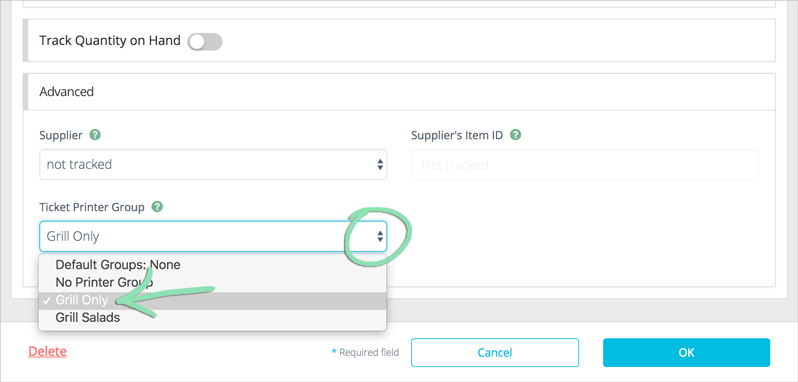
- Click 'OK' to save changes.
- If accessing the Item List from BackOffice, get updates on the iOS or Android register to sync the changes to the register.
If you receive an error while getting updates, visit our troubleshooting guide for help.
Set a Fallback Printer
If a ticket printer fails to print, you can set another ticket printer or a receipt printer as a fallback that will print the ticket. Assign an optional fallback printer to each ticket printer in the event a ticket printer fails.
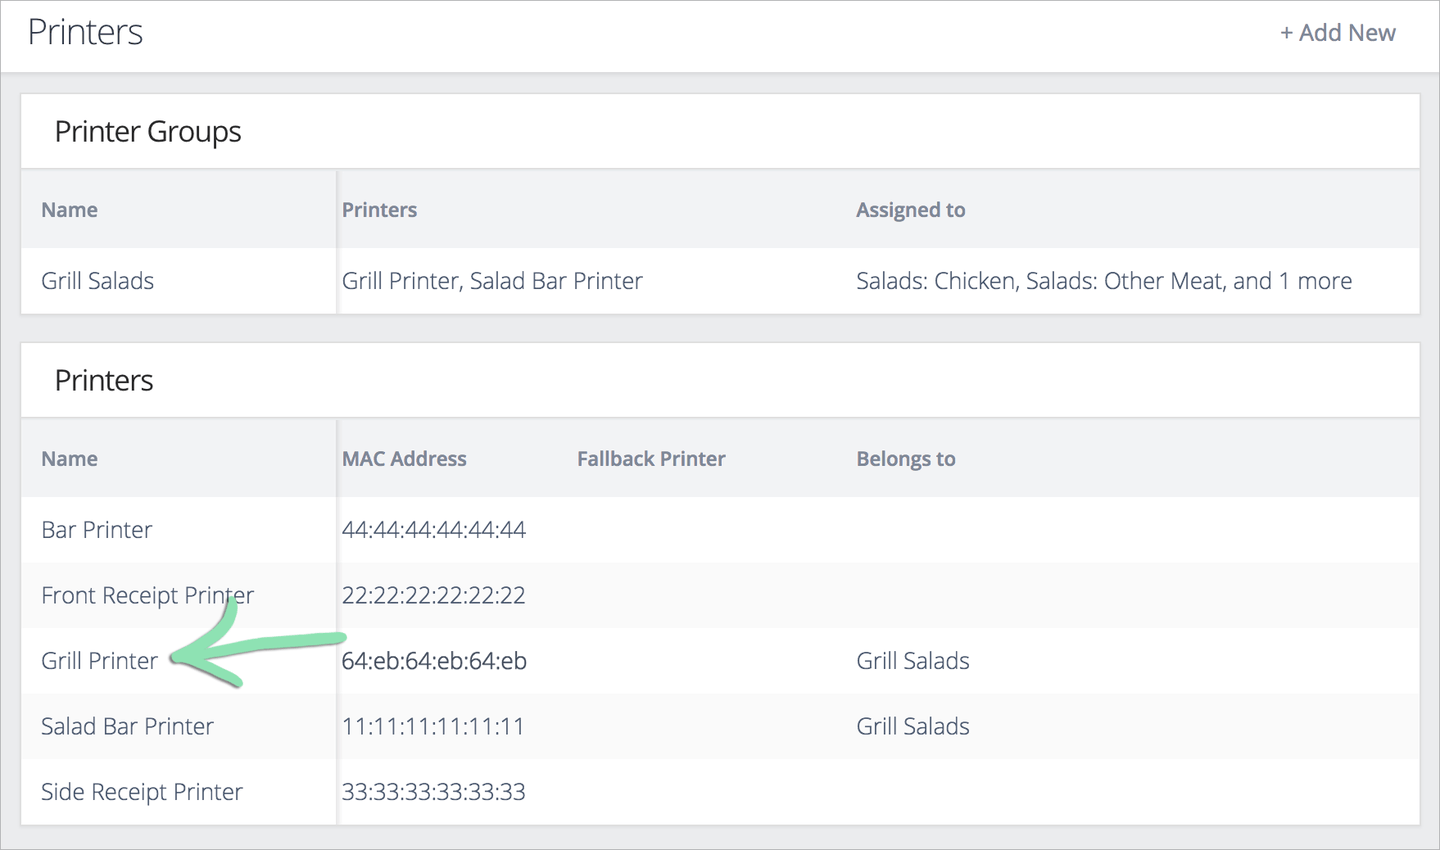
- In BackOffice, click ‘Settings’ and select ‘Printers’.
- Select a ticket printer from the 'Printers' list.
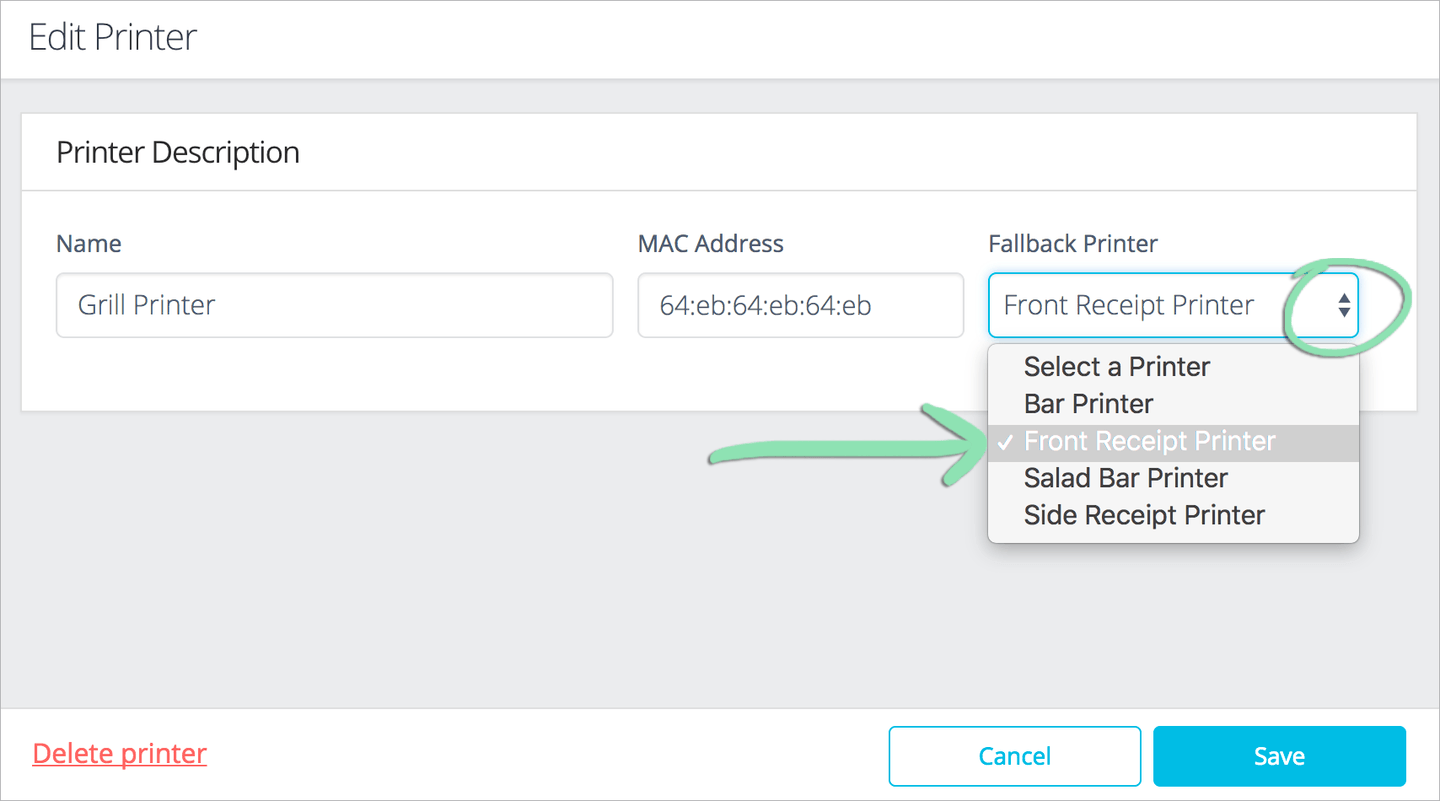
- Choose a ‘Fallback Printer’ from the drop-down.
Select another ticket printer or an ethernet receipt printer to use as the fallback.
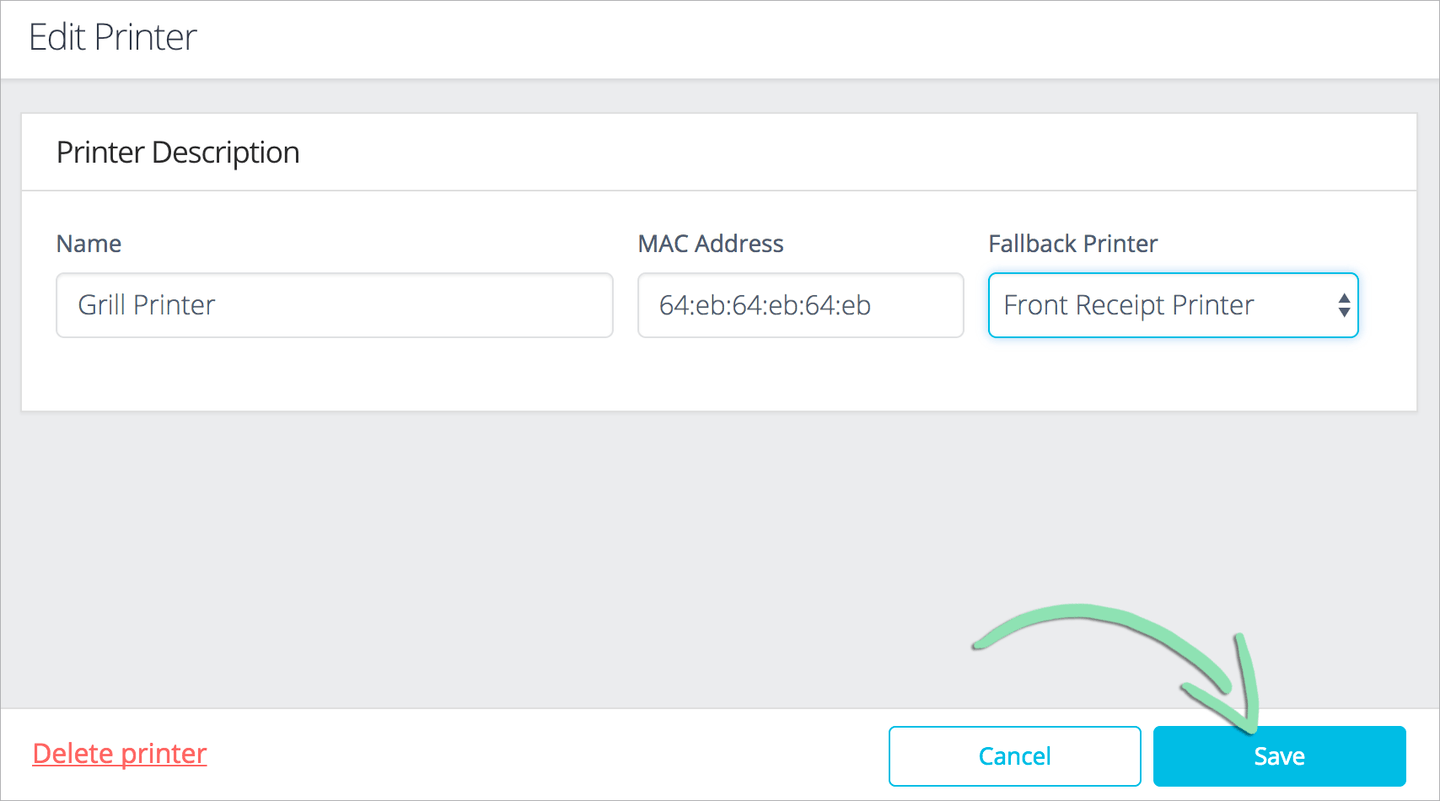
- Click ‘Save’ to save changes.
- Get updates on the iOS or Android register to sync the changes to the register.
If you receive an error while getting updates, visit our troubleshooting guide for help.
Ticket Printing at the Register
Tickets print automatically when a cashier saves or tenders a sale containing items assigned to a printer group. The cashier can also enter notes that will print on the ticket. If needed, tickets can be resent to the kitchen using the reprint feature.
Tickets also automatically print for online orders received at the register. Visit our Lightspeed eCom (E): Online Ordering article to learn more about ticket printing for online orders.
- At the register, add a printer group item to a sale.
- (Optional) Add notes that will print on the ticket.a Tap ‘Add ticket notes’ (iOS), or swipe right across the item and tap ‘Note’ (Android).Retail POS (S-Series) app for iOS
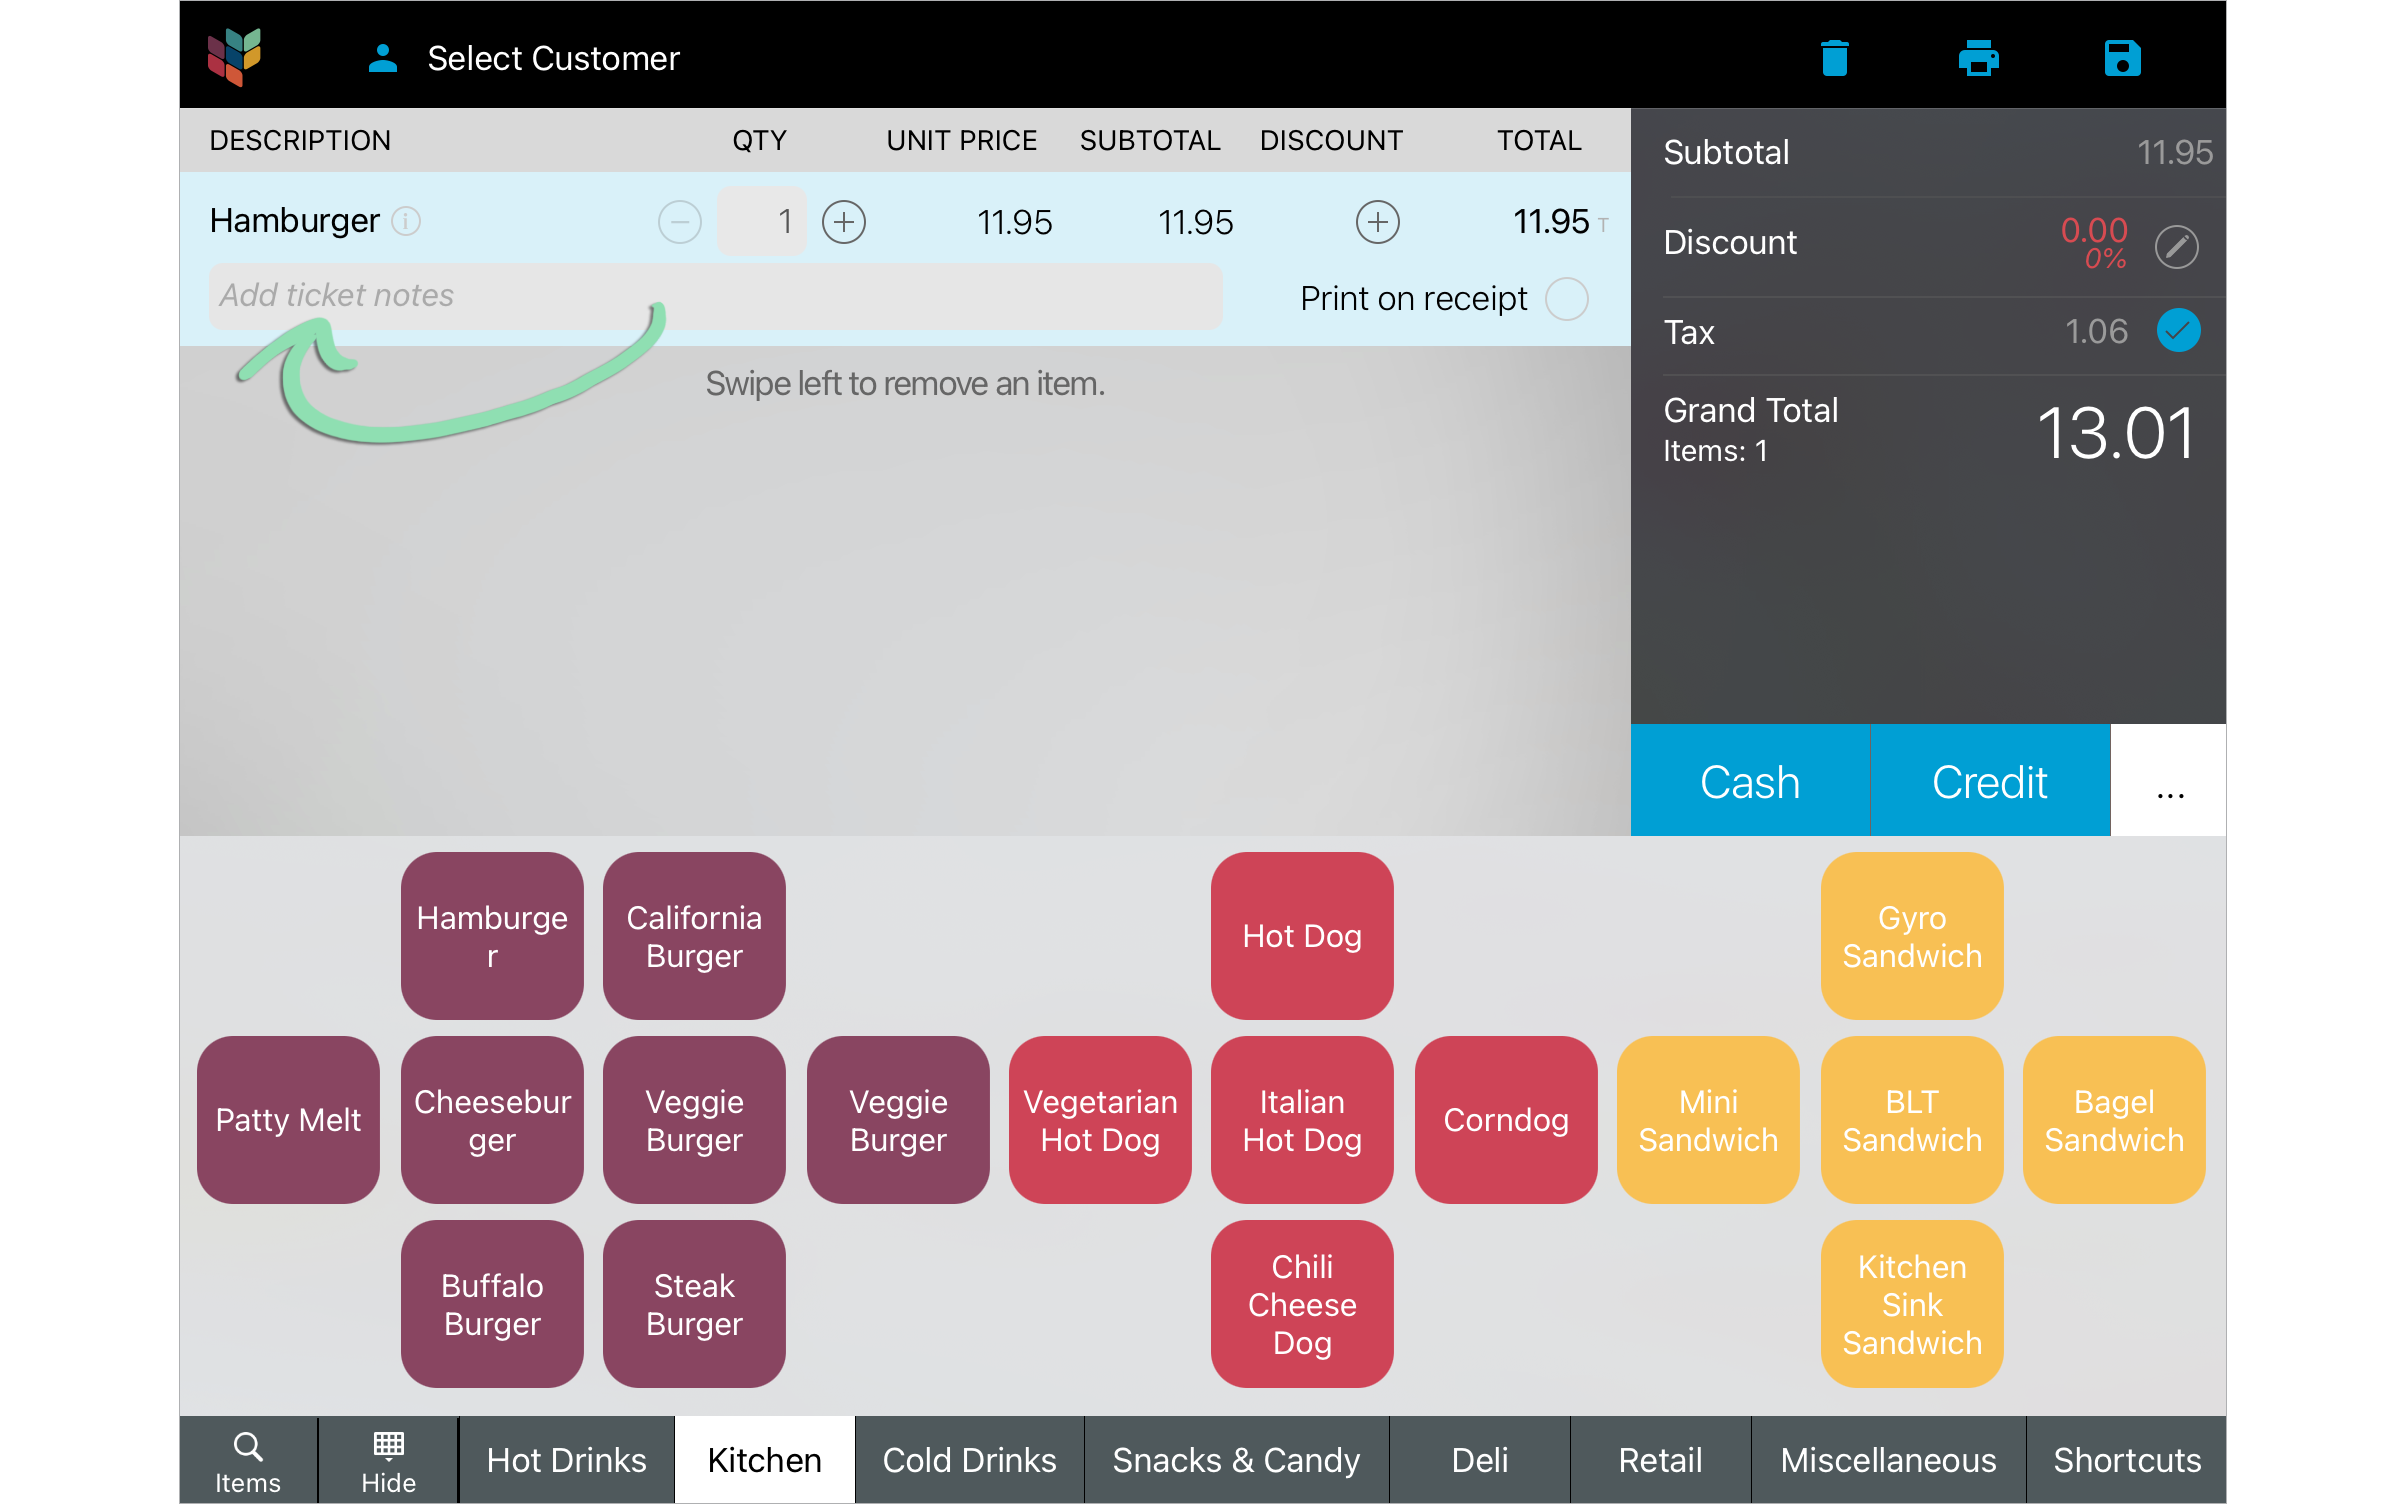 Retail POS (S-Series) app for Android
 b Enter a note to appear on the kitchen ticket.Retail POS (S-Series) app for iOS
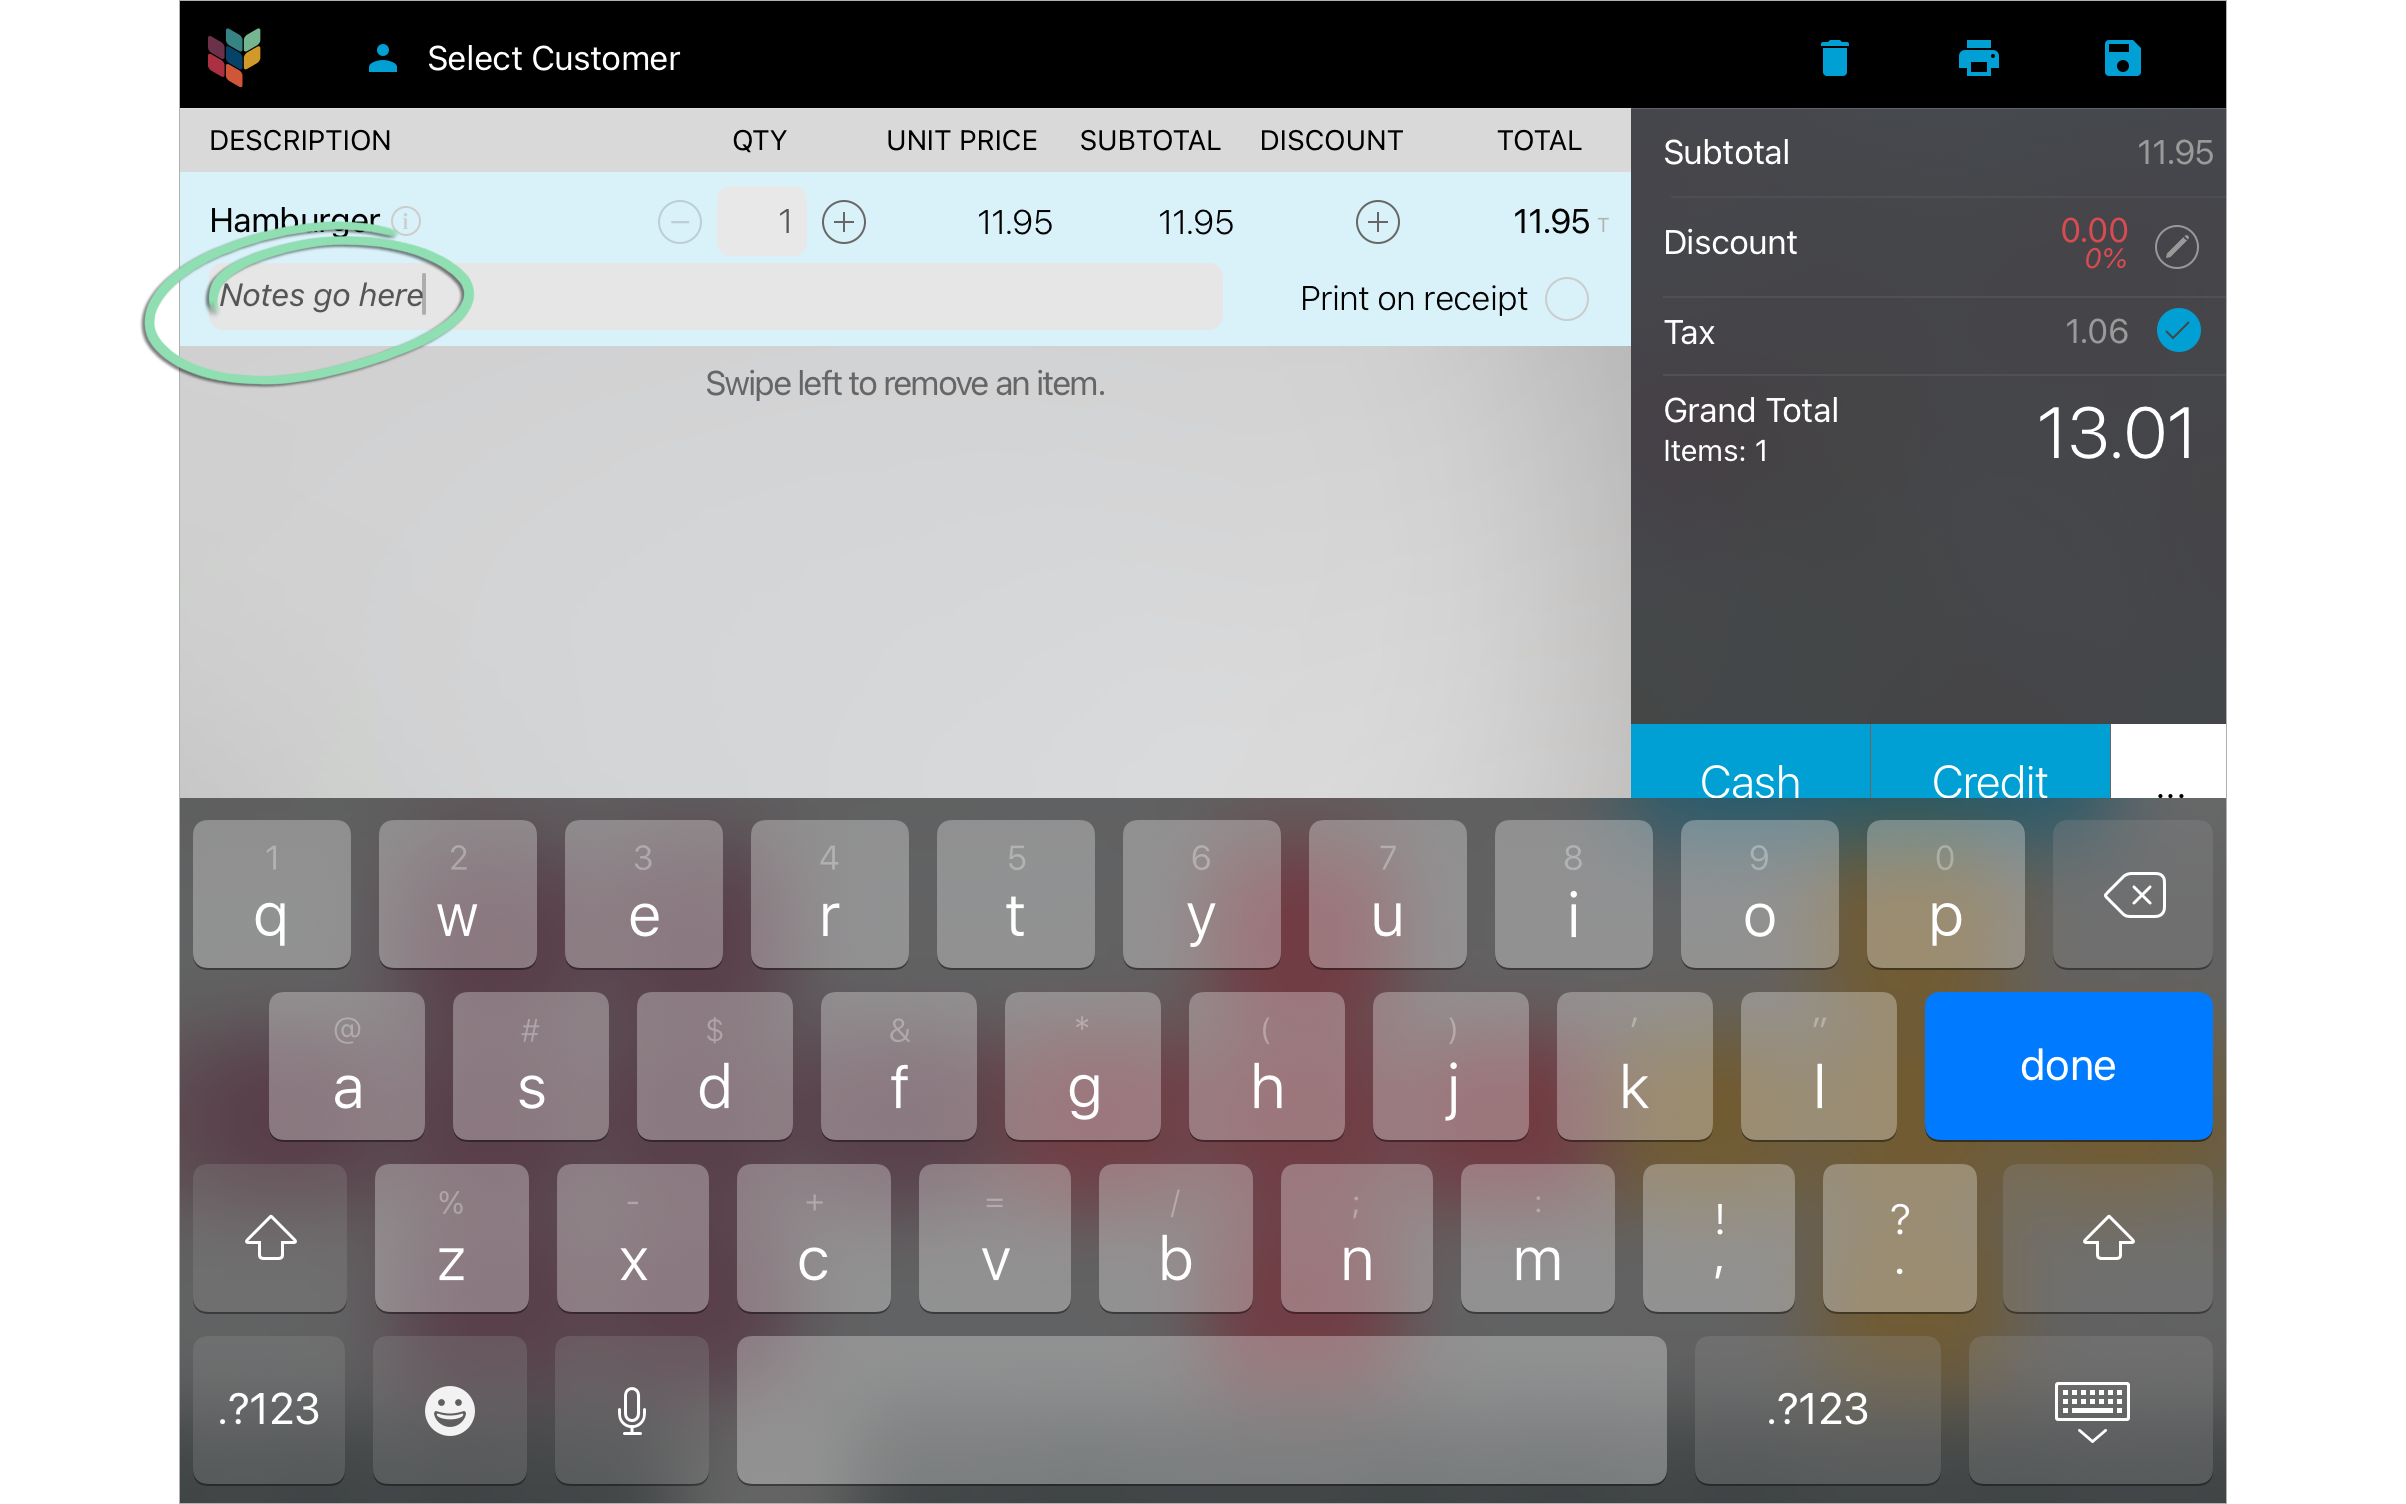 Retail POS (S-Series) app for Android
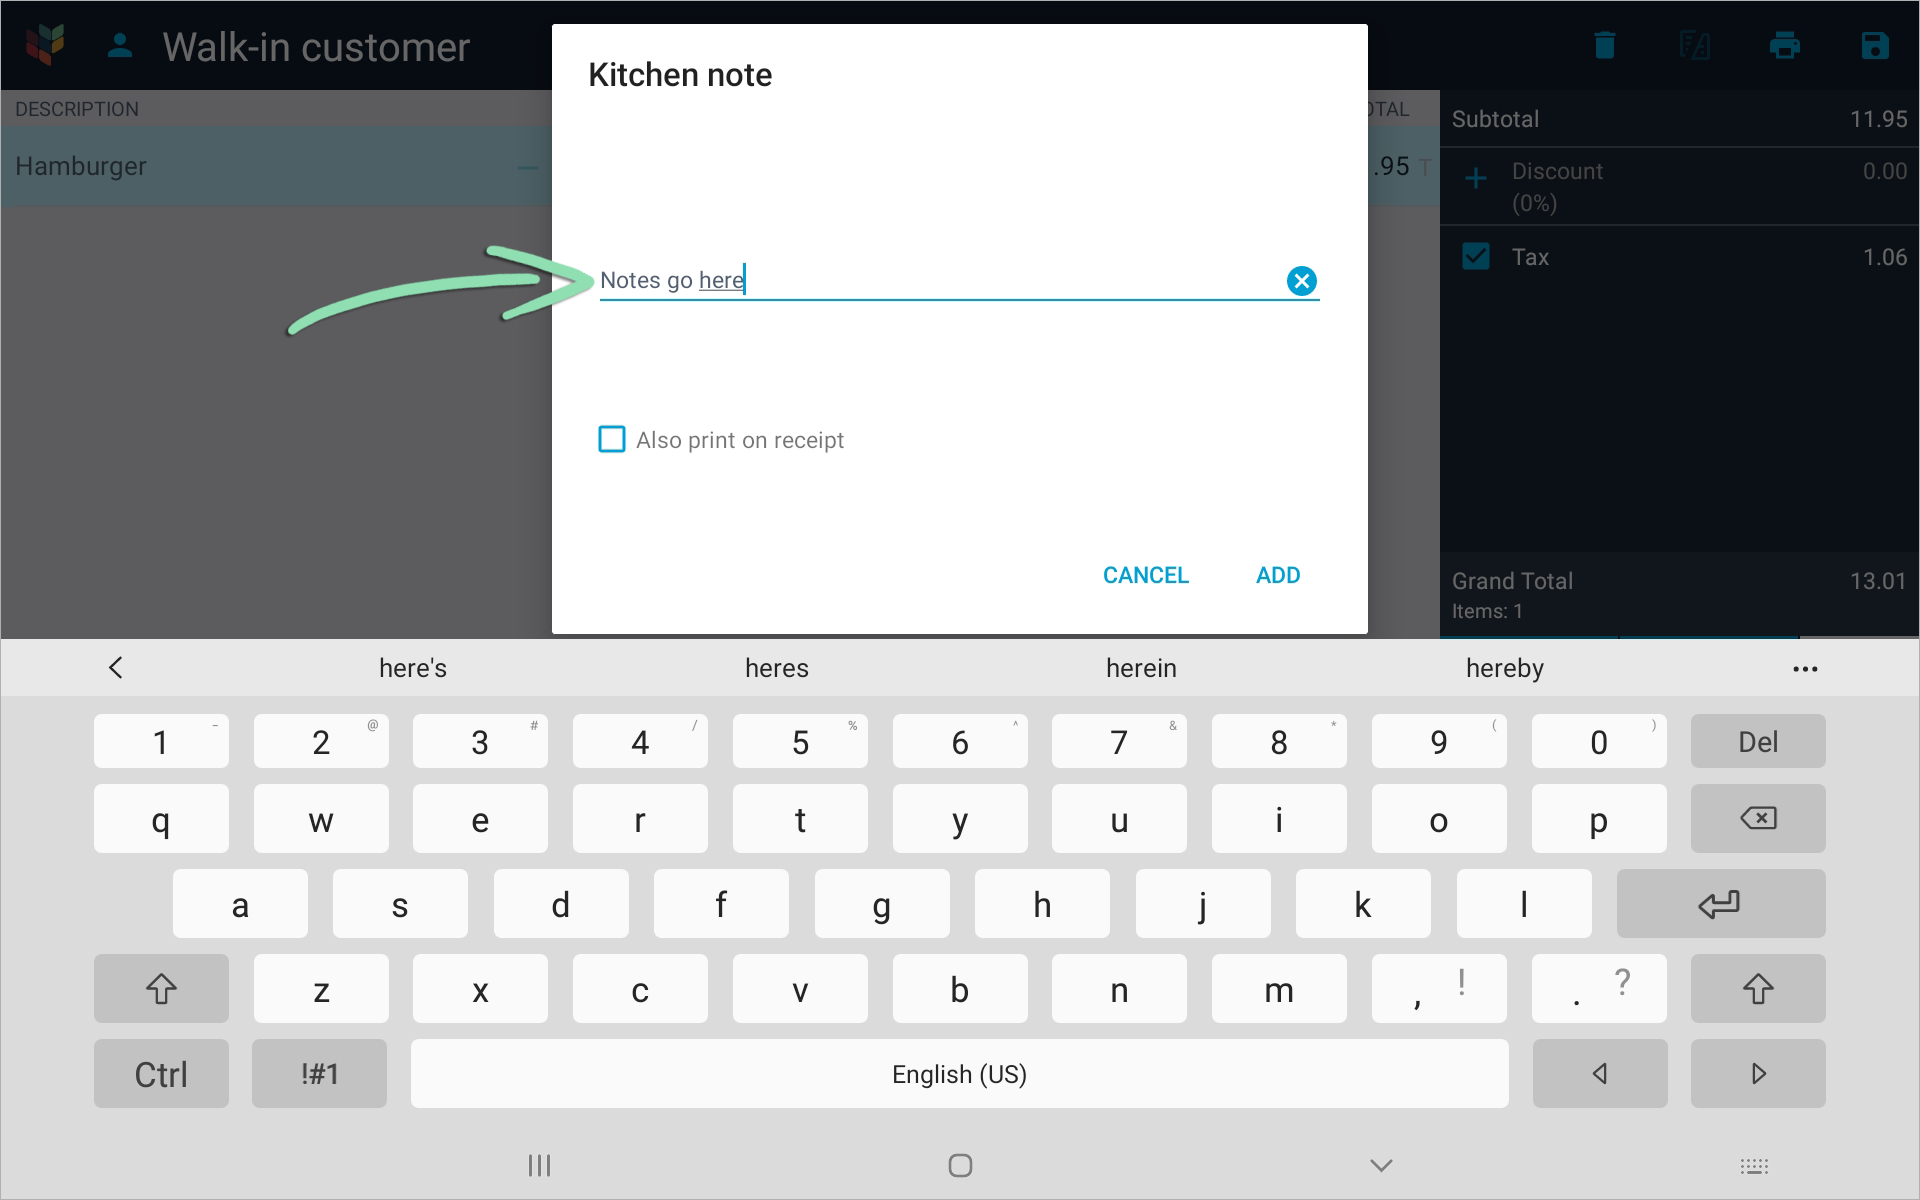 c (Optional) To add the note to the sale receipt, enable the ‘Print on receipt’ (iOS) or ‘Also print on receipt’ (Android) setting.Receipt notes are also available from the BackOffice Transactions Report on the downloaded copy of the receipt.b Tap ‘Done’ (iOS) or ‘Add’ (Android) to finish adding the note.
 -
Save or tender the sale and the ticket prints automatically.
If a cashier adds items to a saved sale, tickets print for the new items when the sale is saved again.
Ticket from a saved sale: Ticket from a tendered sale:
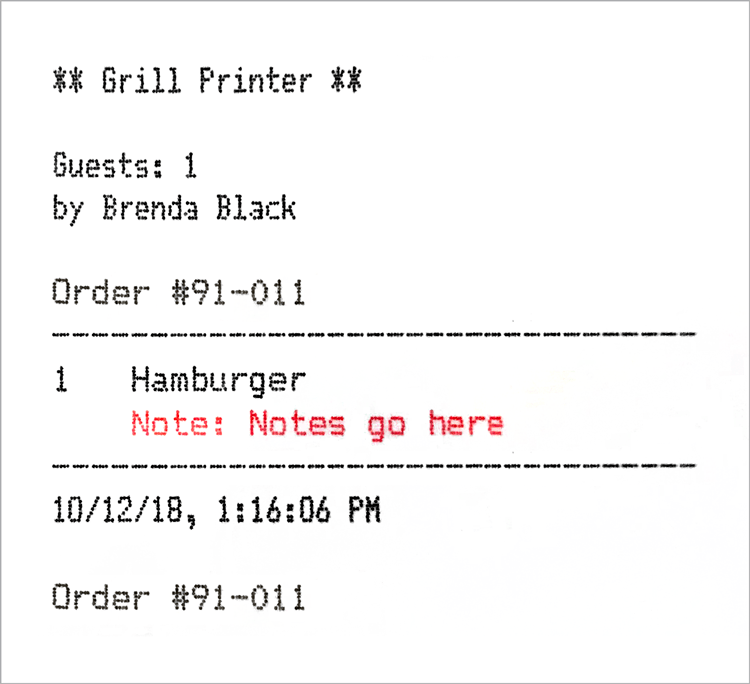
- (Optional) For a saved sale, tap the printer icon, then ‘Reprint Ticket’ to send the ticket to the printer again.
Learn how to reprint kitchen tickets for online orders directly from the Saved Sales screen here.

If tickets do not print properly, visit our troubleshooting guide for help.