Ethernet
Receipt Printer Setup
The Star Micronics TSP100 Ethernet Printer plugs directly into your router to print receipts and/or kitchen tickets over your network. Connect a cash drawer to the printer to have it pop open automatically when cash transactions are run.
Setting up an Epson TM-m10 or TM-m30 ethernet receipt printer? Visit this article instead.
Watch our Ethernet Printer Setup video below:
In the Box
The Star Micronics TSP100 Ethernet Printer ships with all of the parts listed below.

Printer Hardware Setup
Complete the basic steps of plugging the printer into your router, connecting it to power, and loading paper. After setup, the printer can be connected to Lightspeed Retail for use at the register.
This printer must be physically plugged into your router to be able to connect to the Retail POS (S-Series) app. You must also have Wi-Fi at the location or have your register connected to the router with an ethernet adapter to complete setup.
- Plug the ethernet cable into the leftmost port labeled '100/10BASE'.
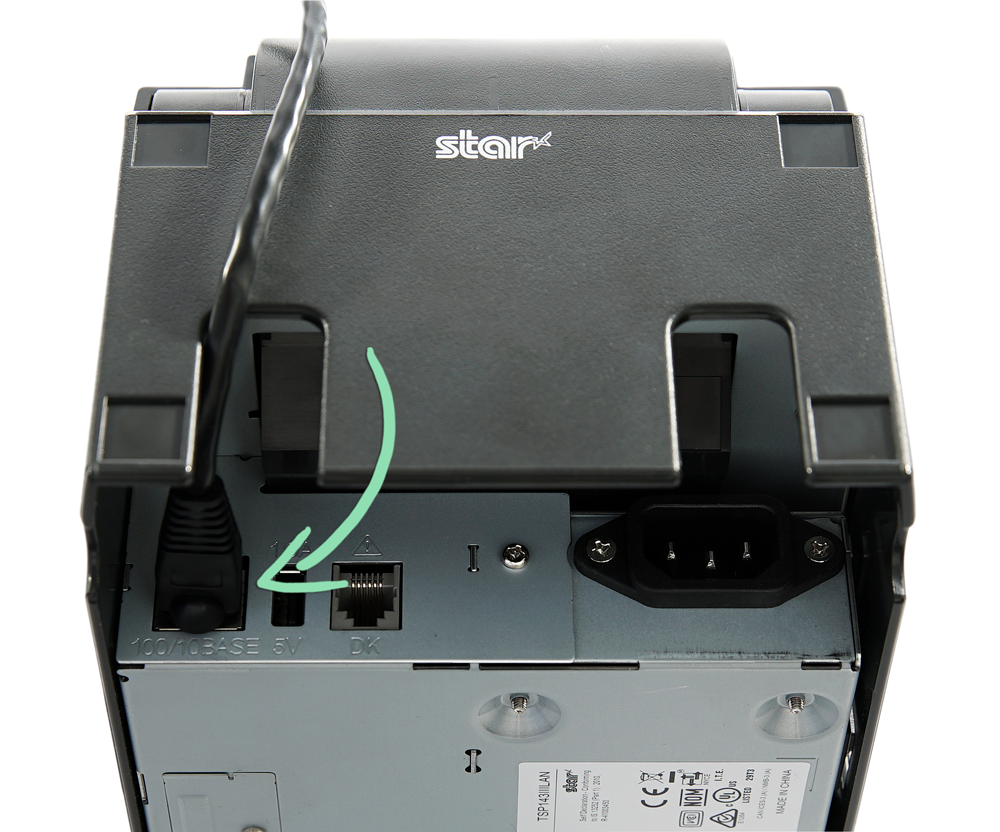
- Plug the power cable into the rightmost port.

- Connect the opposite end of the ethernet cable to an open numbered port on the router.
If the cable will not reach the router, purchase a longer cable, extender pack, or ethernet switch to lengthen it.
- Push back the lever to open the cover, load the paper, and close the cover on the paper.
Paper must feed from the bottom of the roll as shown below.

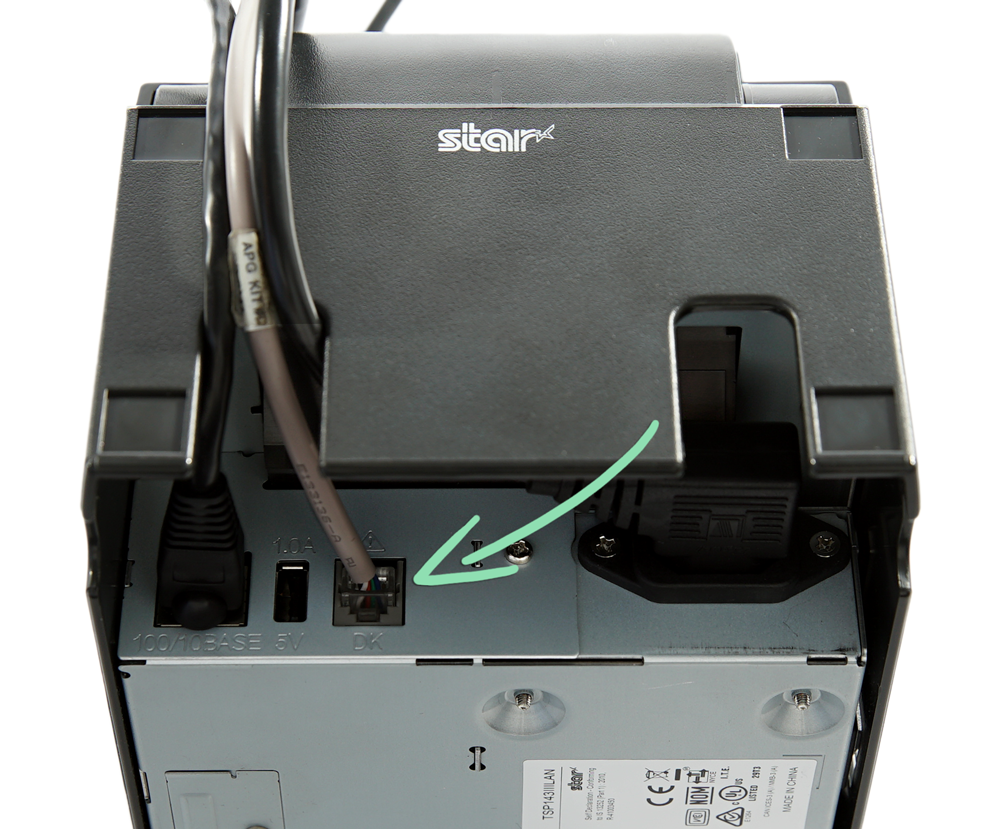
- (Optional) Connect a cash drawer.a Plug the small end of the cash drawer cable into the ‘DK’ port on the printer.
 b Plug the larger end of the cash drawer cable into the bottom of the drawer.
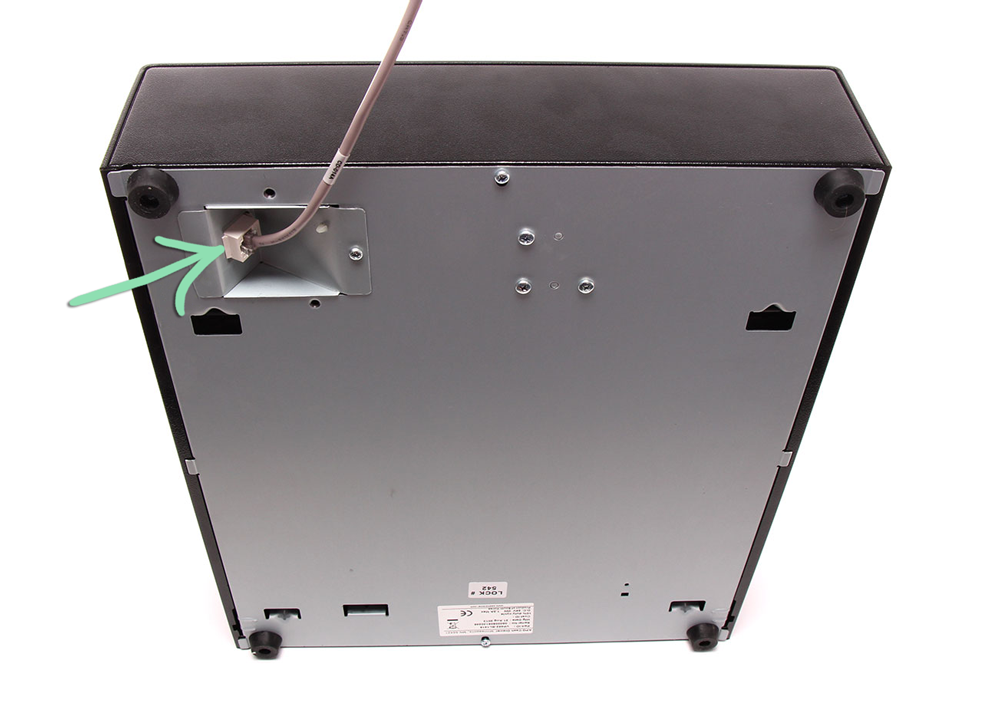
- Plug the power cable into a power outlet.
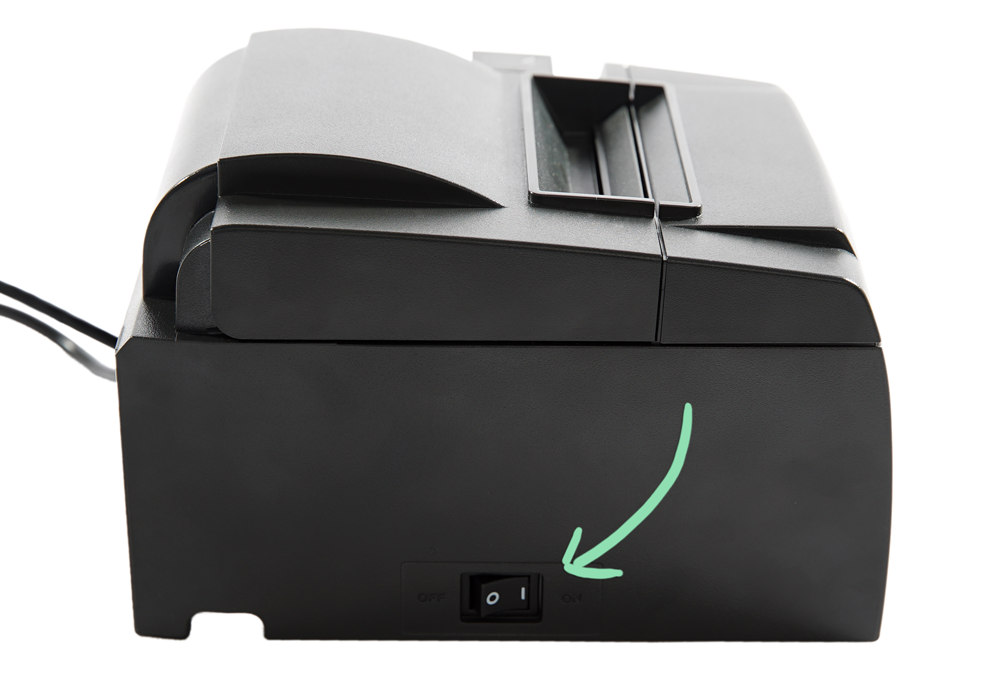
- Flip the power switch to turn the printer on.
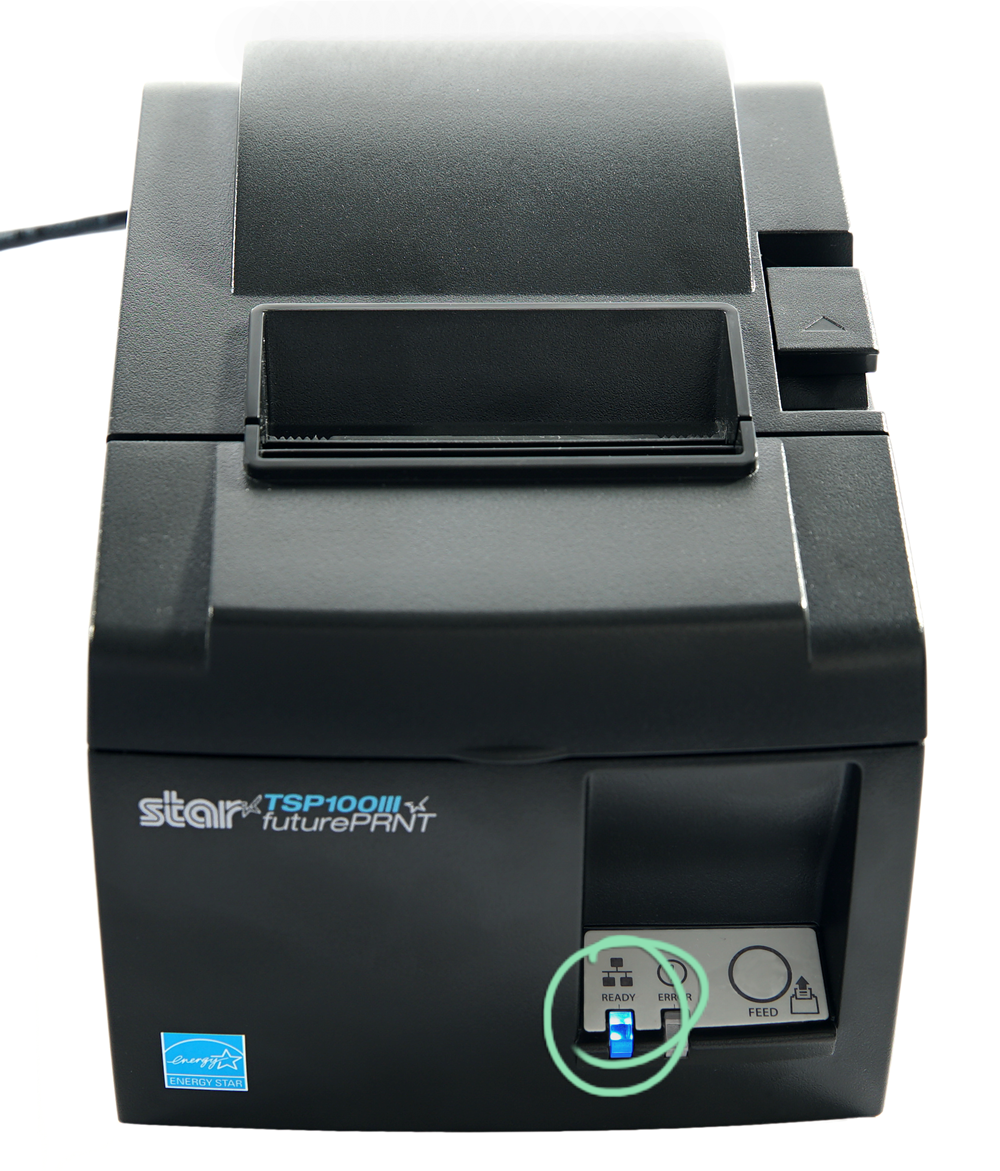
- Wait for the 'READY' light to turn solid blue.
If this does not happen, visit our troubleshooting guide for help.
- Follow the steps below to connect the printer to Lightspeed Retail.
Learn how to take care of the printer and cash drawer hardware here.
Connect to Lightspeed
With the printer hardware set up, connect the printer to the Retail POS (S-Series) app to start printing receipts and/or kitchen tickets.
Before continuing, make sure the register is connected to the network of the router the printer is plugged into.
- In the Retail POS (S-Series) app, tap 'Integrated Hardware' from the Main Menu.

- Tap 'Printers'.

- Toggle the switch for the Star printer on from the list of receipt and/or ticket printers.
If the printer is not listed, visit our troubleshooting guide for help resolving the issue.
- Switches can be toggled on or off at each register to change the status of printers.
- To learn how to connect the Star TSP100 as a ticket printer, visit our ticket printing article.

- (Optional) Tap the printer icon to test the connection between the register and the printer.
If successful, this prints a slip of paper with the printer’s name, MAC address, and the date and time.


If you have questions, visit our Printer FAQ.
Running into issues with the printer? Visit our troubleshooting guide for solutions to common problems.