Set up receipts in BackOffice or at the register with the information you want customers to see, such as the name, logo, address, and contact details of your business. Additional settings allow you to print customer delivery information on paper receipts, add social media links to email receipts, and control how customers sign and tip for sales paid by credit or gift card. At the register, receipts can be printed to a connected receipt printer or emailed.
View samples of paper and email receipts here.
Business information and logo
From BackOffice or the Retail POS (S-Series) app, enter the business info that will appear on all receipts, and upload a business logo to appear in color on email receipts and, if enabled, in grayscale on printed receipts.
-
Sign into BackOffice as an employee with the relevant permissions or into the Retail POS (S-Series) app as the Business Owner, and open receipt settings.
-
In BackOffice, click Settings and select Receipts and Tips.
Don’t see Receipts and Tips? Visit our troubleshooting guide for help.

- In the iOS app, tap Receipt and Tip Settings on the Main Menu. For the Android app, tap Setup on the register menu, then select Receipt and Tip Settings.
Retail POS (S-Series) app for iOS

Retail POS (S-Series) app for Android

-
-
Select the Business Info tab.

-
Fill in as much business information as desired to appear on receipts.
Information entered here also appears on invoices created in BackOffice.
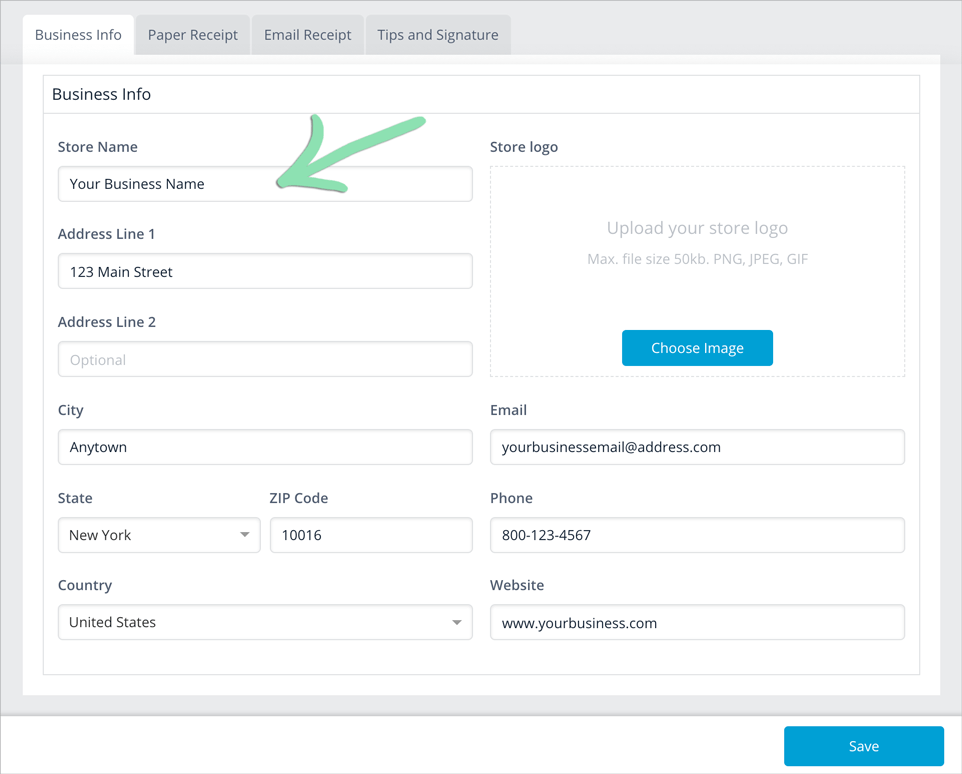
- Store Name: Business name as it will appear on receipt headers, the register sign in screen, printed barcode labels, and Clover devices.
- Address / City / State / ZIP / Country: Physical location of the business.
- Email: Email address customers use to contact the business.
- Phone: Phone number customers use to contact the business.
- Website: Have a website? Enter the URL here.
-
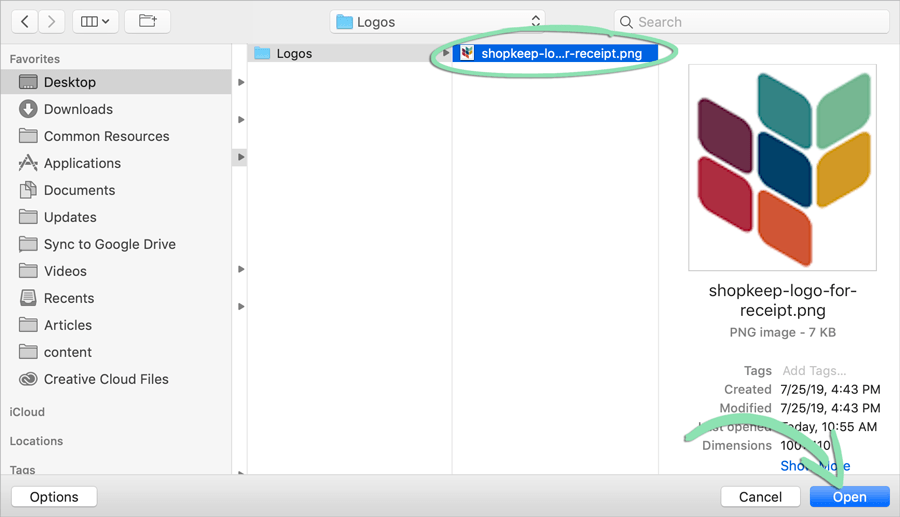
(Optional) Upload a logo for receipts.
The uploaded logo will appear in color on email receipts and invoices and, if enabled, in grayscale on printed receipts. To learn how to enable the logo to appear on paper receipts, see the section below.
-
Click Choose Image.

- Select an image file from your computer or register and click Open or tap Done.
- Logos must be in .PNG, .JPG, or .GIF format and cannot exceed 50kB in size.
-
If also printing the logo on paper receipts, we recommend following these tips to optimize the logo before uploading it.
-
- Click Save to save changes.
Paper receipt settings
Further customize paper receipts by adding extra text, customer delivery information, and a grayscale version of the business logo uploaded in the Business Info section.
-
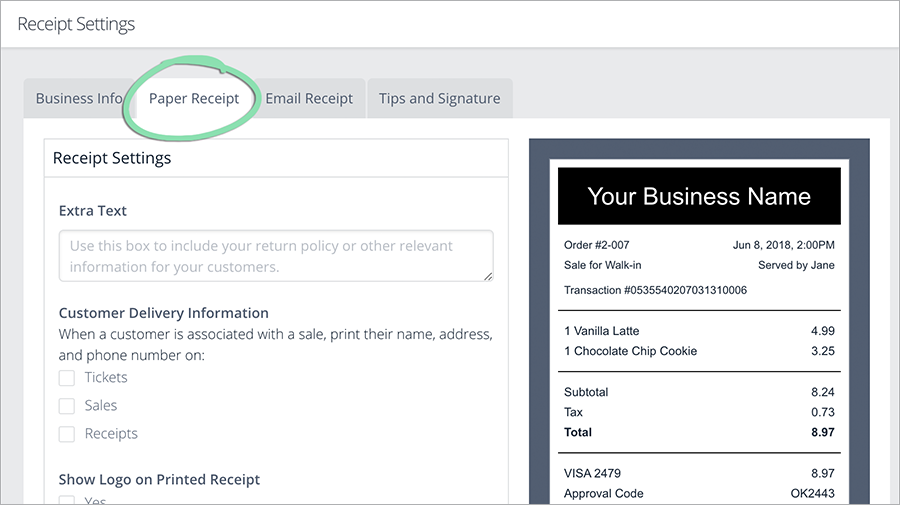
From receipt settings, click the Paper Receipt tab.
-
Customize the paper receipt settings as desired.
All settings except for Show Logo on Printed Receipt also apply to the receipt image shown on email receipts.
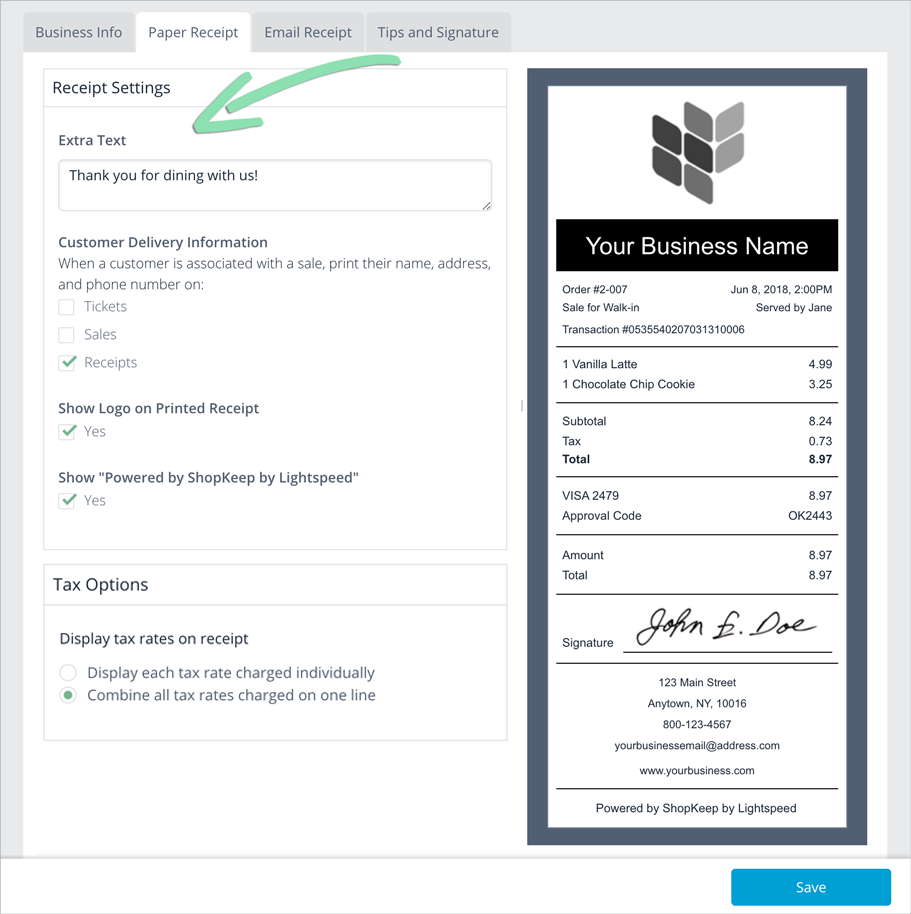
- Extra Text: Additional information that prints at the bottom of receipts.
- Customer Delivery Information: Where to print customer name and address information to help with deliveries: on kitchen tickets, sales printed before payment, or paper receipts. Learn how to add customers and tag them to sales here.
- Show Logo on Printed Receipt: Print the business logo in grayscale at the top of paper receipts. Before enabling this feature, you must upload a logo. To optimize the logo for printed receipts, we recommend the following tips.
- Show “Powered by Lightspeed”: Add “Powered by Lightspeed” to the bottom of receipts.
- Display tax rates on receipts: For transactions where multiple tax rates are charged, either list each rate separately on the receipt or display a single Total Tax line. View examples of how receipts appear with each option for this setting here.
- Click Save to save changes.
Email receipt settings
Customize email receipts with promotional messaging and social media links to help drive customer engagement with the business. After emailing some receipts, visit the Marketing Dashboard to see how often customers click these links.
View a breakdown of a finished email receipt here.
-
From receipt settings, click the Email Receipt tab.

-
Fill in as much of the Messaging Above Receipt and Messaging Below Receipt sections as desired.

- Logo Link: Enter a website URL to send customers to when they click the business logo.
- Heading: Appears below the business logo at the top of email receipts.
- Message: Appears below the Heading.
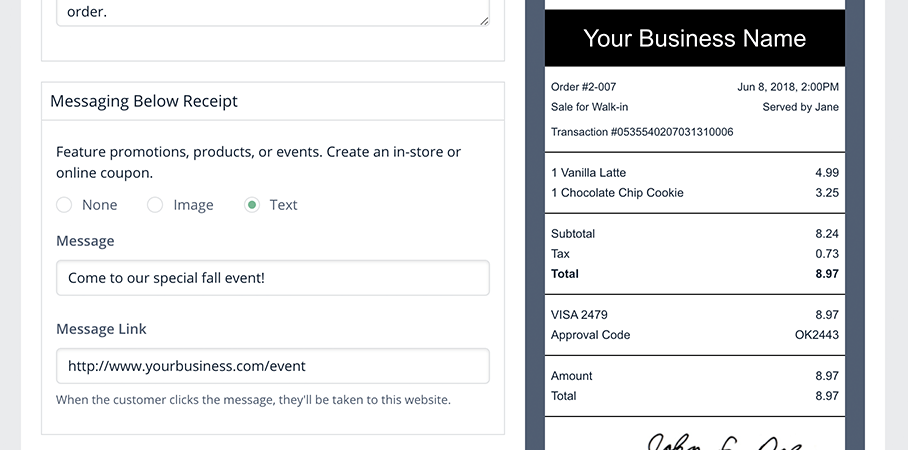
- None / Image / Text: Select a type of banner to add to email receipts. For Image, tap Choose Image to upload an image file. For Text, enter a message. Banner images must be in .PNG, .JPG, or .GIF format and cannot exceed 70kB in size.
- Message Link: Enter a website URL to send customers to when they click the image or text banner.
- (Optional) Add social media links.
-
Visit a social media page for the business.
Email receipts support links to Yelp, Facebook, Twitter, Instagram, and email addresses.
- Highlight the website URL in the address bar.
- Right-click or tap the highlighted URL and select Copy.
-
-
In BackOffice email receipt settings, right-click or tap a social media field and select Paste.

-
Toggle the switch to make the link appear on email receipts.

- Repeat these steps to add additional social media links.
- Click Save to save changes.
Tips and signature
Enable tip settings to allow customers to leave gratuity on sales paid with credit and gift cards, change how they tip (on screen or on paper receipt), and adjust the suggested tips shown to customers.
-
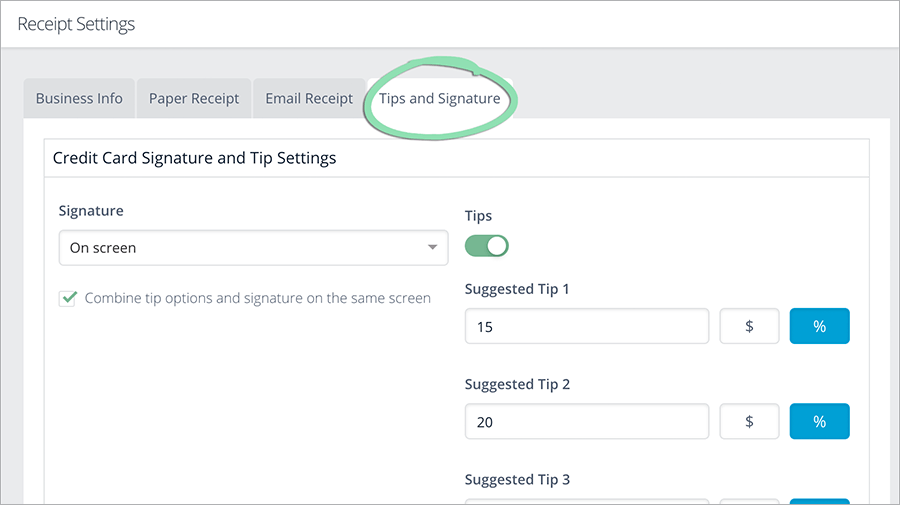
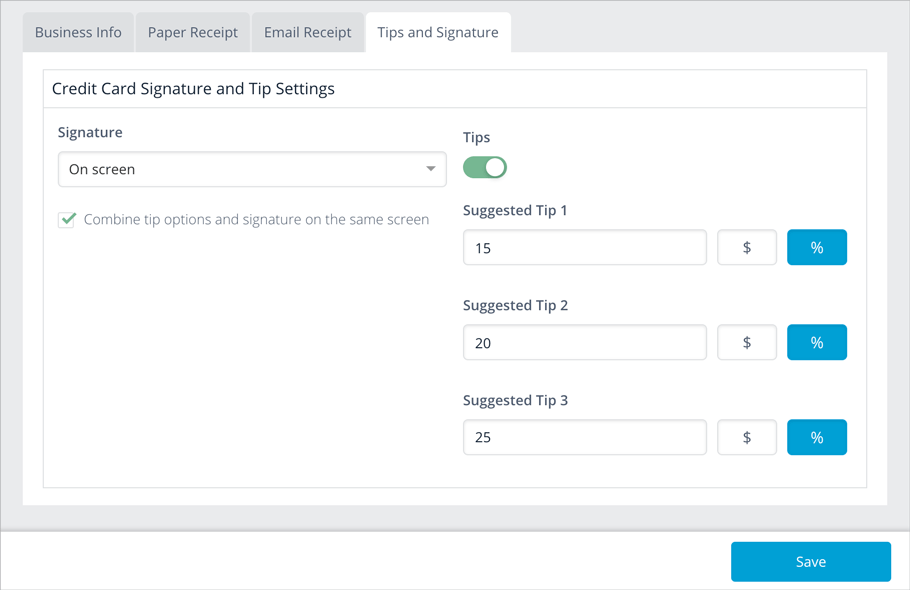
From receipt settings, click the Tips and Signature tab.
-
Customize the Signature and Tips settings as desired.
-
Signature: Set how customers sign for credit sales and leave tips (if enabled): on the screen of the register or on paper receipts.
For sales paid with a gift card, tips must be entered on screen regardless of the Signature selection.
Accepting tips on paper receipts is not supported when using the Clover Go card reader with the Retail POS (S-Series) app for iOS.
- Tips: Toggle to enable or disable gratuity for sales paid with credit or gift cards or the Pay by Link tender.
- Show tip suggestions on paper receipts: Enable to display suggested tip amounts on paper receipts. This feature is only available when Signature is set to On paper and Tips is enabled.
- Combine tip options and signature on the same screen : Controls whether customers sign and tip on the same screen or on separate screens. This feature is only available to merchants using the Retail POS (S-Series) app for iOS with EMV payments disabled, Signature set to On screen, and Tips enabled.
- Show the tip screen before or after inserting EMV cards : Controls when customers are prompted to leave a tip during an EMV transaction: before or after inserting their card into the reader. This feature is only available to merchants using the Retail POS (S-Series) app for iOS with Signature set to On screen, Tips enabled, EMV payments enabled, and a compatible Ingenico card reader.
- Suggested Tip 1 / 2 / 3: Show preset tip amounts ($) or percentages (%) on paper receipts or the register gratuity screen. This feature is only available when Tips is enabled.
Visit our Tips and Gratuity article to learn how tipping works at the register.
-
- Click Save to save changes.
What's Next?
After customizing receipt settings, move on to other receipt-related topics. Learn how to print, text, and email receipts, connect a receipt printer, collect gratuity, and get help with any questions or issues that come up.
Print and Email Receipts
With receipt setup complete, learn how to print, email, reprint, and resend receipts for transactions performed at the register. Visit our Using the Register article for more information.
Register Receipt Settings
Enable receipt settings at the register to automatically print or email receipts at the end of transactions, print barcodes on receipts to make returns easier, and display sale names on receipts. Visit our iPad Settings for Retail POS (S-Series) App article to learn more.
Receipt Printer Setup
Set up a receipt printer to be able to print receipts and shift reports at the register. Visit our Hardware page to find the setup guide for your specific printer.
Tips and Gratuity
Learn how to accept gratuity at the register based on the Tips and Signature settings selected while setting up receipts. Visit our Tips and Gratuity article to get started.
FAQ and Troubleshooting
Visit our FAQ for answers to common setup questions or visit one of our troubleshooting guides for help with any issues that arise.
Related Articles
Epson TM-m10 / TM-m30 Ethernet Printer Setup Running Sales at the Register Private: Automatic Receipts