Running Sales at the Register
From ringing up items, applying discounts, and tagging customers to saving sales, accepting payment, and providing receipts, learn what you need to know about running sales at the register.
Before running sales on a register, a Register Manager must open a register shift. Learn how to open and close register shifts here.
Watch our Run a Sale & Return video below:
Ring Up Items
Every sale starts by adding the items a customer is purchasing. After adding items to a sale, a cashier can change item quantities, add notes to items, remove items, or discard the entire order.
Add items to a sale to ring up the products or services a customer wants to purchase. There are four ways to add items to a sale, each of which is covered below.
- From the 'New Sale' screen, add an item to the sale using any method listed below.a Tap an item shortcut.
To learn how to hide, show, and navigate the shortcuts panel, visit our Item Shortcuts article.
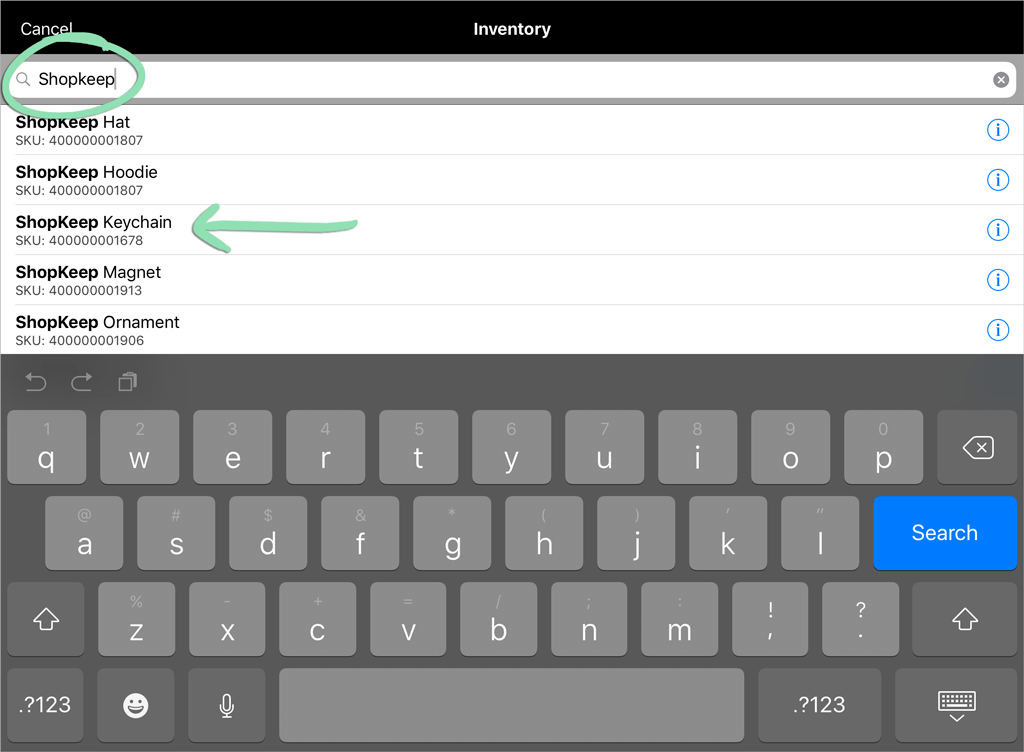
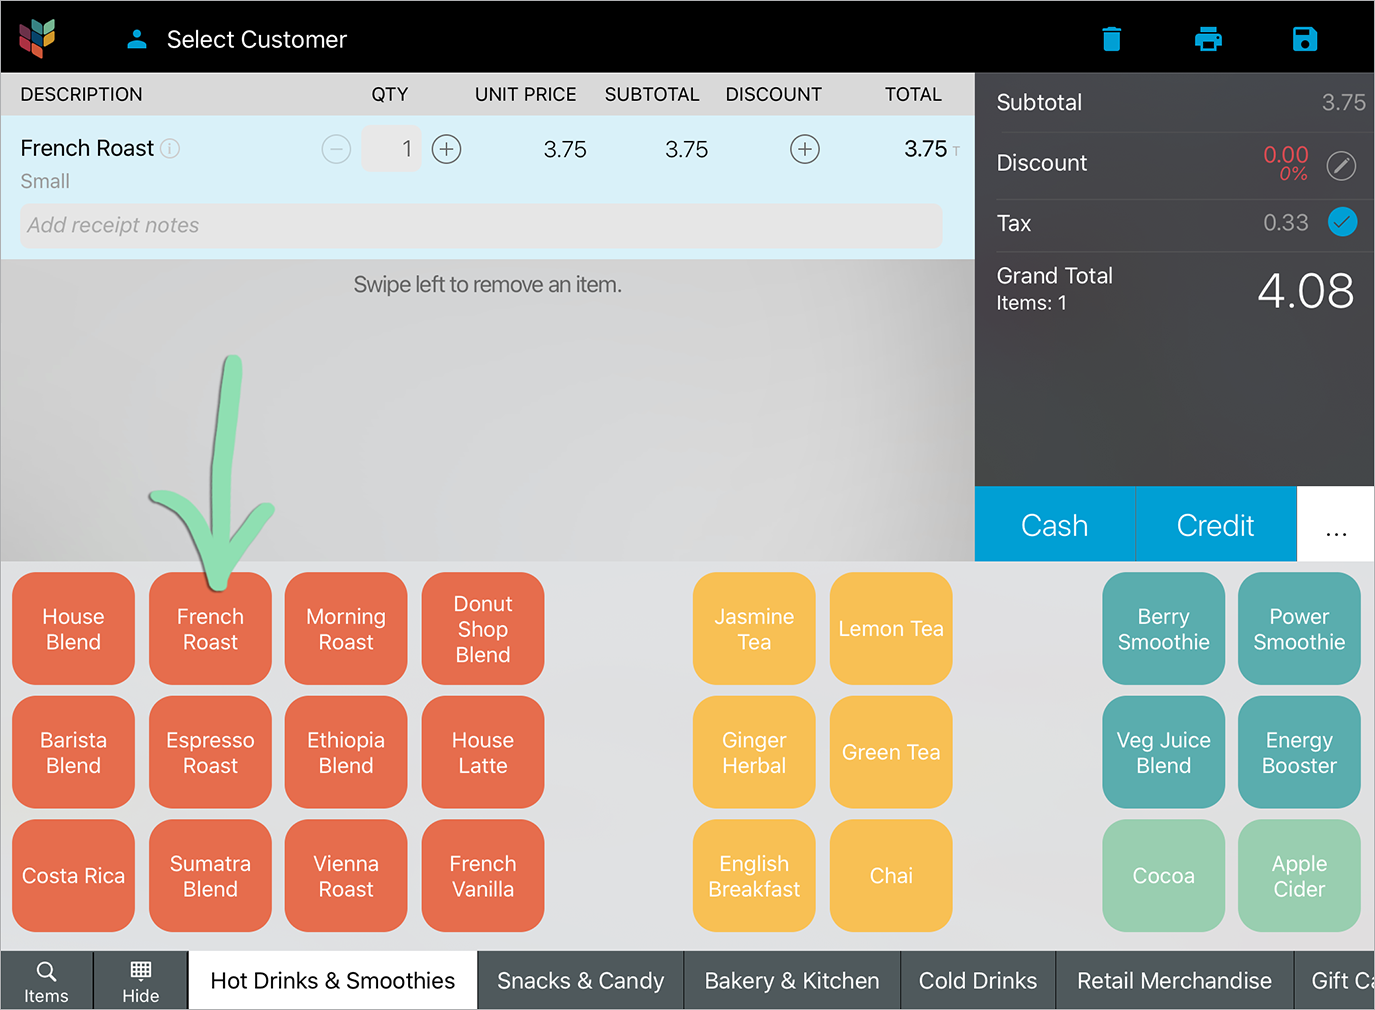 b Tap the magnifying glass to search for an item by name, SKU, or UPC, then tap the item.
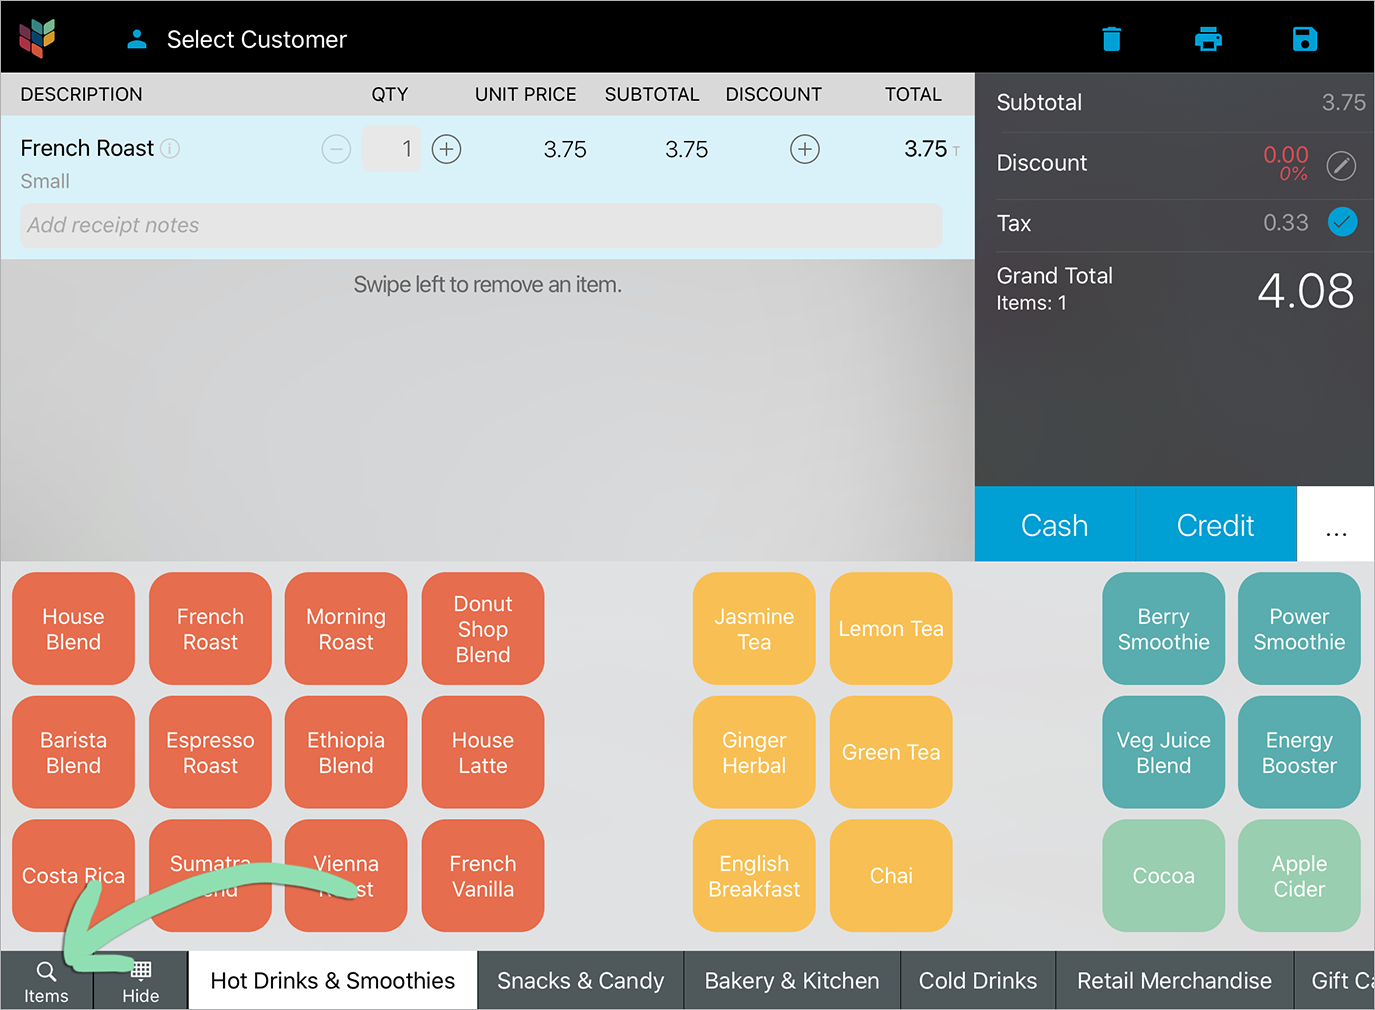
 c Use a supported barcode scanner to scan an item’s barcode.
For help connecting a barcode scanner to the register, visit our Hardware page to find the setup article for your specific scanner.
d Android only. Tap the barcode icon to use the register’s built-in camera to scan an item’s barcode, then align the barcode with the red line on the screen and wait for the item to be added to the sale.Barcode scanning with the built-in camera works best in well-lit areas. This feature is only available in the Retail POS (S-Series) app for Android.


The total quantity of items on the sale appears under the grand total, allowing cashiers to track the number of items being sold. Each unit priced item counts as 1 item despite the quantity entered.

After adding items to a sale, change their quantity if the customer wants more or less than what the cashier rang up. There are two ways to change item quantities, each of which is covered below.
- Change the quantity of a sale item by using either method listed below.a Tap ‘+’ or ‘–’ to increase or decrease the quantity.
 b Tap the quantity, enter a new number, and tap ‘Done’.
Add notes to a sale item to enter additional information for the item that will appear on its kitchen ticket and/or receipt. Use notes to alert the kitchen of a customer’s allergy, record a serial number, or any other time you need to include extra details for an item. Receipt notes are also available from the BackOffice Transactions Report on the downloaded copy of the receipt.
- Add an item to a sale.
- Tap ‘Add ticket notes’ or ‘Add receipt notes’ (iOS), or swipe right across the item and tap ‘Note’ (Android).
Don’t see these options in the Retail POS (S-Series) app for iOS? Tap the line item to highlight it.
Retail POS (S-Series) app for iOS Retail POS (S-Series) app for Android
-
Enter a note to appear on the kitchen ticket or receipt.Retail POS (S-Series) app for iOS
 Retail POS (S-Series) app for Android
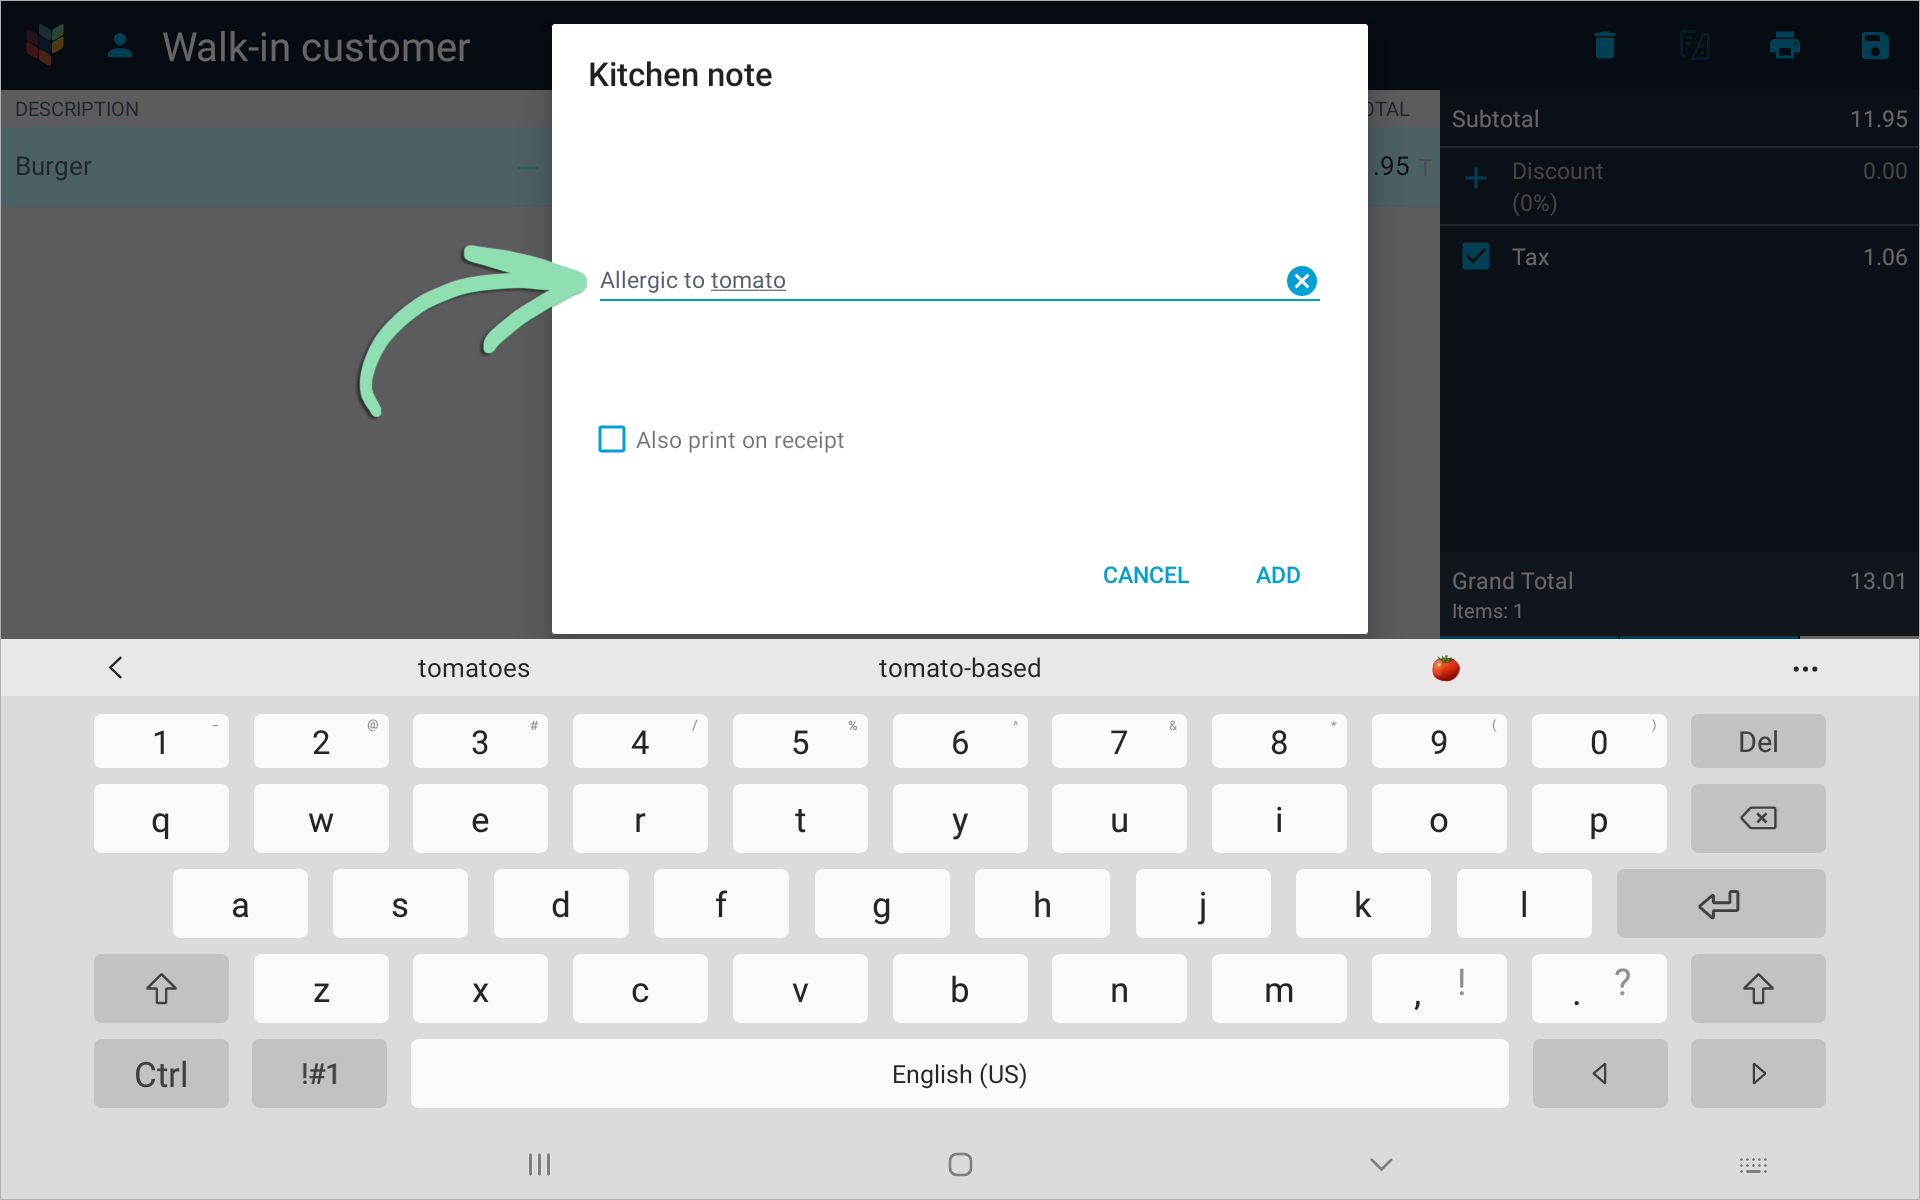
- (Optional) If adding a ticket note, enable the ‘Print on receipt’ (iOS) or ‘Also print on receipt’ (Android) setting to add the note to the sale receipt.
- Tap ‘Done’ (iOS) or ‘Add’ (Android) to finish adding the note.
Kitchen notes print on kitchen tickets after saving or tendering a sale. Receipt notes appear on customer receipts at the end of the sale and are available from the BackOffice Transactions Report on the downloaded receipt copy.
Click to view a sample kitchen ticket or receipt with note.
Cashiers can remove individual items from a sale if the customer changes their mind. To remove all of the items on a sale, discard the sale instead.
To learn how to track the quantity and value of items deleted from sales, visit our Void Reporting article.
- Swipe left across a line item, then tap 'Delete' to remove it.

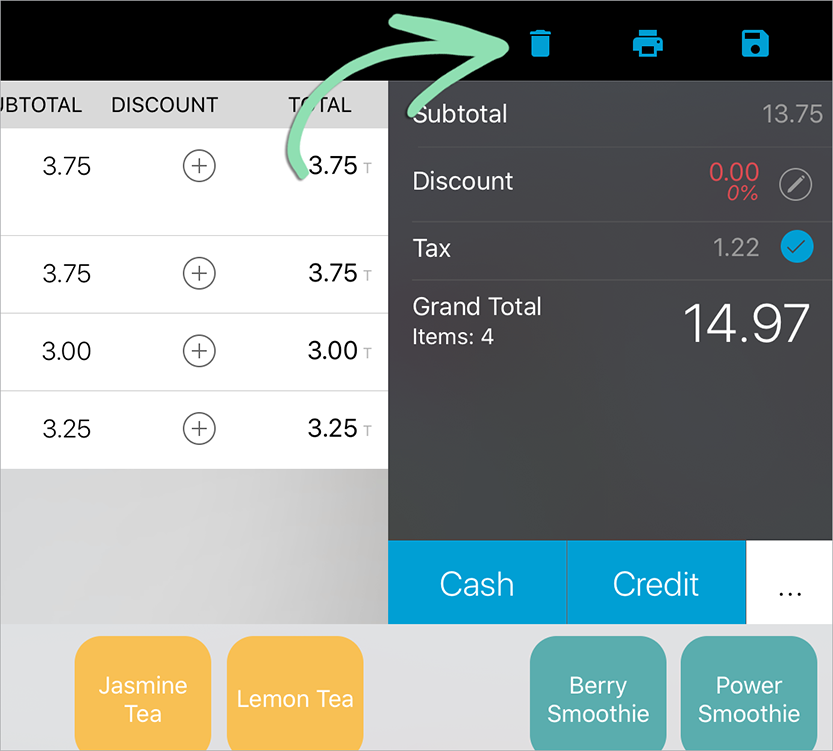
Discard a sale to remove all of the items from the sale and start a new one. To remove only some items from a sale, follow the steps to remove individual items instead.
To learn how to track the quantity and value of items from discarded sales, visit our Void Reporting article.
- Tap the trash can icon to get rid of all items on the sale.
Tag a Customer
Tag customers to sales to track their purchases and contact details. New customers added at the register sync directly to the Customer List in BackOffice with an active internet connection.
Visit our full Manage Customers article to learn how to edit customers at the register and in BackOffice, view customer reporting, and export customers.
- Tap 'Select Customer' (iOS) or the customer icon (Android) to tag a customer to the sale.
Tag a customer before tendering the sale. A customer cannot be tagged during checkout after the sale has been tendered.

- Select an existing customer from the list or tap '+' to add a new customer.
- Search for existing customers by name, phone number, email address, or customer notes. In the Retail POS (S-Series) app for Android, you can also search by address, city, or state.
- When adding a new customer, a warning will prevent you from adding duplicate email addresses. After saving a new customer, they will automatically be tagged to the current sale. To change the customer tagged to a sale, repeat steps 1 – 2 in this section.

Visit our Sales by Customer Report article to learn how to view top customers by sales count and amount spent.
Apply a Discount
Discounts allow the cashier to remove a dollar amount or percentage from a line item or the entire sale.
Visit our full Discounts article to learn how to set up custom preset discounts, manage discount settings, and view reporting on discount usage.
- Apply a discount to a sale item or the sale subtotal by using the relevant method listed below.a To discount an item, tap the discount button on a line item and select a discount.
 b To discount the entire sale, tap ‘Discount’ and select a discount.
By default, sale-level discounts will affect non-discountable items. Visit our troubleshooting guide to learn how to change discount settings.

Visit our Sales by Discount Report article to learn how to view top discounts by sales count and amount discounted.
Remove the Tax
If a customer is tax exempt, the cashier may need to remove sales tax from the sale.
Visit our Tax Settings article to learn how to set up and manage tax rates and tax groups.
- Tap the 'Tax' check button to toggle the tax off or on.

Visit our Sales by Tax Rate Report article to learn how to view total taxable and non-taxable sales and estimated sales tax due.
Save the Sale
After ringing up items, save the sale to create a check or tab that will remain open until the customer is done ordering, allowing the cashier to modify the sale or process payment at a later time.
To learn how to modify and close saved sales at the register, visit our full Saved Sales article.
- Tap the disk icon.

- (Optional) Enter a new name for the sale, or swipe a credit card through a connected iDynamo card reader to automatically assign the cardholder’s name to the sale.
The sale name will default to the customer tagged to the sale. If no customer is tagged, it will default to ‘Walk-in’ or the table where the order was started, plus the current time.

-
Tap ‘Save’ (iOS) or the disk icon (Android) to finish saving the sale.Retail POS (S-Series) app for iOS
 Retail POS (S-Series) app for Android
Payment & Receipt
When a customer is ready to pay, select their payment tender, and print a receipt or send one via email to finish the sale.
- Select a tender to accept payment for the sale.
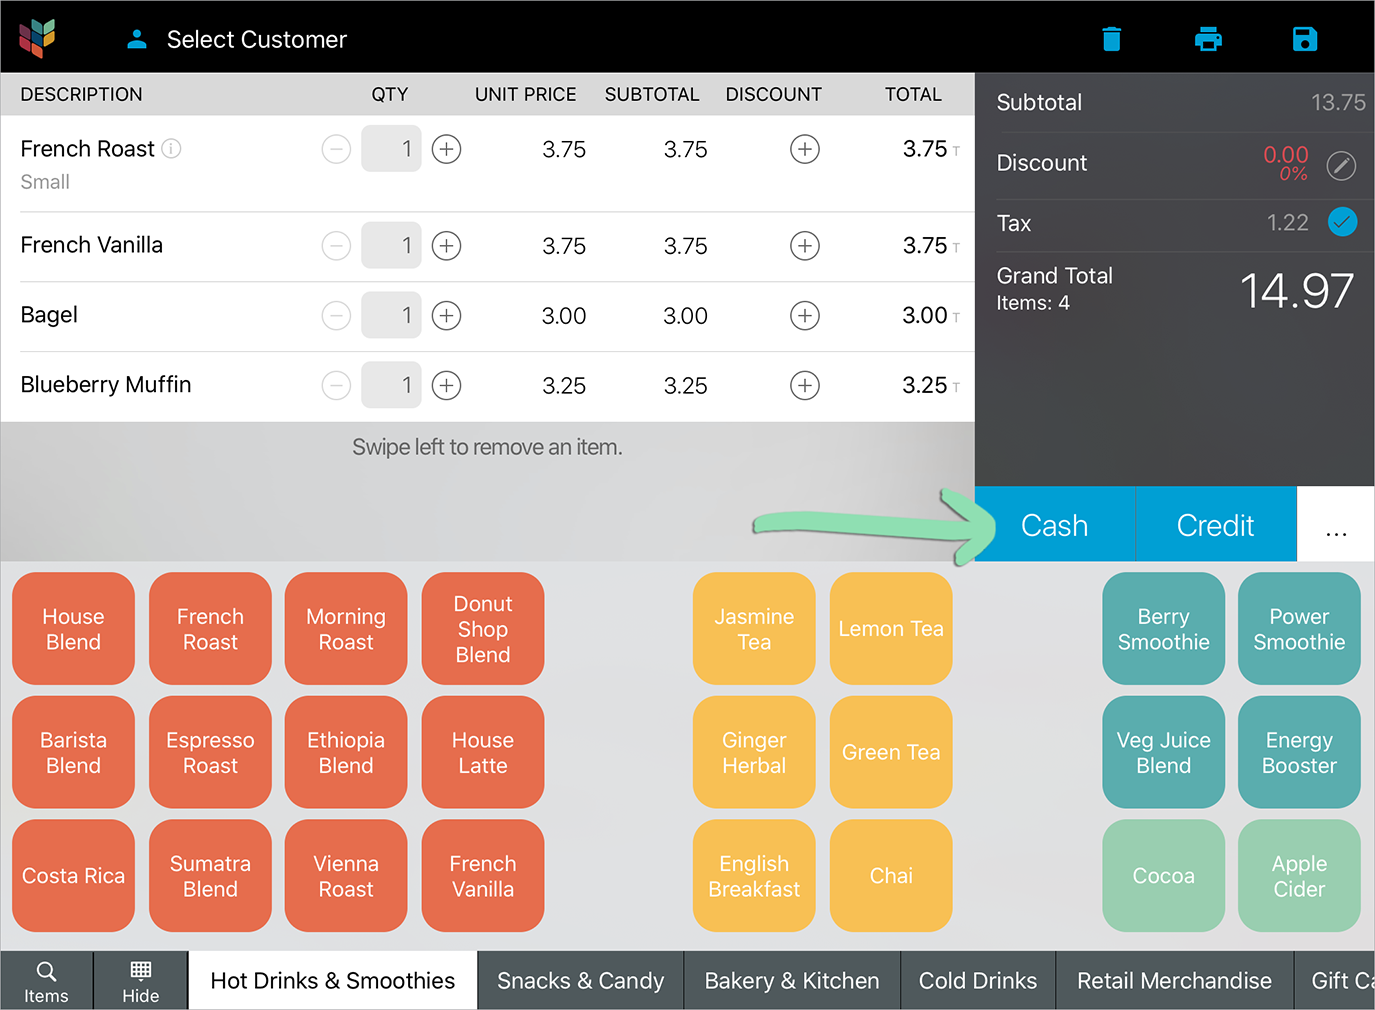
Cash – Tell the customer the total due, enter the amount they hand the cashier, and give change.

Credit – Swipe or insert a credit card or tap an Apple Pay device or contactless card.
Visit our full Accepting Credit Cards article or the setup article for your specific card reader for a complete walkthrough of a credit sale.
… – Expands the menu to show ‘Split Tender’, ‘Pay by Link’, and additional tenders enabled in BackOffice, such as ‘Gift Card’ and ‘Mobile Payment’.
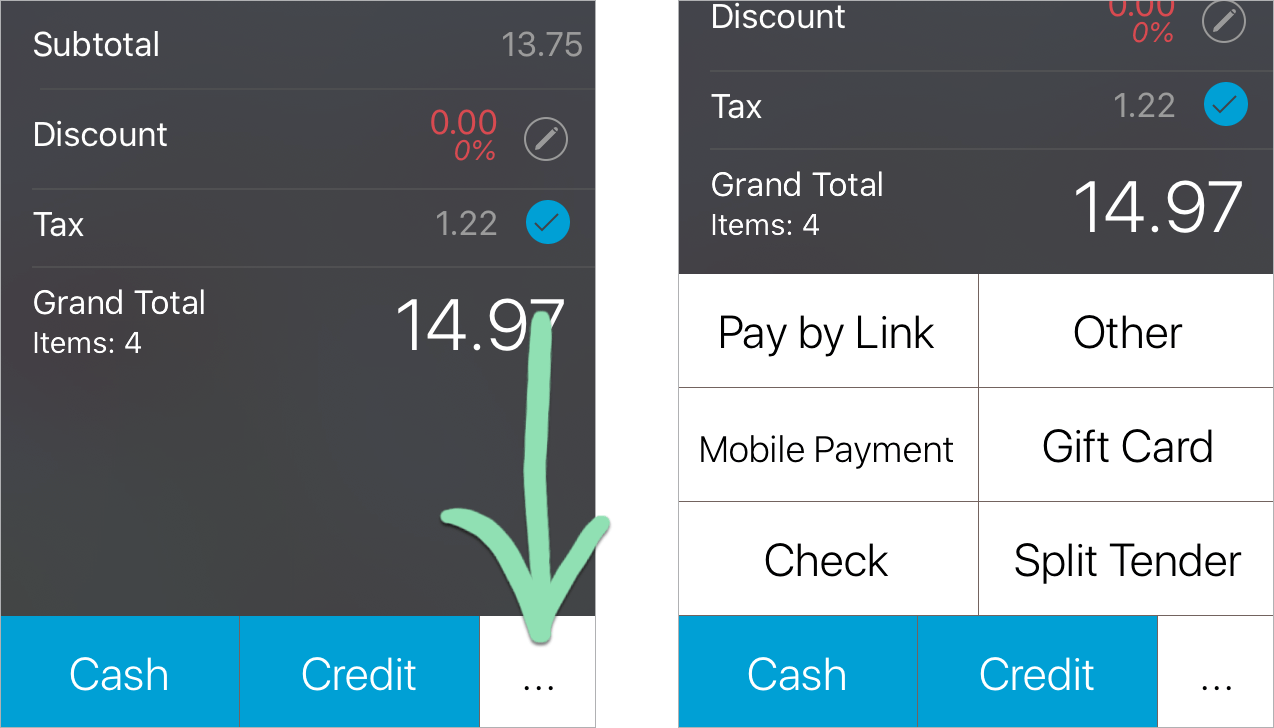
Other | Used for any alternate tender not built in.
Mobile Payment / Gift Card / etc. | Optional tenders enabled in Tender Settings.
Split Tender | Accept up to 9 different payments for one sale.
Pay by Link | Used to send customers a link they can visit to pay for a sale from their own device. This tender is only available to merchants who signed up for online and mobile payments and use the Retail POS (S-Series) app for iOS with Saved Sales Sync enabled. To learn how to use this tender, visit our Pay by Link article. - Select a receipt option and tap ‘Done’ or tap 'No Receipt'.
Visit our Receipt Setup article to learn how to customize the business information, logo, and messaging that appear on receipts.
Email Receipt | Send the sales receipt to an email address.
*For swiped and EMV credit card transactions, the email address entered will be linked to the customer’s credit card and will be automatically filled on the receipt screen in the future when using that card at any Lightspeed Retail merchant. Learn more about automatic receipts here.Print Receipt | Print the sales receipt to a connected receipt printer.
Print Gift Receipt | Print the sales receipt without prices to a connected receipt printer.
Having issues running sales? Visit our troubleshooting guide for help with common problems or our Register FAQ for answers to frequent questions.