Create specific discounts, such as a senior discount or an employee discount, to track how often they are used at the register and the total amounts they deduct. Learn how to manage discounts, apply them to sales, and monitor their usage with reporting.
Watch our Named Discounts video below:
Set Up New Discounts
By default, two discounts are automatically set up when a Lightspeed Retail account is created (Open Amount and Open Percentage). Add new discounts in BackOffice to track other types of commonly used discounts.
Discounts must be added individually to BackOffice and applied manually at the register. If you want to apply a discount to a large number of items or create a sale for a particular set of items, calculate item prices to include the discount and update the prices using our Bulk Management feature.
-
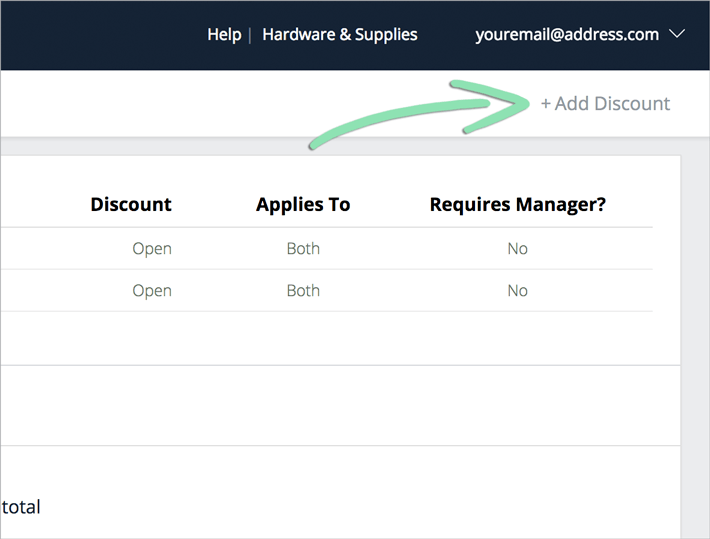
In BackOffice, click Settings, then Discounts.

-
Click Add Discount.
-
Fill in the details of the discount and click Save.
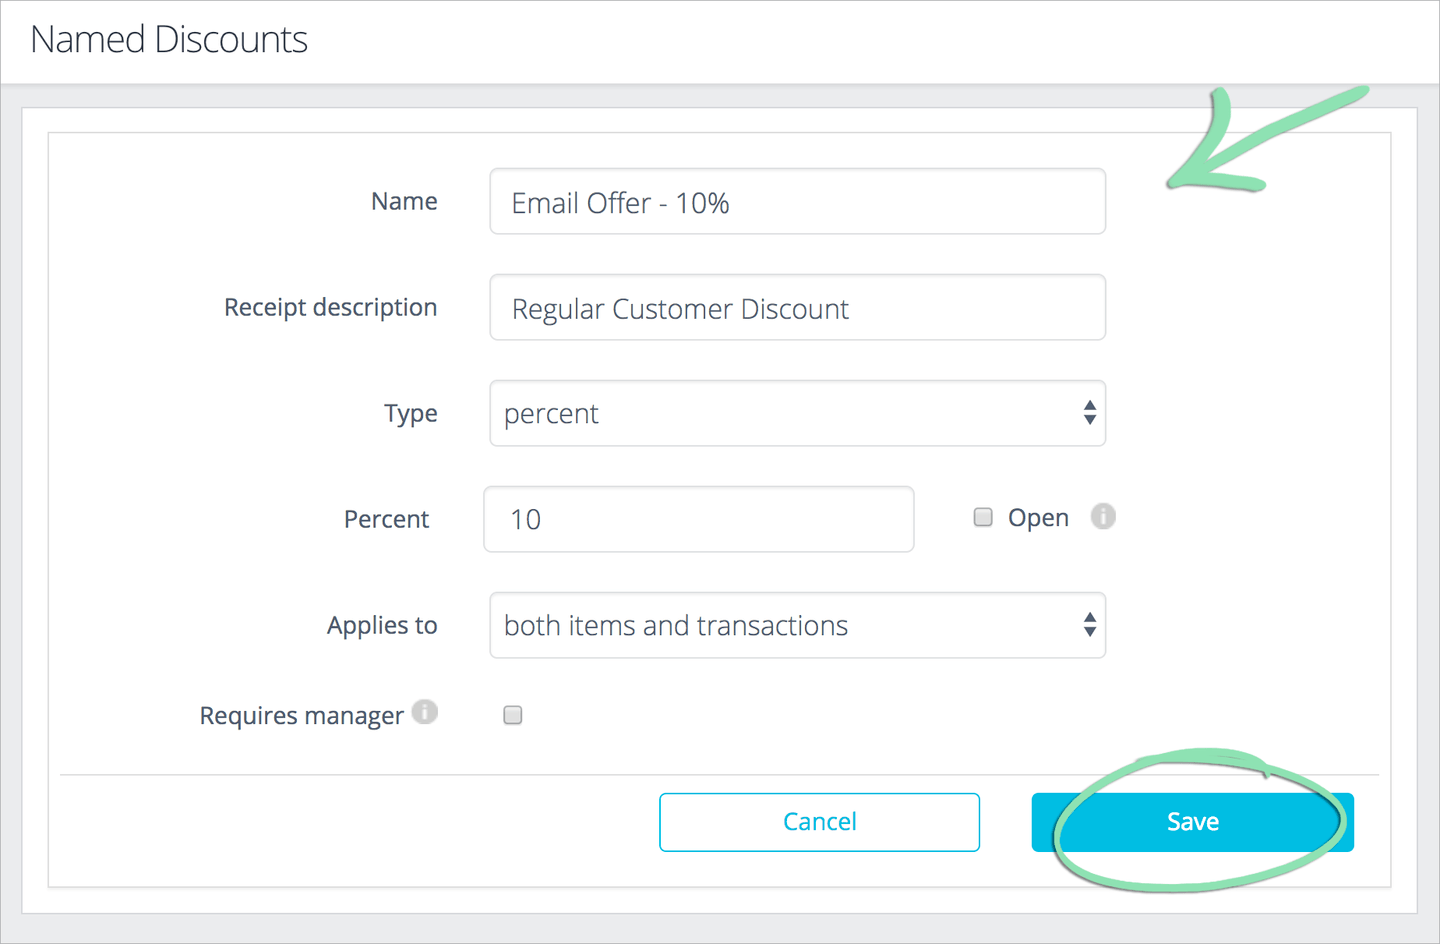
- Name: Name of the discount as it appears on the register and in BackOffice reporting.
- Receipt description: Name of the discount as it appears on receipts. Leave blank to use the Name entered above. View a sample receipt with Receipt descriptionhere.
- Type: Select whether the discount is a dollar amount or a percent.
- Amount/Percent: Depending on the Type chosen, enter the discount’s dollar amount or percent.
- Open: Check this box to allow cashiers to enter an amount or percent at the register when applying the discount to a sale. If checked, the Amount/Percent field will be disabled.
- Applies to: Decide if the discount can be applied to individual items, to entire transactions, or to both.
- Requires manager: Check this box to require a manager code before a cashier can apply the discount.
-
In the Retail POS (S-Series) app, tap Get Updates from BackOffice, then Get Updates to sync the new discount to the register.
Receiving an error while getting updates? Visit our troubleshooting guide for help.
Manage Discounts
Edit existing discounts to change their name, type, amount, or other attributes. If the business no longer offers a particular discount, delete it to remove it from the register.
-
In BackOffice, click Settings, then Discounts.
-
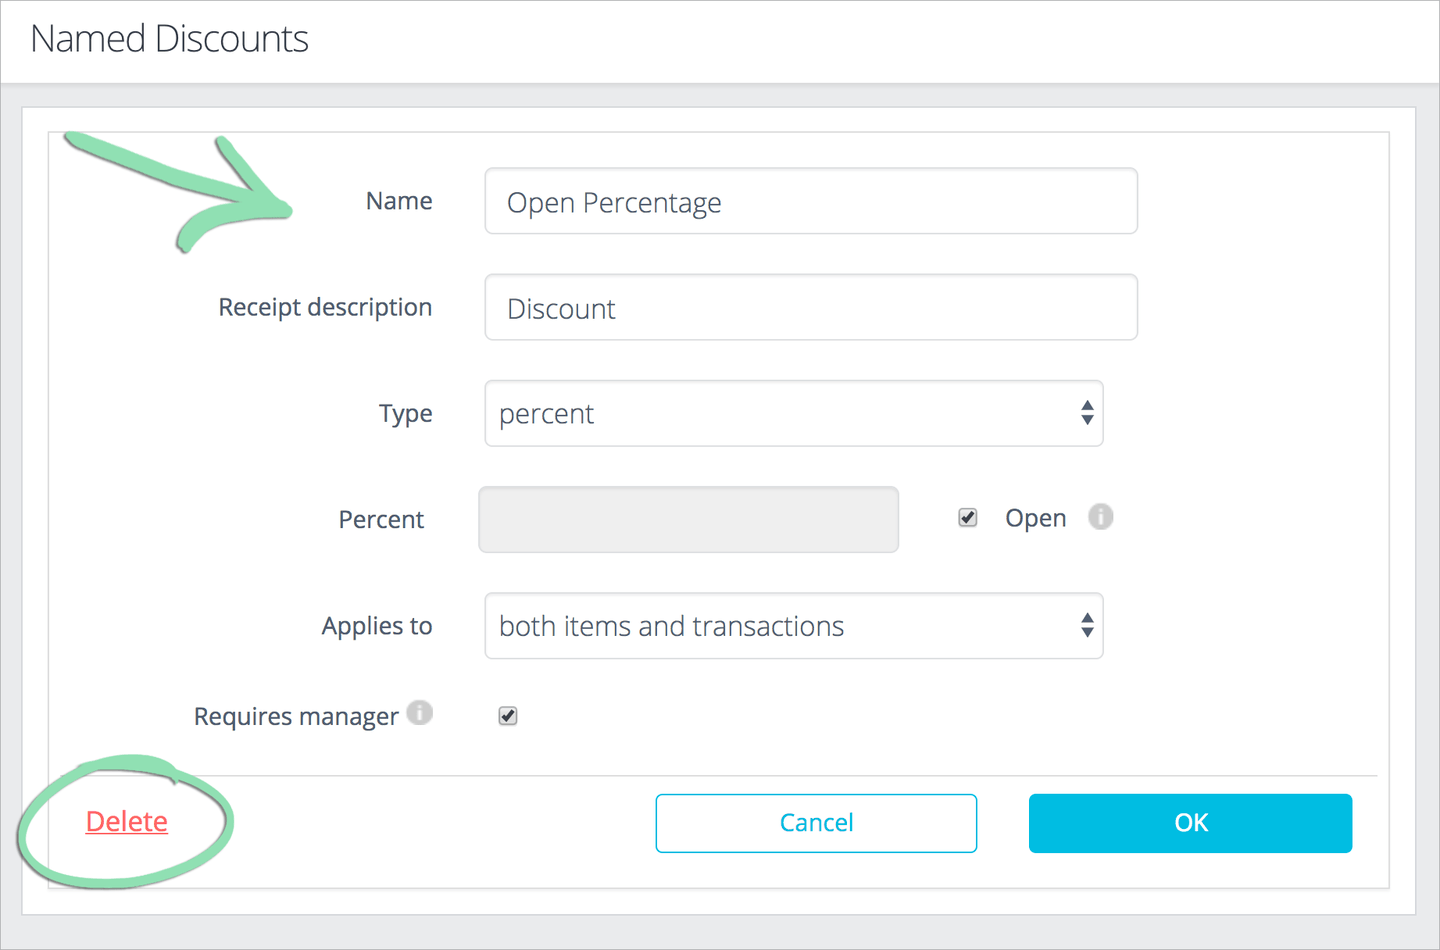
Select a discount.

-
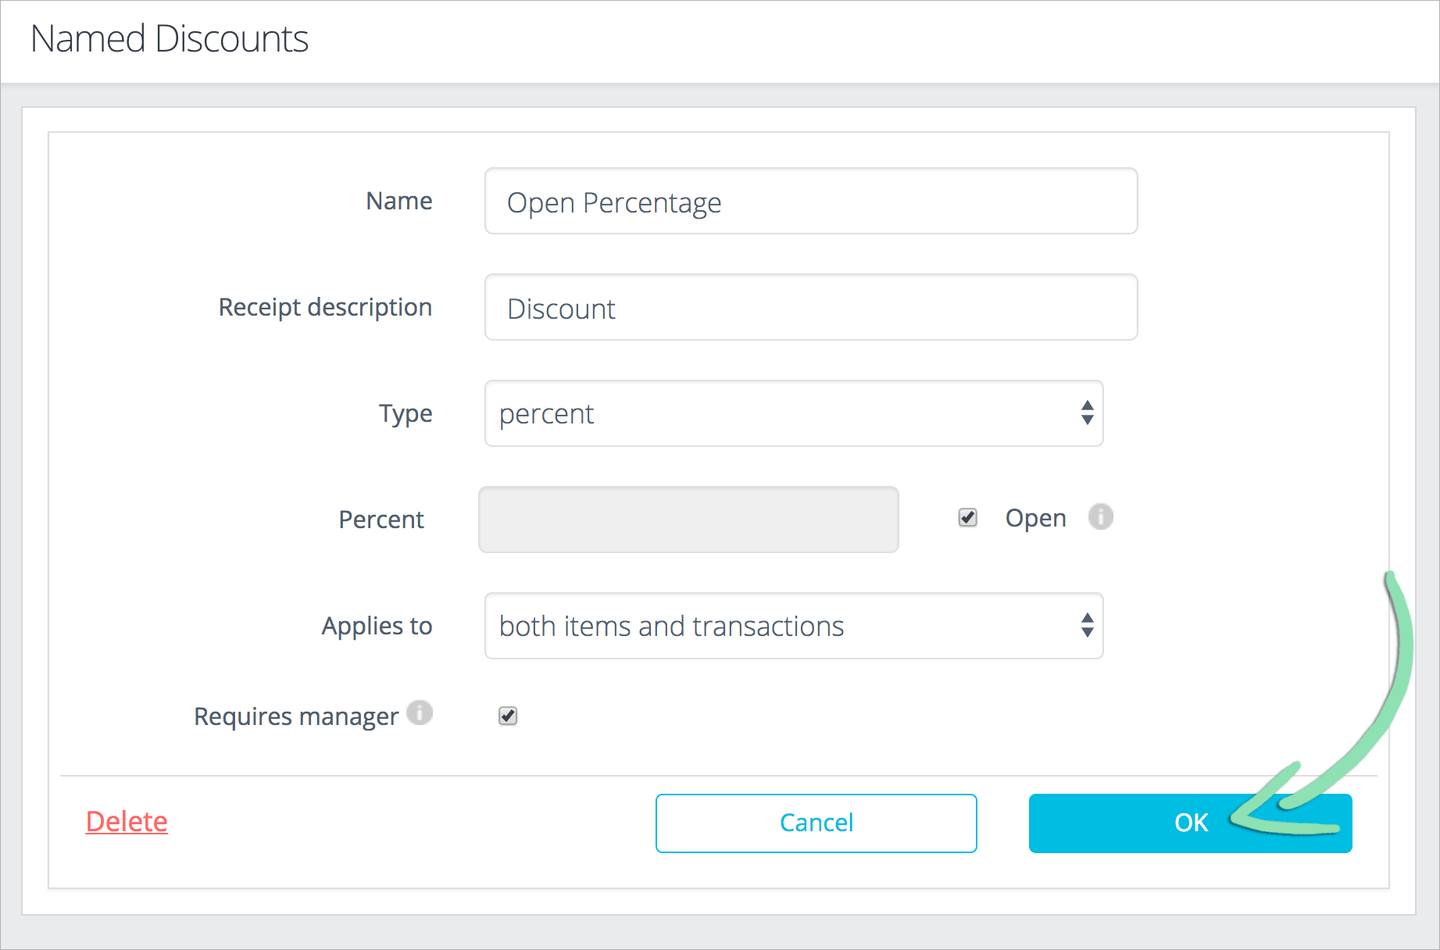
Modify the discount or click Delete to remove it.
Changing the name of a discount will also update it in some historical reporting. To learn more, visit the article for a specific report from our BackOffice support page.
-
If modifying the discount, click OK to save changes.
-
In the Retail POS (S-Series) app, tap Get Updates from BackOffice, then Get Updates to sync changes to the register.
Receiving an error while getting updates? Visit our troubleshooting guide for help.
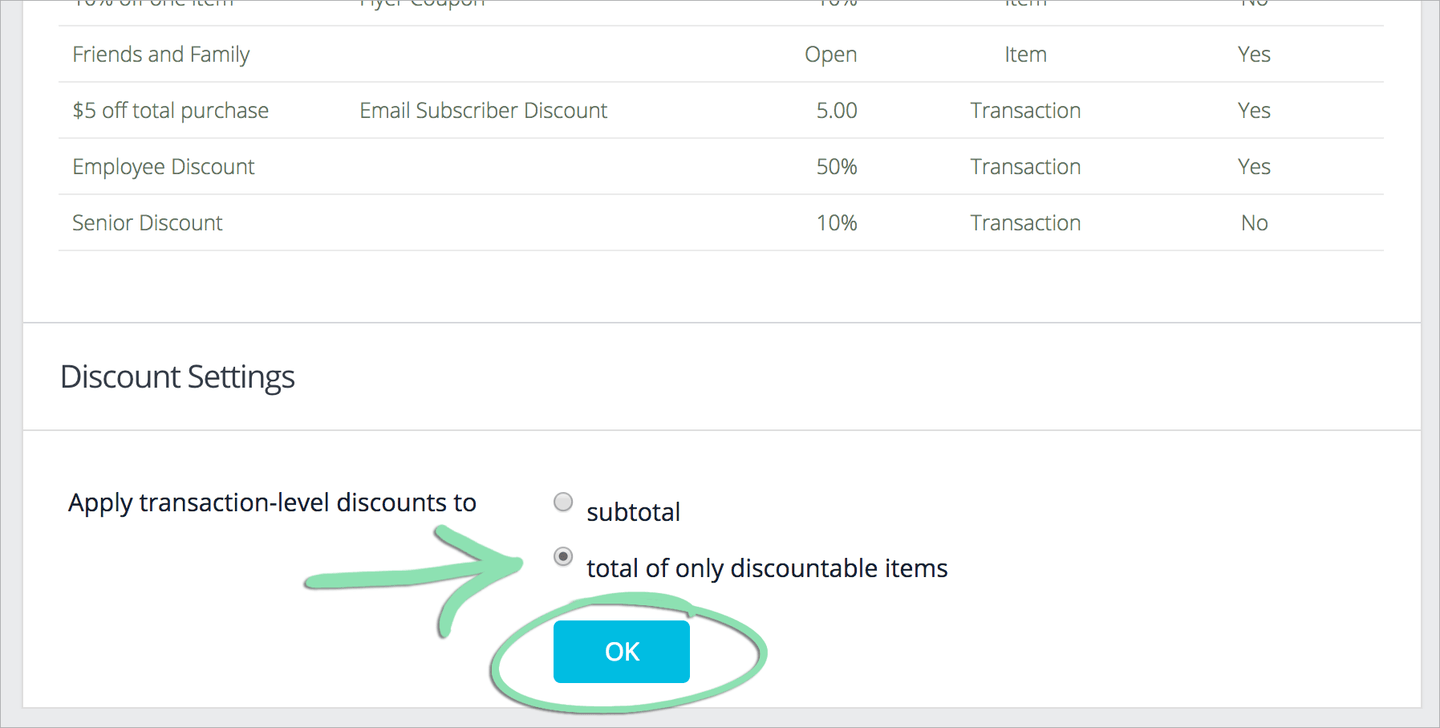
Discount Settings
Configure discount settings to control how discounts applied to the overall sale affect the sale’s total.
-
In BackOffice, click Settings, then Discounts.
-
Choose how to apply transaction-level discounts and click OK.
- Subtotal means discounts apply to the entire sale subtotal, even if some items are non-discountable.
- Total of only discountable items means discounts apply to the subtotal of only the discountable items.
-
In the Retail POS (S-Series) app, tap Get Updates from BackOffice, then Get Updates to sync changes to the register.
Receiving an error while getting updates? Visit our troubleshooting guide for help.
Apply Discounts to Sales
At the register, apply a discount to deduct an amount or percentage from a sale. Depending on the type of discount, the cashier may need to manually enter its amount or percent.
-
On the New Sale screen, tap the discount button to add a discount.
For item-level discounts, tap the button next to a line item.

For transaction-level discounts, tap Discount.

Each sale can have a maximum of 1 discount per line item and 1 transaction-level discount. You cannot stack two discounts of the same type.
- Select a discount to apply to the sale.
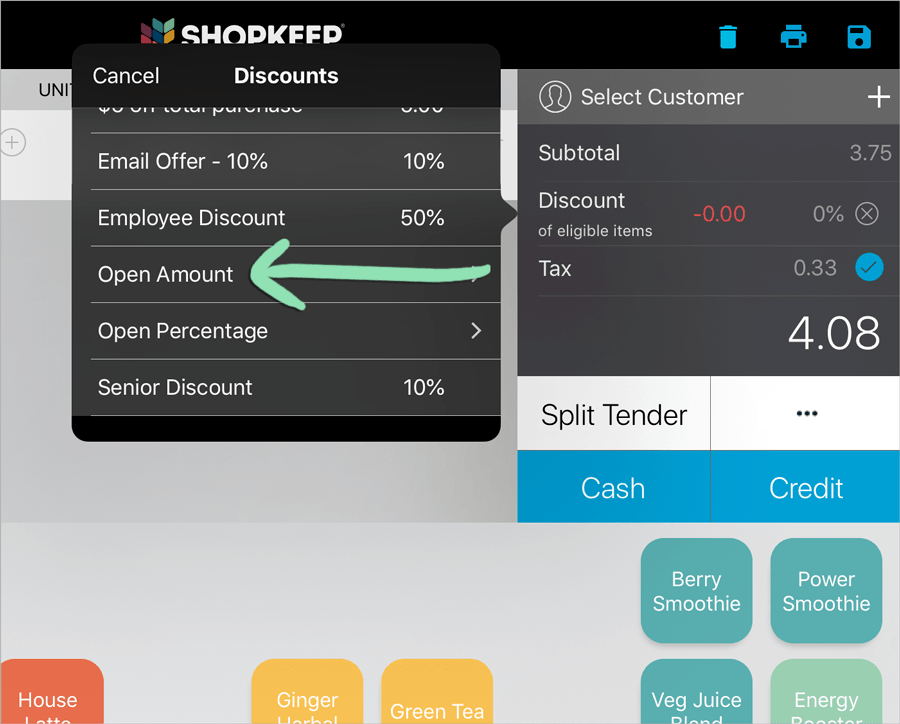
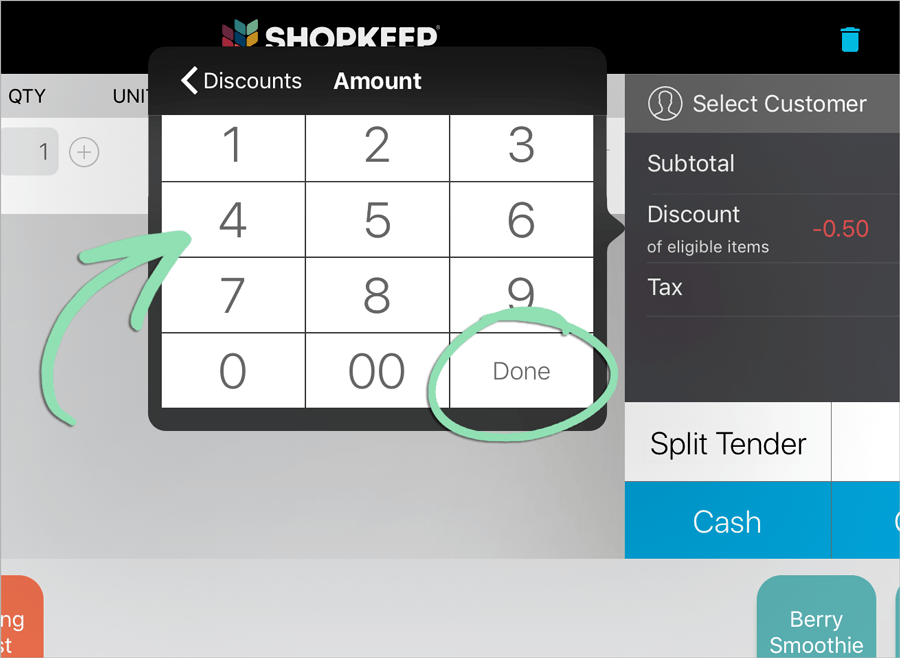
- If the discount is open, enter its amount or percent and tap Done.
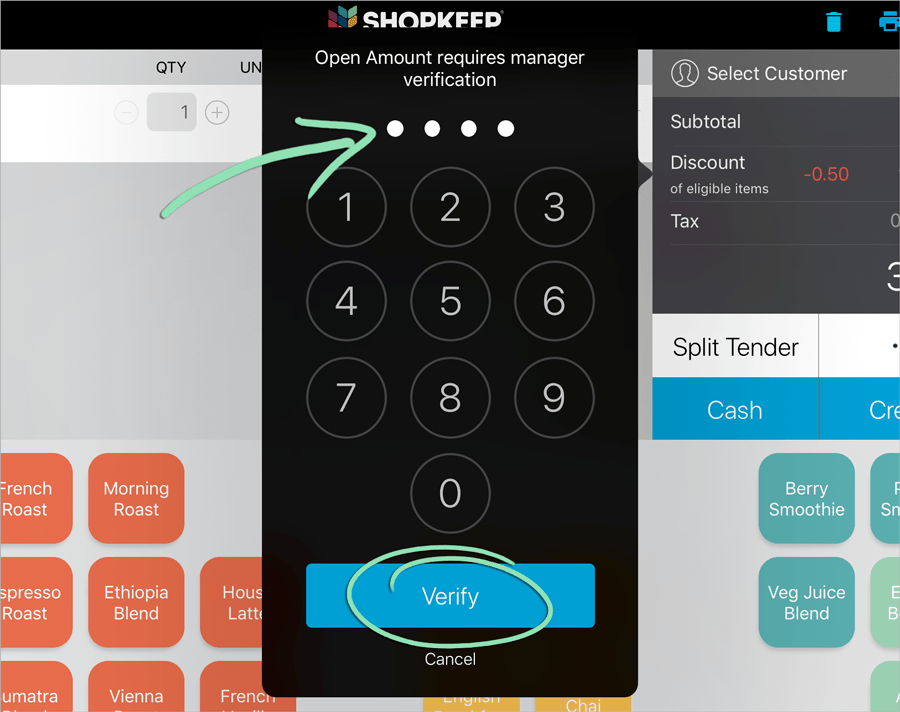
- For discounts requiring manager approval, have a manager enter their register code and tap Verify.
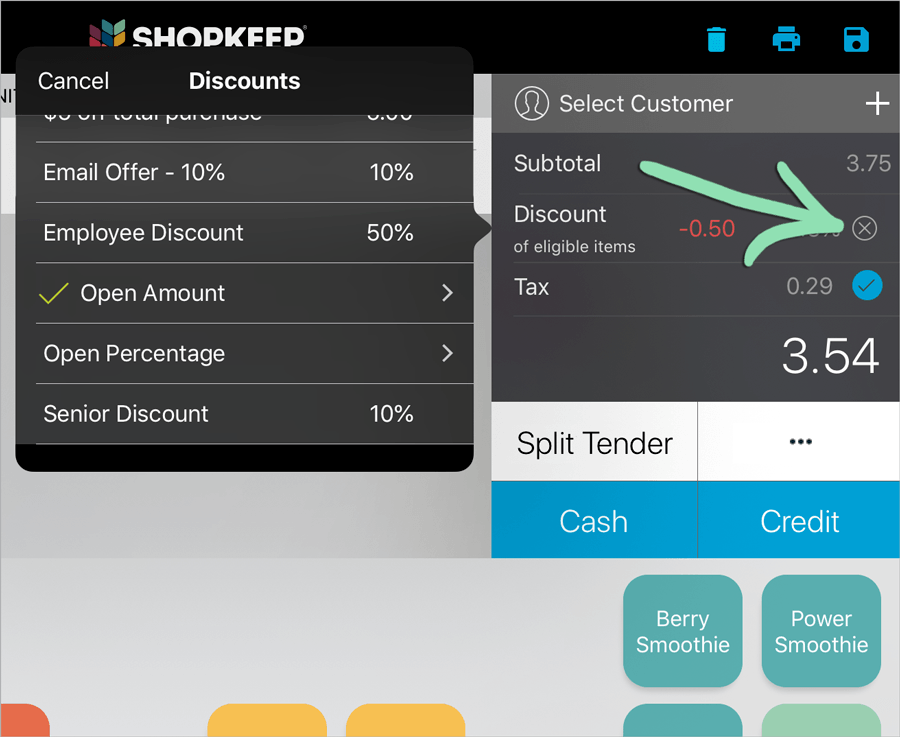
- (Optional) To remove a discount from the sale, tap the Discount button, then the X.
-
Finish the rest of the sale as usual.
The discount’s Receipt Description appears on the customer’s receipt.

For help completing the sale, visit our Running Sales at the Register article. Visit our troubleshooting guide for help solving common sale-related issues.
Discount Reporting
Use the Sales by Discount report to learn how often and to what extent discounts are given at the register.
This report is only available for Lightspeed Retail merchants on select pricing packages.
-
In BackOffice, click Reports, then Discounts.
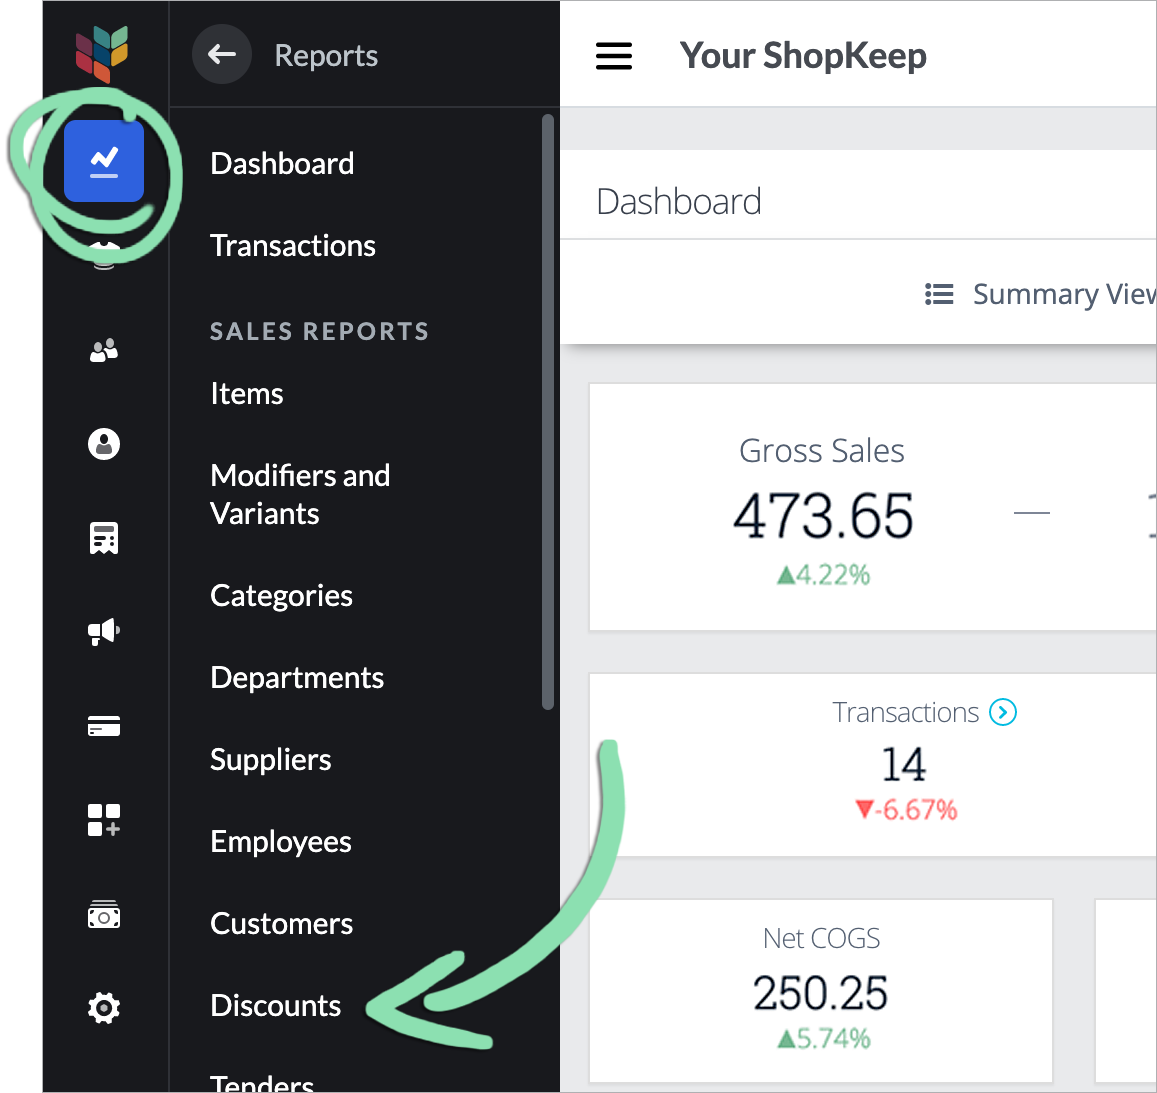
The Sales by Discount report shows how often each discount is used and gives total discount amounts. To learn how to read, filter, export, and print this report, visit our full Sales by Discount article.

Want another perspective on discount usage? Learn about other reports that have discount information: