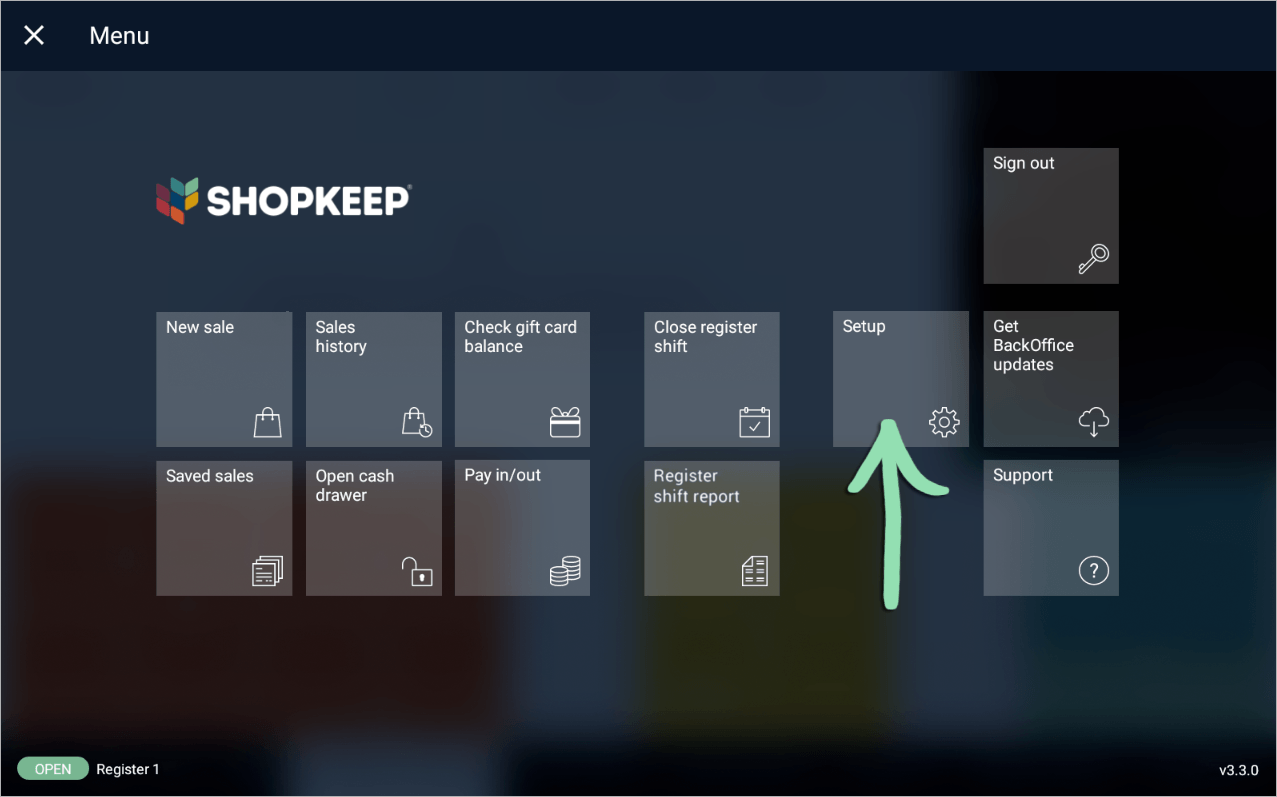
New Sale Screen Troubleshooting
This page provides solutions to issues you might encounter while running sale transactions at the register from the ‘New Sale’ screen.
I don't see 'Gift Card' or another tender on my register.
- Make sure to look in the correct area of the register.
Tap ‘…’ to reveal the ‘Gift Card’ tender and other additional tenders enabled in BackOffice.

- Check if the tender is enabled in BackOffice.

- If missing the ‘Pay by Link’ tender, make sure you have signed up for online and mobile payments and enabled Saved Sales Sync.
Pay by Link is only available in the Retail POS (S-Series) app for iOS.
- Get updates on the iOS or Android register to sync the register with BackOffice.
If you receive an error while getting updates, visit our troubleshooting guide for help.
My cash drawer won't open.
In most cases, the Lightspeed Retail POS communicates with the cash drawer through your receipt printer. Follow the steps below to check the printer’s connection and, if necessary, troubleshoot the cash drawer itself.
- Open the printer setup screen and make sure the receipt printer is enabled.
- In the Retail POS (S-Series) app for iOS, tap ‘Integrated Hardware’ on the Main Menu and select ‘Printers’. Tap the switch to enable the printer.


- In the Retail POS (S-Series) app for Android, tap ‘Setup’ on the register menu and select ‘Receipt printers’. Tap the switch to enable the printer.

- If the receipt printer does not appear on the printer setup screen, find the guide for your printer here and follow the relevant steps to troubleshoot the printer’s connection.
- If the problem persists, visit our Cash Drawer Troubleshooting guide for additional help.
"Card Reader Connected / Disconnected"
This message appears in the Retail POS (S-Series) app for iOS when the iPad loses its connection with an iDynamo credit card reader. Make sure the reader is firmly secured in the charging port.
The register's keyboard or keypad won't pop up.
By default, the on-screen keyboard is hidden when a barcode scanner is first connected but can be easily revealed as needed.
- If using the Retail POS (S-Series) app for iOS, tap and hold the arrow in the bottom-right corner to manually open the keyboard.
- Once opened manually, the keyboard will automatically open in the future when a text box is selected on the iPad.
- Using a Socket Bluetooth scanner? Double-tap the small power button on top of the scanner to toggle the keyboard or put the scanner into Application Mode for iOS devices.

- If using the Retail POS (S-Series) app for Android, follow the steps below to enable the on-screen keyboard.
These steps show how to enable the keyboard on our supported Samsung Galaxy Tab A (2019) tablet, but steps for other devices may vary. If you need help, contact your device manufacturer or visit Android support.
a Open the ‘Settings’ app.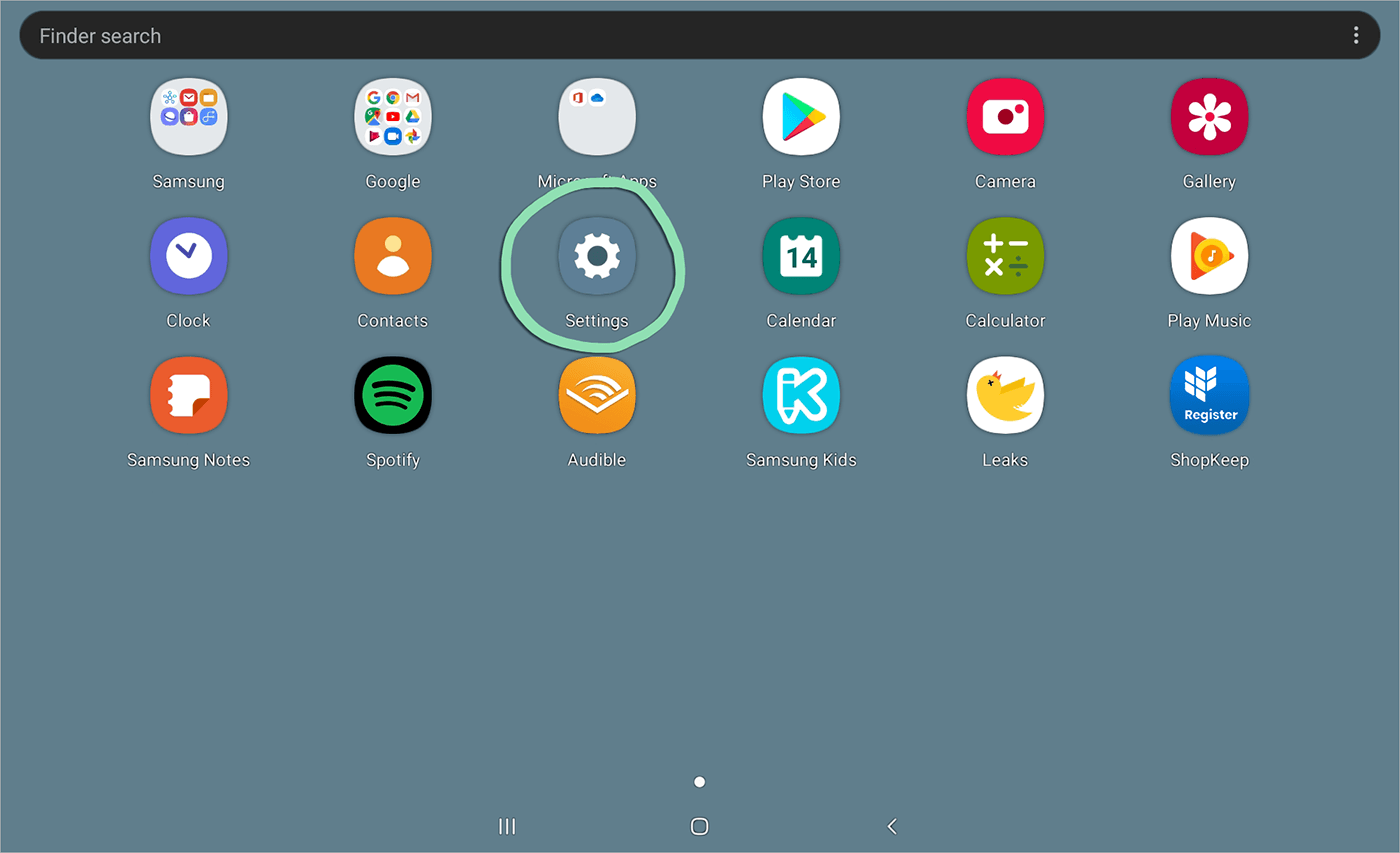 b Tap ‘General Management’.
 c Select ‘Language and input’.
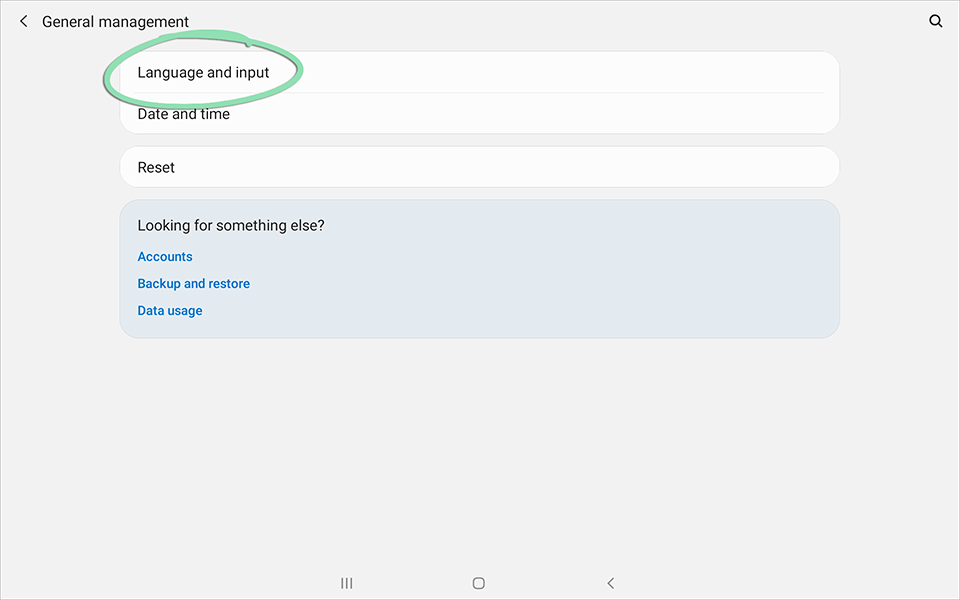 d Tap ‘Default Keyboard’.
 e Toggle ‘On-screen keyboard’ on.
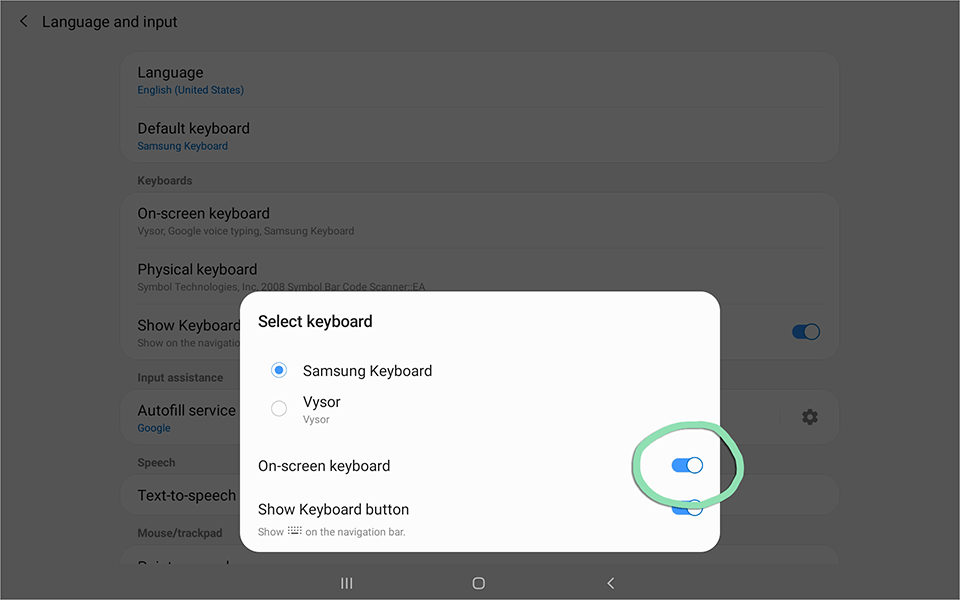
The text on my register is too small.
For the Retail POS (S-Series) app for iOS, you can make the font used on item shortcuts bigger or smaller to increase readability. For the Retail POS (S-Series) app for Android, you can change the size of fonts and display elements used throughout the Retail POS (S-Series) app.
- Follow the steps in the relevant support article below to adjust font and/or display size settings.
Discounts are applying to non-discountable items.
By default, transaction-level discounts apply to the entire sale subtotal regardless if there are non-discountable items involved. If desired, you can change this behavior in BackOffice.
- In BackOffice, click 'Settings' and select 'Discounts'.
- Select 'total of only discountable items'.

- Click 'OK' to save.
- Get updates on the iOS or Android register to sync the changes to the register.
If you receive an error while getting updates, visit our troubleshooting guide for help.
“Quantity on Hand tracking disabled”
This error occurs in the Retail POS (S-Series) app for iOS when checking the quantity on hand (QoH) of an untracked inventory item. Read below to learn how to track the item.
- Tap ‘OK’ to dismiss the error.
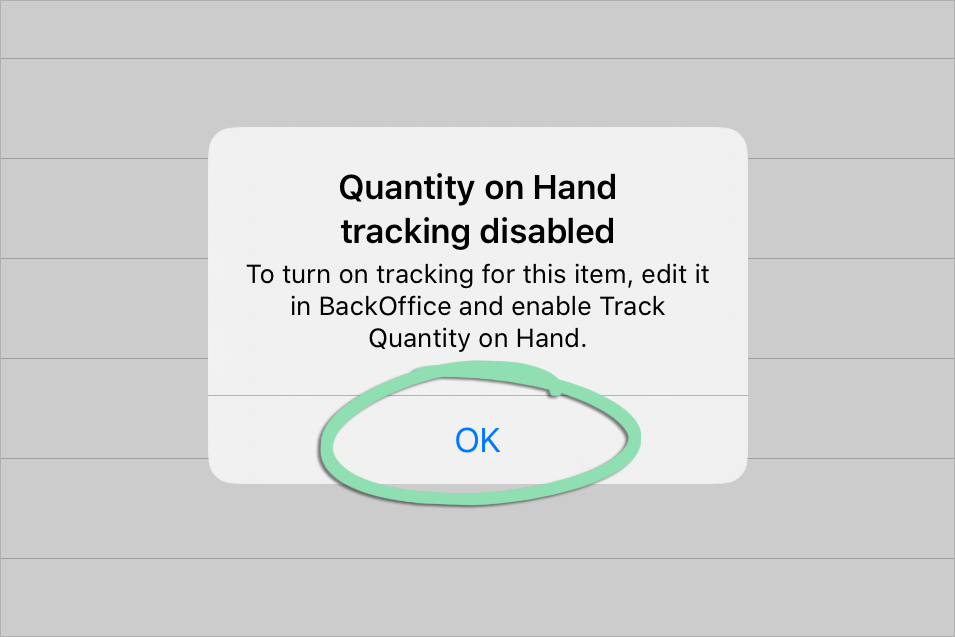
- Follow the steps here to enable inventory tracking for the item.
- On the register, open the Main Menu, tap ‘Get Updates from BackOffice’, and select ‘Get Updates’.

“Connection Failed”
This error means the register has either poor or no internet connection. The Retail POS (S-Series) app must be connected to the internet to utilize certain features, such as viewing an item’s quantity on hand (QoH).
- Tap ‘OK’ to dismiss the error.
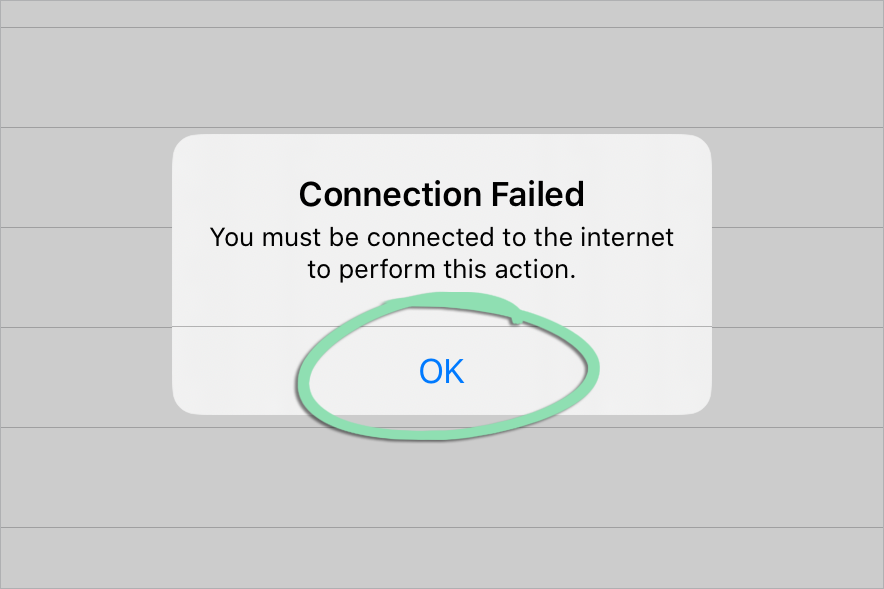
- Follow the steps here to troubleshoot your network connection.
An item’s quantity on hand is incorrect.
An incorrect quantity on hand (QoH) may mean the item was not sold or returned properly, was not received in BackOffice, or was stolen. Read below to learn how to fix the item’s quantity.
- Follow the steps here to update the item’s quantity to the correct number.
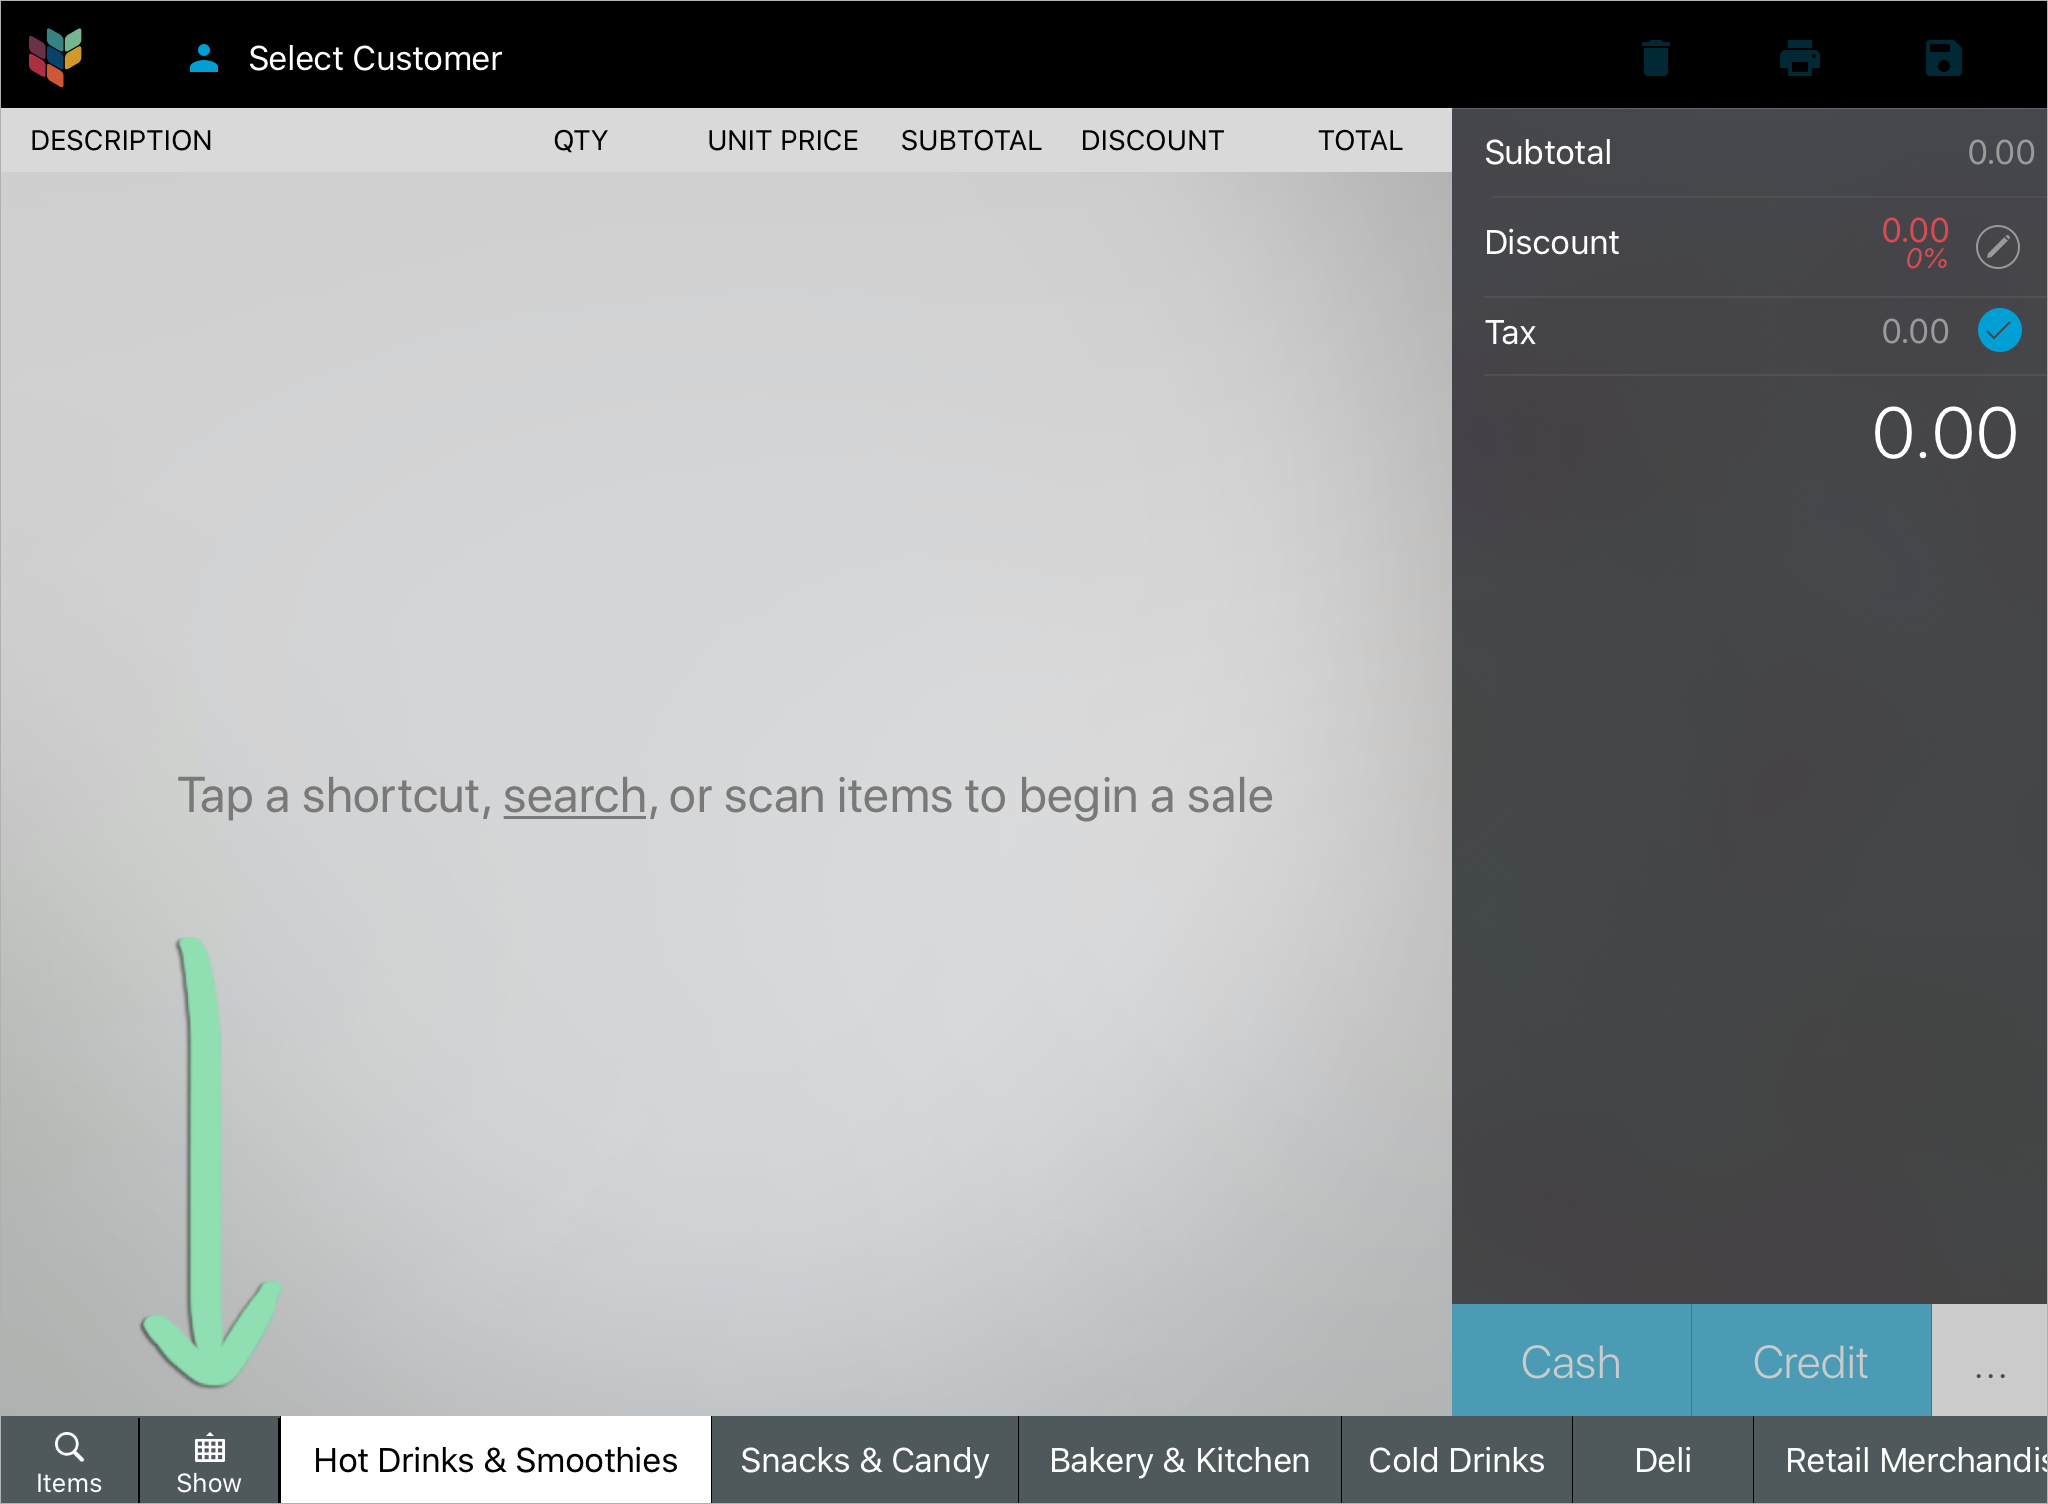
My register is missing the item shortcuts panel.
Businesses that scan or search for items can hide the item shortcuts for an expanded view of the New Sale screen. Unhide the item shortcuts panel to start using it again.
-
Tap ‘Show’ (iOS) or the grid with arrow icon (Android) to unhide the item shortcuts panel.Retail POS (S-Series) app for iOS
 Retail POS (S-Series) app for Android
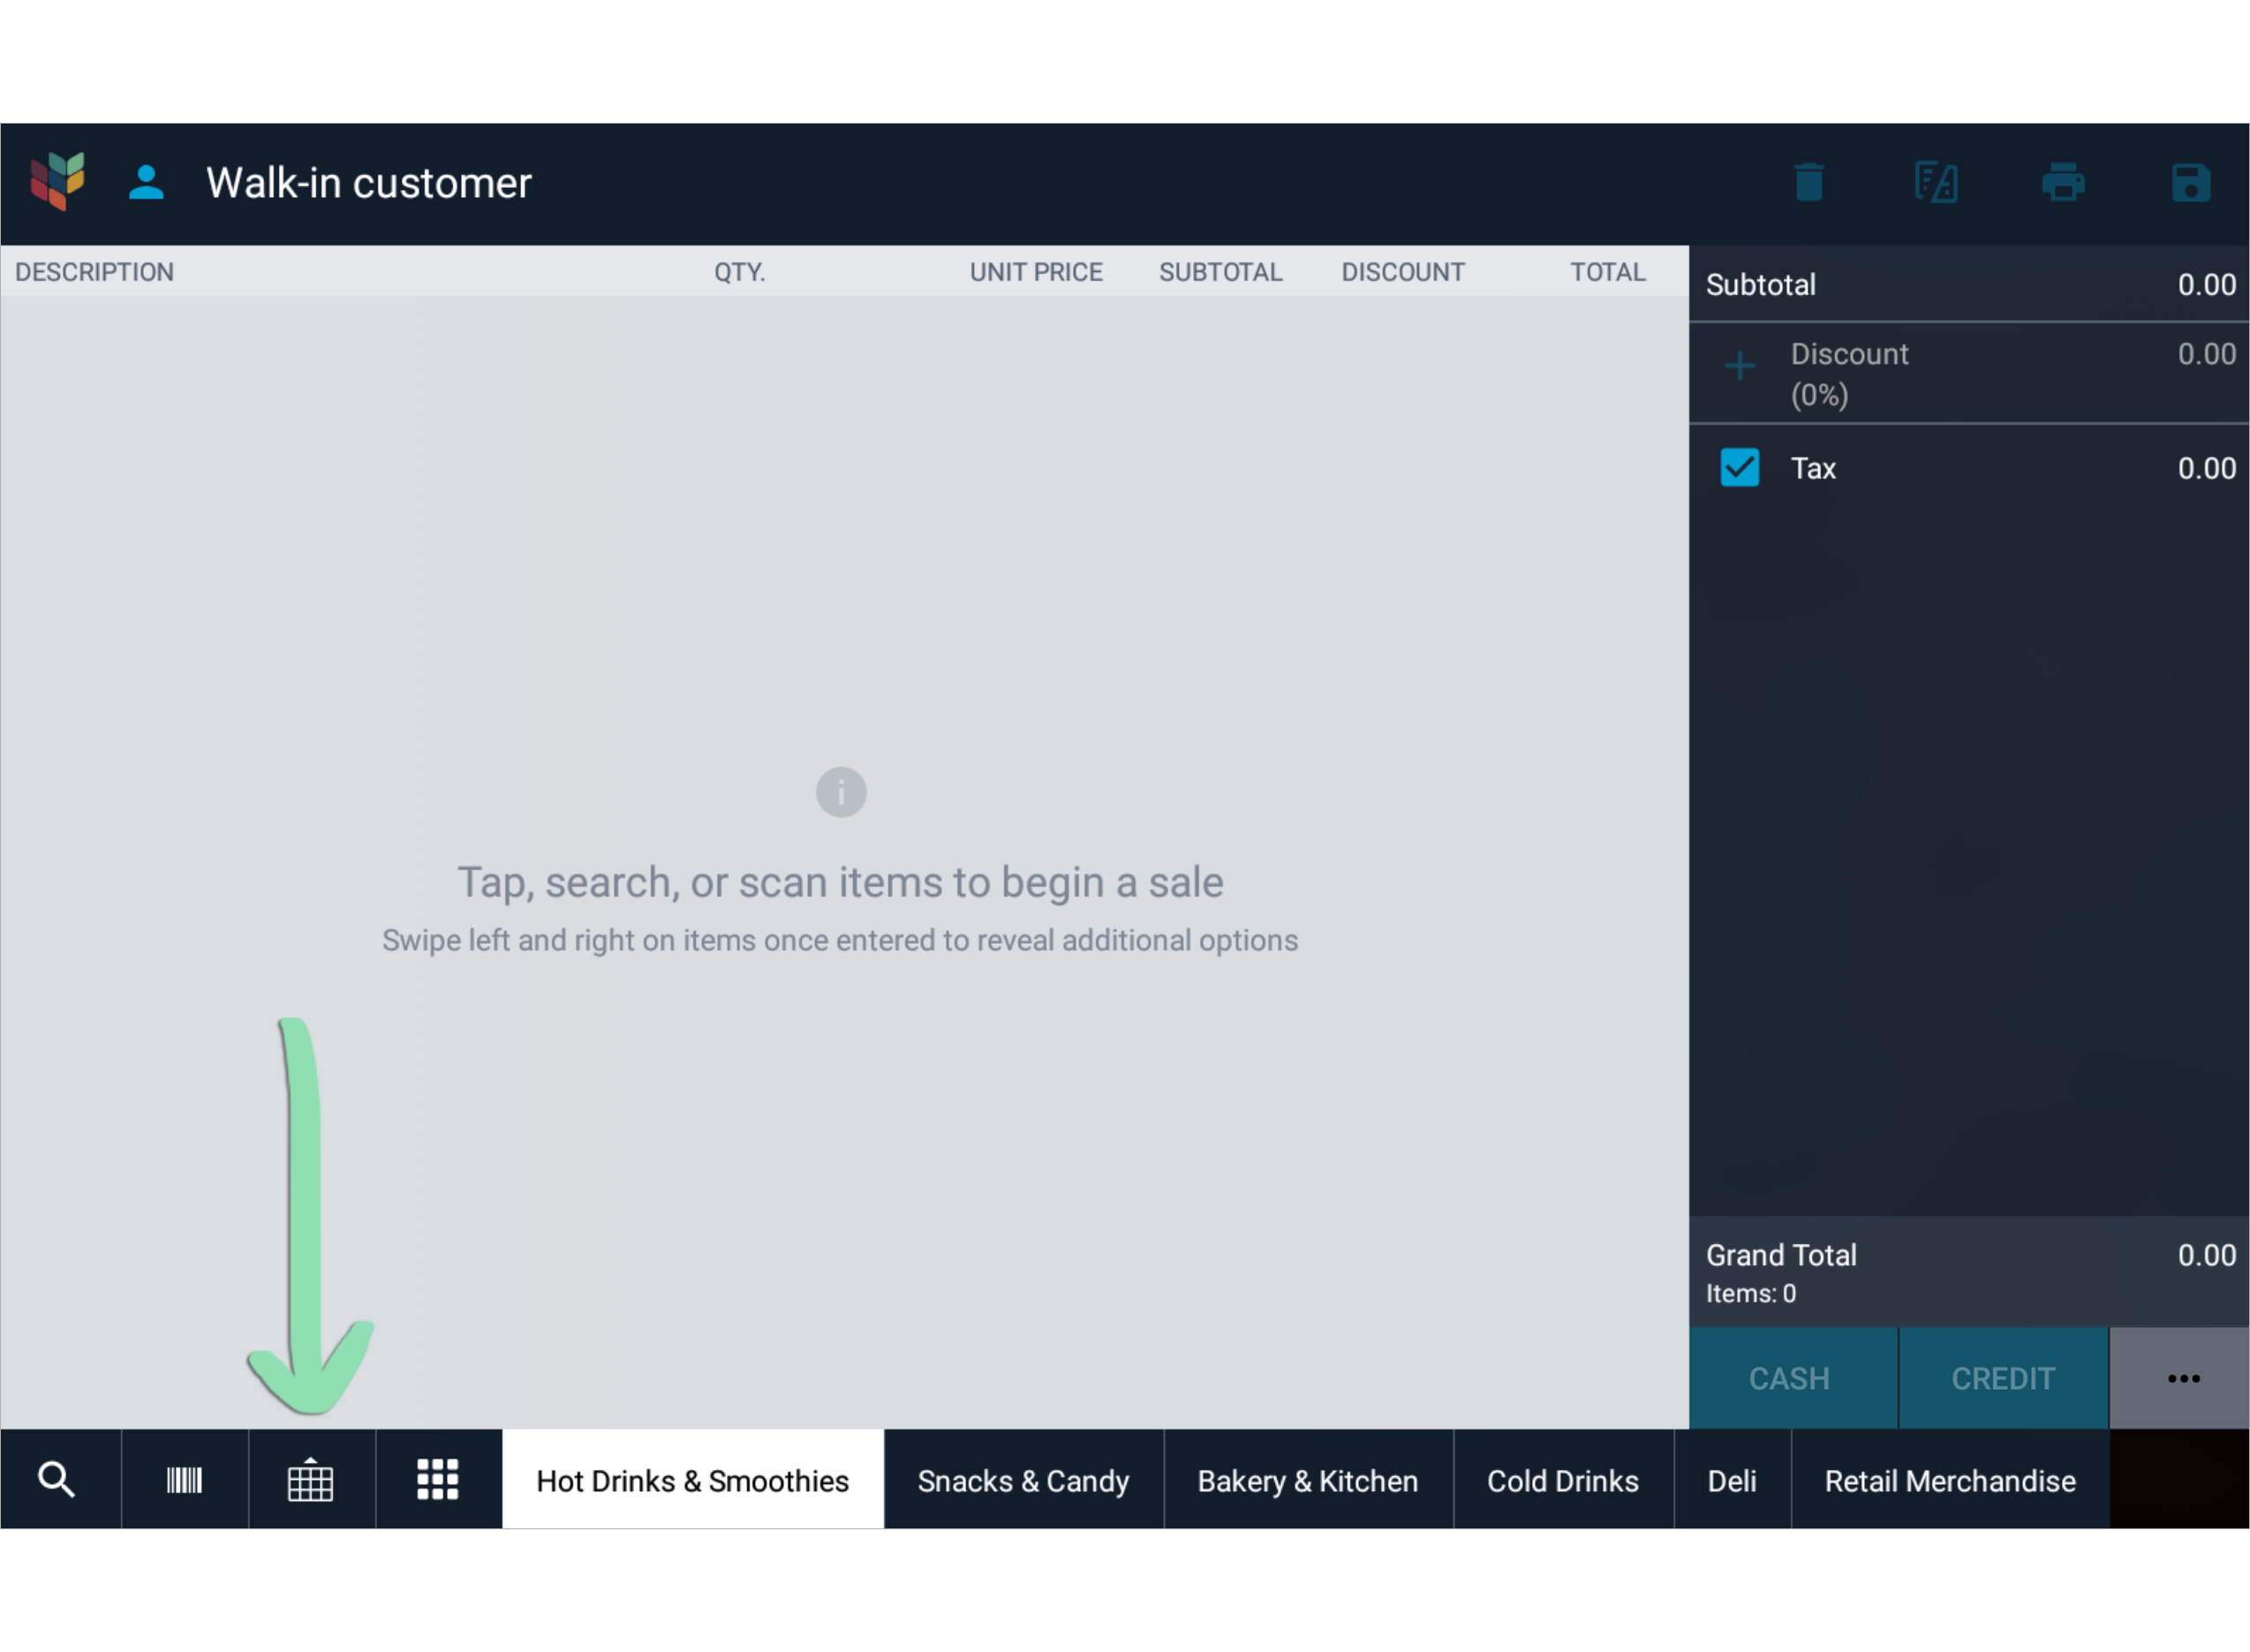
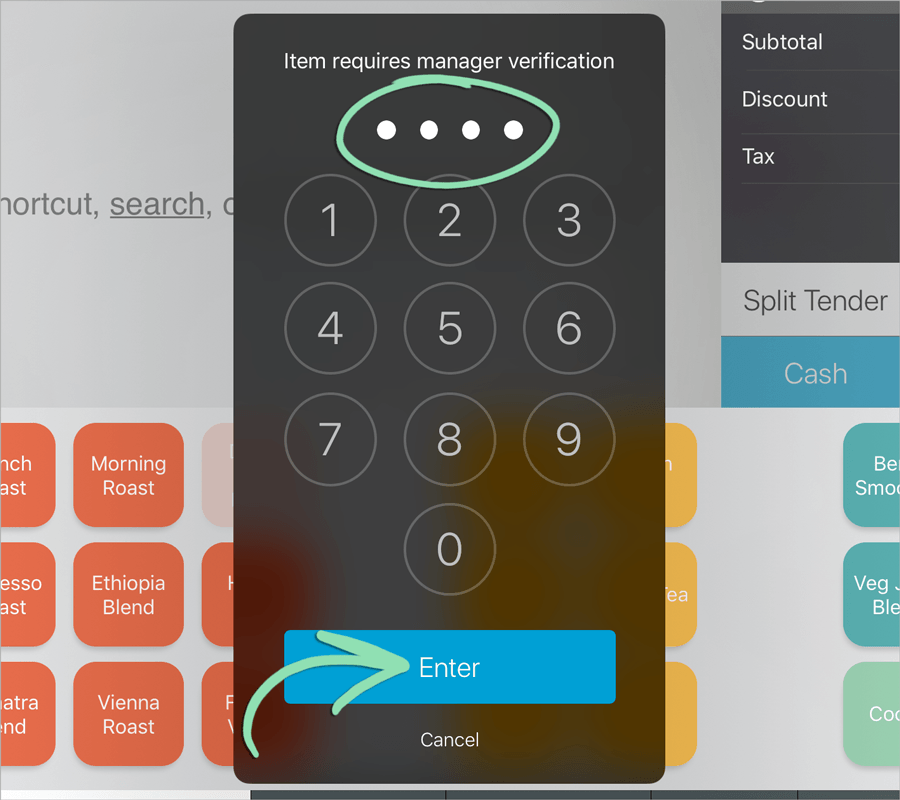
An item is grayed out on the item shortcuts and item search panels.
When an item is grayed out in the Retail POS (S-Series) app for iOS and unable to be rung up, it means the item was made unavailable for sale. If the item is physically able to be provided to customers, make it available again on the register to ring it up.
- Tap and hold the unavailable item shortcut for 2 seconds.

- Select ‘Available for sale’ to make the item available.
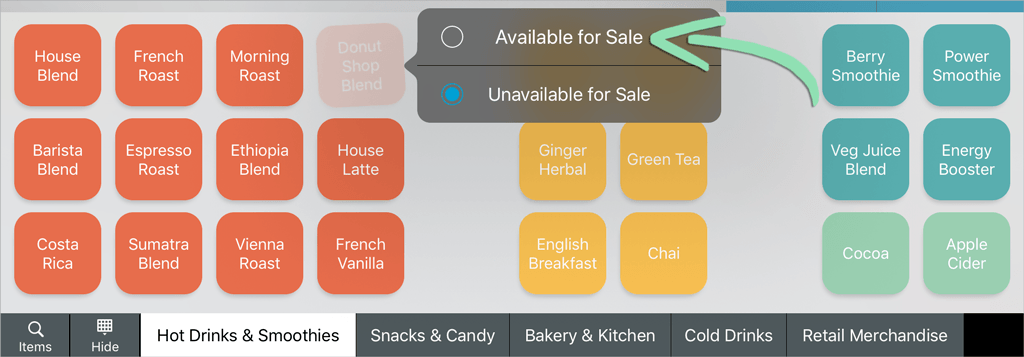
- If prompted, enter a manager code and tap ‘Enter’ to authorize the change in availability.
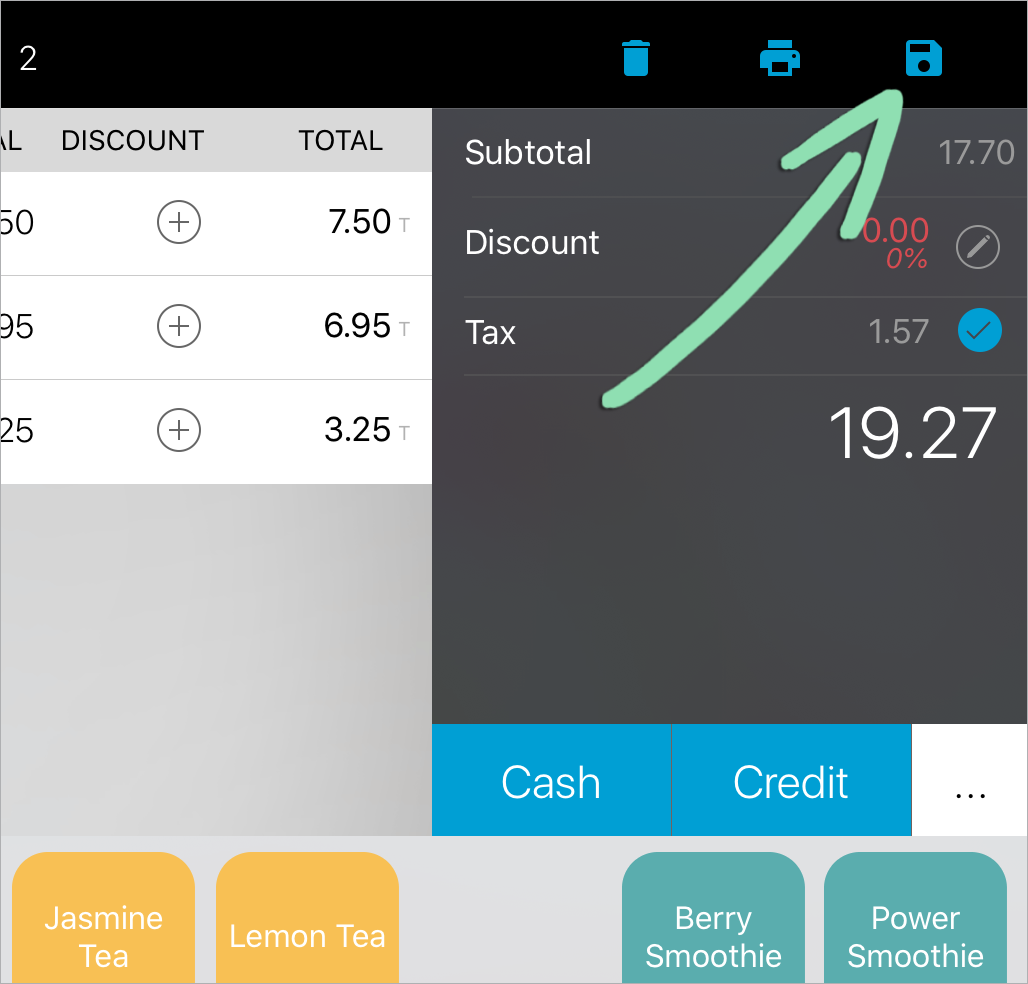
I entered the wrong guest count.
Follow the steps below to re-enter the guest count if you make a mistake.
- Tap the Guests icon.

- Enter the correct number of guests and tap ‘Done’.

- Tap the disk icon to save changes.
A keypad pops up whenever I start a sale.
The keypad appears to remind cashiers to enter the number of guests associated with each new transaction. Visit BackOffice to disable this automatic prompt.
- In BackOffice, click ‘Settings’ and select ‘General’.
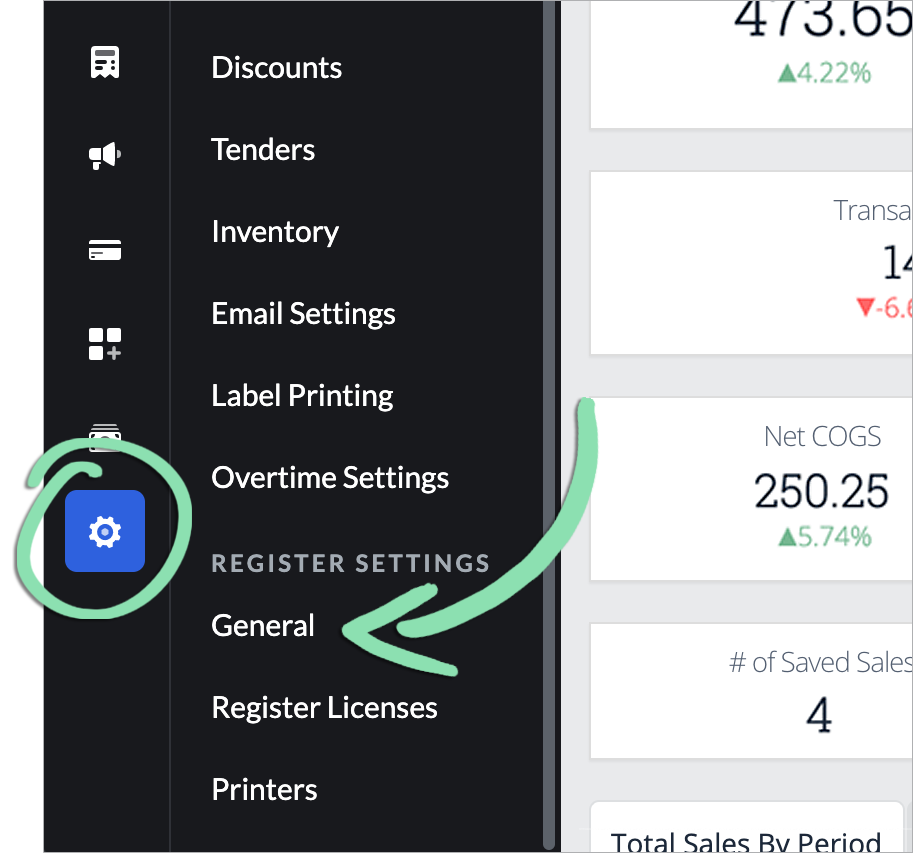
- Uncheck the setting for prompting cashiers to enter the Guest Count, then click ‘Save’.
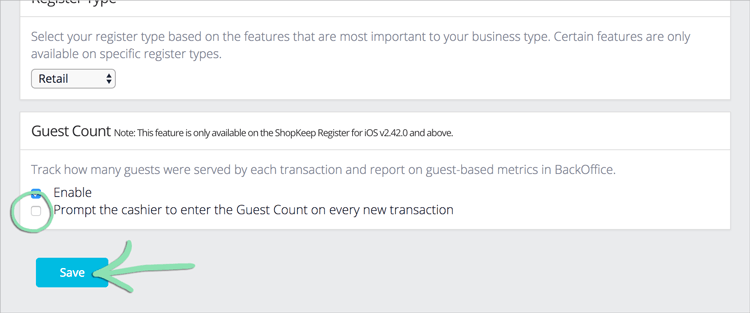
- Get updates on the iOS or Android register to sync the register with BackOffice.
I’m unable to enter guest counts for transactions.
Follow the steps below to make sure the feature is enabled, then refresh the register.
- Follow the steps here to enable Guest Count in BackOffice.
- Get updates on the iOS or Android register to sync the changes to the register.
I need to adjust a tip that was entered incorrectly.
In most cases, tips cannot be changed after tapping ‘Charge’ at the register. However, merchants processing credit cards with ShopKeep Payments by Lightspeed in the Retail POS (S-Series) app for iOS can submit requests to adjust incorrectly-entered tip amounts.
- Follow the steps here to view the instructions for requesting a tip adjustment.
After scanning a customer’s ID, driver’s license, or passport, I am not prompted to verify the customer’s information.
This issue may occur if you scan the wrong barcode, are not using a supported scanner model, or if the Socket S740 scanner is not in Application mode.
- Make sure you are scanning the correct part of the customer’s ID, driver’s license, or passport.
Not sure what to scan? See our example here.
- If the customer’s ID has multiple barcodes, cover the incorrect barcode while scanning the correct one.
- If scanning an ID or driver’s license, make sure you are using either the Socket S740, Zebra DS2208, or Zebra DS4608 2D barcode scanner.
Other barcode scanner models are not supported for scanning IDs.
- If scanning a passport, make sure you are using the Zebra DS4608 2D barcode scanner and have enabled passport scanning.
Other barcode scanner models are not supported for scanning passports.
- Update the Retail POS (S-Series) app.
For help updating the Retail POS (S-Series) app, visit one of the following articles:
- If the problem persists while using the Socket S740, follow the additional steps below.