Socket Barcode
Scanner Setup
Socket Bluetooth Barcode Scanners connect wirelessly with the iOS or Android versions of the Retail POS (S-Series) app to ring up items by scanning their barcodes and, when using the S740 model only, to validate sales restrictions by scanning customer state-issued IDs and driver’s licenses. Charge the scanner, pair it with the register, and add item UPC codes to BackOffice to get started.
Setting up The Mini USB Barcode Scanner by ID Tech or a Zebra USB Barcode Scanner? Find the setup article for your scanner here.
Watch our Barcode Scanner Setup video below:
In the Box
The Socket Barcode Scanner ships with all of the parts listed below.

Charge the Scanner
Socket scanners use rechargeable batteries to keep your store’s operations moving for a full day. Plug the scanner in to charge before using it the first time and whenever its batteries are running low.
- Plug the USB charging cable into the scanner or charging dock (sold separately).

- Plug the USB end of the charging cable into a 5V/1A charging adapter (sold separately).
Purchase a compatible charging adapter here.
- Plug the charging adapter into a power outlet.
- If using a charging dock, place the scanner on the dock.
- If setting up the scanner for the first time, allow it to charge for 6 hours.
Having trouble charging the scanner? Visit one of the troubleshooting guides below for help:
Pair Scanner
With the Socket scanner charged, pair it with the register to begin using it to scan items. The specific steps to pair the scanner will vary based on whether you use the iOS or Android version of the Retail POS (S-Series) app.
On iOS
If using the Retail POS (S-Series) app for iOS, follow the steps below to pair the Socket scanner with your iPad in the Settings app.
- Hold the power button to turn the scanner on.
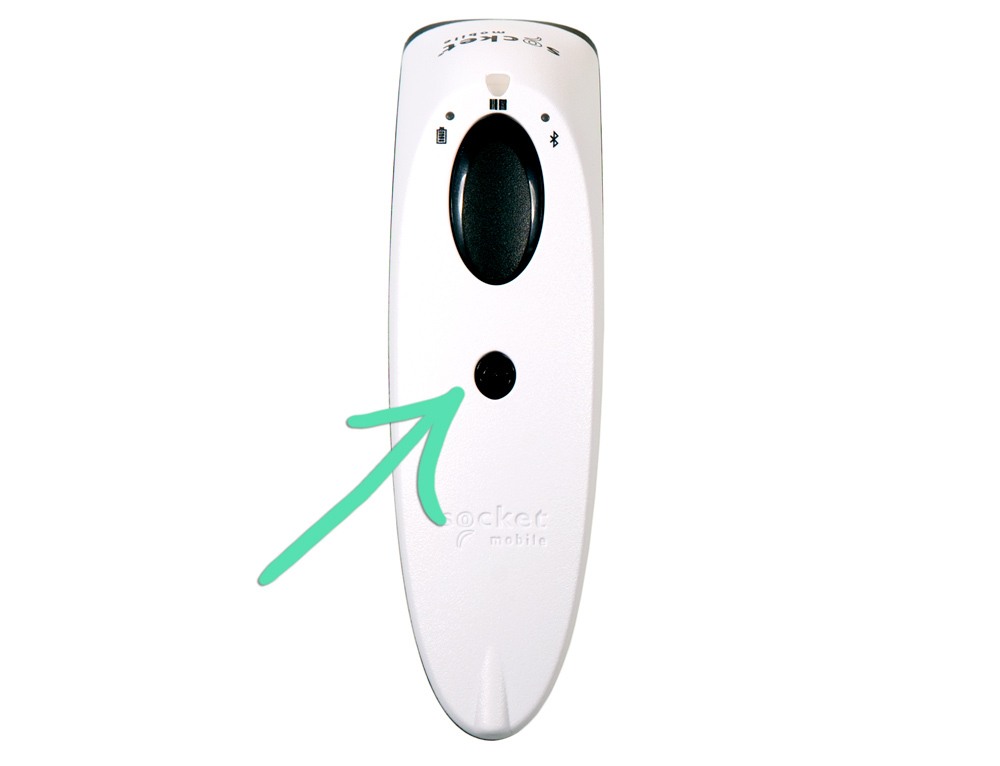
- (Optional) Put the scanner into Application Mode by scanning the relevant barcode in the user manual.
Application mode allows full access to the keyboard in the Retail POS (S-Series) app without having to double-tap the scanner power button and is required to be able to validate sales restrictions by scanning customer state-issued IDs and licenses (S740 model only).
Download the manual for your specific scanner and learn more about scanner modes here.
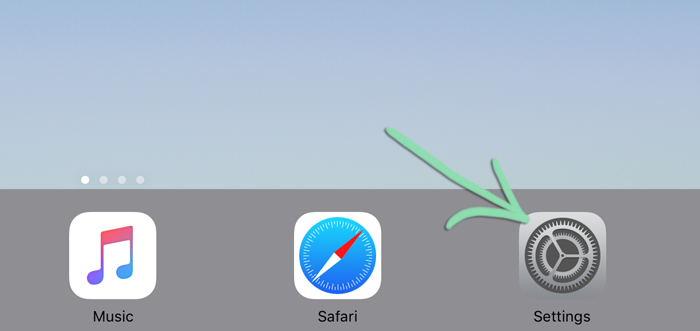
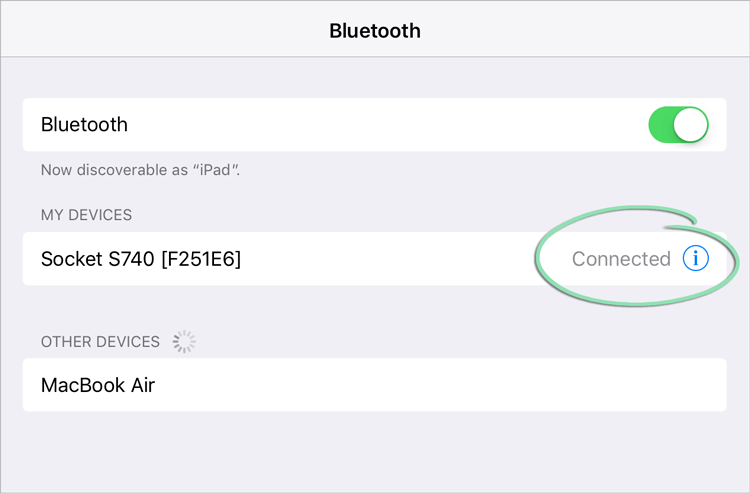
- Open the iPad's 'Settings' app.
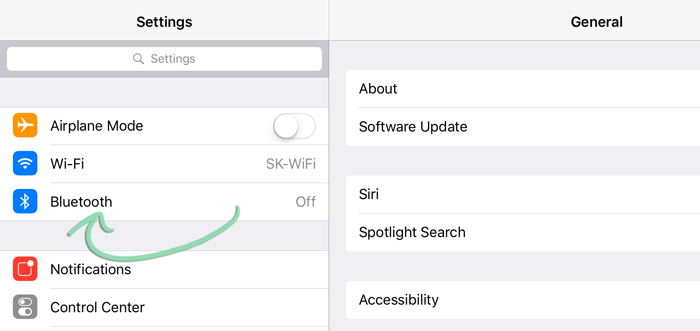
- Tap 'Bluetooth'.
- Switch Bluetooth on and tap the 'Socket' device.
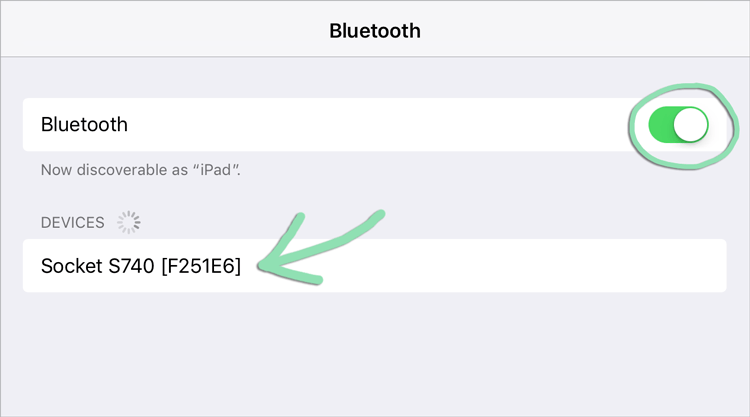
- Wait for the Socket's status to change to Connected'.
The scanner is now ready to use in the Retail POS (S-Series) app and will remain paired with the iPad until powered off, disconnected, or unpaired.
If you have difficulty pairing the scanner, visit our Barcode Scanner Troubleshooting guide for help.
On Android
If using the Retail POS (S-Series) app for Android, follow the steps below to pair the Socket scanner with your Android tablet in the Retail POS (S-Series) app.
Socket scanner integration is only available on the latest compatible versions of the Retail POS (S-Series) app for Android. This scanner will not connect to the Lightspeed Retail POS on The Mini or The Station. For help updating the Retail POS (S-Series) app for Android, visit the Introduction to Android article.
- Hold the power button to turn the scanner on.
- Follow the steps here on the register to turn Bluetooth on.
- Sign into the Retail POS (S-Series) app as a Register Manager.
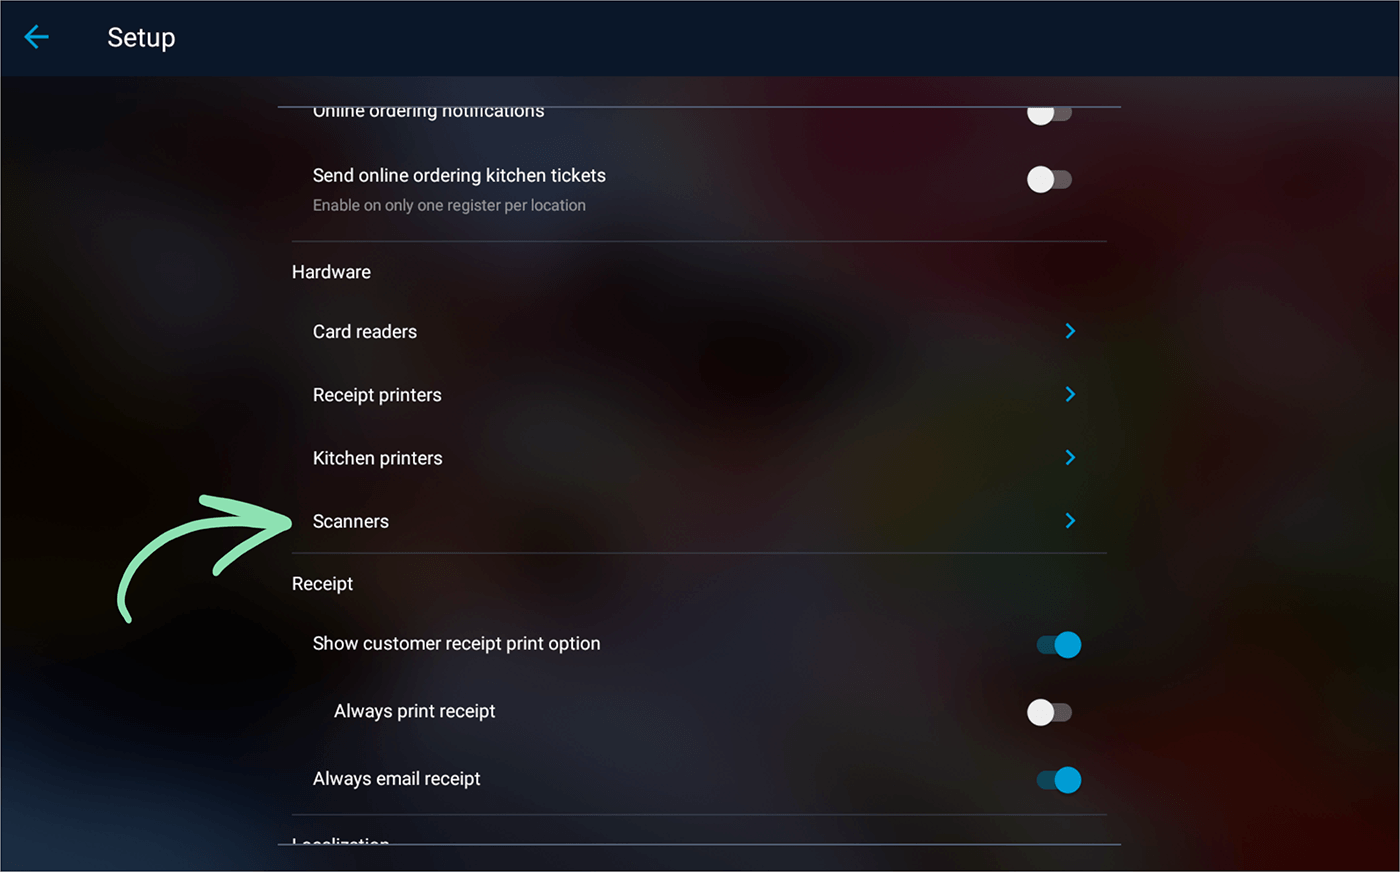
- In the Retail POS (S-Series) app, tap ‘Setup’ on the register menu.
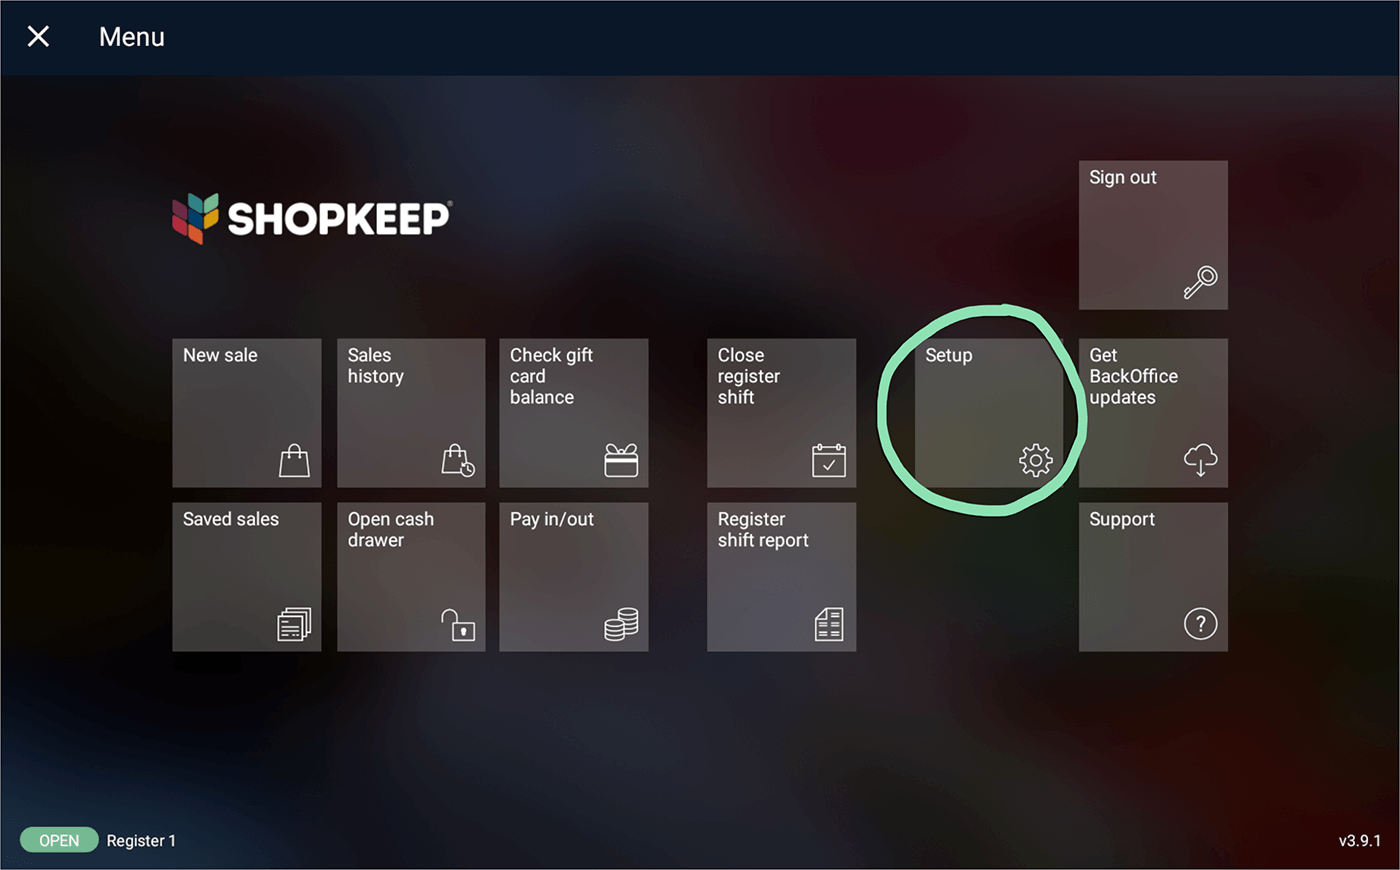
- Select ‘Scanners’.
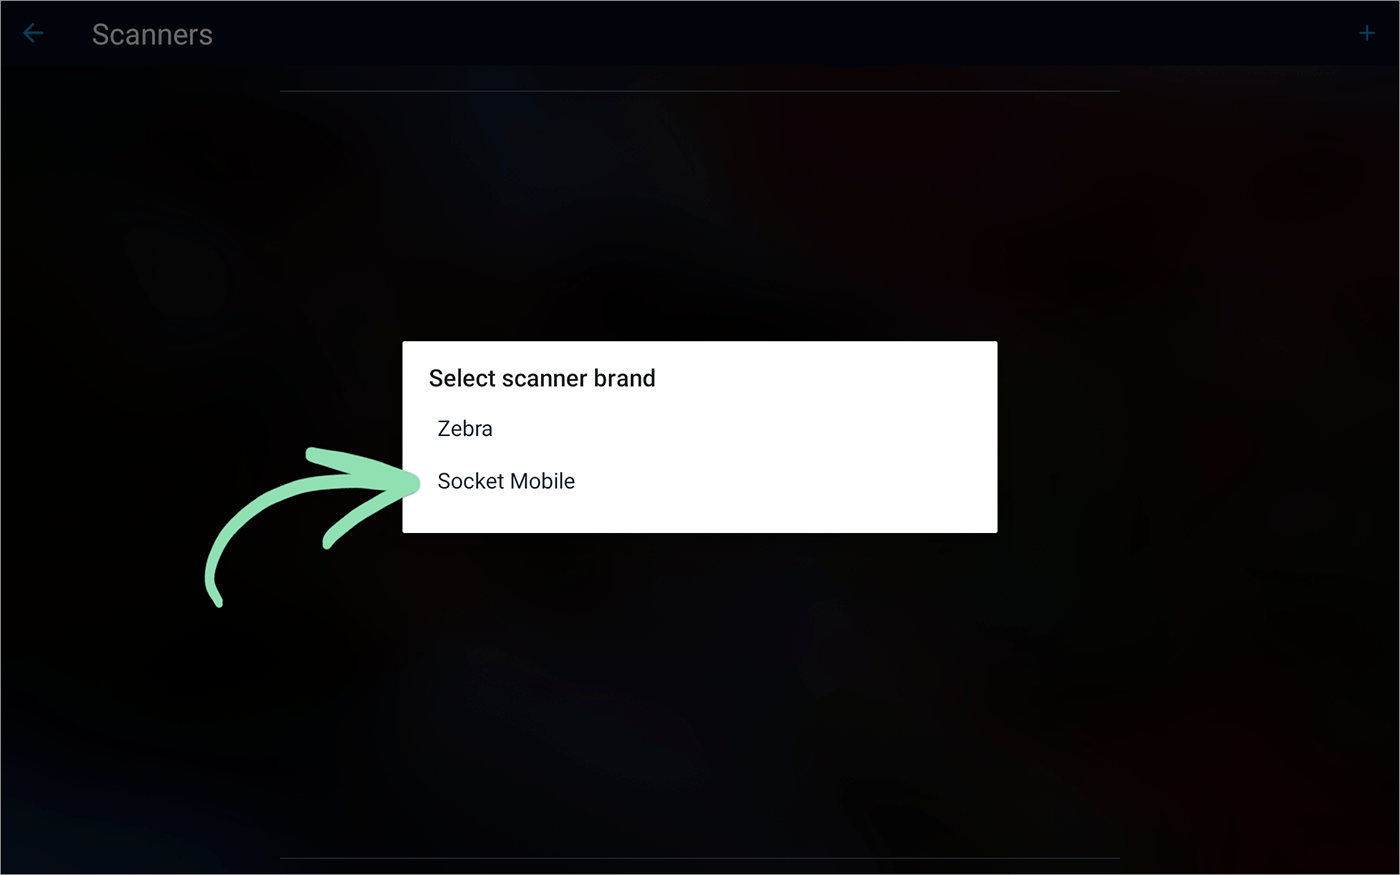
- Tap the ‘+’ to set up a new scanner.
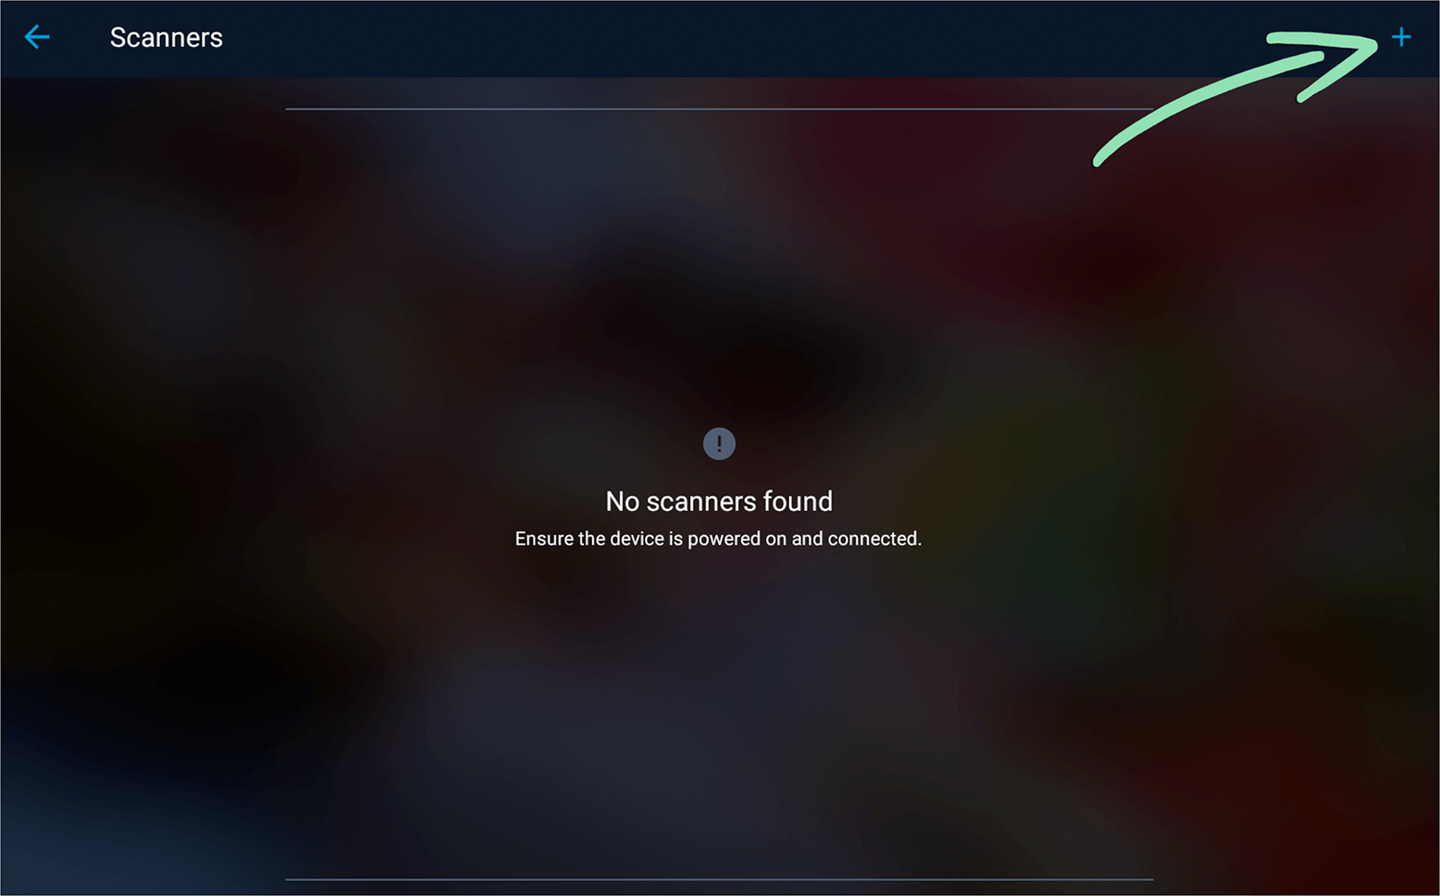
- Select ‘Socket Mobile’.
- Scan the first barcode displayed on screen to reset the scanner to factory settings.
To avoid scanning the second barcode, cover it with a finger. After scanning the first barcode, the scanner will beep 8 times and automatically power off.
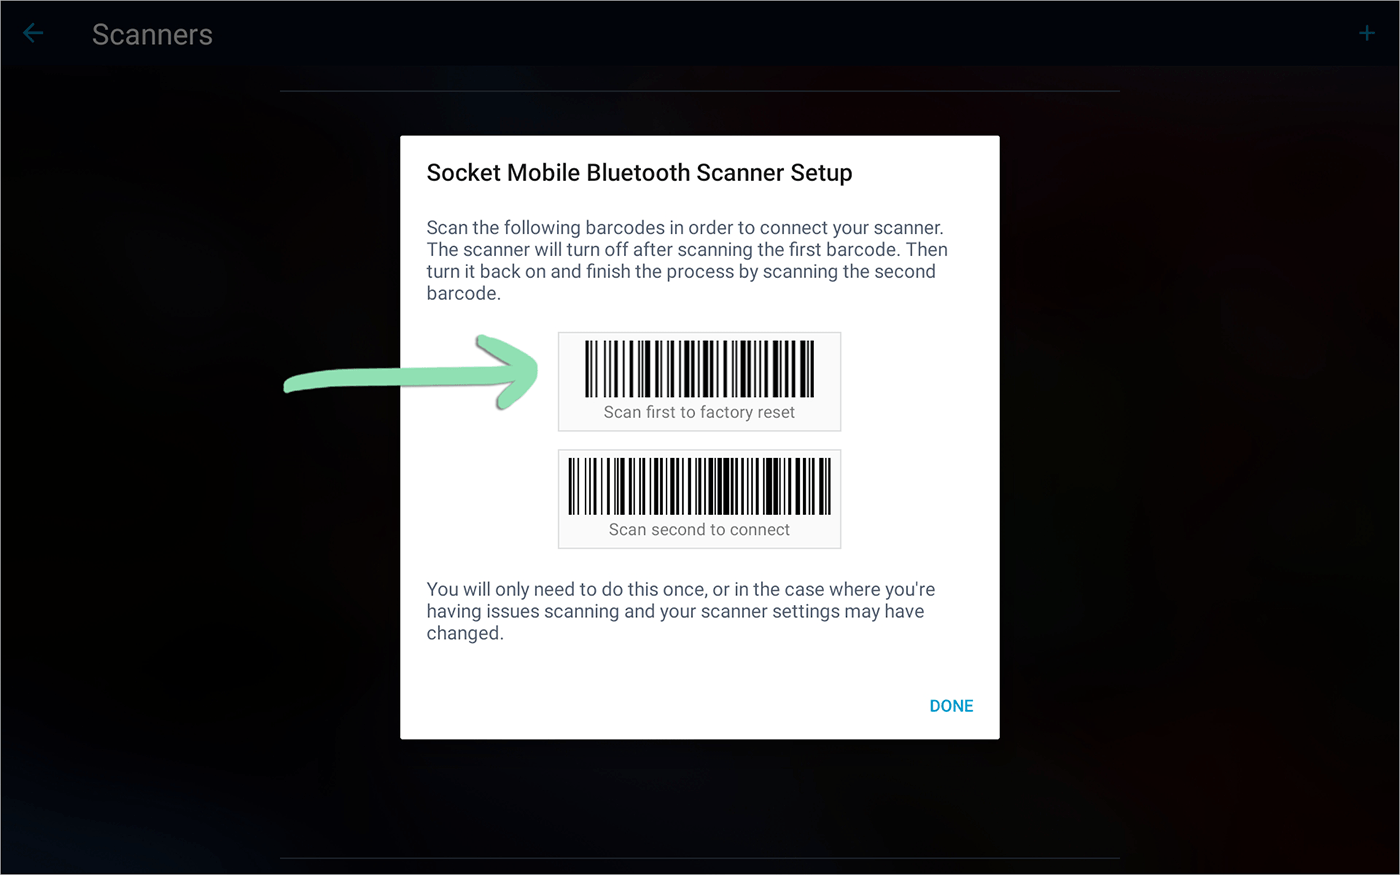
- Power the scanner back on.
- Scan the second barcode displayed on screen to put the scanner into Application Mode.
To avoid scanning the first barcode again, cover it with a finger. Application Mode is required for connecting the scanner to the Retail POS (S-Series) app for Android.

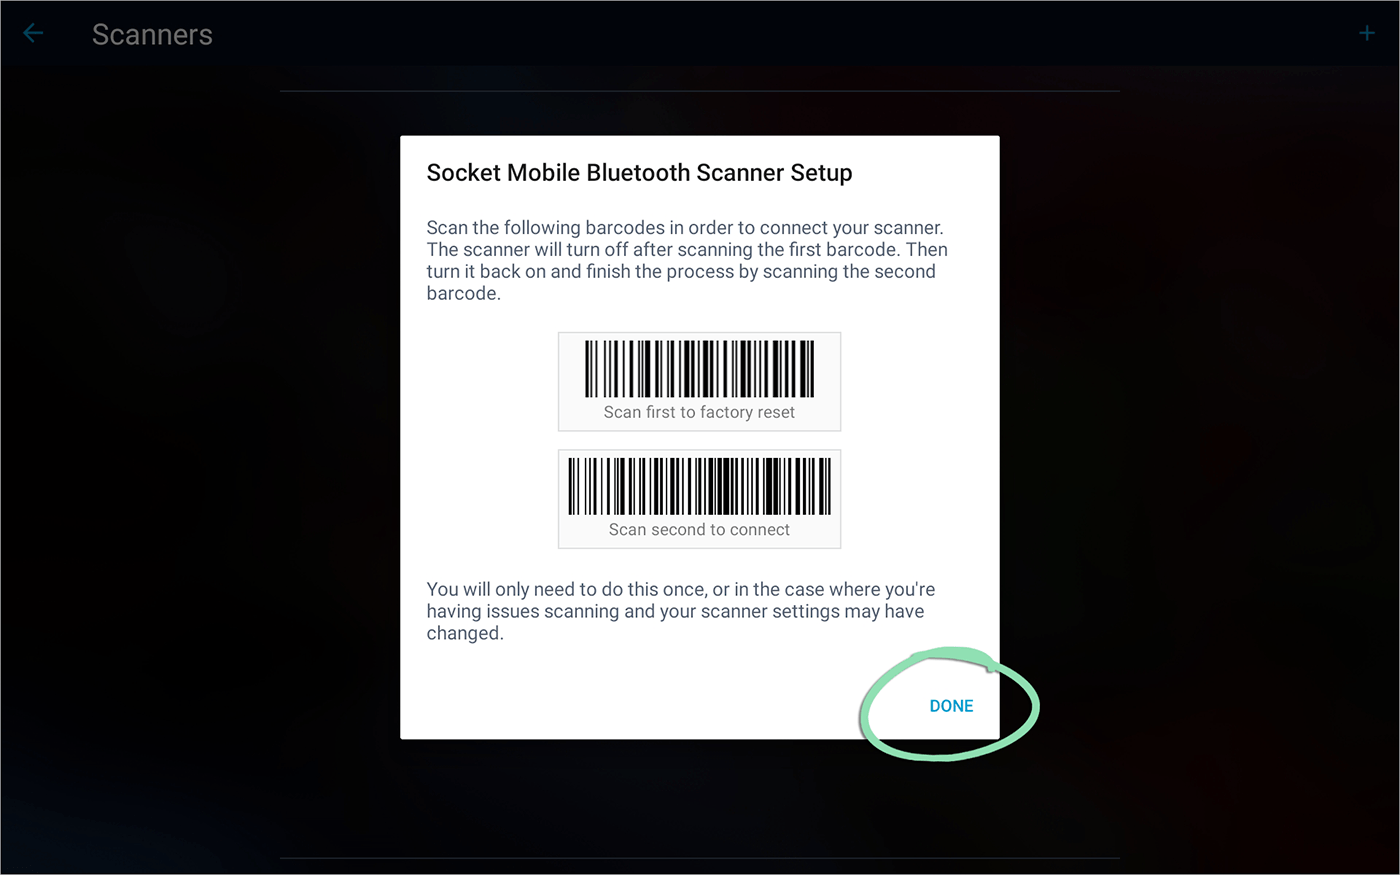
- Tap ‘Done’ to dismiss the barcode prompt.
- Tap the Socket scanner to pair it with the register.
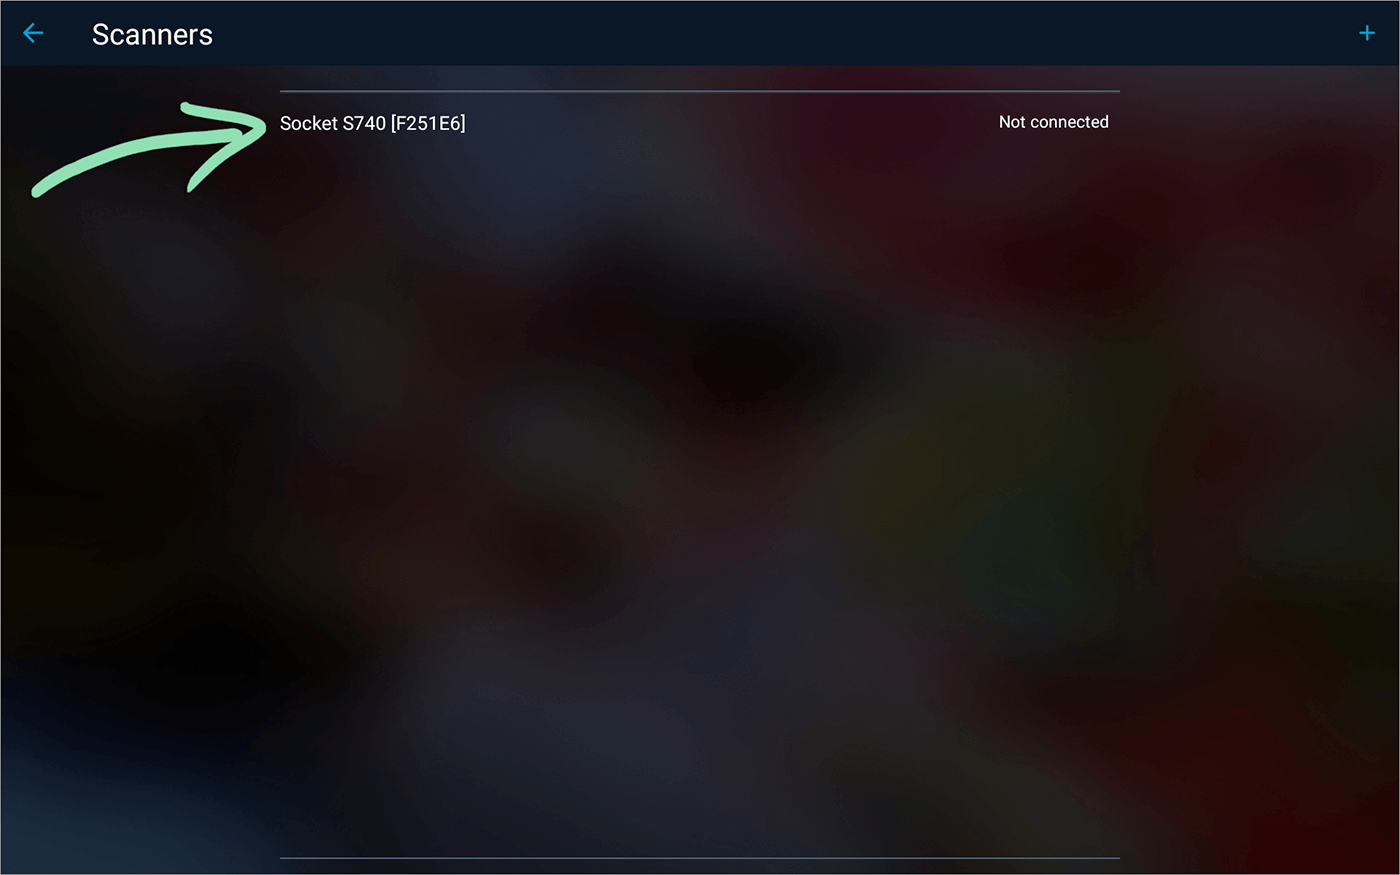
- When prompted, tap ‘OK’ to accept the Bluetooth pairing request.
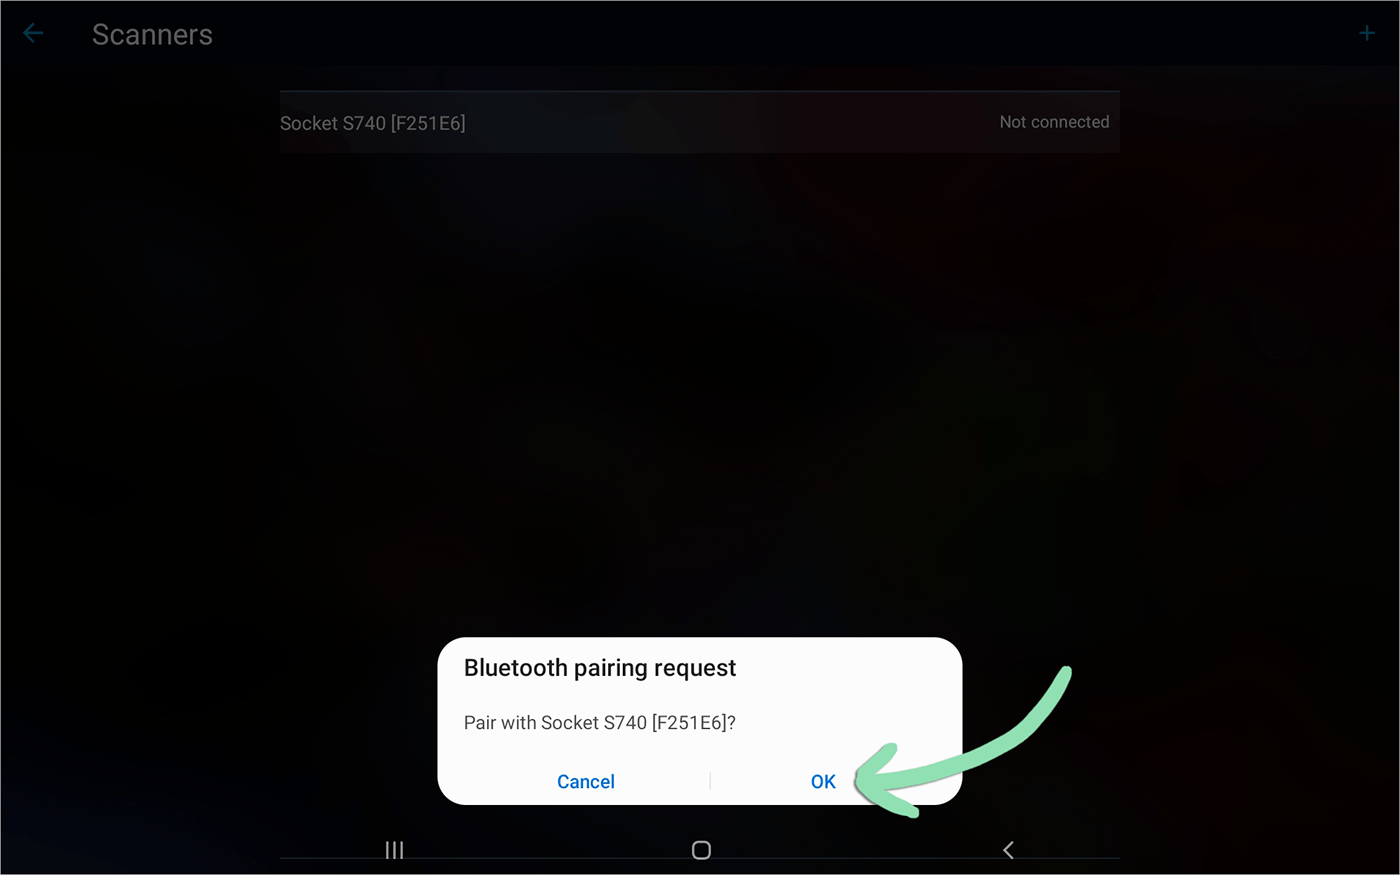
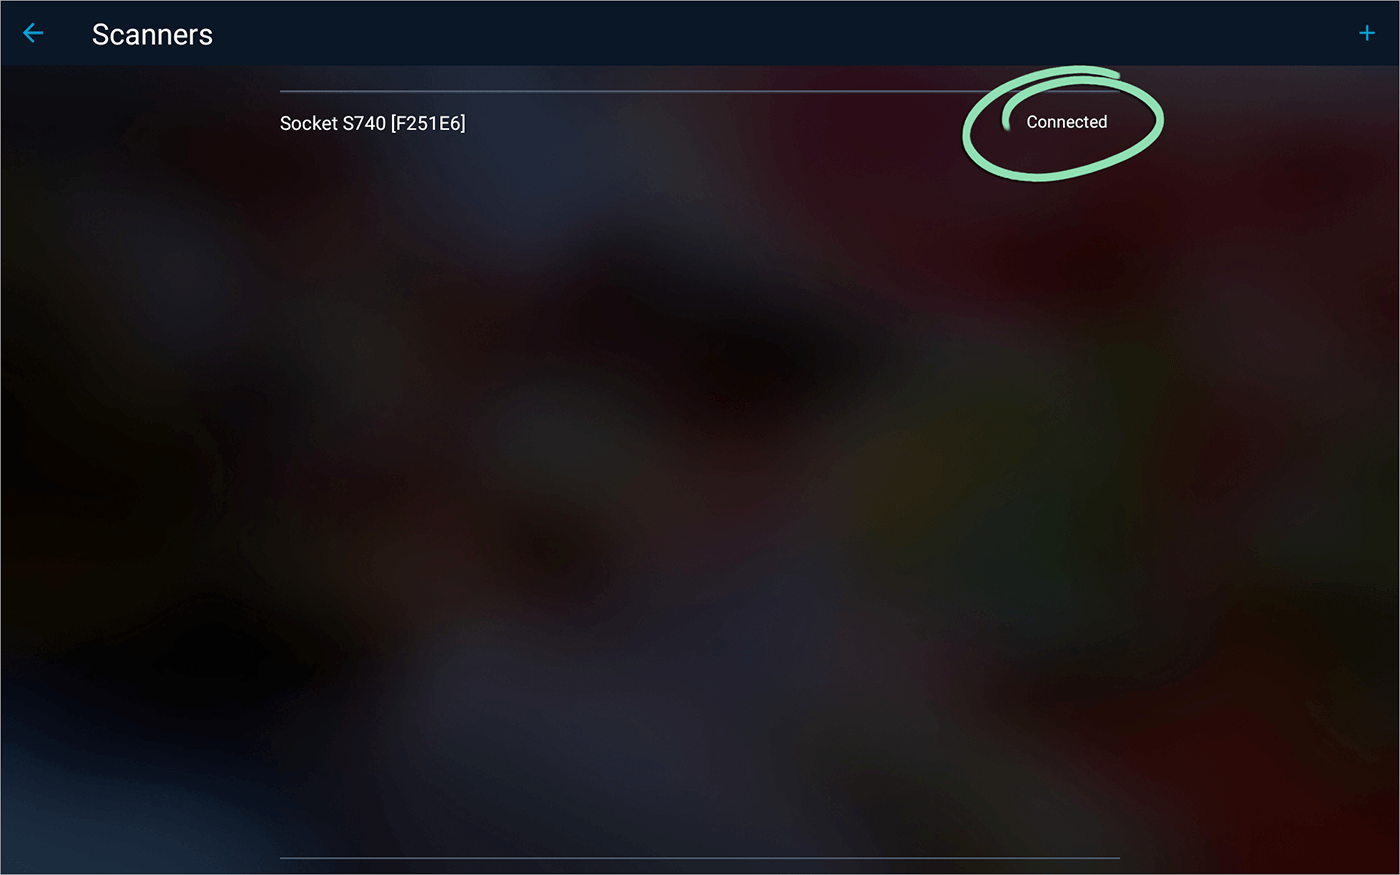
- Wait for the status of the scanner to change to ‘Connected’.
The scanner is now ready to use in Lightspeed Retail and will remain paired with the register until powered off, disconnected, or unpaired.
If you have difficulty pairing the scanner, visit our Barcode Scanner Troubleshooting guide for help.
Unpair Scanner
Unpair the scanner from the register in order to pair it with a different device or change the scanner’s mode. The specific steps to unpair the scanner will vary based on whether you use the iOS or Android versions of the Retail POS (S-Series) app.
On iOS
If using the Retail POS (S-Series) app for iOS, follow the steps below to unpair the Socket scanner from your iPad in the Settings app.
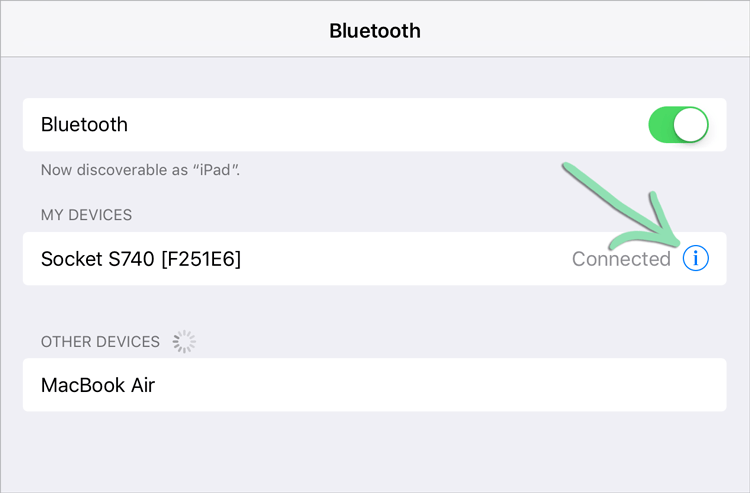
- Open Settings on the iPad.
- Tap 'Bluetooth'.
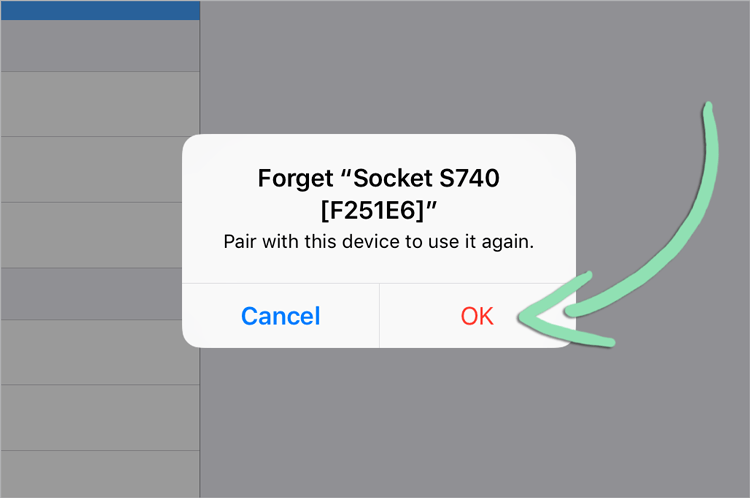
- Tap the blue ⓘ next to the scanner.
- Select 'Forget This Device'.
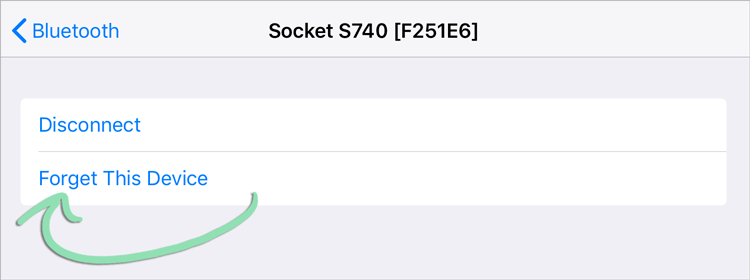
- Tap 'OK' to confirm.
On Android
If using the Retail POS (S-Series) app for Android, follow the steps below to unpair the Socket scanner from your Android tablet in the Settings app.
The steps below show how to unpair a Bluetooth device on our supported Samsung Galaxy Tab A (2019) tablet running Android 10, but steps for other devices and versions of Android may vary. For help, contact your device manufacturer or visit Android support.
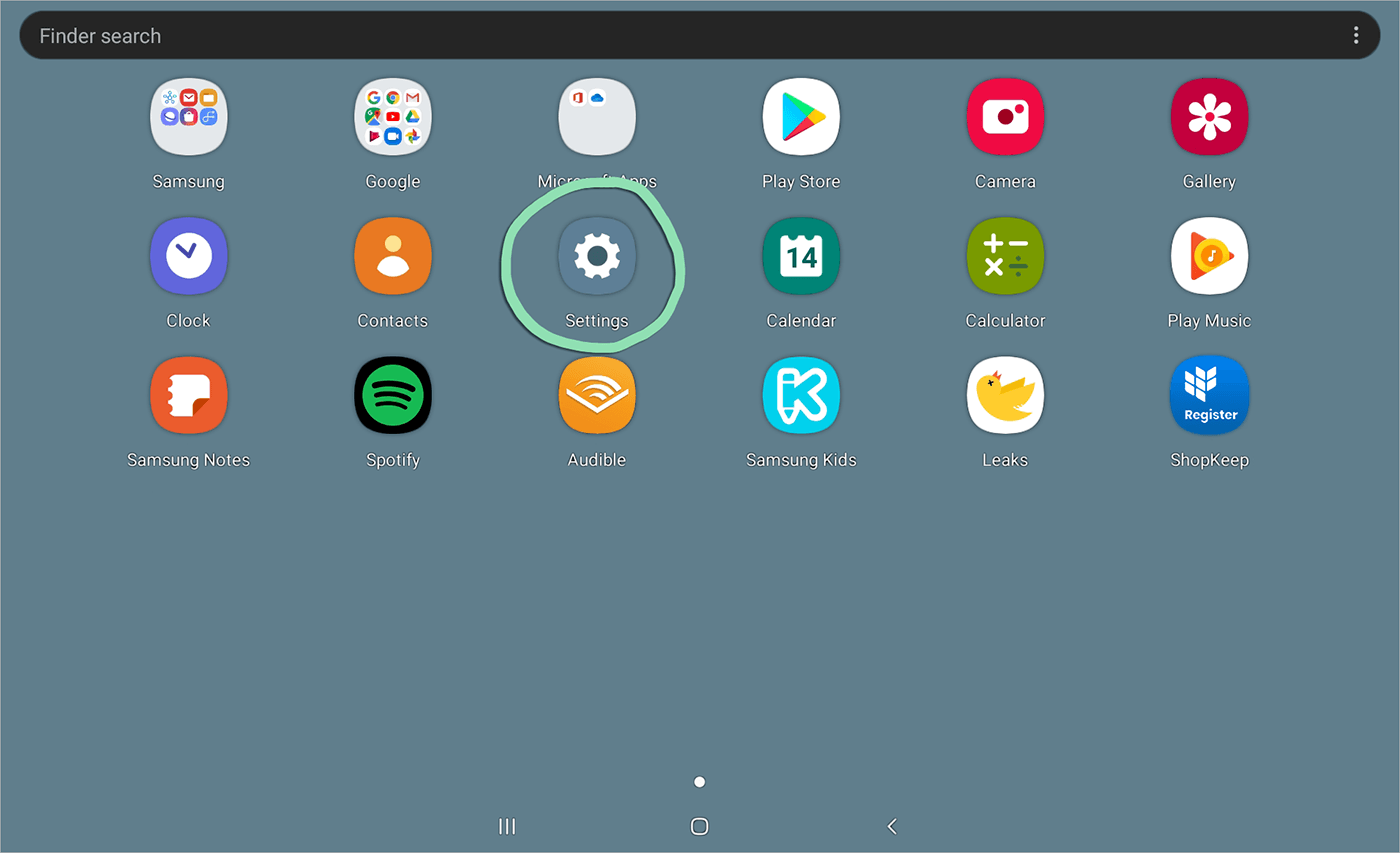
- Open the ‘Settings’ app.
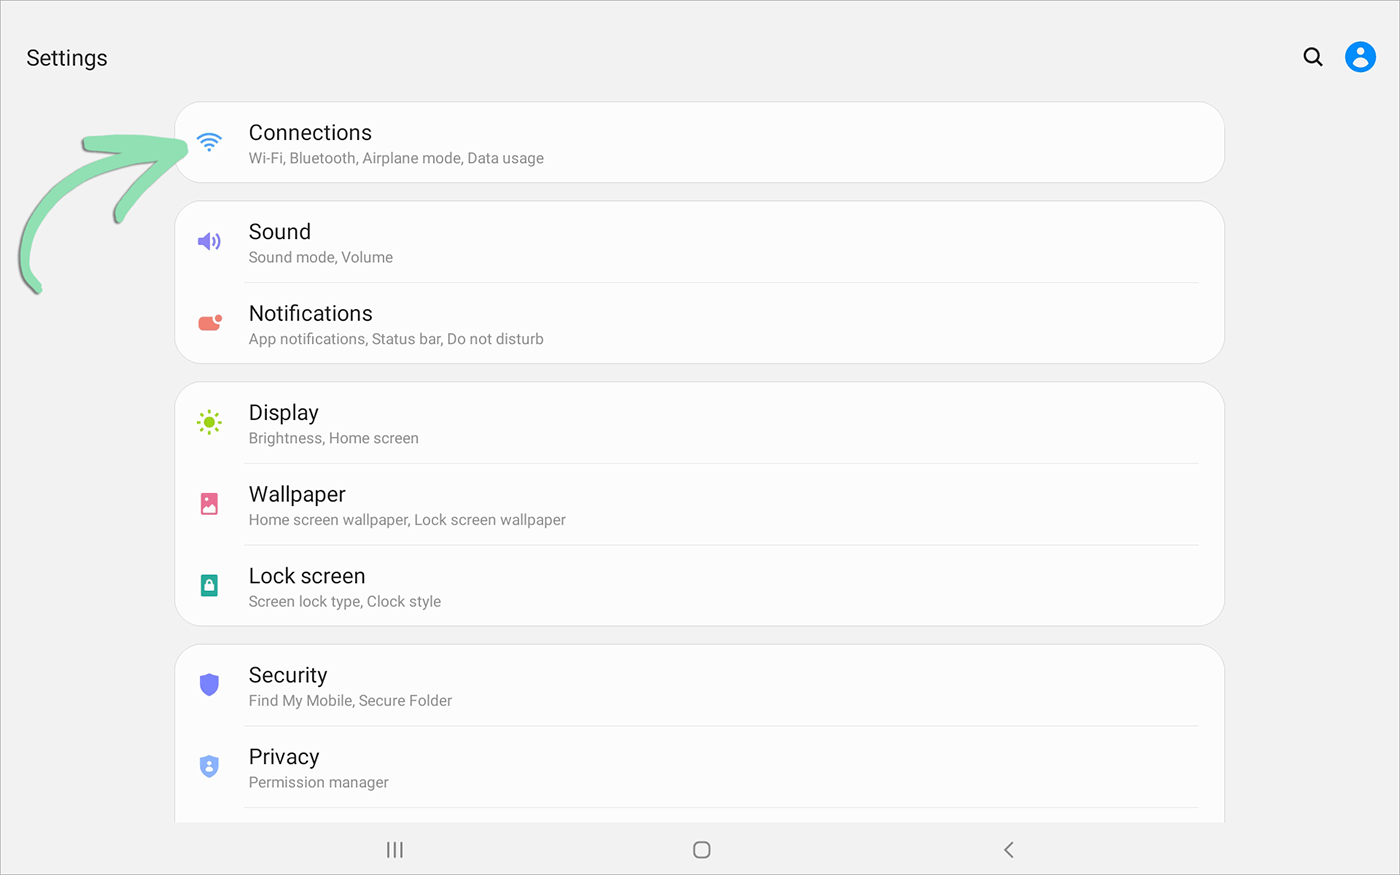
- Select ‘Connections’.
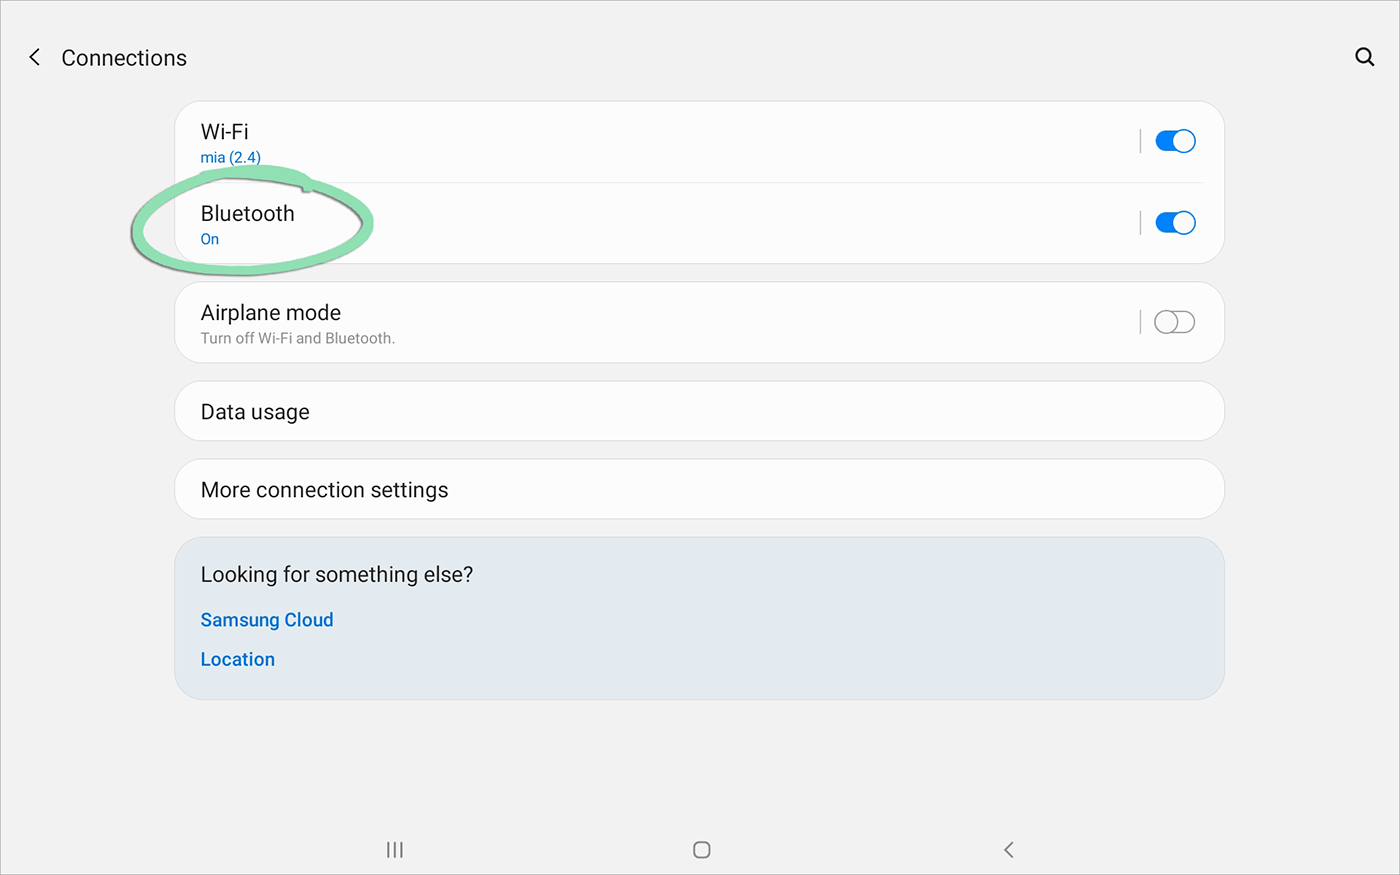
- Tap ‘Bluetooth’.
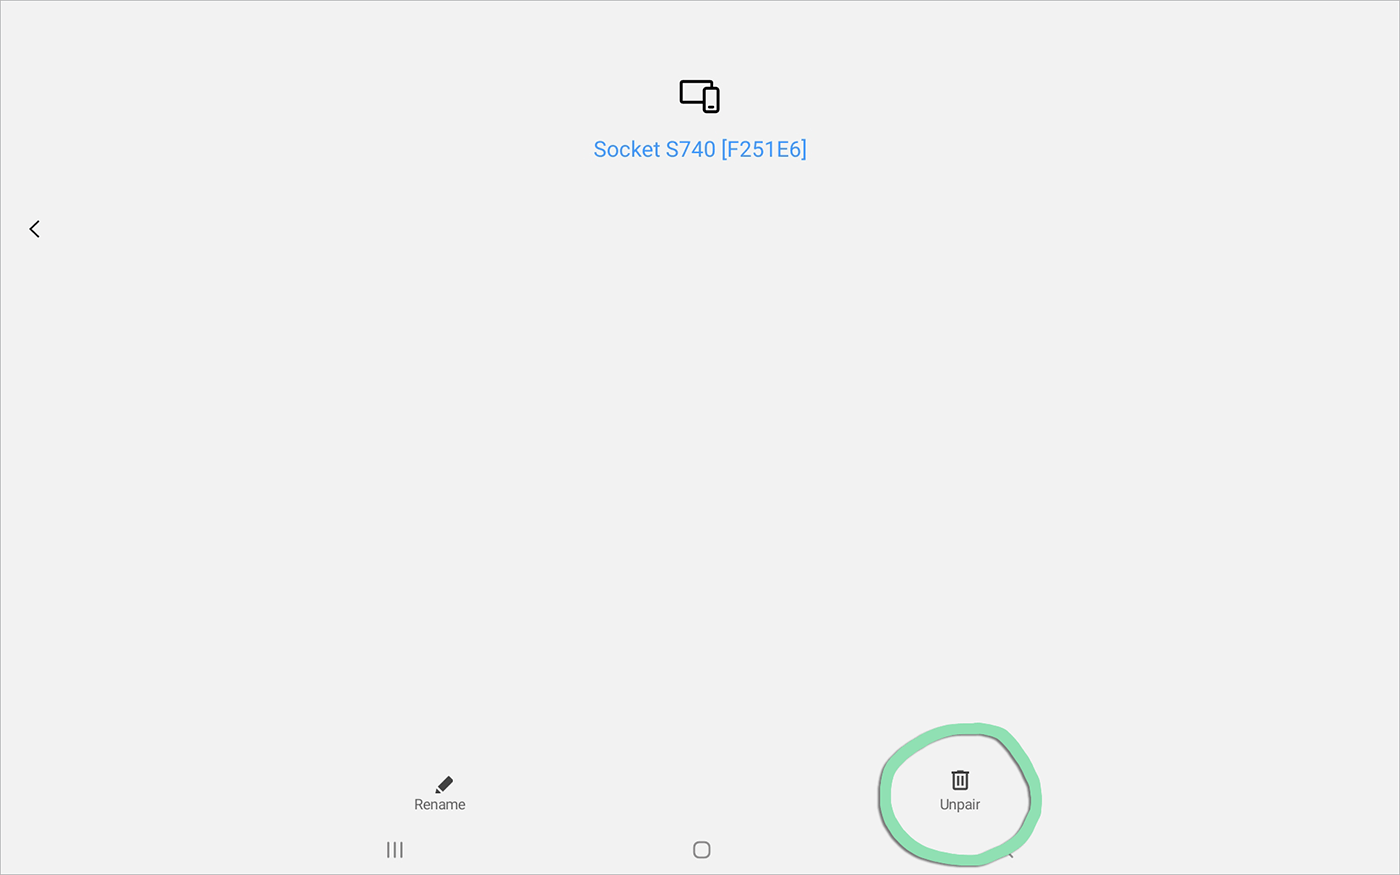
- Tap the gear icon next to the Socket scanner.
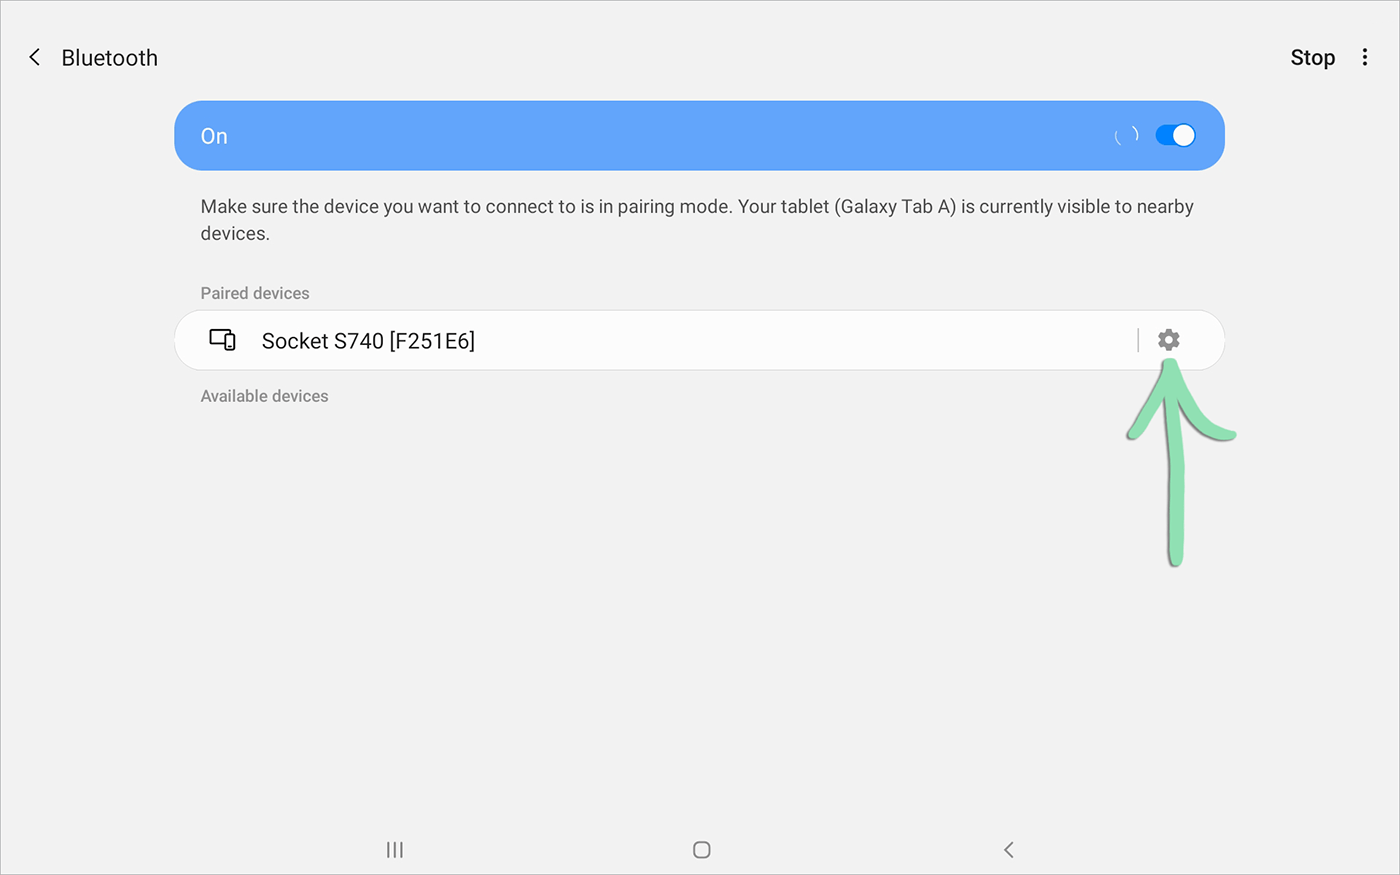
- Select ‘Unpair’.
Scanner Modes
Socket scanners support multiple modes of operation. Basic Mode (HID) is the default for all scanners, but the Retail POS (S-Series) app also supports Application Mode. Learn about each mode below to decide which to use with your scanner.
Before switching your scanner’s mode, you must unpair the scanner from your iPad.
Look at the label on the bottom of your scanner to find its model number.
Add UPC Codes
Add item UPC codes to BackOffice so you can scan them at the register. For large quantities of items, consider using Bulk Management to import UPC codes from a spreadsheet.
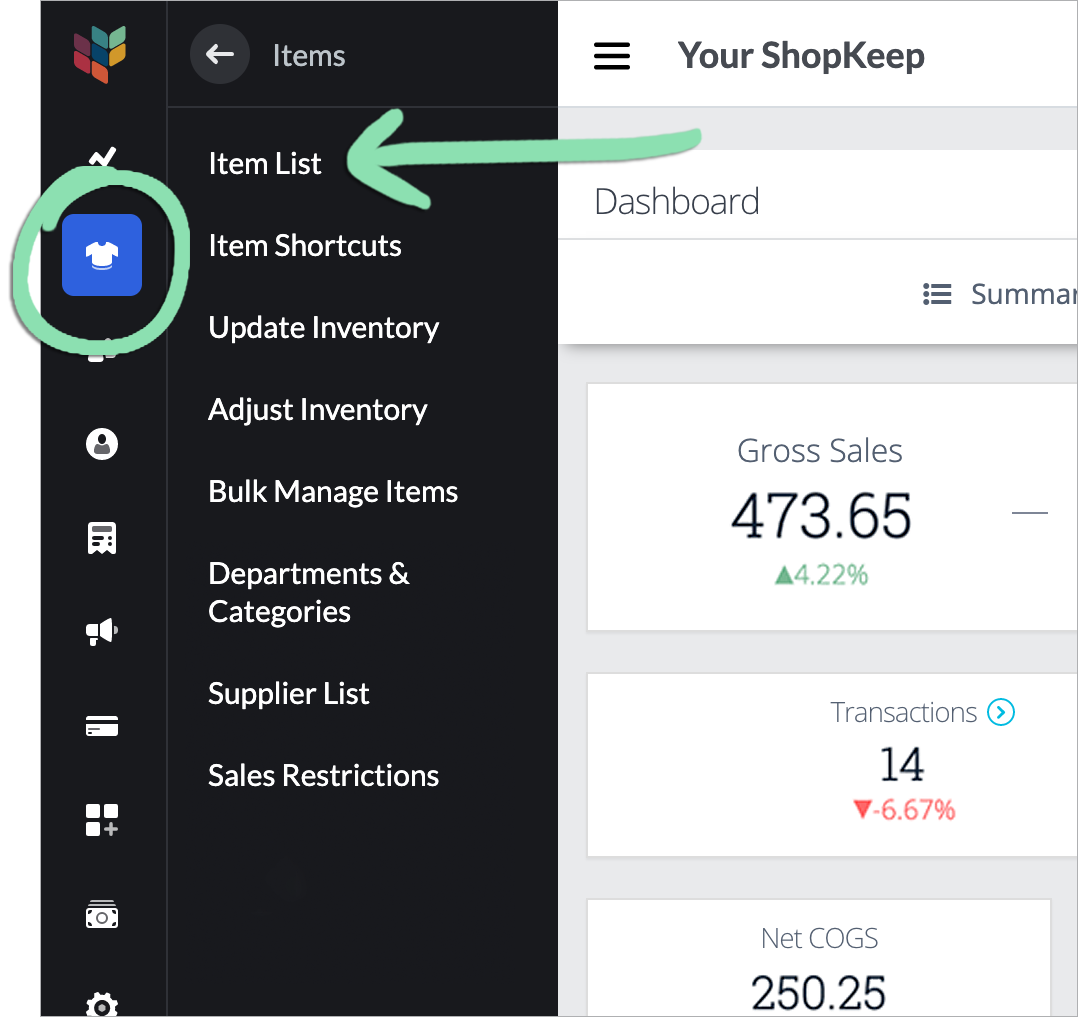
- Visit the Item List in BackOffice or from the Retail POS (S-Series) app (employees with BackOffice permissions only).
- In BackOffice, click ‘Items’ and select ‘Item List’.
- In the Retail POS (S-Series) app for iOS, tap ‘Manage Items’ on the Main Menu. For the Retail POS (S-Series) app for Android, tap ‘Setup’ on the register menu, then select ‘Manage Items’.
Retail POS (S-Series) app for iOS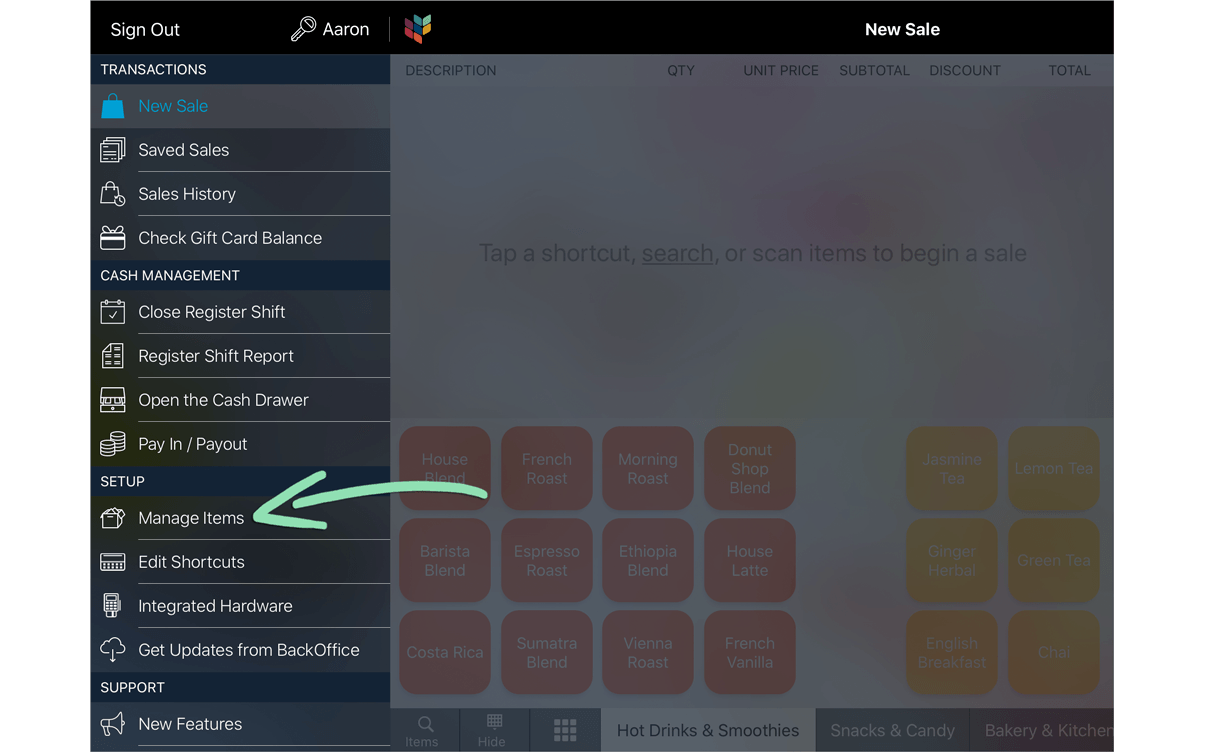 Retail POS (S-Series) app for Android
- Select an item to edit or add a new item.
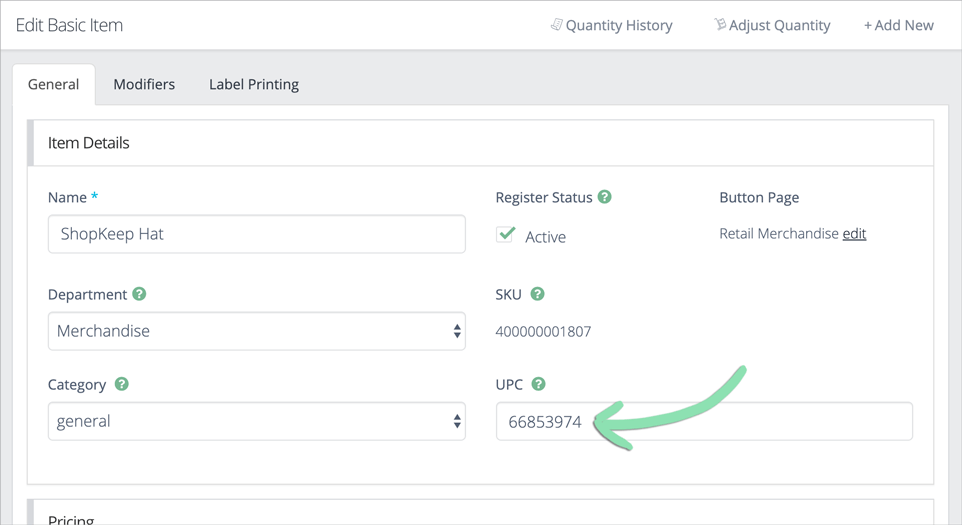
- Click the 'UPC' field and scan (or manually type) the UPC code on the item.
- In the Retail POS (S-Series) app for iOS, scanning UPC codes into the ‘UPC’ field requires the Socket scanner to be in ‘Basic’ mode. To learn how to change the mode of the scanner, visit the Scanner Modes section above.
- UPC codes must be 2 – 55 digits long and cannot contain letters.
- Select a save option to finish editing or creating the item.
- If adding UPC codes in BackOffice, get updates on the iOS or Android register to sync the changes made to the register.
Do you have more questions? Check out our Barcode Scanner FAQ. Visit our Best Practices guide to learn how to care for your scanner.