Manage Customers
Add customers to the Customer List from the register or BackOffice to track their contact details and link them to their purchases. View purchase histories of individual customers and see a report of top customers by sale frequency and amount after you start tagging customers to sales.
Register Customer Management
Add new customers, tag customers to sales, and modify existing customers while they are in the store making a purchase. With an internet connection, all customer details sync to BackOffice for record keeping.
Add Customers
Add new customers at the register to begin tracking their contact details and purchases. After adding a new customer, they will be automatically tagged to the current sale in progress at the register.
- Tap ‘Select Customer’ (iOS) or the customer icon (Android).

- Search to make sure the customer does not already exist.
- Search by customer name, phone number, email address, or customer notes.
- Duplicate customer records cannot be merged. A warning prevents cashiers from adding multiple customers with the same email address or phone number.
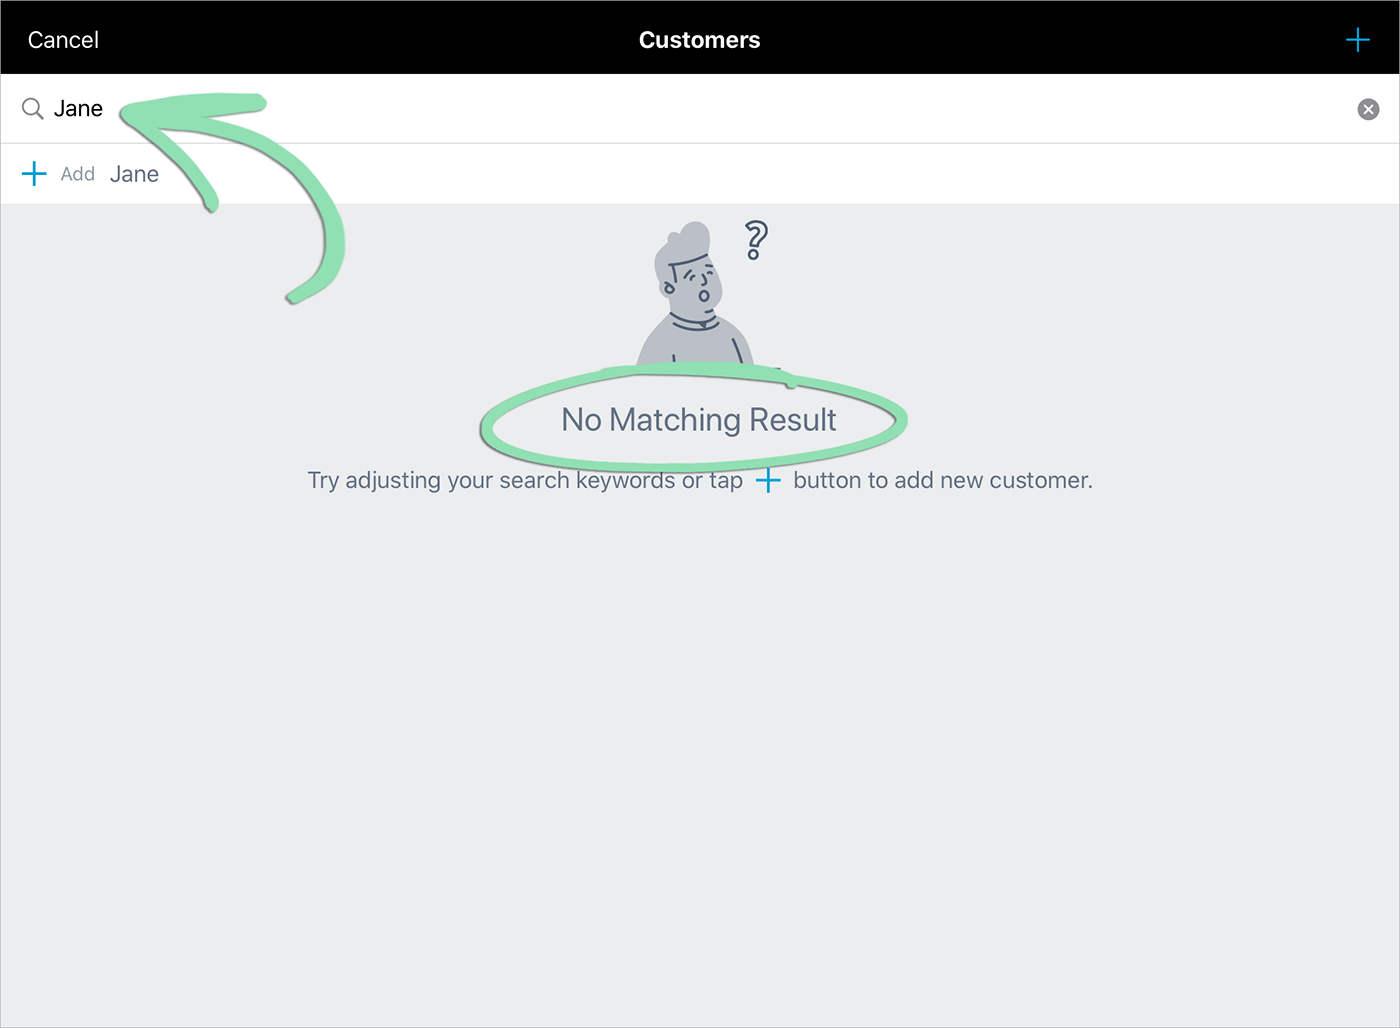
- Tap 'Add' or the ‘+’ to add a new customer.

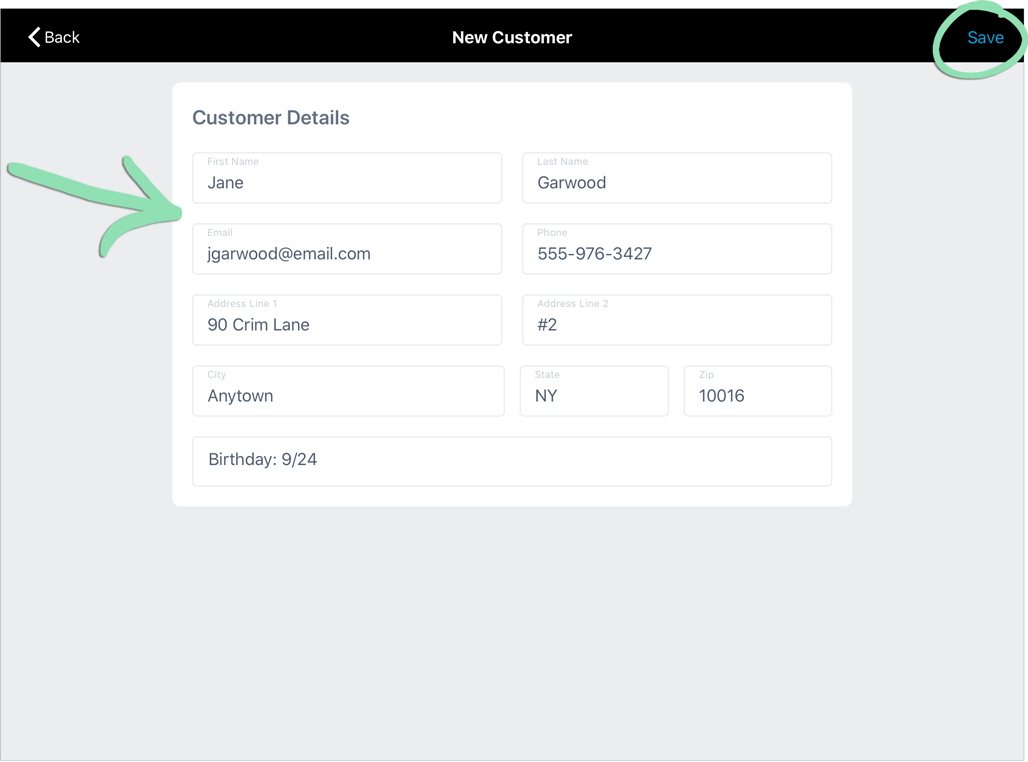
- Enter as many customer details as desired and tap 'Save' (iOS) or the disk icon (Android).
At minimum, one of the following must be entered: first or last name, email address, or phone number.
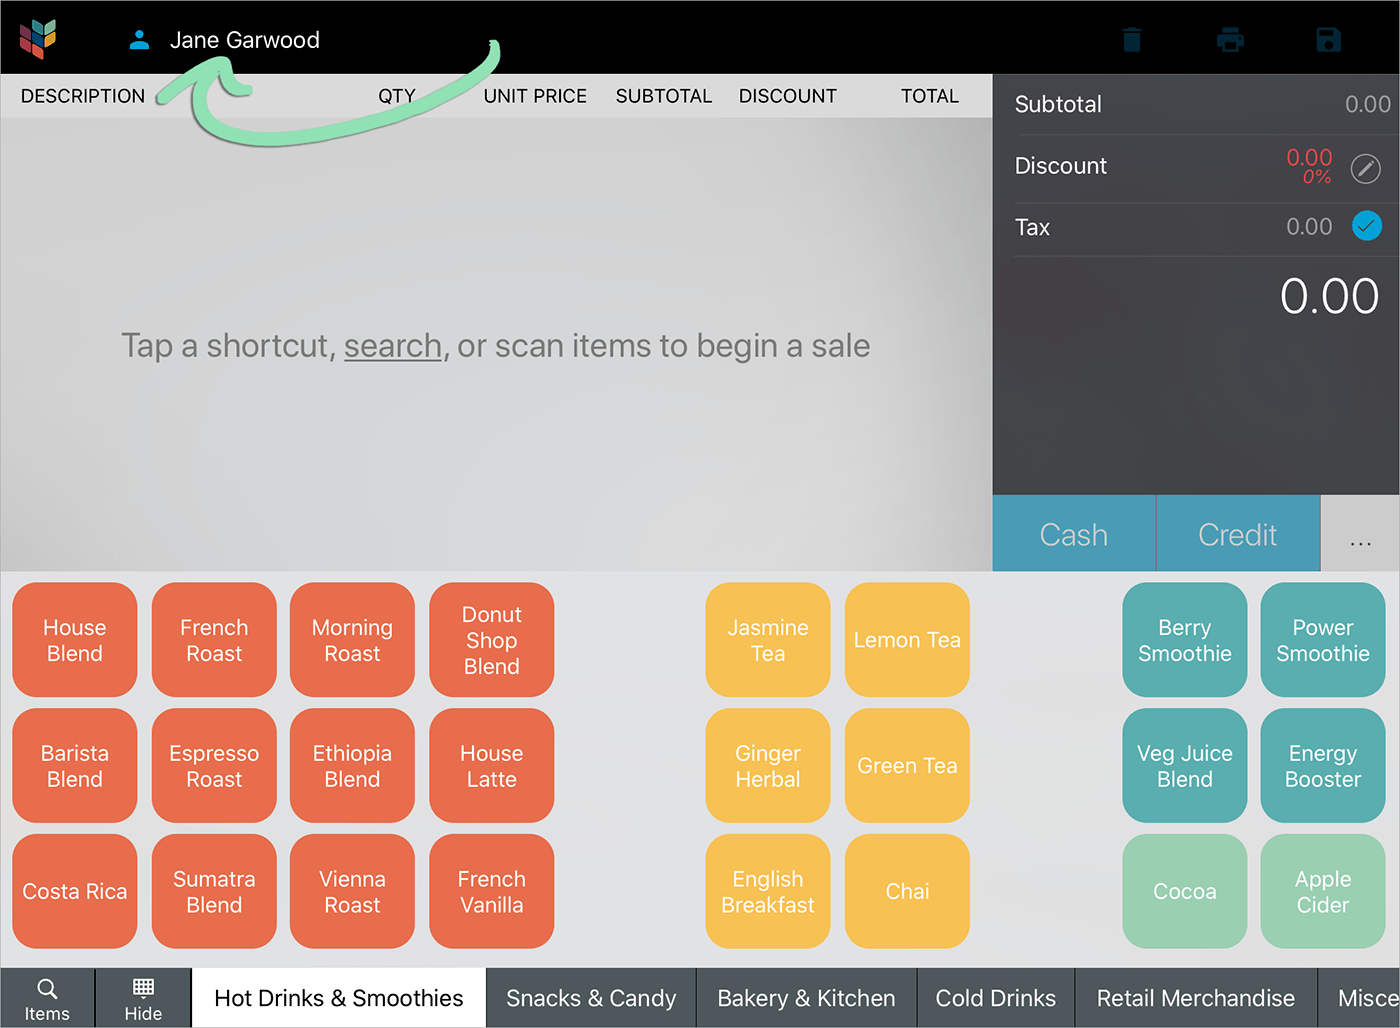
After saving, the new customer will automatically be tagged to the current sale. Learn how to change the customer tagged to the sale here.
Track how the Customer List grows over time with the Marketing Dashboard in BackOffice. Visit the Marketing Dashboard article for more information.
Tag Customers
Tag an existing customer to a sale during checkout before tendering it to link the customer to the transaction. This allows you to track the customer’s purchase history and to more quickly email a receipt if they have an email address on file.
- Tap ‘Select Customer’ (iOS) or the customer icon (Android).
- Search for and select a customer to tag to the sale.
- Search by customer name, phone number, email address, or customer notes.
- Tag a customer before tendering the sale. A customer cannot be tagged during checkout after the sale is tendered.

- (Optional) After completing the sale, tap 'Email Receipt' to send a receipt to the customer’s email.
After running some sales, visit the BackOffice Sales by Customer report to see an overview of top customers and what they purchased.
Edit Customers
Modify the name, address, or contact details of a customer right at the register to keep the Customer List up to date. After editing a customer in the Retail POS (S-Series) app for iOS, they will be automatically tagged to the current sale in progress at the register.
- Tap ‘Select Customer’ (iOS) or the customer icon (Android).
If a customer is already tagged to the sale, tap their name, email address, or phone number.
- Search for a customer, then tap the ⓘ icon next to that customer.
Search by customer name, phone number, email address, or customer notes.

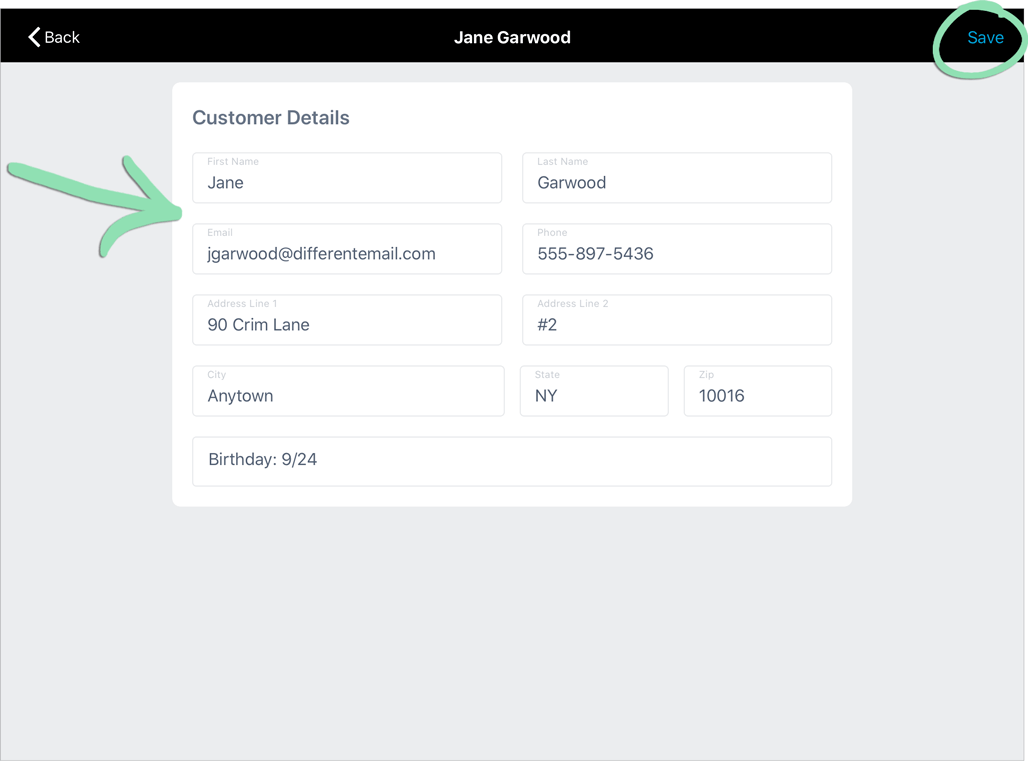
- Add, edit, or delete information as needed.
Changing the name of a customer will also update this information in some historical reporting. To learn more, visit the article for a specific report from our BackOffice support page.
- Tap ‘Save’ (iOS) or the disk icon (Android) to save changes.
In the Retail POS (S-Series) app for iOS, the edited customer will automatically be tagged to the current sale after saving changes. In the Retail POS (S-Series) app for Android, you must manually select the customer to tag them to the sale or exit the Customer List without tagging a customer. Learn how to change the customer tagged to a sale here.
iOS
Android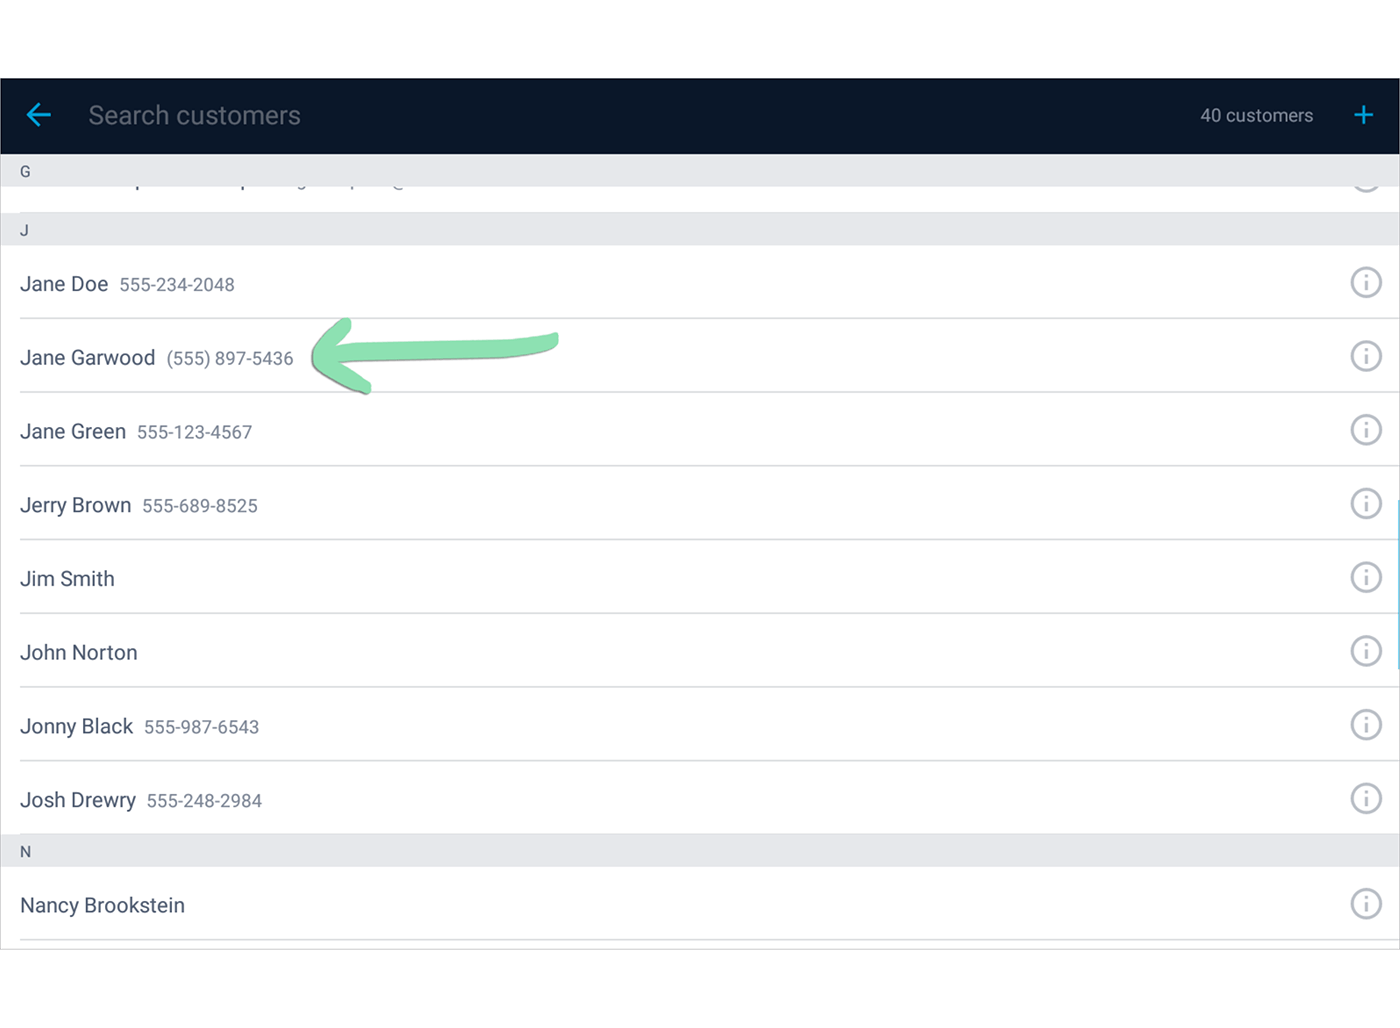
View Transaction History
Access the transaction history of a customer from the register to easily process returns, reprint receipts or resend them via email (iOS only), and track what customers are buying.
- Open the Main Menu (iOS) or register menu (Android), and select 'Sales History'.Retail POS (S-Series) app for iOS
 Retail POS (S-Series) app for Android
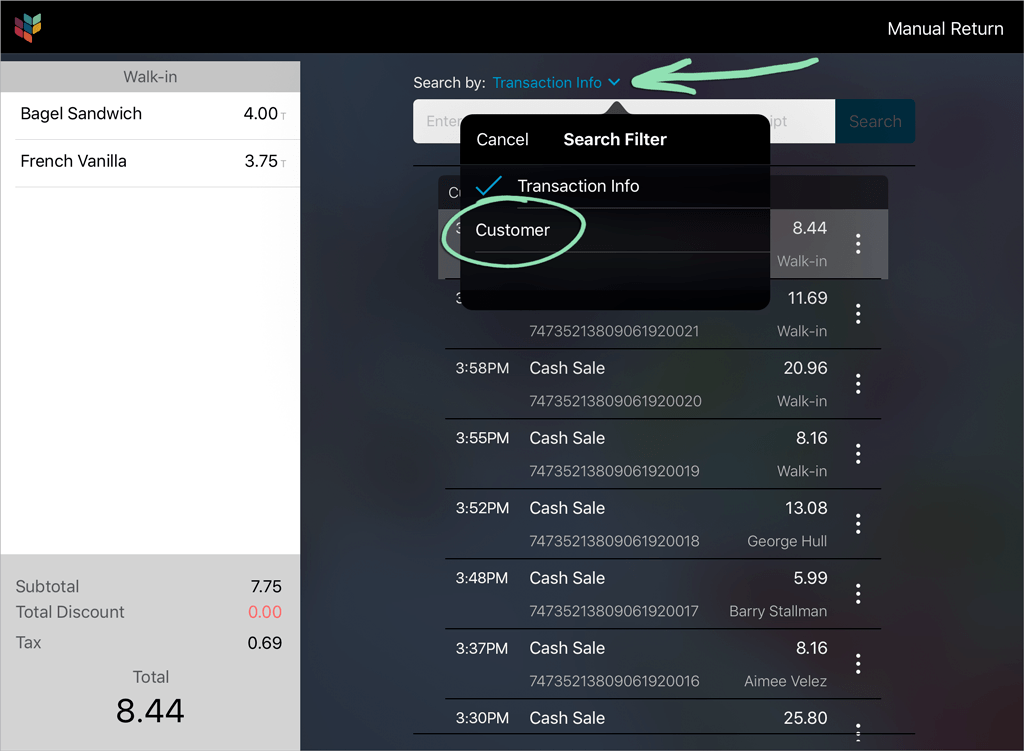
- Tap the arrow (iOS) or icon (Android) near the search field and select 'Customer' to search for a customer.Retail POS (S-Series) app for iOS
 Retail POS (S-Series) app for Android
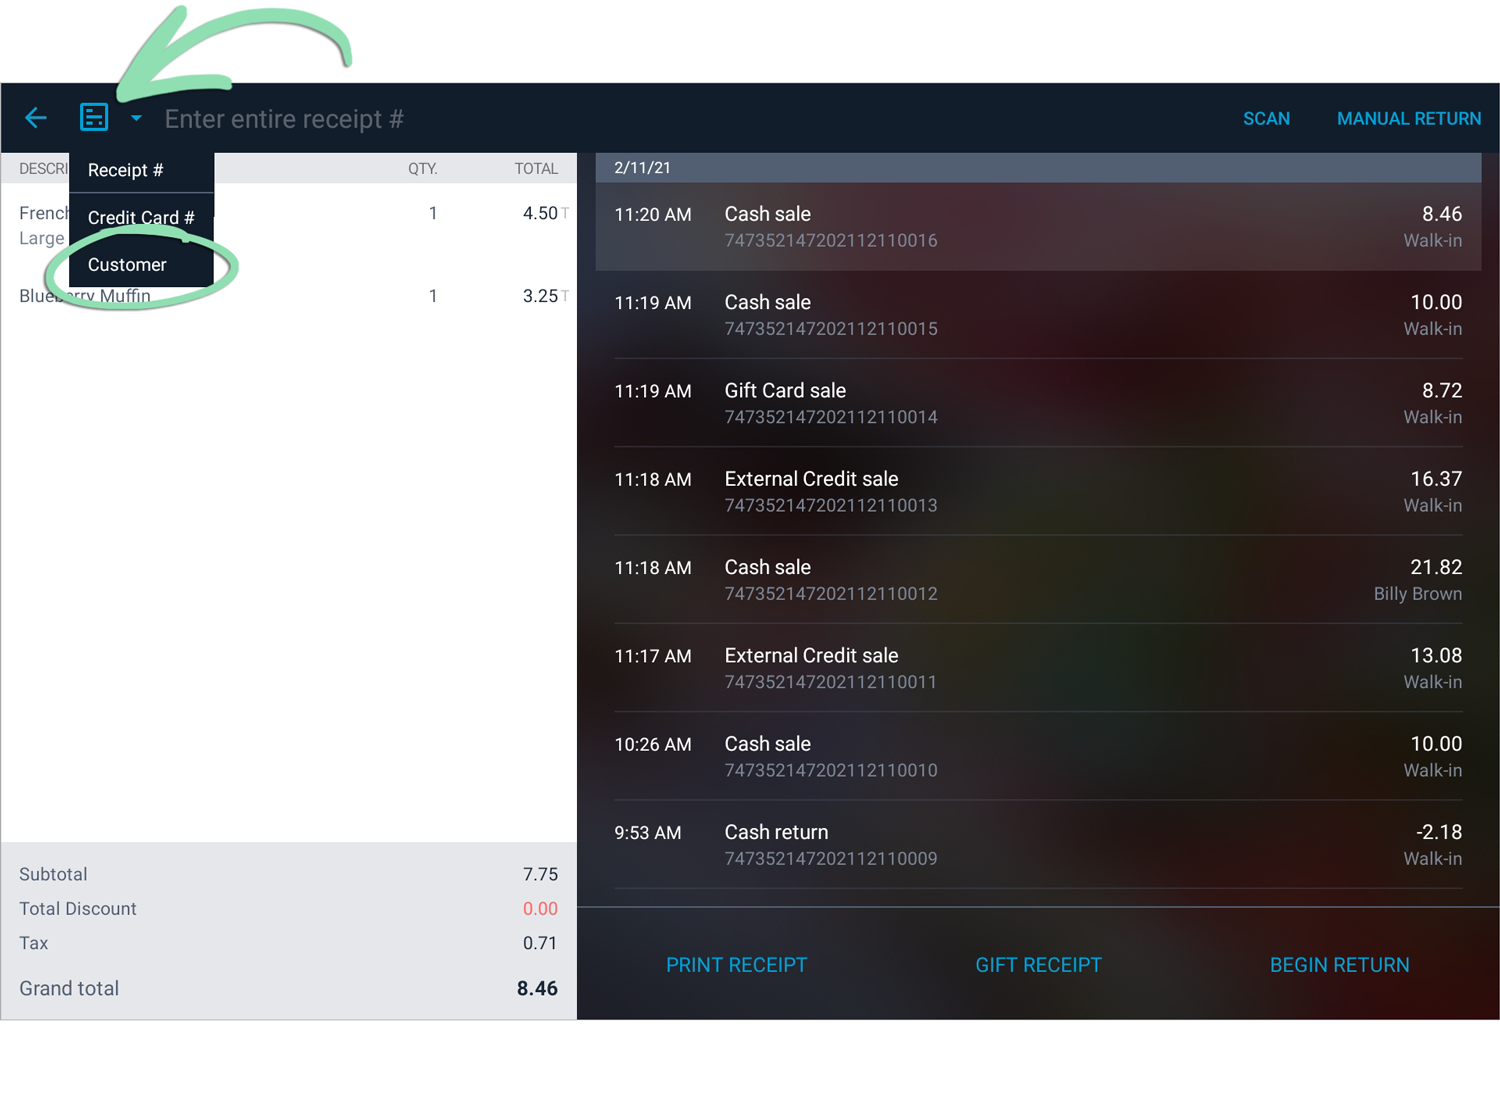
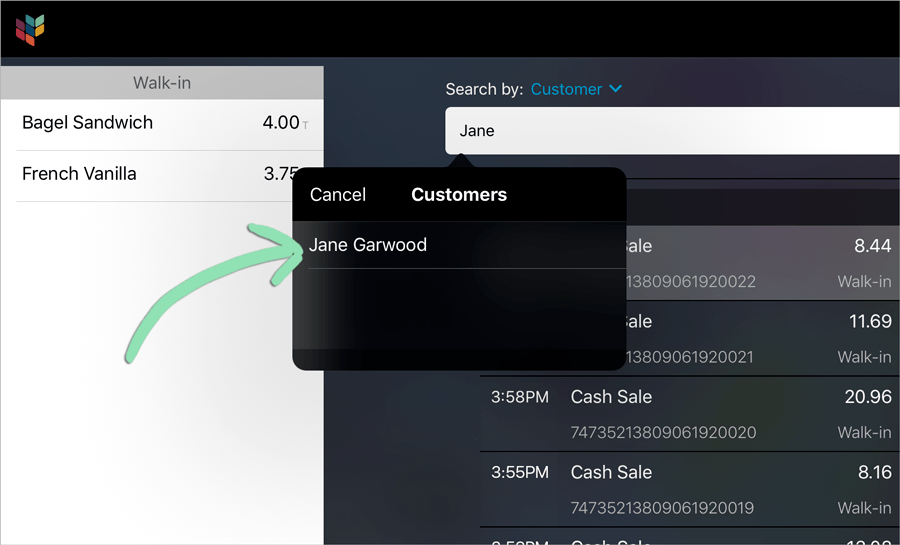
- Enter a customer name, email address, or phone number to search.

- Tap the customer to view their transaction history.
All transactions tagged to the customer from past and present shifts will appear.
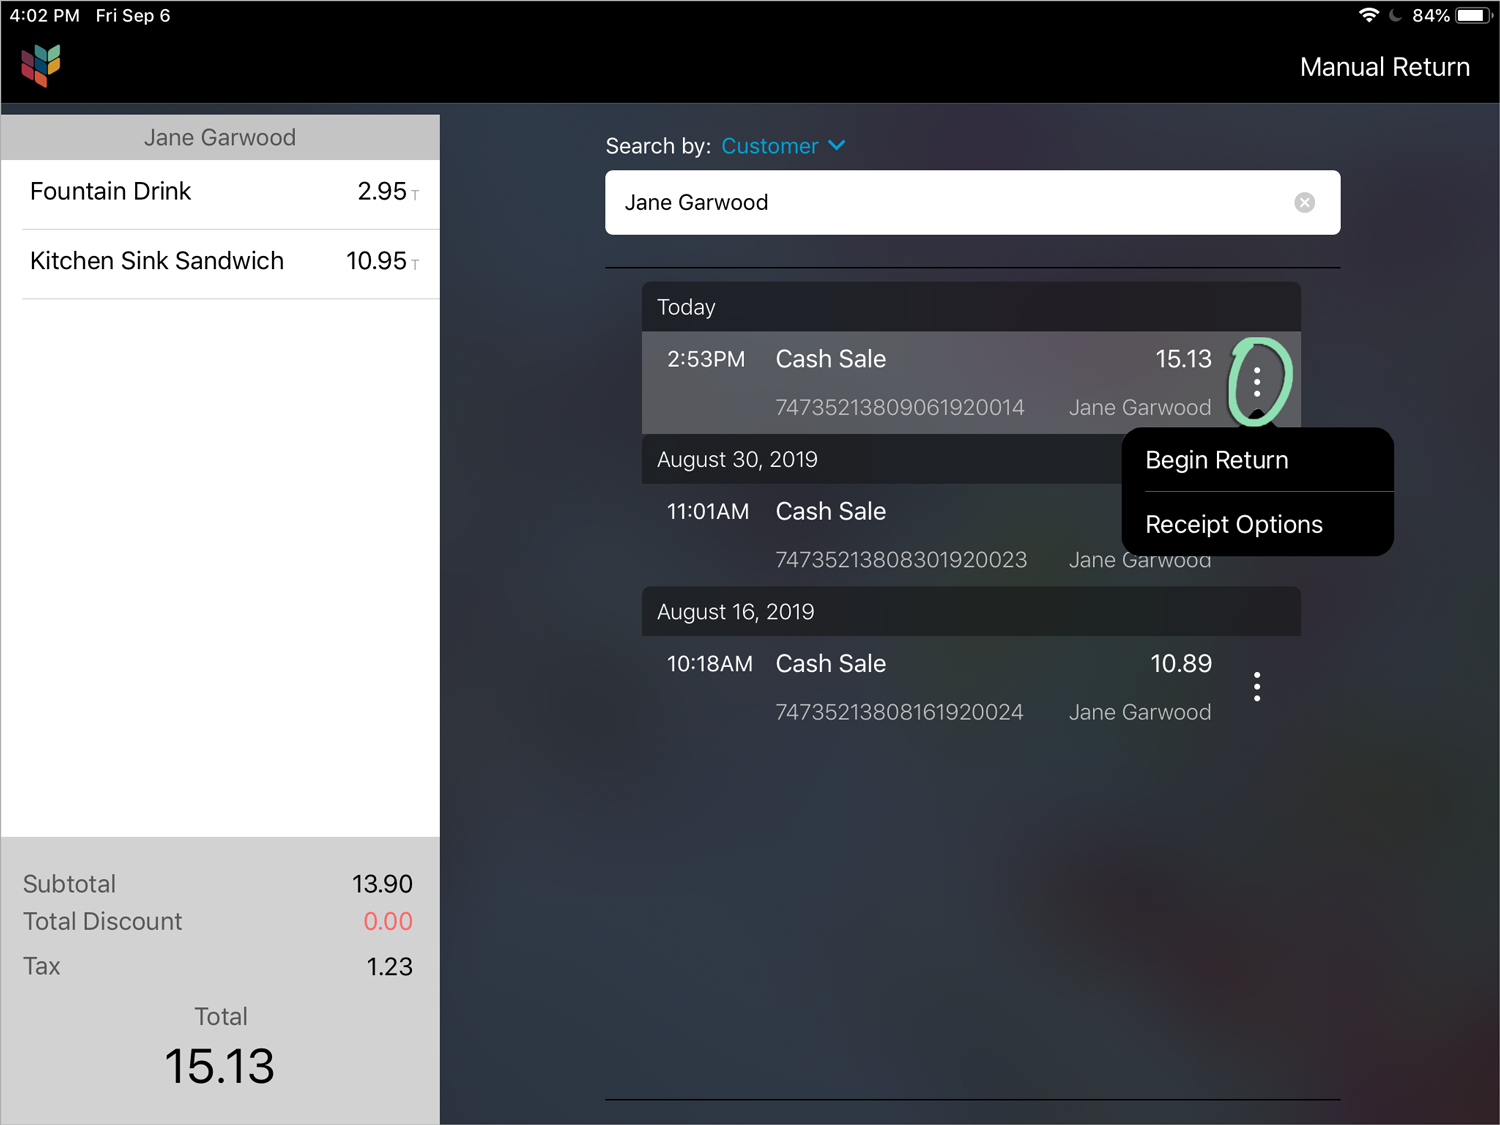
- (Optional) Tap the 3 dot menu on any transaction to reprint or resend receipts or to return a sale (iOS), or tap ‘Print Receipt’ or ‘Begin Return' (Android).
Retail POS (S-Series) app for iOS
 Retail POS (S-Series) app for Android
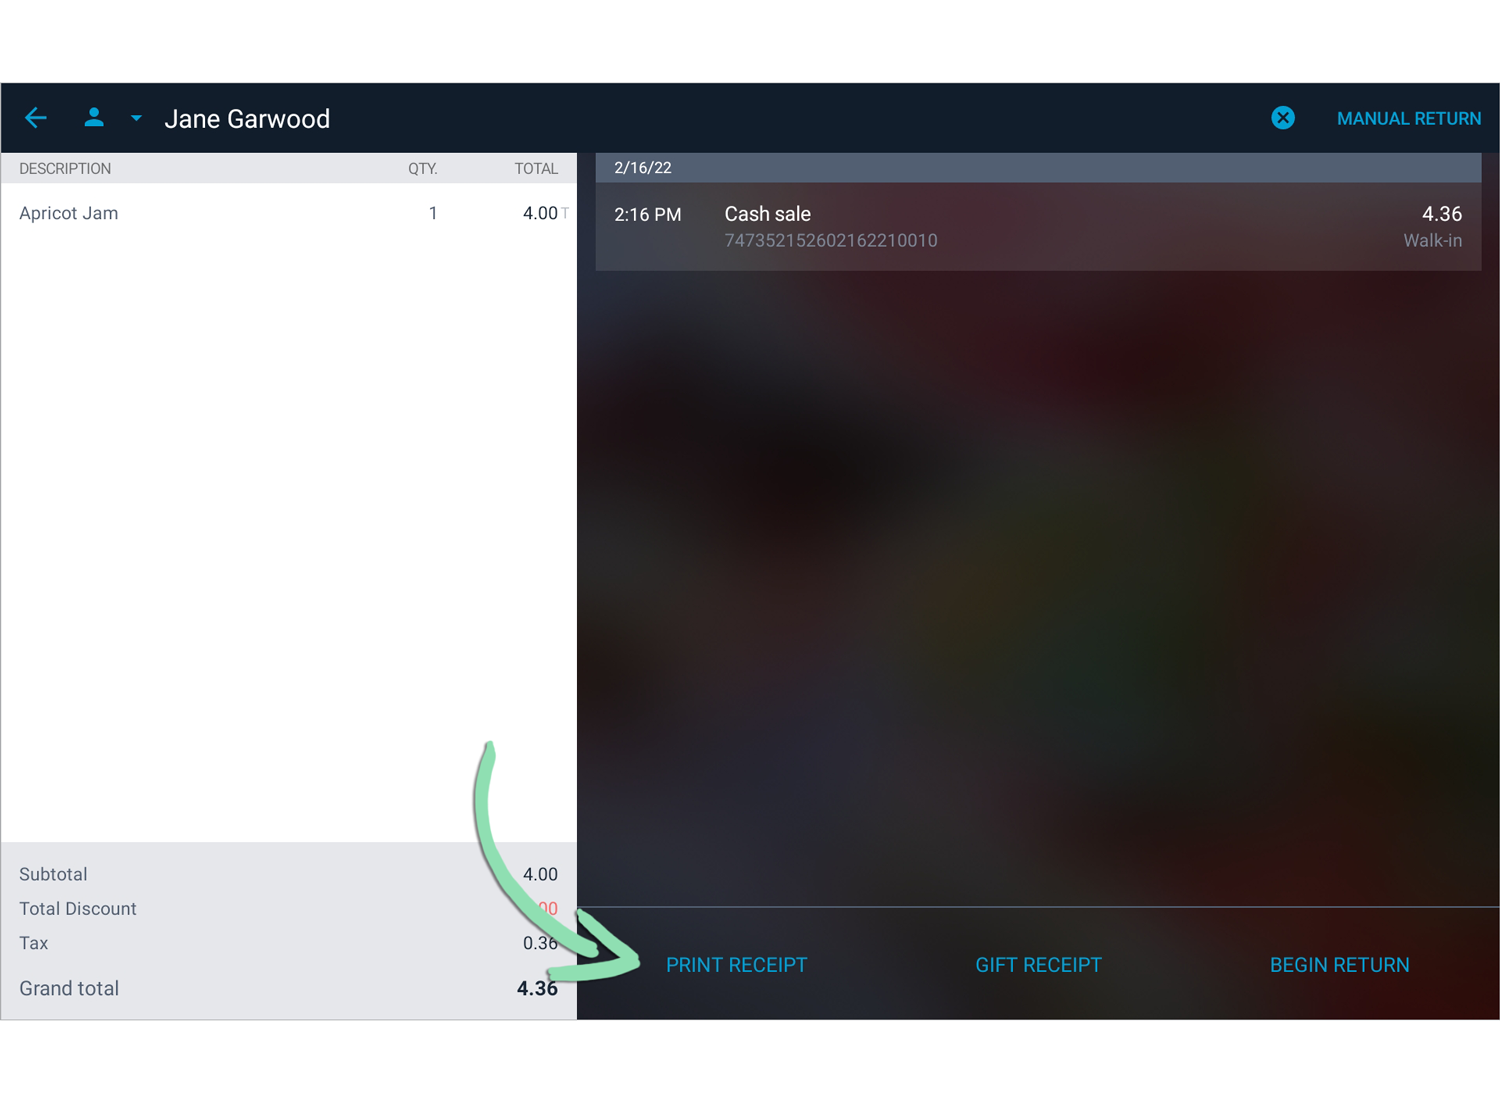
BackOffice Customer Management
Add, edit, or delete customers one at a time through the Customer List in BackOffice.
For managing large quantities of customers, use Bulk Customer Management to add, modify, or delete customers with spreadsheets.
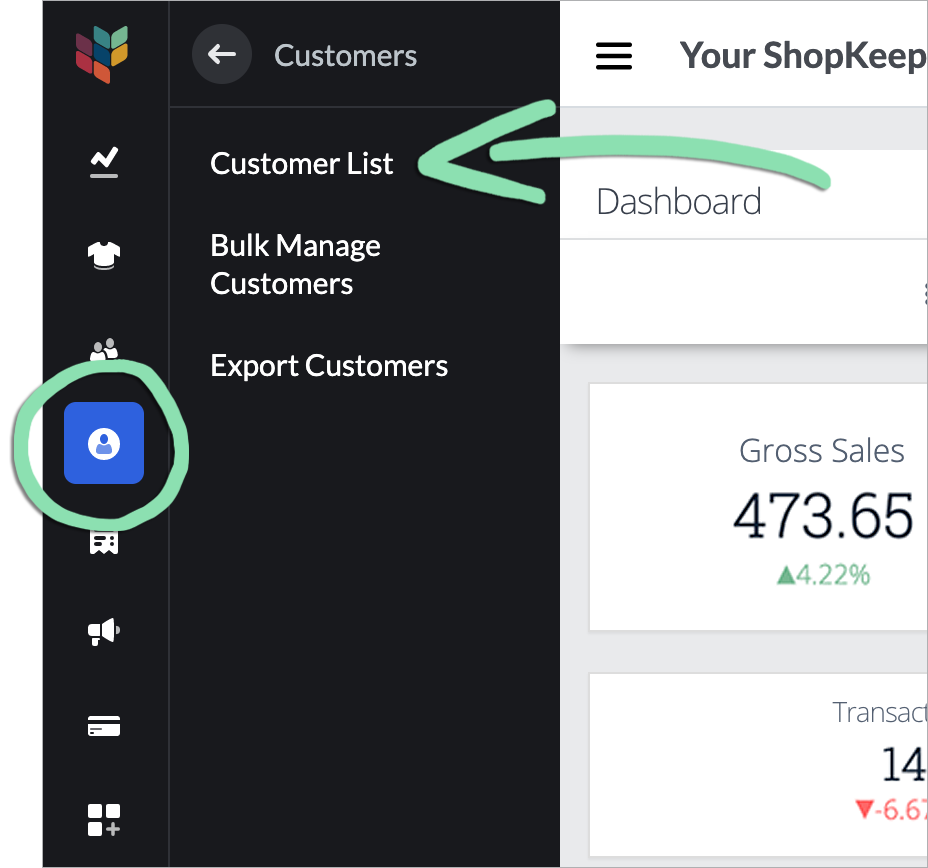
- In BackOffice, click ‘Customers’ and select 'Customer List'.
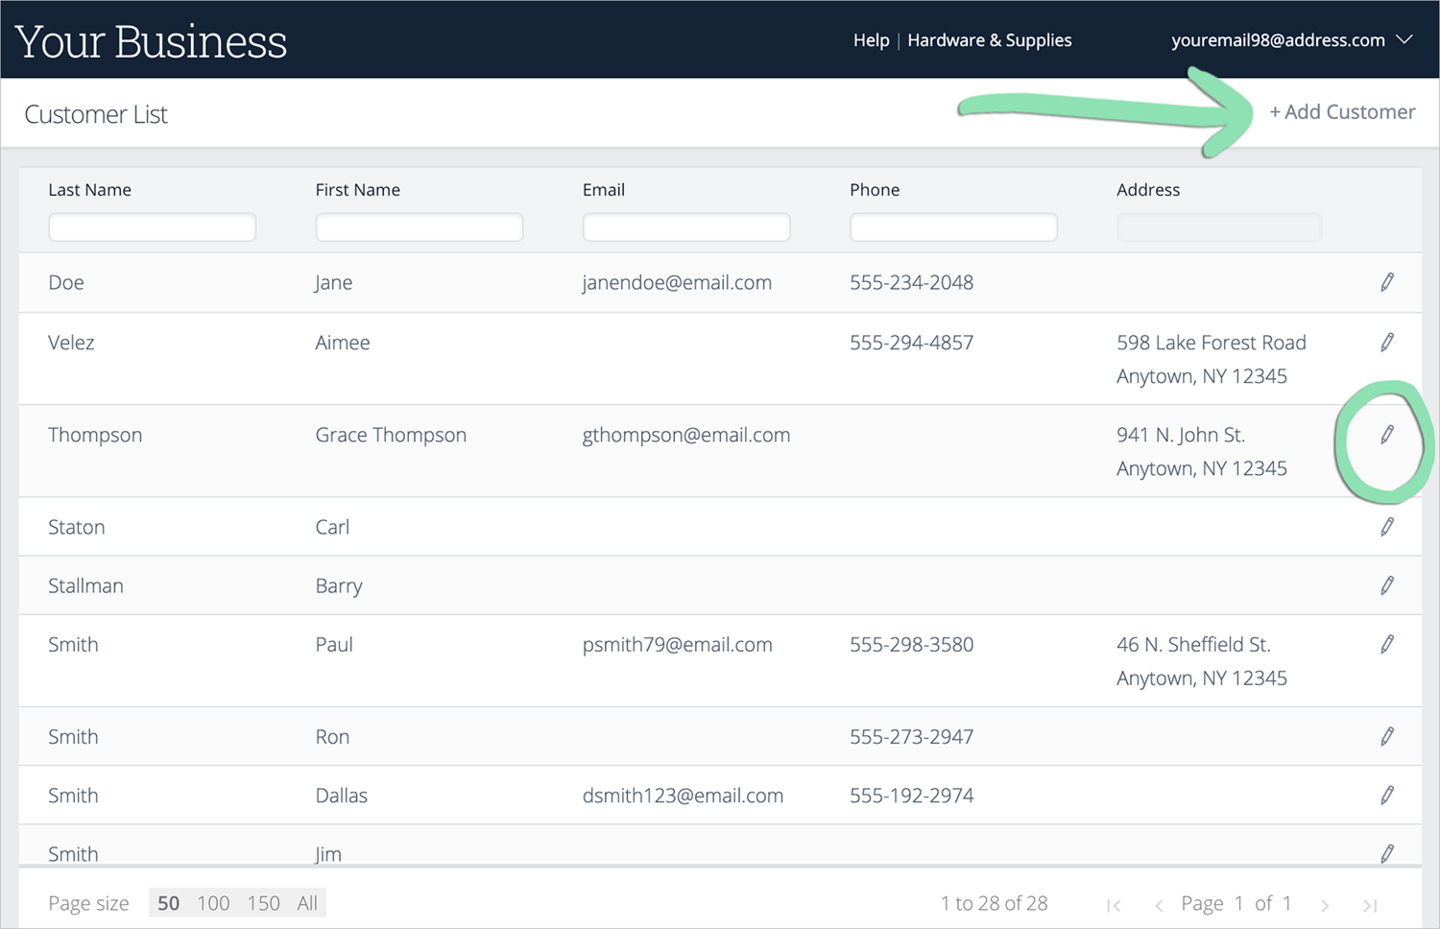
- Click 'Add Customer' to add someone new, or click the pencil icon next to an existing customer to edit or delete that customer.
To find a specific customer, search by first name, last name, email address, or phone number.
 Before adding a new customer, search the Customer List to make sure they do not already exist. Duplicate customer records cannot be merged.
 - If adding a new customer or editing an existing customer, enter or make changes to their information, then click ‘Save’.
At minimum, one of the following must be entered: first name, last name, email address, or phone number. Changing the name of a customer will also update it in some historical reporting. To learn more, visit the article for a specific report from our BackOffice support page.

- To delete an existing customer, click 'Delete', then ‘Continue’ to confirm the deletion.


- Get updates on the iOS or Android register to sync the changes to the register.
Receiving an error while getting updates? Visit our troubleshooting guide for help.
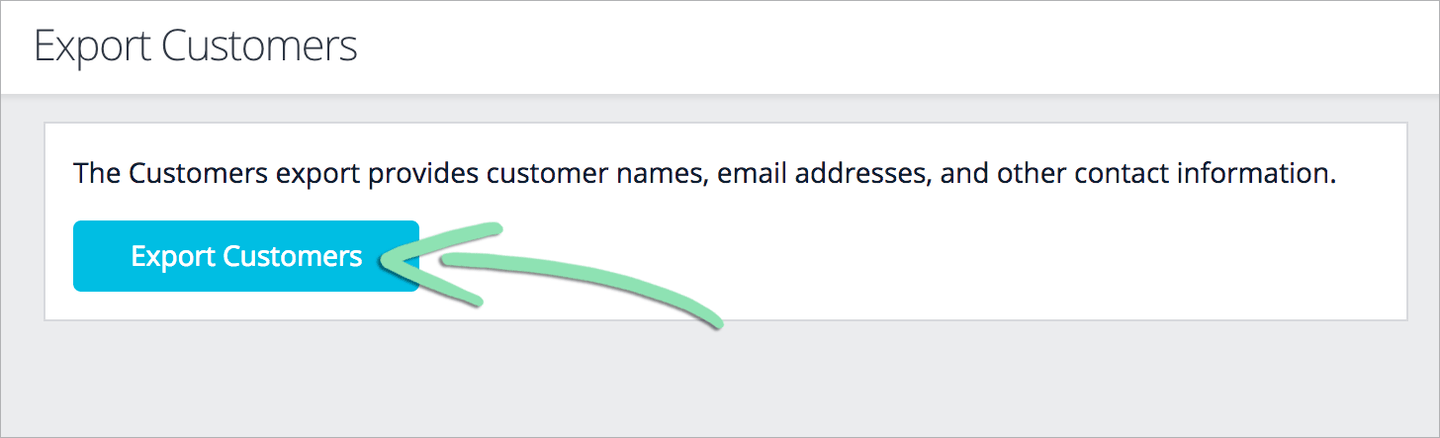
Export Customers
Run the Customers Export to download a copy of the entire Customer List to analyze in spreadsheet software. This report contains the names, addresses, and contact information of your customers.
- In BackOffice, click 'Customers' and select 'Export Customers'.

- Click 'Export Customers' to download the report.
- After downloading, open the export in spreadsheet software.

Customer Record ID | ID code required for modifying and deleting customers with Bulk Management.
First/Last Name | Customer’s first and last name.
Address Line, City, State, Zip | Customer’s location information.
Email | Customer’s email address.
Phone | Customer’s phone number.
Sales Tax Number | If tax exempt, the tax number entered for the customer.
Account Number | Unique customer identification number
Notes | Any notes entered about the customer.
Customer Reporting
When it comes to reporting, view the purchase history of a single customer from the Customer List or run a report that displays all top customers of the business.
If you email receipts, visit the Marketing Dashboard to see how customers interact with the links on those receipts.
Customer Purchase History
Look up the purchase history of a customer to see how much they spent, what they bought, and more details on their activity.
- In BackOffice, click ‘Customers’ and select 'Customer List'.
- Click the pencil icon next to a customer.

- Click 'Item Purchase History'.
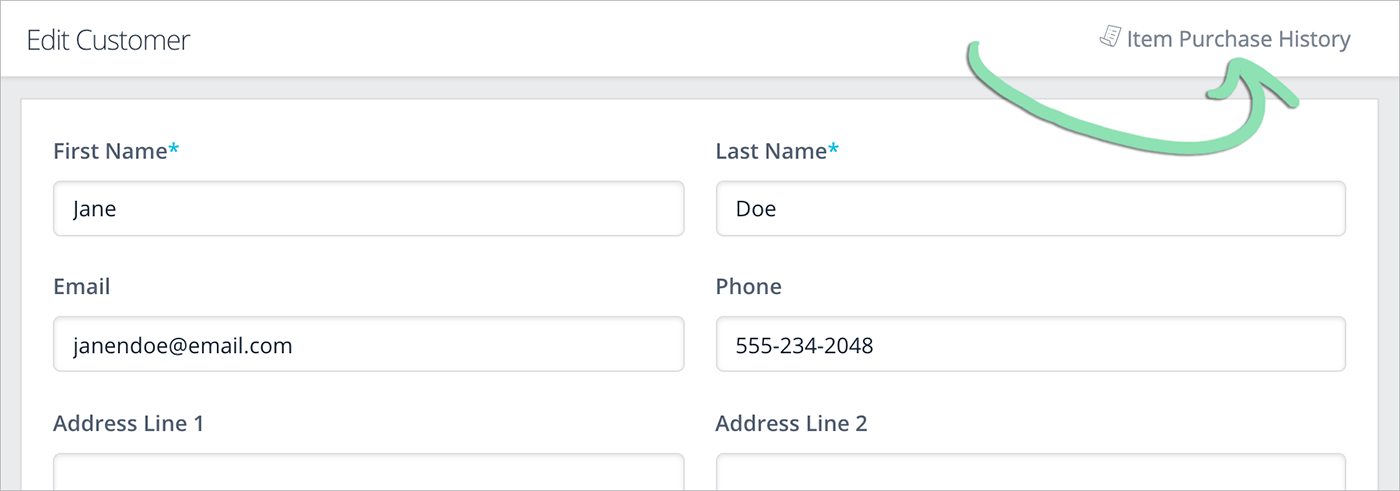
This shows the entire purchase history of the customer, complete with their total sales amount and the individual items they bought.

Purchase histories of separate customers cannot be merged.
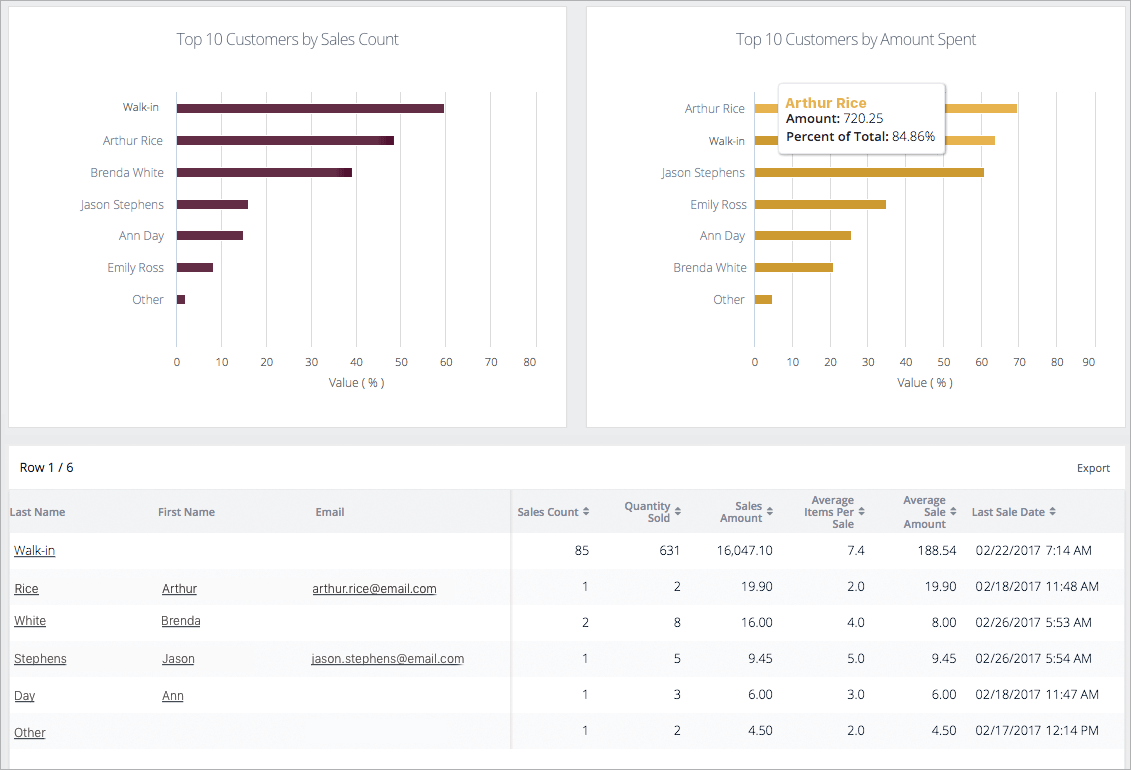
Sales by Customer
To learn how often and to what extent customers are making purchases, use the Sales by Customer report.
- In BackOffice, click ‘Reports’ and select 'Customers'.

The Sales by Customer report shows how often individual customers make purchases and gives total sale amounts. To learn how to read, filter, export, and print this report, visit our full Sales by Customer article.
Purchase histories of separate customers cannot be merged.