Organize Inventory
Organizing inventory makes it easy to identify and report on which kinds of items sell best, to sort and view specific groups of items, and to set up items for ticket printing. After assigning items to departments, categories, and suppliers, you can manage these groups and use them to filter, search, and export from the Item List.
To learn how to organize item shortcuts on the register, visit our Item Shortcuts article.
Watch our Organize Inventory video:
Departments and Categories
To understand how departments and categories in Lightspeed Retail impact inventory management, let’s define what they are, look at a few examples, and review how they are used.
Categories are subgroups within departments. Each department has a unique set of categories.
Note: Departments and categories cannot be renamed, only deleted.
| Department | Categories |
| Hot Drinks | Coffee, Tea, Cocoa |
| Entrées | Burgers, Pasta, Chicken |
| Men’s Clothing | Pants, Dress Shirts, Sweaters |
If you have questions about departments and categories, visit our Inventory FAQ.
Suppliers
To understand how suppliers in Lightspeed Retail impact inventory management, let’s define what they are, look at a few examples, and review how they are used.
| Item | Supplier |
| Bottled Water | Grocery Supply Co. |
| T-Shirt | USA Shirts |
| Sheet Set | Bedding and More |
Item Assignments
Assign items to departments, categories, and suppliers to organize the inventory of the business from BackOffice or the Retail POS (S-Series) app (employees with the relevant BackOffice permissions only).
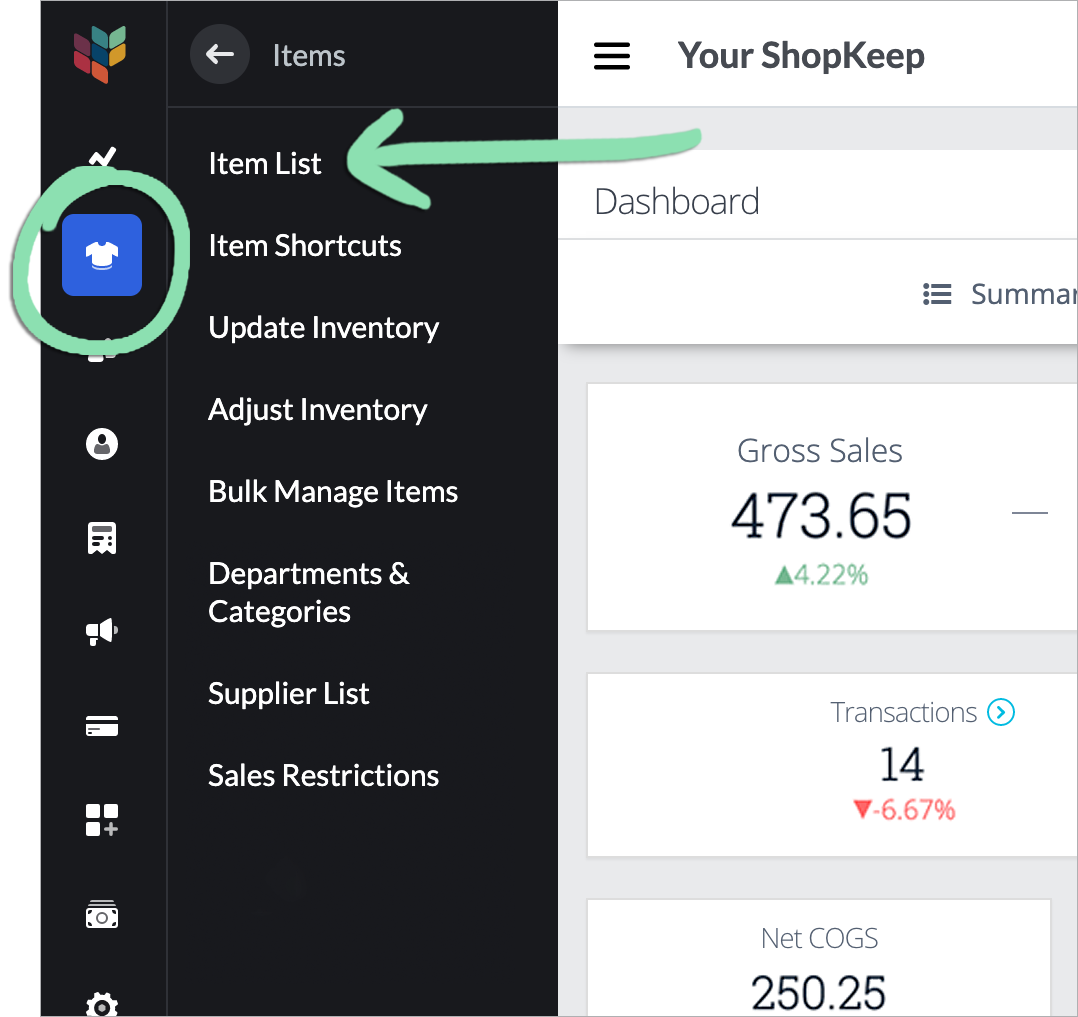
- Visit the Item List in BackOffice or from the Retail POS (S-Series) app (employees with BackOffice permissions only).
- In BackOffice, click ‘Items’ and select ‘Item List’.
- In the Retail POS (S-Series) app for iOS, tap ‘Manage Items’ on the Main Menu. For the Retail POS (S-Series) app for Android, tap ‘Setup’ on the register menu, then select ‘Manage Items’.
Retail POS (S-Series) app for iOS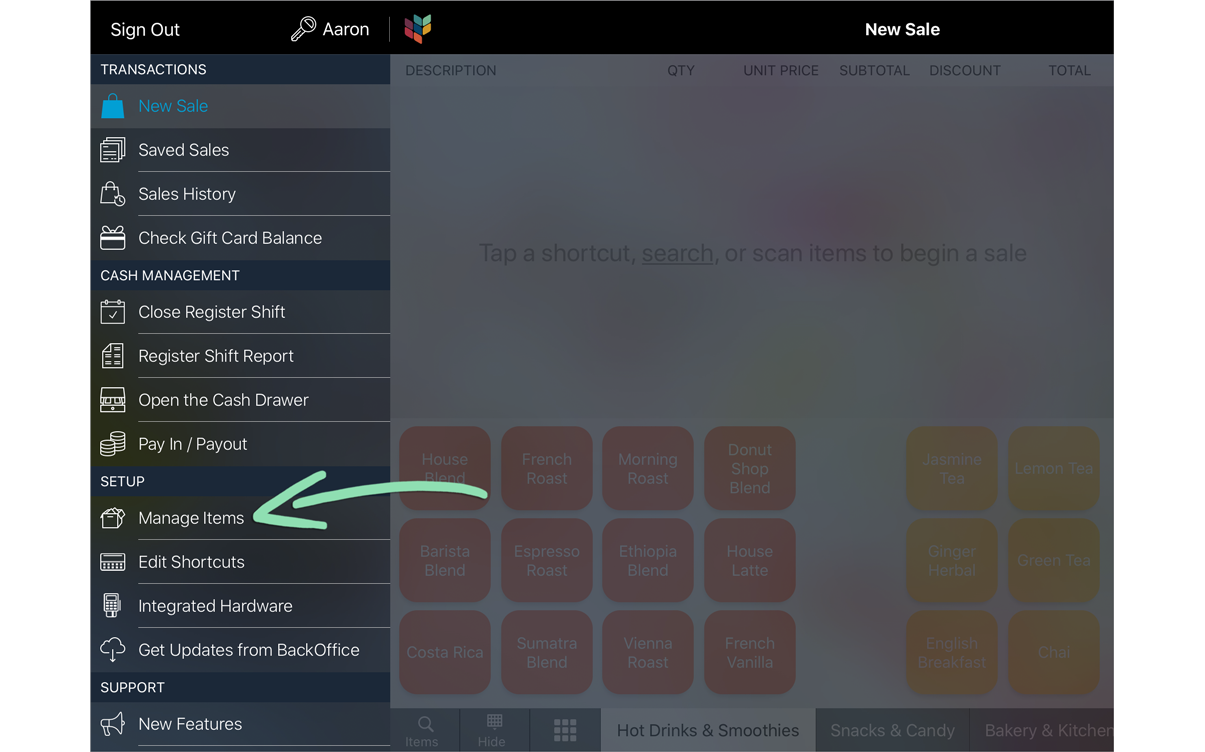 Retail POS (S-Series) app for Android
- Click ‘Add New’ to create a new item or select an existing item to edit.
Visit our Bulk Edit article to learn how to edit several items at once.
 If adding a new item, visit one of the following articles for a complete item creation walkthrough:
 - Choose a 'Department' or select ‘Add a new department’ from the drop-down to create a new one.
Changing the department an item is assigned to will also update it in some historical reporting. To learn more, visit the article for a specific report from our BackOffice support page.

- Choose a 'Category' or select ‘Add a new category' from the drop-down to create a new one.
Changing the category an item is assigned to will also update it in some historical reporting. To learn more, visit the article for a specific report from our BackOffice support page.

- Choose a ‘Supplier’ or select ‘Add a new supplier’ from the drop-down to create a new one.
Changing the supplier an item is assigned to will also update it in some historical reporting. To learn more, visit the article for a specific report from our BackOffice support page.

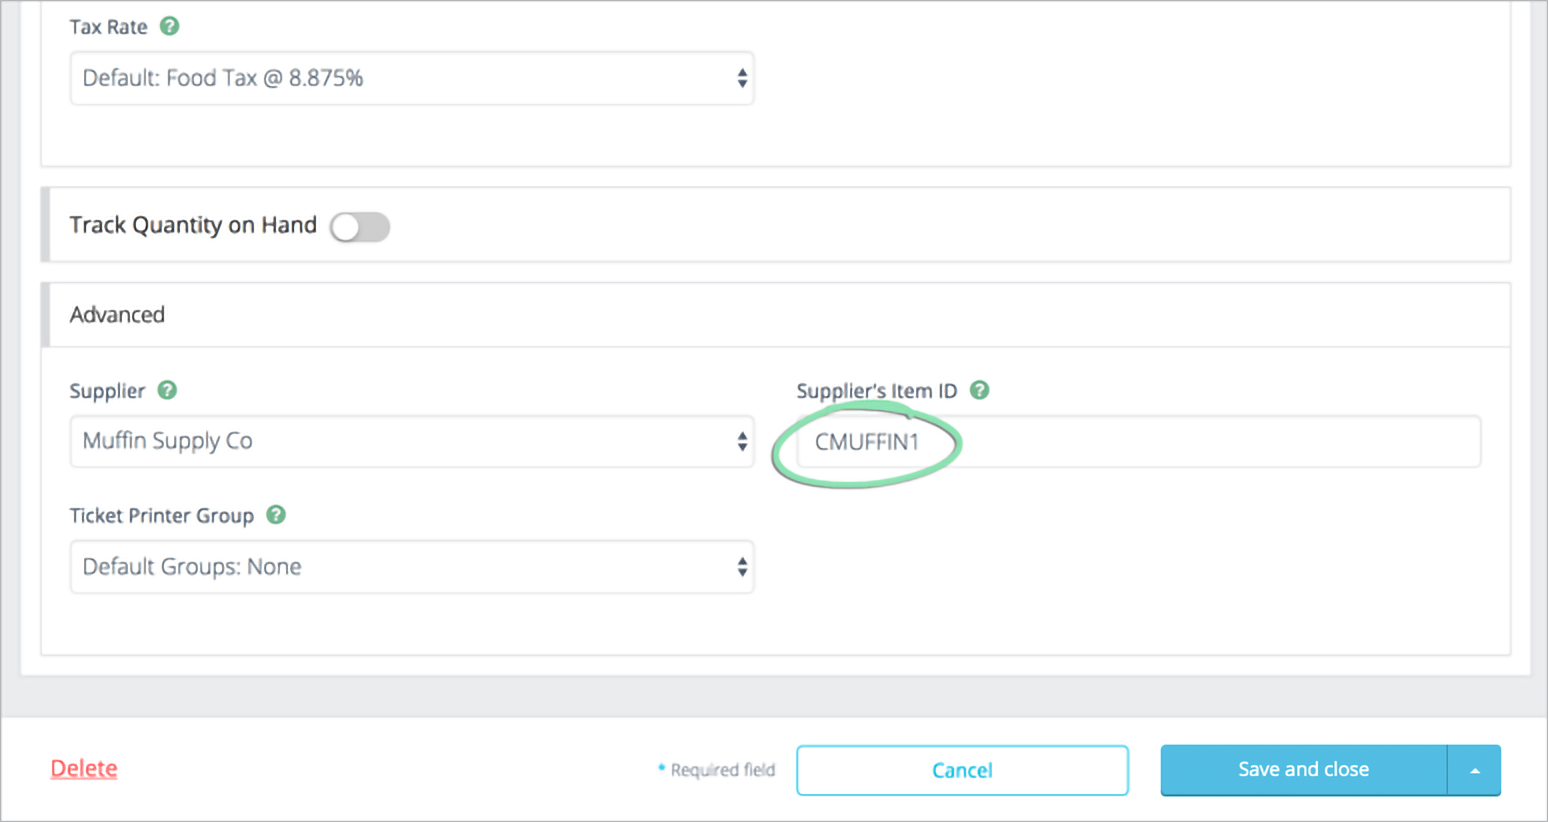
- (Optional) Enter the supplier’s item ID.
This is any reorder code associated with the item.
- Select a save option to finish editing or creating the item.

- If managing item assignments from BackOffice, get updates on the iOS or Android register to sync the changes to the register.
Receiving an error while getting updates? Visit our troubleshooting guide for help.
Manage Departments and Categories
View all existing departments and categories, see how many items are assigned to each, and delete those that are empty all from the Departments & Categories page in BackOffice. Note that departments and categories cannot be renamed, only deleted.
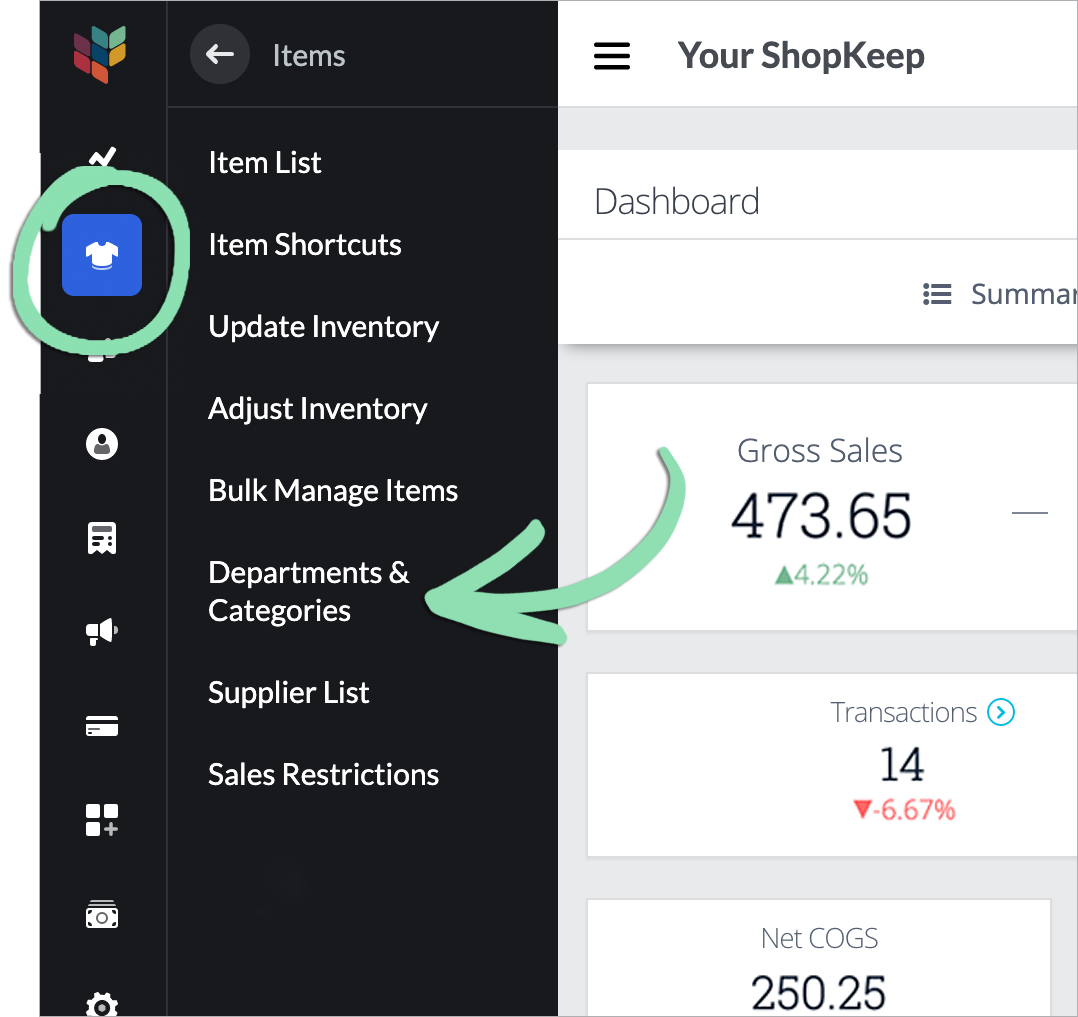
- In BackOffice, click ‘Items’, then ‘Departments & Categories’.
- Scroll down to view information about each department and category.

Each section begins with the name of a department (e.g. ‘Bakery’) followed by:
Category | Name of each category within the department.
Item Count | Number of unique items assigned to each category. To view the specific items in each department or category, follow the steps here. - To delete an empty department or category, click ‘Delete’, then 'Yes' to confirm the deletion.
- If a department or category contains items, first follow the steps here to reassign the items.
- The default ‘General’ department and ‘General’ category within each department cannot be deleted.


Department and category names cannot be edited. Instead, assign all items to a different department or category, then delete the empty one.
Manage Suppliers
View a list of existing suppliers, add new suppliers, edit supplier names, and delete suppliers all from one BackOffice page.
For businesses with multiple linked locations, the same set of suppliers is used for each linked Lightspeed Retail store. The Supplier List for each linked location is identical, and adding, renaming, or deleting a supplier in one location will automatically make that change in all other locations. Item assignments must be managed separately for items in each location.
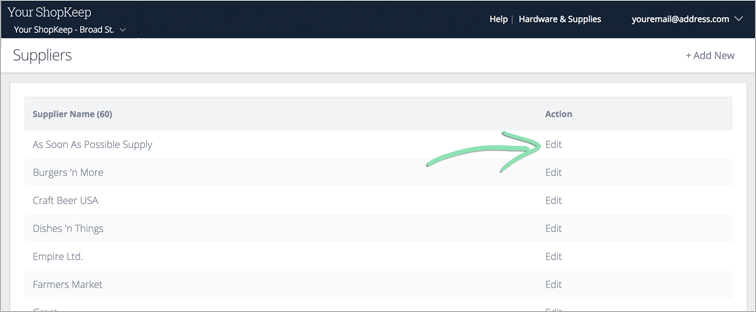
- In BackOffice, click ‘Items’, then ‘Supplier List’.

Add a New Supplier
- Click 'Add New'.
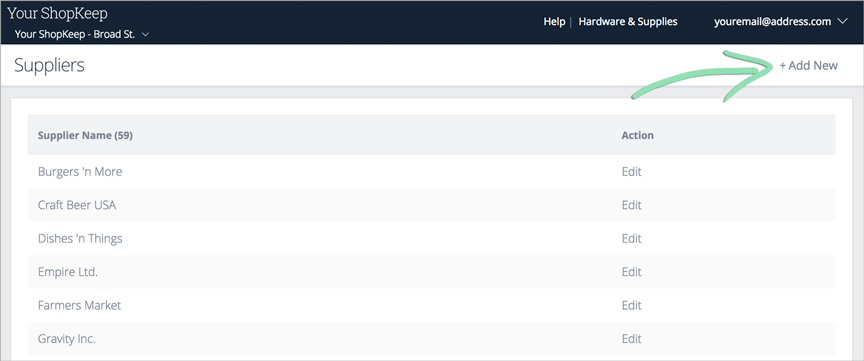
- Enter the name of the supplier and click ‘Continue’.
If you have multiple linked locations, the supplier will be added to all linked locations automatically.

-
Assign the supplier to inventory items obtained from that vendor.
- (Optional) Repeat step 3 in each other linked location to assign the supplier to items in those locations.
For help switching between linked locations in BackOffice, visit our Multi-Store Management article.
Rename a Supplier
*Renaming a supplier will also update its name in historical reporting. To learn more, visit the article for a specific report from our BackOffice support page.
- Click ‘Edit’ next to a supplier.

- Enter the updated supplier name and click ‘Continue’.
If you have multiple linked locations, the supplier name will be updated in all linked locations automatically.

Delete a Supplier
- Click ‘Edit’ next to a supplier.
- Select ‘Delete supplier’.
Note: If a supplier has items assigned to it, deleting it will automatically unassign the items. Follow the steps here to assign the items to a new supplier.
If you have multiple linked locations, the supplier will be deleted from all linked locations automatically.

- Click 'Delete' to confirm.

Item List
The Item List shows every stock item added to inventory with details such as cost, margin, and quantity on hand. From BackOffice or the Retail POS (S-Series) app (employees with BackOffice permissions only), browse items, search, sort, and filter to find specific items, customize which details are displayed, view individual variants, add new items, edit existing items (one at a time or in bulk), and export the items displayed.
- Visit the Item List in BackOffice or from the Retail POS (S-Series) app (employees with BackOffice permissions only).
- In BackOffice, click ‘Items’ and select ‘Item List’.
- In the Retail POS (S-Series) app for iOS, tap ‘Manage Items’ on the Main Menu. For the Retail POS (S-Series) app for Android, tap ‘Setup’ on the register menu, then select ‘Manage Items’.
Retail POS (S-Series) app for iOS
Retail POS (S-Series) app for Android
Search & Sort the Item List
- Enter an item name, SKU, UPC, Supplier Item ID, or unit under the relevant column header to search for that item.
Don’t see the ‘SKU’, ‘UPC’, ‘Supplier Item ID’, or ‘Unit’ columns? Enable them by following the steps below.

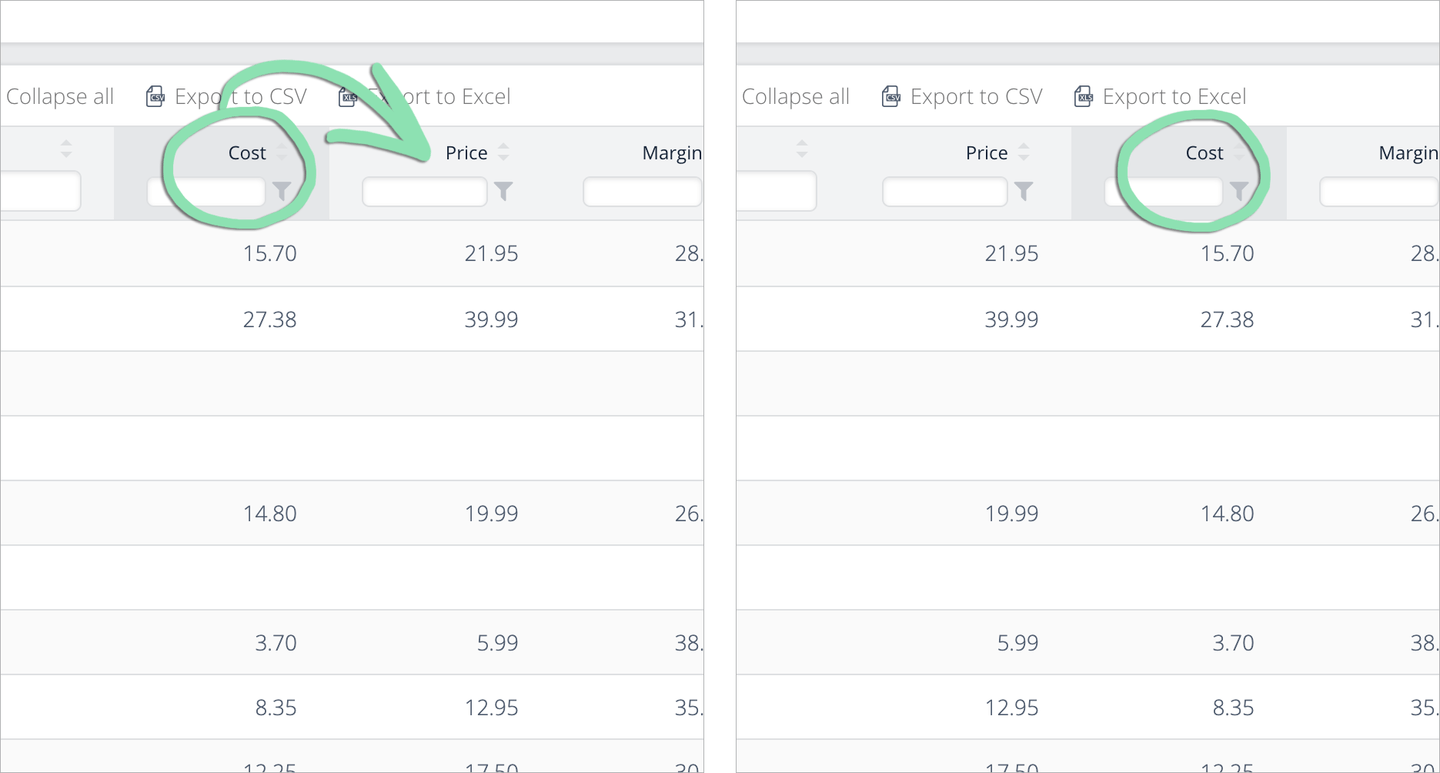
- Click any column with arrows to sort the Item List.
Filter the Item List
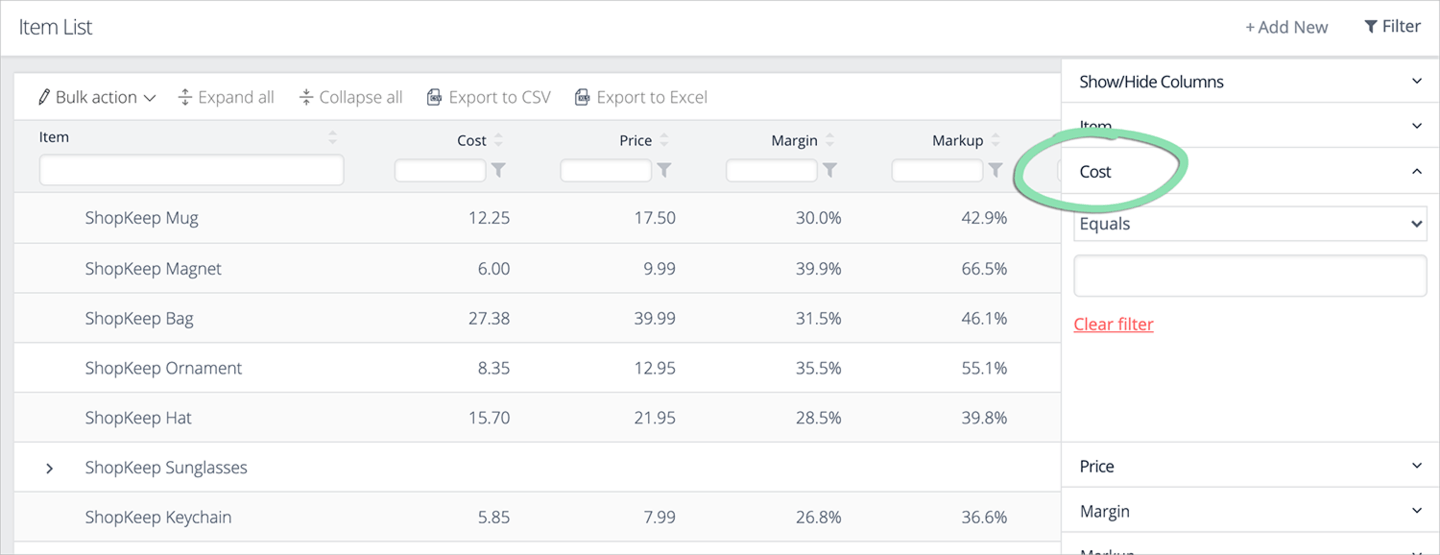
- Click ‘Filter’ and select ‘Show/Hide Columns’, then check or uncheck boxes to show or hide columns on the Item List.

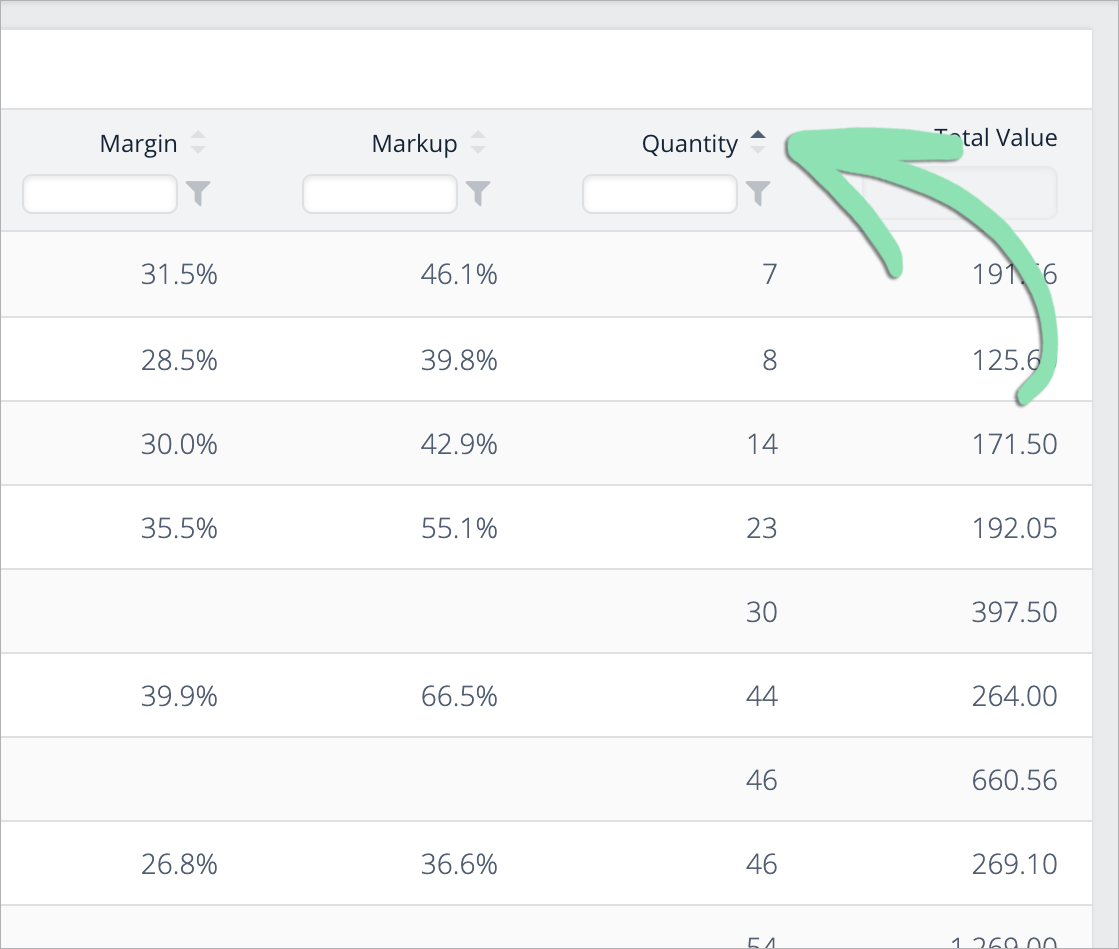
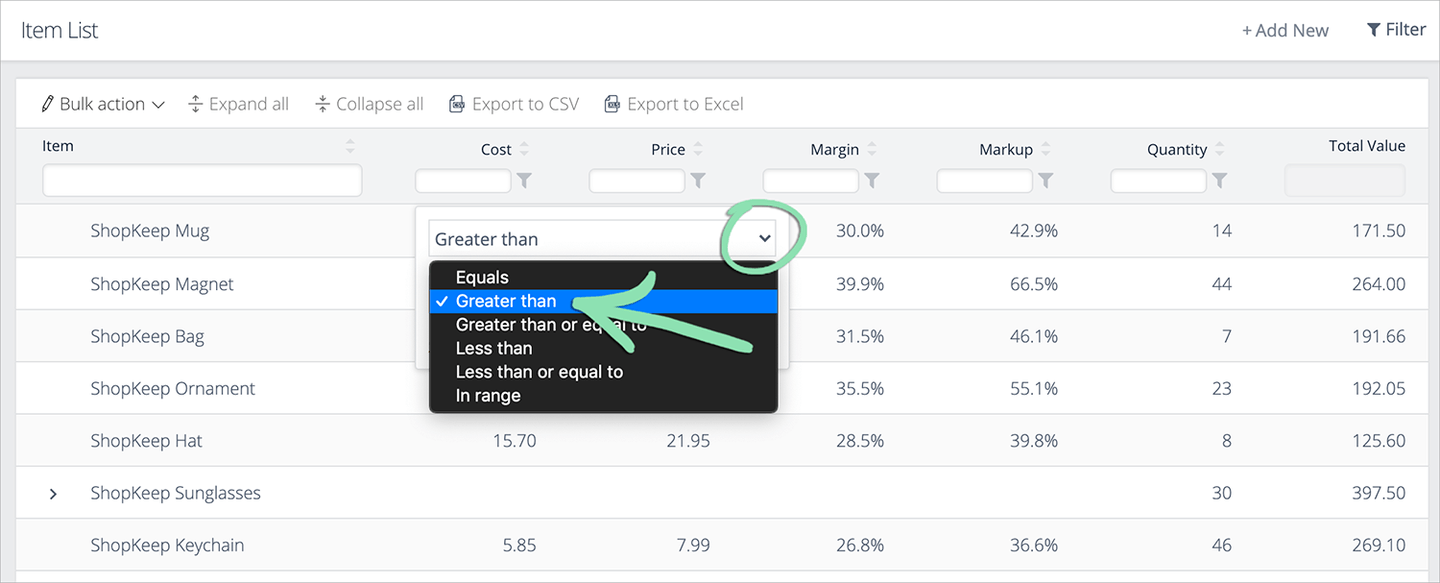
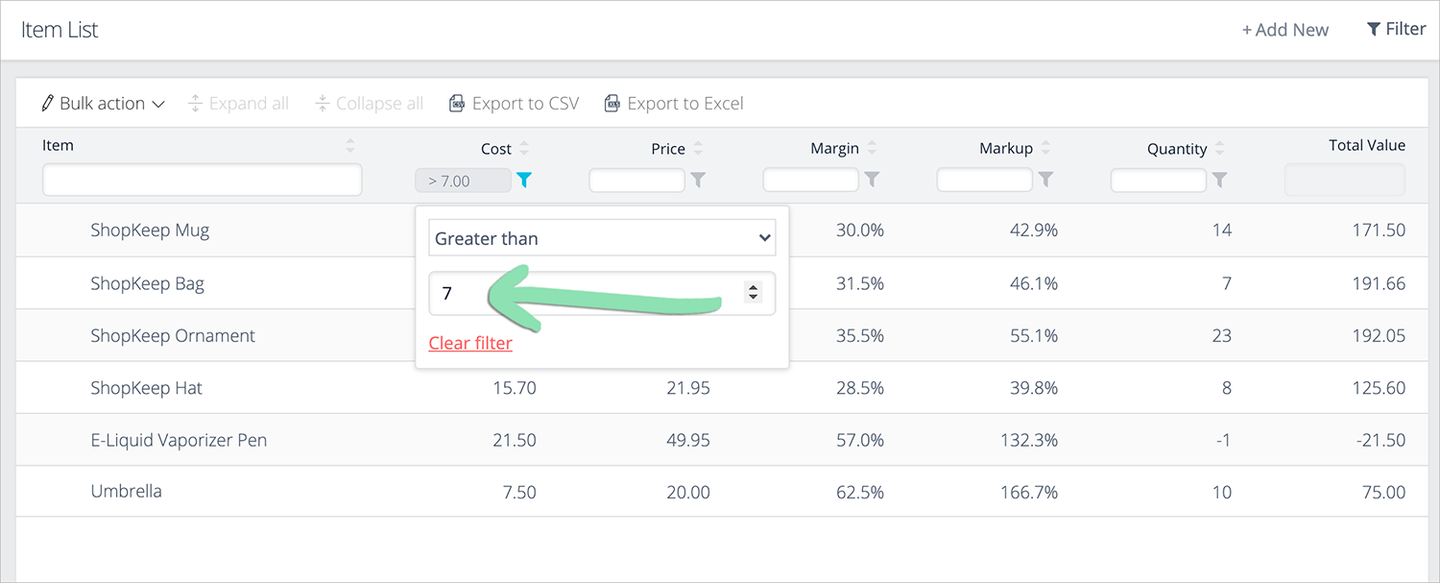
- Select a column to apply a filter to, or click the filter icon on a column.

For numeric filters, select an operator option and enter a value. Learn about each operator option below.
Numeric filters include ‘Cost’, ‘Price’, ‘Quantity’, ‘Margin’, ‘Markup’, ‘Recommended Order’, and ‘Reorder Trigger’.- Equals | Show items that are equal to the entered value.
- Greater than / Less than | Show items that are more or less than the entered value.
- Greater than / Less than or equal to | Show items that are more or less than the entered value or equal to it.
- In range | Show items that are between two entered values or equal to either one.
For alphabetical filters, search, then check or uncheck boxes if necessary.
Alphabetical filters include ‘Item’, ‘Department’, ‘Category’, ‘Supplier’, ‘Supplier Item ID’, ‘SKU’, ‘UPC’, and ‘Unit’.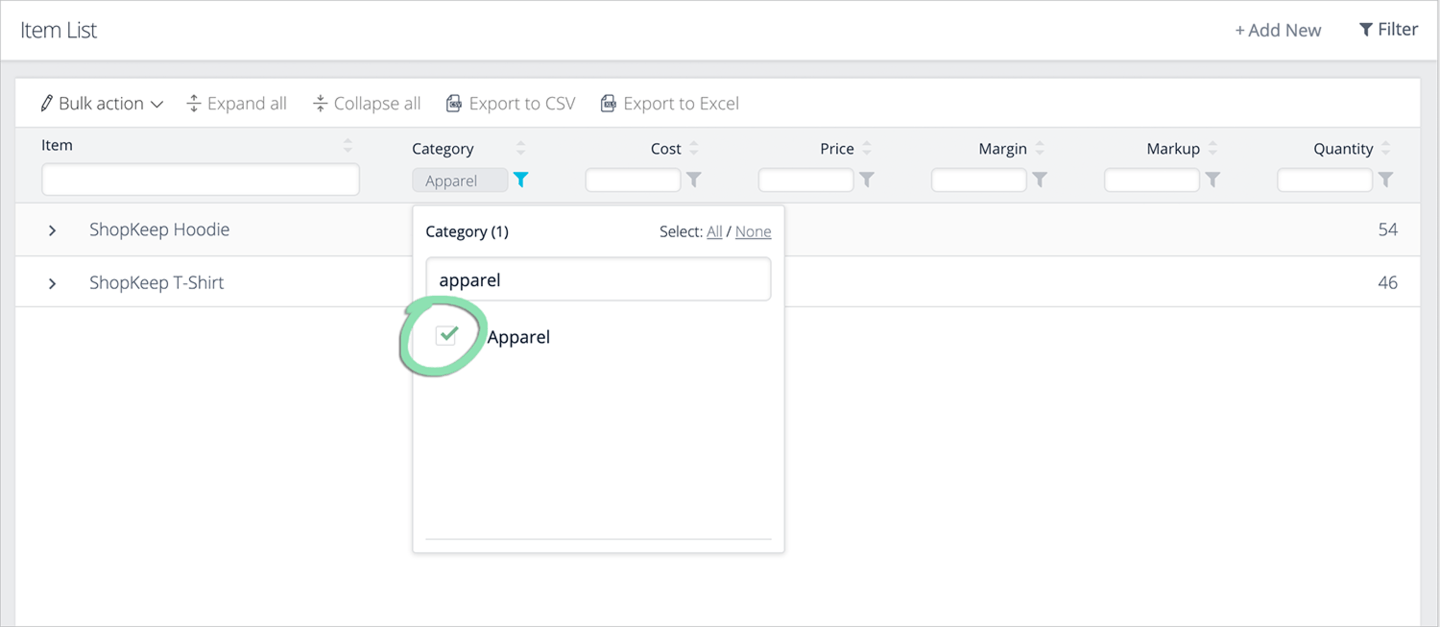
For date filters, use the calendar to select a date range, then click ‘Apply’.
Date filters include ‘Created At’.
For option-based filters, check or uncheck boxes.
Option-based filters include ‘Discountable’ (yes or no), ‘Taxable’ (yes or no), ‘Track Quantity on Hand’ (yes or no), ‘Register Status’ (active or inactive), and ‘Price Type’ (fixed, at the register, or unit price).
Customize Columns
- Adjust column width by clicking and dragging the separator between column headers.

- Rearrange columns by clicking and dragging to a different position.
Page Size & Navigation
- Choose a number of items to appear on each page of the Item List or select ‘All’ to view all items on a single page.
By default, 100 items appear on each page.

- Use the navigation controls to move between pages.

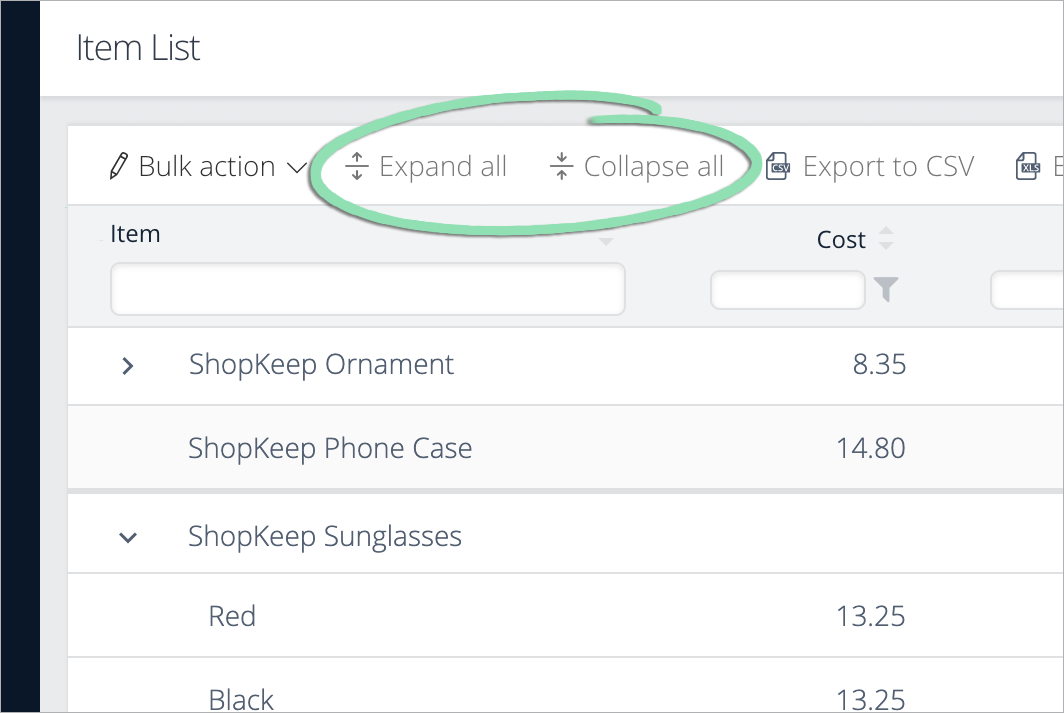
View Variant Details
- Click the arrow icon next to an item to view its active variants and their details.
Items with the arrow icon are items with variants and those without it are basic items.

- To hide or show variants for all items on the list, click ‘Expand all’ or ‘Collapse all’.
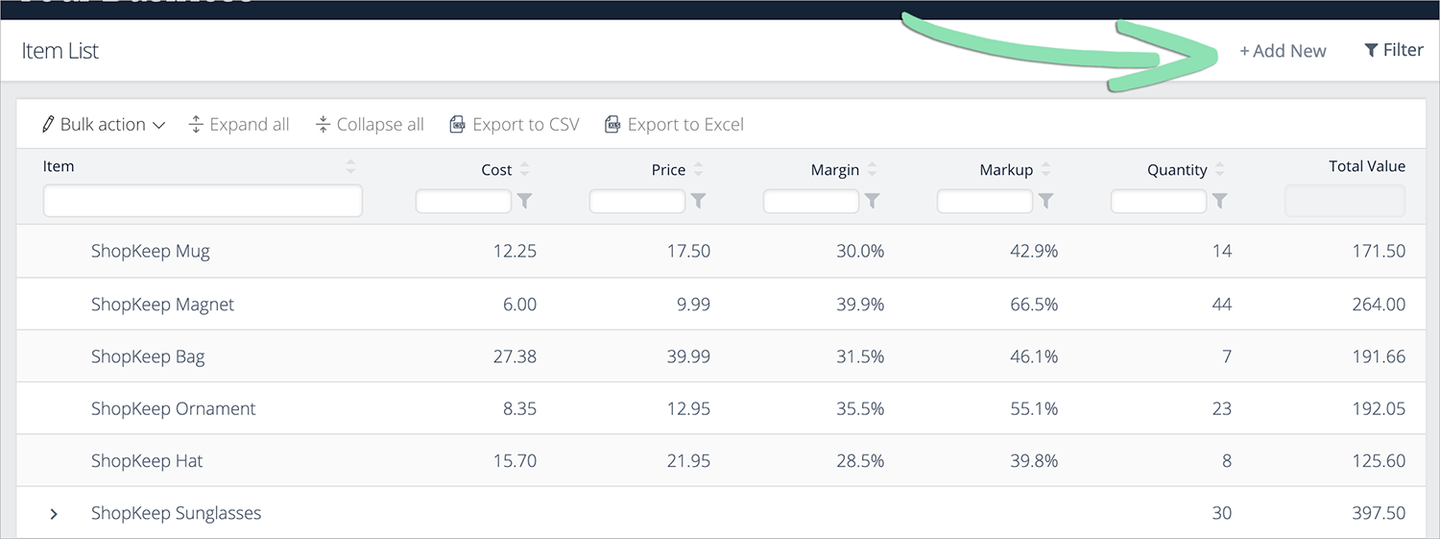
Add a New Item
- Click ‘Add New’ to add a new item.
For a full item creation walkthrough, visit:
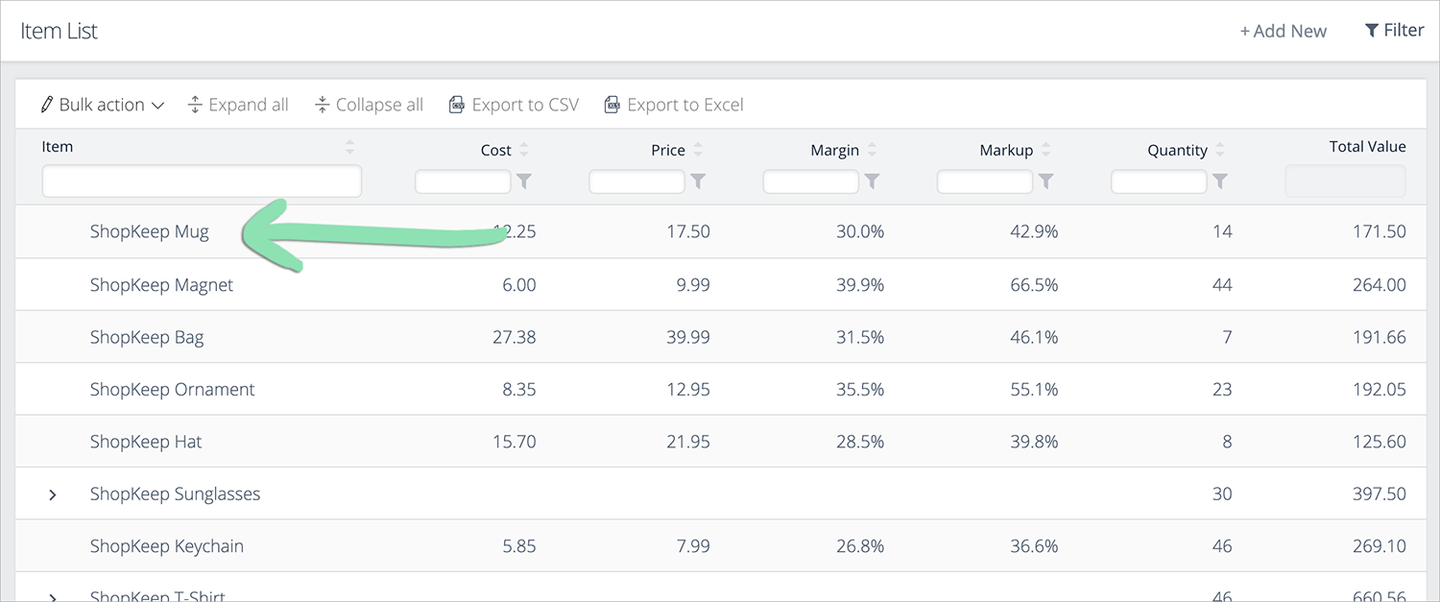
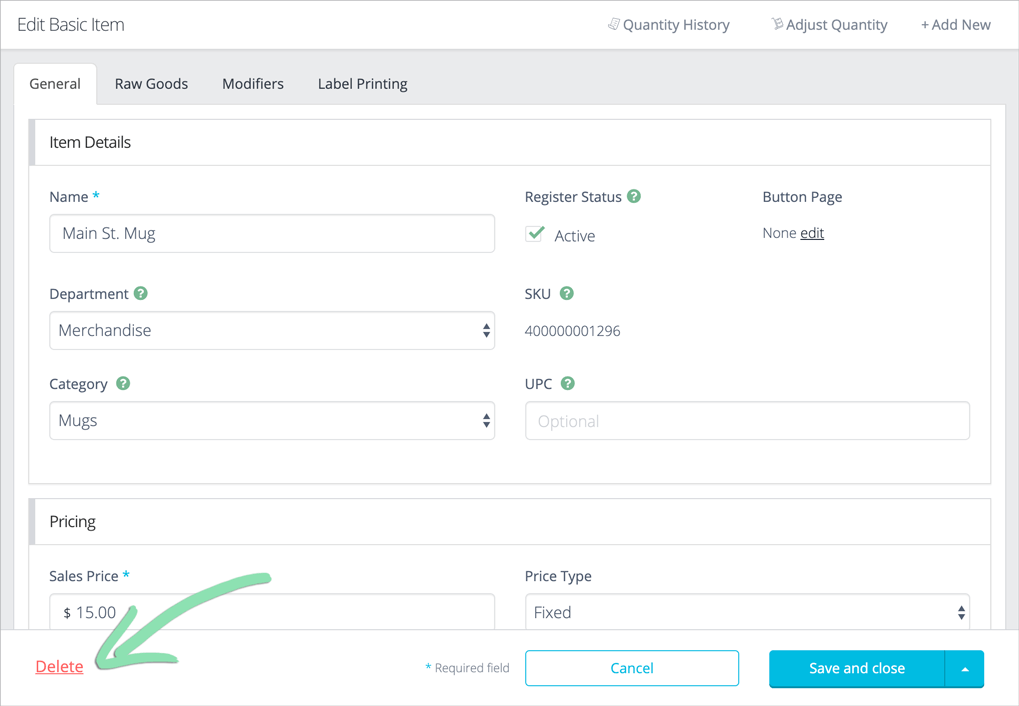
Edit or Delete an Existing Item
- Click an existing item to edit or delete it.
Visit our Bulk Edit article to learn how to edit several items at once.
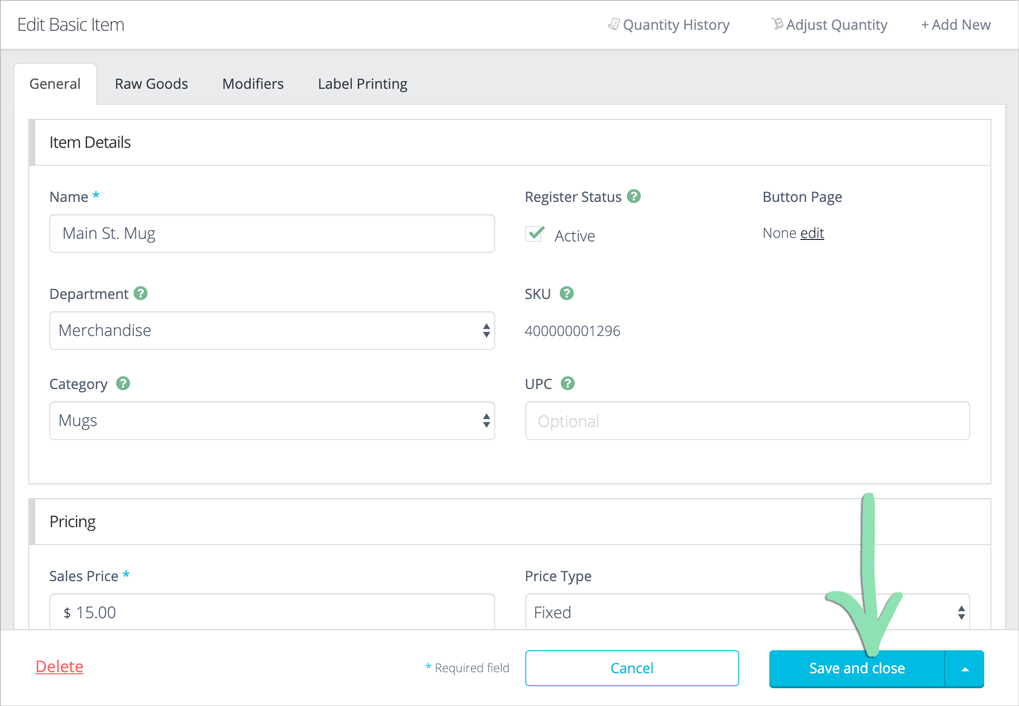
- If editing the item, make changes and select a save option.
Updating the name, department, category or supplier for an item will also update this information in some historical reporting. To learn more, visit the article for a specific report from our BackOffice support page.
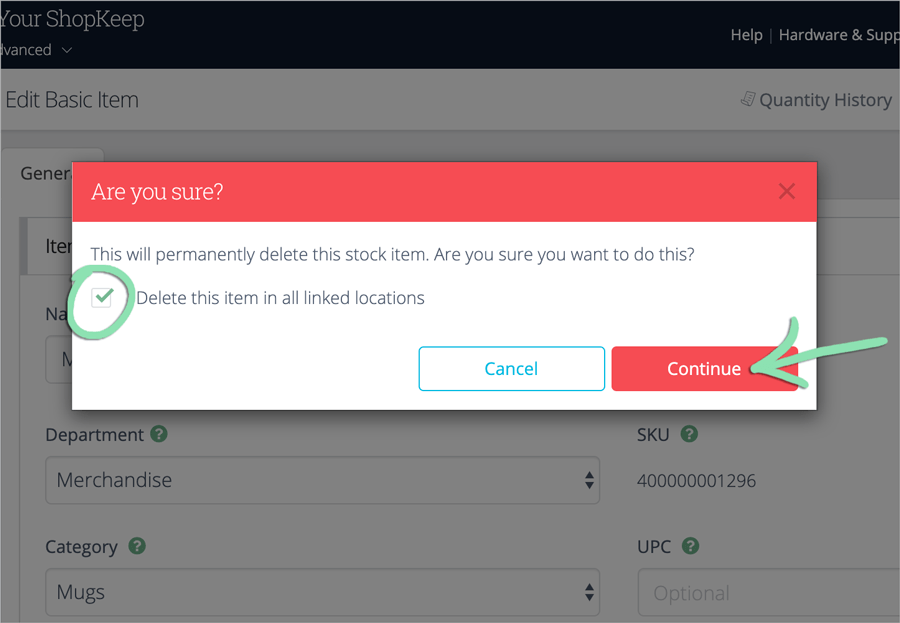
- To delete the item, click ‘Delete’, check the box to delete the item in all linked locations (optional for multi-location accounts), and select ‘Continue’.
- If a deleted item is re-added later, labels printed for the original item must be reprinted. Deleted items appear on sales reports for dates prior to deletion but not on certain other reports. Visit our Inventory FAQ to learn which reports are not supported.
- Deleting items in all linked locations is available for merchants with multiple linked locations and is only visible to the Business Owner in BackOffice.
Bulk Edit
- Click ‘Bulk action’, then select ‘Bulk edit’ to make changes to multiple existing items at the same time.
For detailed help using this feature, visit our Bulk Edit article.
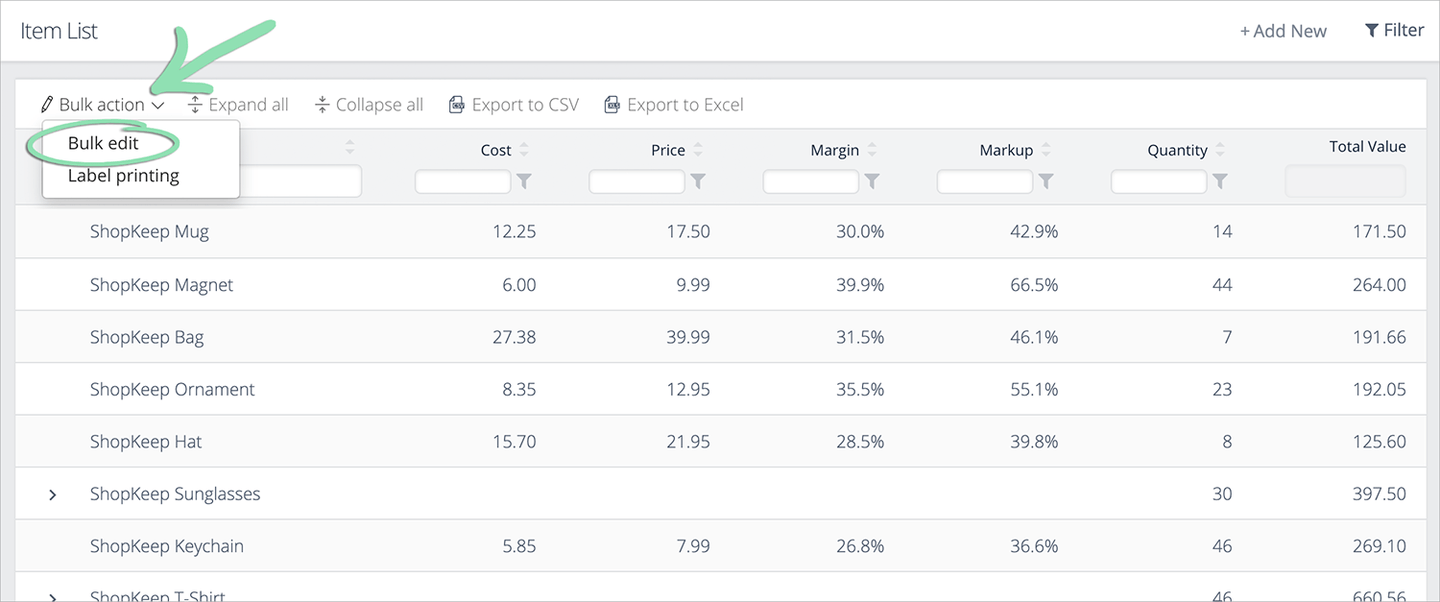
Bulk Label Printing
- Click ‘Bulk action’, then select ‘Label printing’ to print labels to a connected DYMO label printer for multiple existing items at the same time.
For detailed help using this feature, visit our Lightspeed Label Printing article.

Export Item List
- Click ‘Export to CSV’ or ‘Export to Excel’ to export your inventory to a .CSV or .XLSX spreadsheet file.
- The exported file will contain all data displayed on the Item List, including active columns and filters.
- .CSV files are plain text, readable in many different spreadsheet programs, and used for Bulk Management. .XLSX files support text formatting and other additional features, are readable in Microsoft Excel and supported programs, and cannot be used in Bulk Management.
Item List exports can only be performed from a web browser on a computer.
- Follow the steps here to download the export file from the Export Center.