Modifiers
Modifiers are item options that allow customers to personalize their order. With Modifiers, a customer can select how they’d like their burger cooked, which additions (e.g. extra bacon) they’d like, and if they’d prefer holding an ingredient (e.g. no cheese) due to allergies or personal preference.
Modifiers are compatible only with basic items, not items with variants. Visit the Variants vs. Modifiers article to learn about each type of item and decide which to use for your inventory.
Watch our Item Modifiers video below:
Add Modifiers to an Item
Modifiers simplify your menu, allow customers to personalize their order, and print on kitchen tickets and receipts. Modifiers can easily be added to existing inventory items in BackOffice or at the register if you have the relevant BackOffice permissions.
- Visit the Item List in BackOffice or the Retail POS (S-Series) app (staff with BackOffice permissions only).
- In BackOffice, click ‘Items’ and select ‘Item List’.
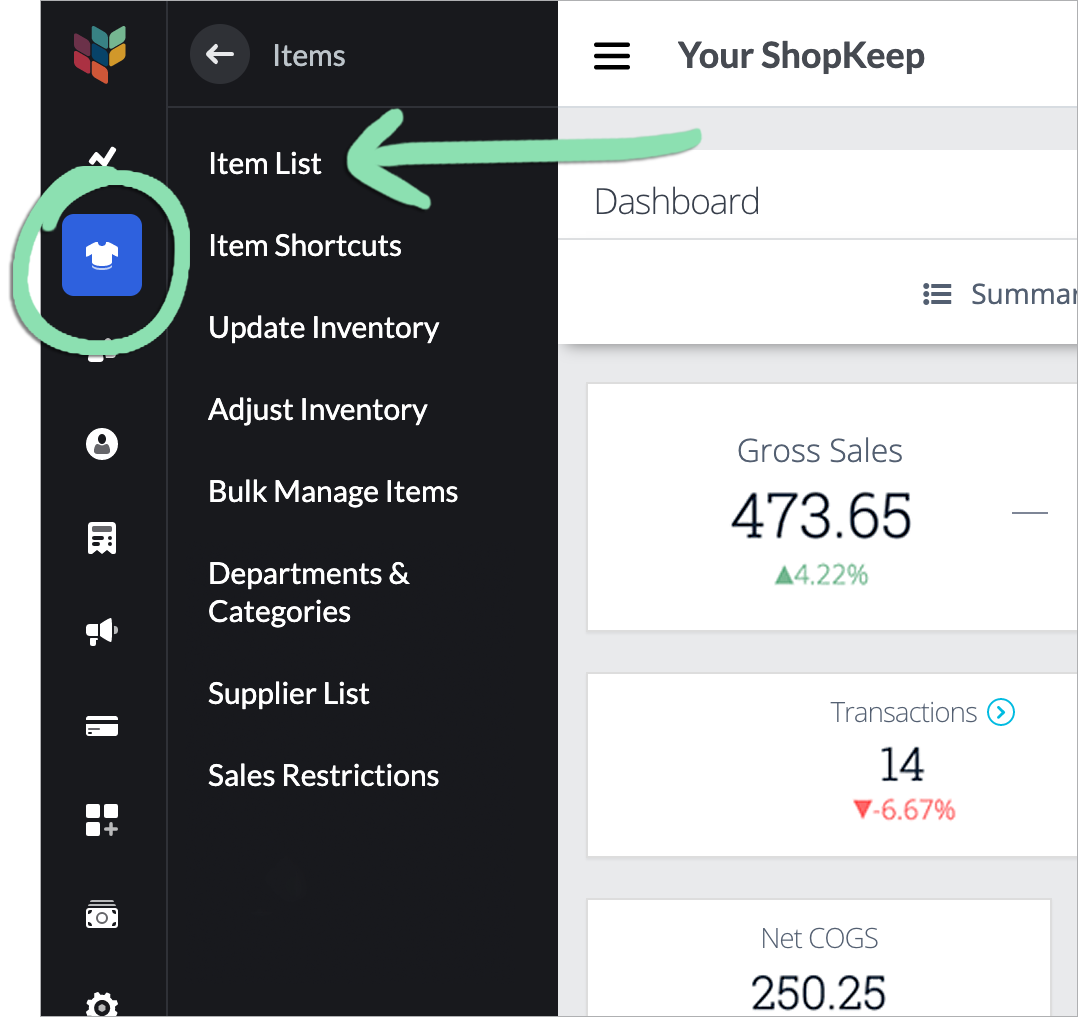
- In the Retail POS (S-Series) app for iOS, tap ‘Manage Items’ on the Main Menu. For the Retail POS (S-Series) app for Android, tap ‘Setup’ on the register menu, then select ‘Manage Items’.
Retail POS (S-Series) app for iOS Retail POS (S-Series) app for Android
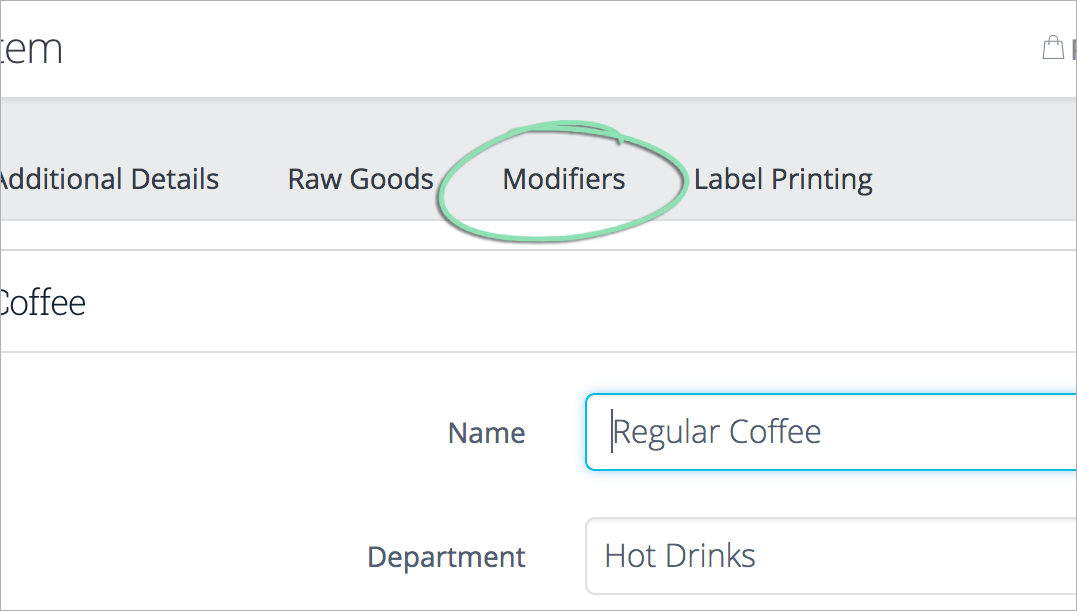
- Search for and select a basic inventory item.
Basic items do not have an arrow icon next to the item name.

- Click the 'Modifiers' tab.
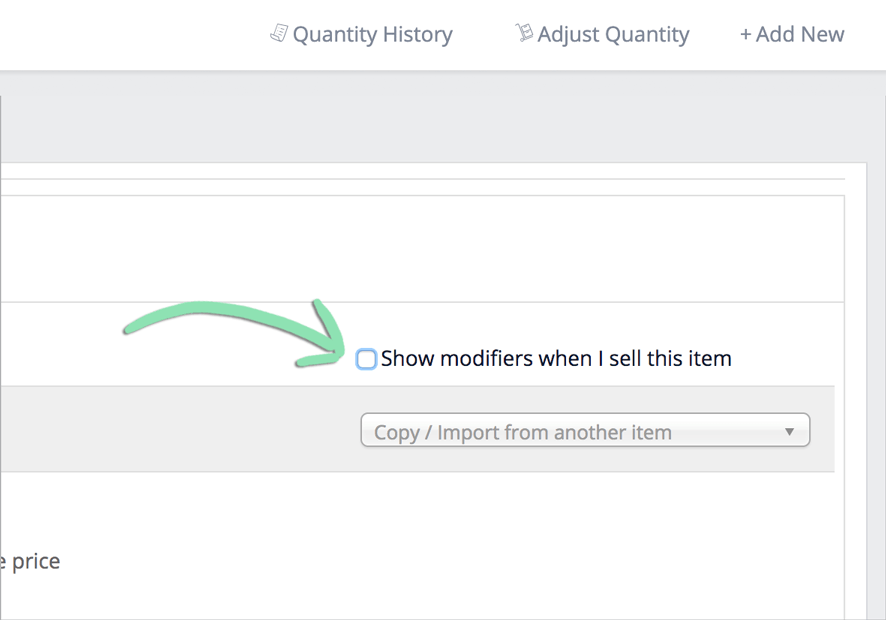
- (Optional) Uncheck 'Show modifiers when I sell this item' to prevent the register from automatically asking cashiers to select modifiers when the item is added to a sale.
- Follow the instructions below to add or copy modifiers to the item.
Modifiers cannot be imported in bulk and must be added or copied manually to items using the steps below.
- Add Single Choice Modifiers
- Add Multiple Choice Modifiers
- Copy Modifiers from an Item
Used for either/or choices the customer can make (e.g. Rare, Medium, or Well Done).
Used for add-ons, extras, and for holding ingredients (e.g. Extra Cheese or No Onions).
If modifiers have already been added to an item, you can copy those modifiers to another item.
Single Choice Modifiers
Single choice modifiers allow customers to select one option from a group of choices. For example, choosing between mild, spicy, or extra spicy salsa with an order of chips.
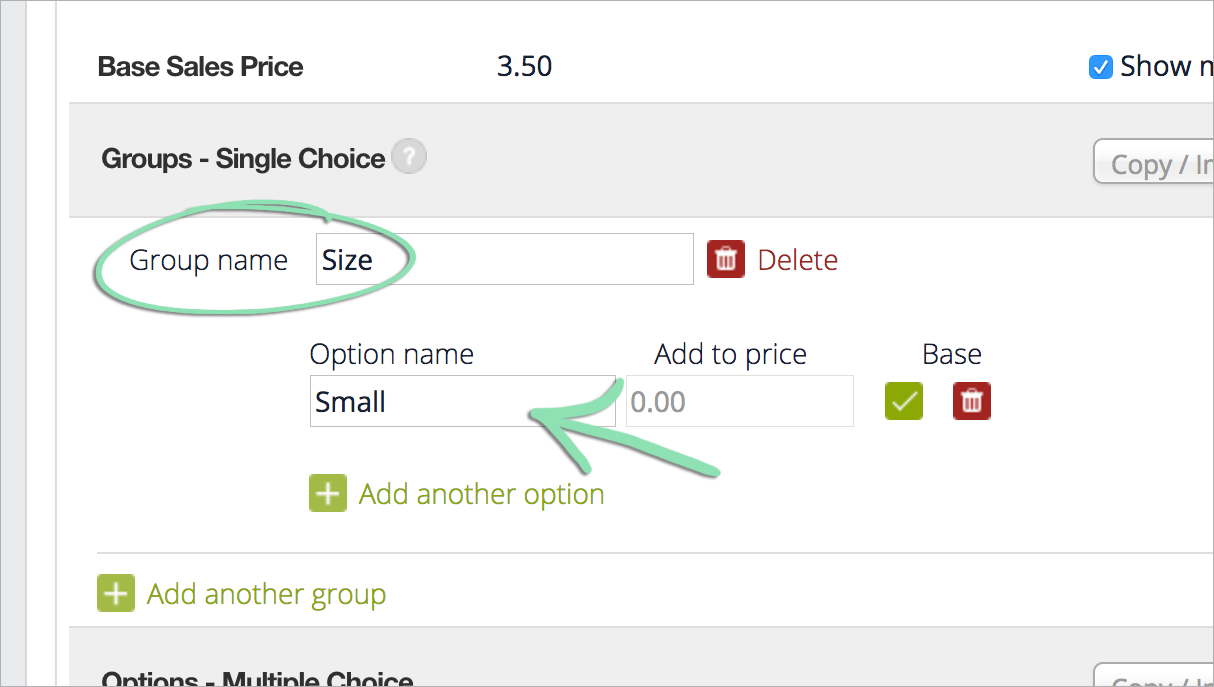
- Click ‘Add a Group’.

- Enter a name for the group and enter a name for the 'Base' option.
The Base is the default option that is automatically selected when the item is rung up. Changing the name of a modifier after creating it will also update it in some historical reporting. To learn more, visit the article for a specific report from our BackOffice support page.
- Click ‘Add another option’ to add an additional option to the group.
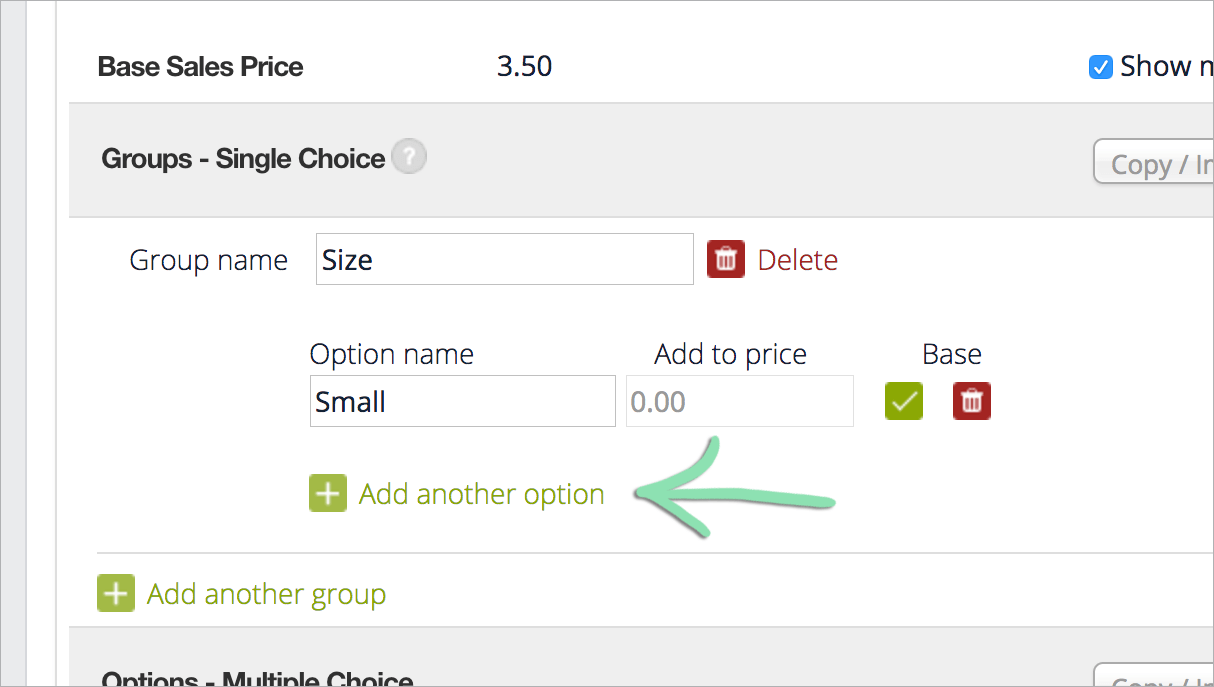
- Enter a name and an optional ‘Add to price’.
‘Add to price‘ increases the item’s sales price when that option is selected at the register. Changing the name of a modifier after creating it will also update it in some historical reporting. To learn more, visit the article for a specific report from our BackOffice support page.
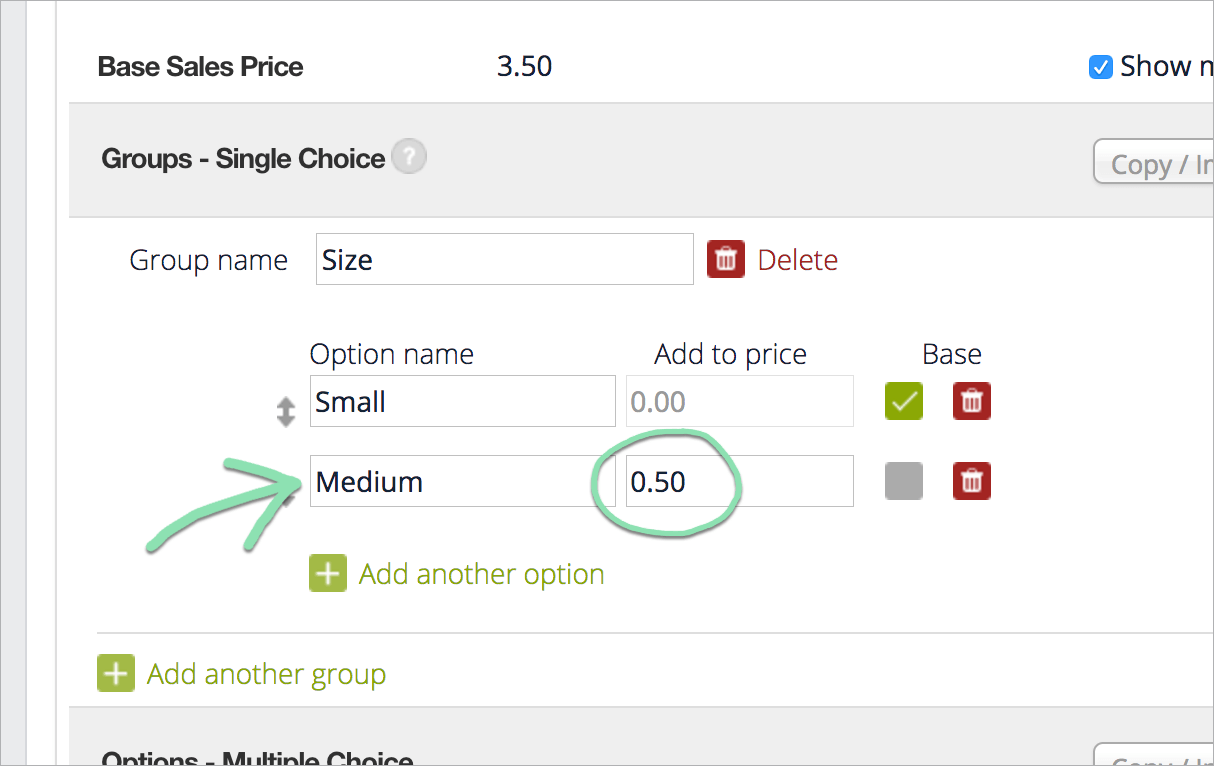 Check one of the gray boxes to turn a different option into the Base.
 - (Optional) Repeat steps 3 - 4 as needed to add more options to the group.
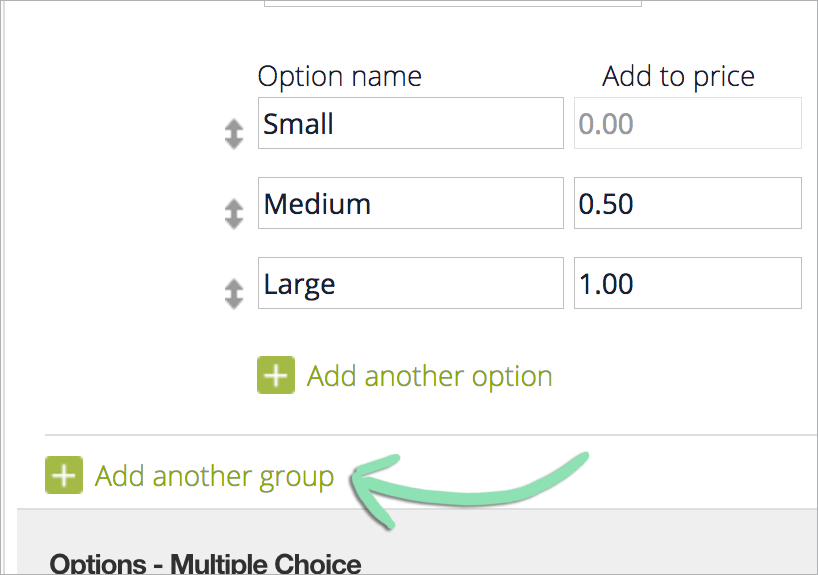
- (Optional) Click ‘Add another group’ to create a new group of single choice modifiers.
Then repeat steps 2 – 5 to enter options for that group.
- Click ‘OK’ to save changes.
- If adding modifiers from BackOffice, get updates on the iOS or Android register to sync the changes to the register.
If you receive an error while getting updates, visit our troubleshooting guide for help.
Multiple Choice Modifiers
Multiple choice modifiers allow customers to select as many options as they want but no more than one of any particular option. There are two types of multiple choice modifiers:
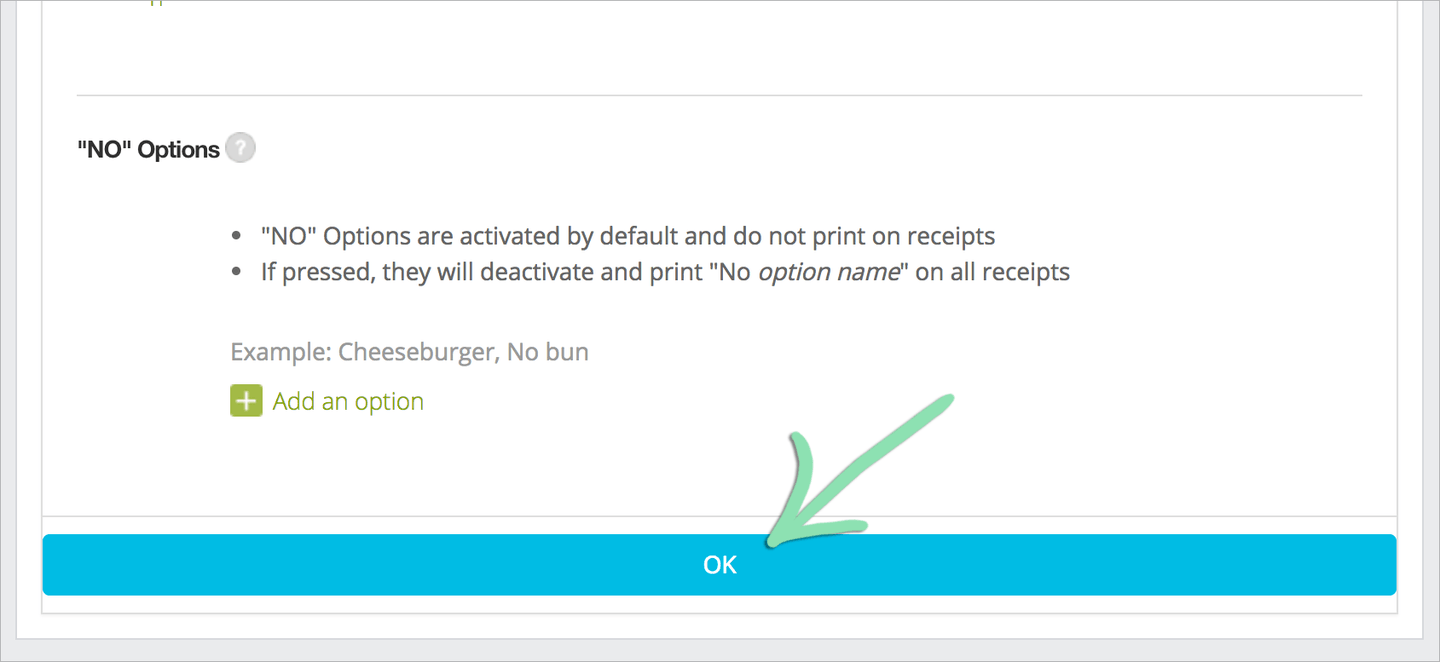
- Click ‘Add an option’ under Add-ons or "NO" Options.
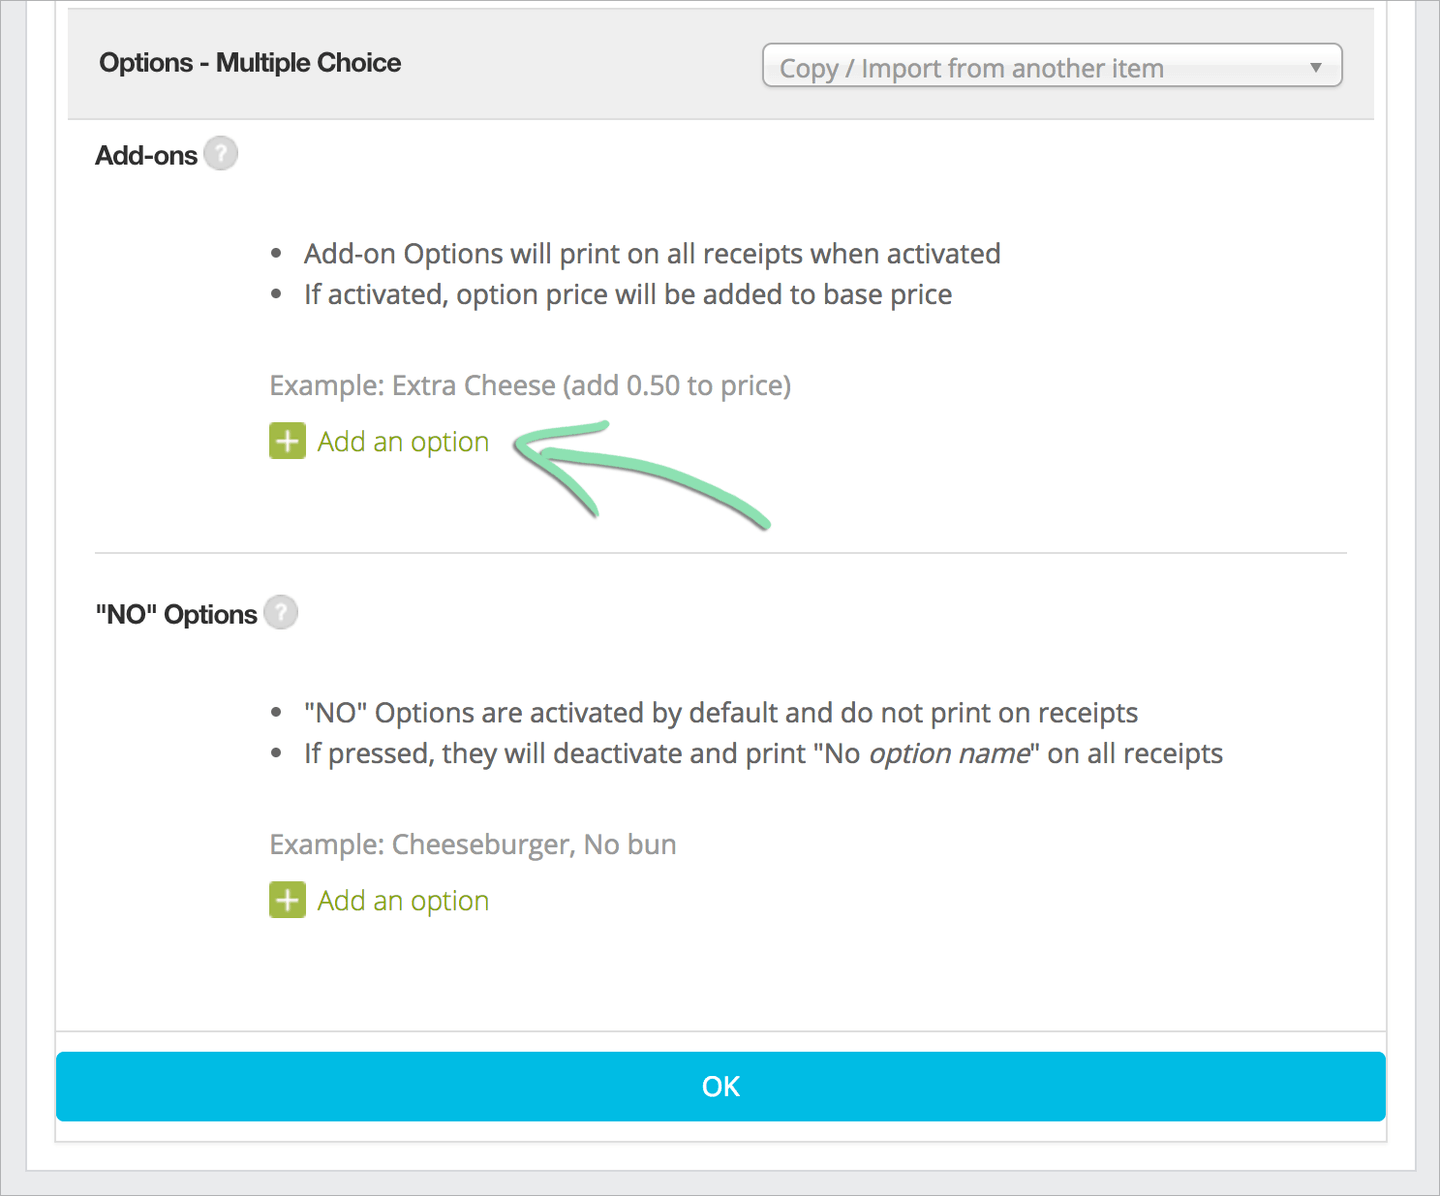
- Enter a name and an optional amount.
Add-ons: enter an ‘Add to price’ that raises the item’s price when the modifier is selected at the register.
“NO” Options: enter a ‘Discount when OFF’ that decreases the price when the modifier is deselected.
Changing the name of a modifier after creating it will also update it in some historical reporting. To learn more, visit the article for a specific report from our BackOffice support page.
- (Optional) Click ‘Add another option’ to enter additional Add-ons or "NO" Options.
Then enter a name and optional amount for each.
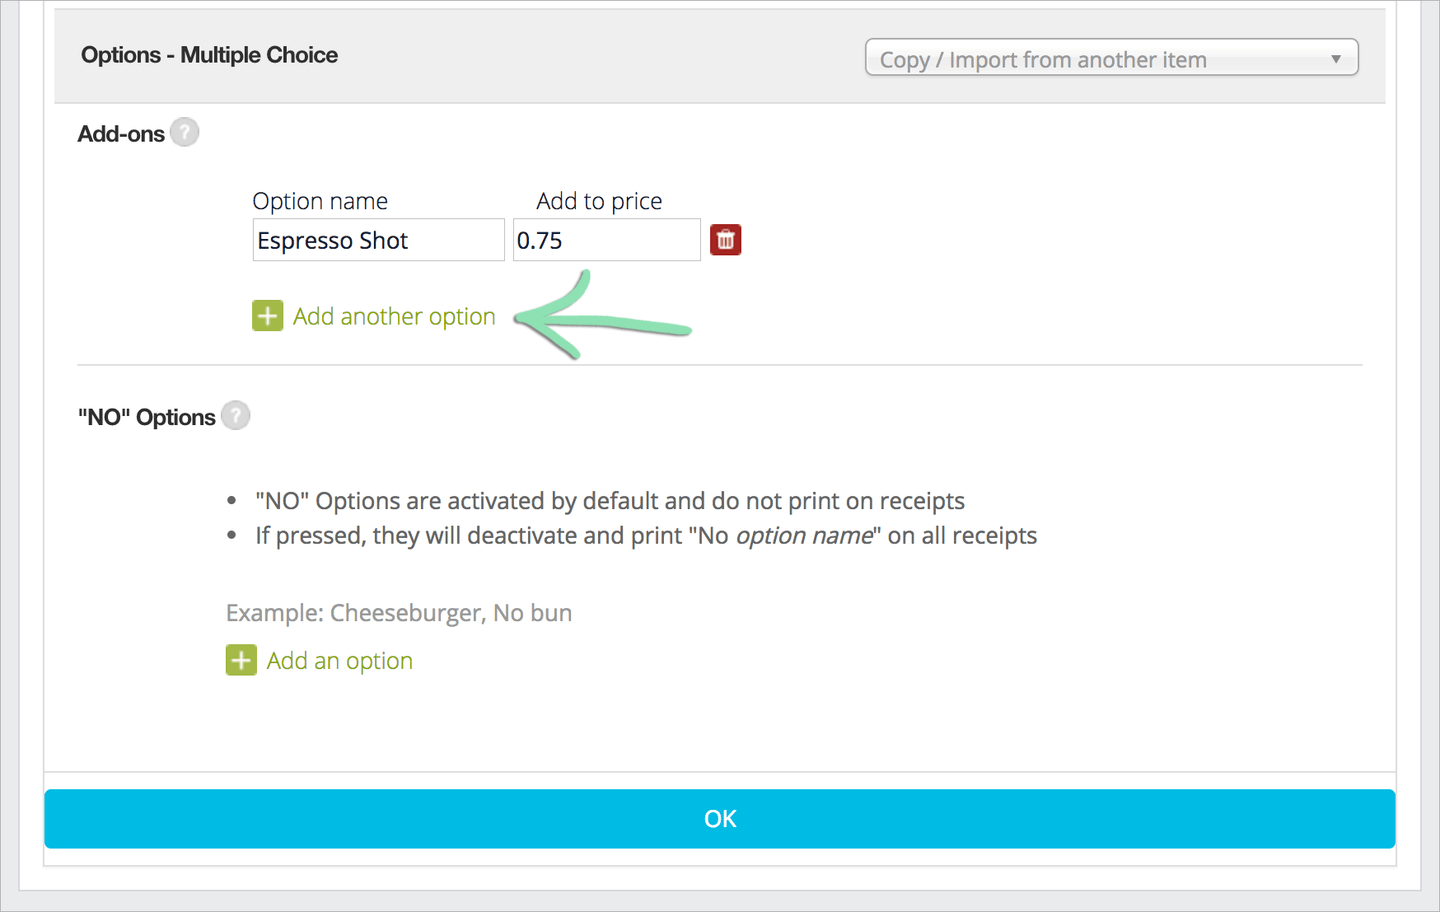
- Click ‘OK’ to save changes.

- If adding modifiers from BackOffice, get updates on the iOS or Android register to sync the changes to the register.
If you receive an error while getting updates, visit our troubleshooting guide for help.
Copy Modifiers from an Item
If multiple items use the same modifiers, copy the modifiers from an existing item to other items. This helps avoid reentering modifiers one by one.
- Click 'Copy / Import from another item' next to 'Groups - Single Choice'.
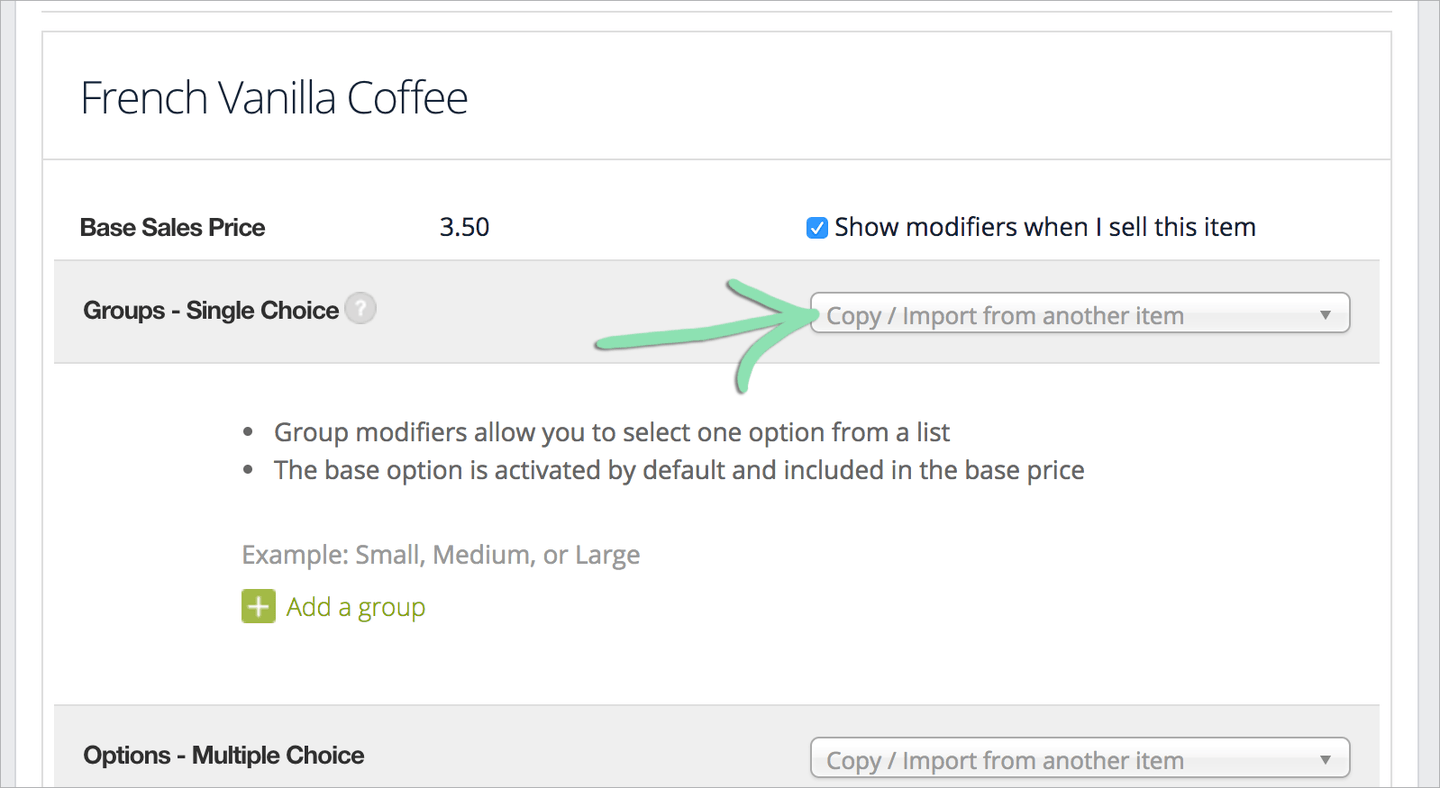
- Search for an item and select a group of single choice modifiers to copy.
This adds the selected group of modifiers to the item.

- Repeat step 2 for each additional group of single choice modifiers.
- Click the copy / import option next to 'Options - Multiple Choice'.
- Search for and select an item to copy its multiple choice modifiers.
This adds the modifiers from the selected item to this one.
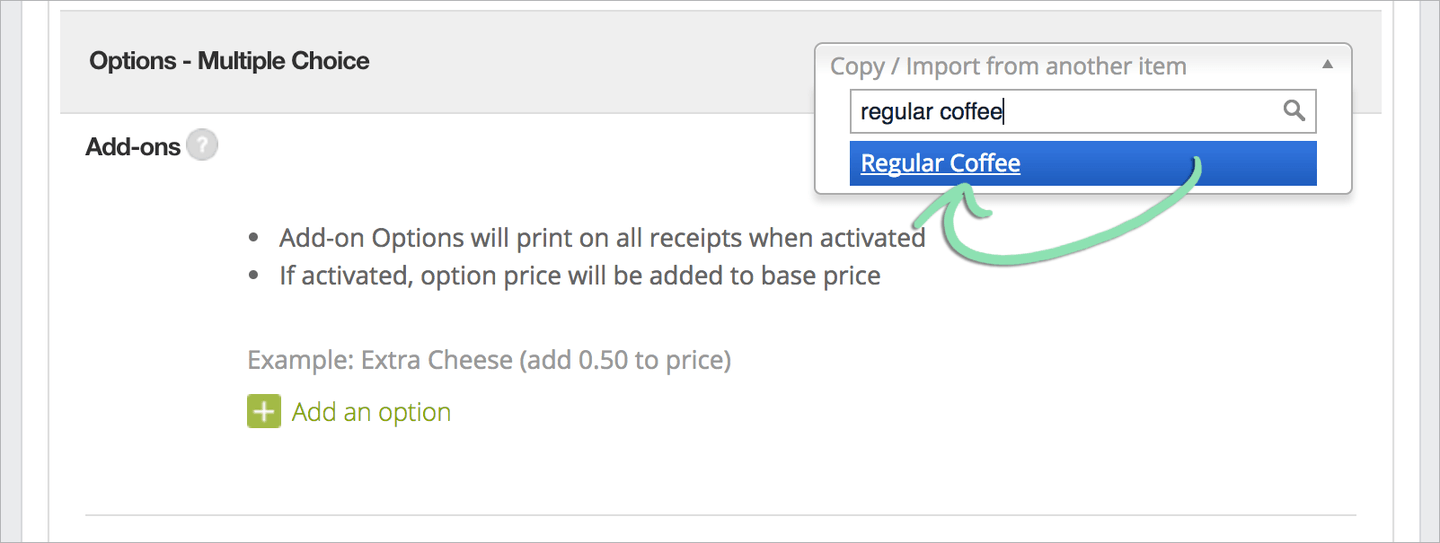
- Click 'OK' to save changes.
- If adding modifiers from BackOffice, get updates on the iOS or Android register to sync the changes to the register.
If you receive an error while getting updates, visit our troubleshooting guide for help.
Modifiers at the Register
Cashiers can ring up a customer’s modifier selections on the register in just a few taps. Because modifiers print on kitchen tickets and receipts, prep staff will know exactly how to prepare the order.
Click to view a sample kitchen ticket with modifiers
- Tap, search, or scan an item to ring it up.
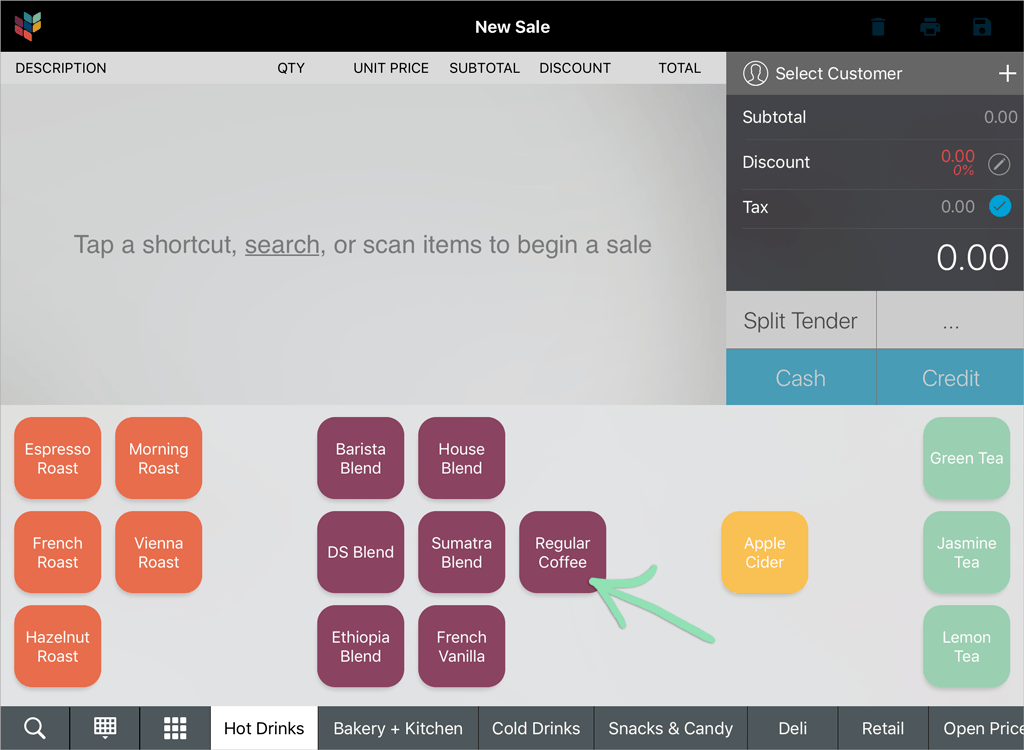
- Tap to select / deselect modifiers, then press 'Done'.
 Don’t see the modifier buttons? Tap the line item on the New Sale screen to pull them up.
 - (Optional) Tap a line item to edit its modifier selections.
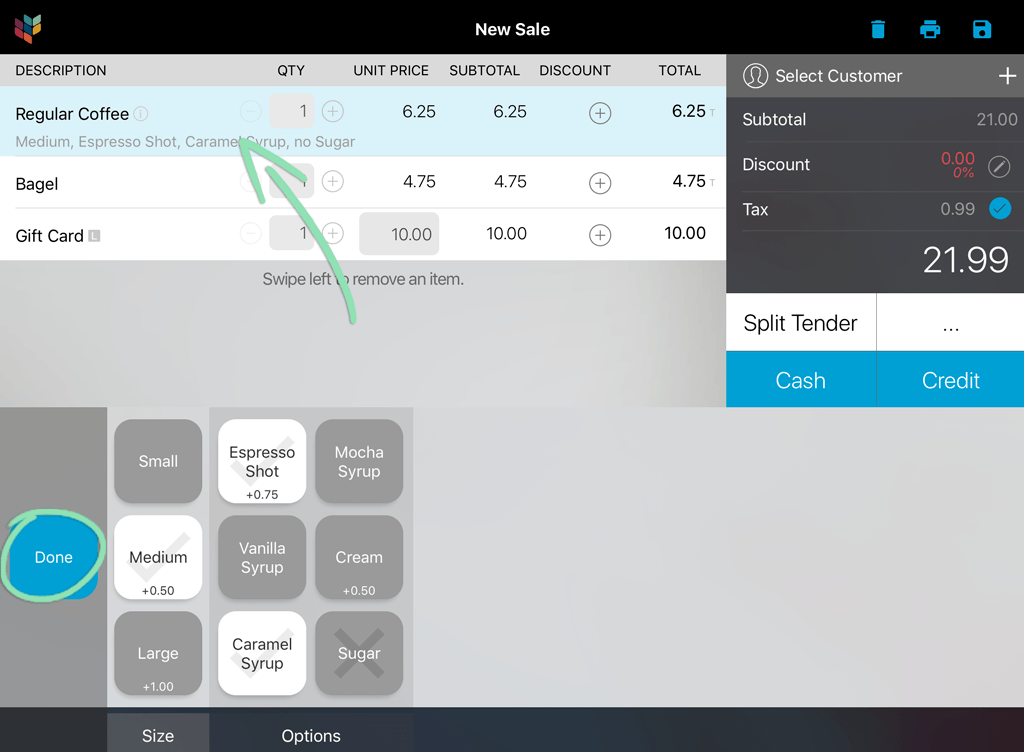
- Finish the sale as usual.
If you’re not sure how to finish, visit our Running Sales at the Register article for help.
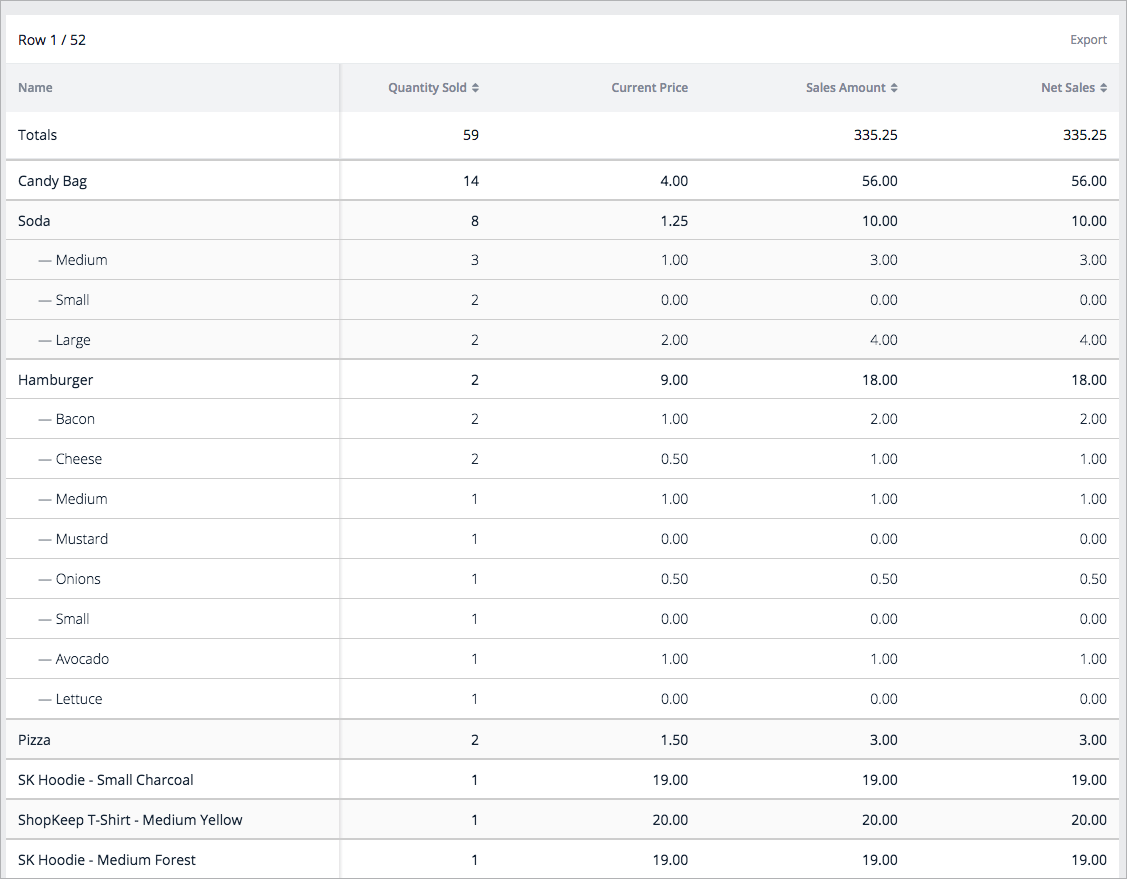
Modifier Reporting
Use the Sales by Modifier and Variant report to see which modifiers are most and least popular so you can decide what to up-sell.
NOTE: This feature is only available for Lightspeed Retail merchants on select pricing packages.
- Click 'Reports' and select 'Modifiers and Variants'.

The Sales by Modifier and Variant report shows how much of each item, modifier, and variant were sold. To learn how to read, filter, export, and print this report, visit our full Modifiers & Variants Report article.