Retail POS (S-Series) for Specialty Food Shops
If you have not set up your BackOffice yet, visit part 1: BackOffice for Specialty Food Shops.
Learn about some of the everyday register processes you’ll use to run your specialty food shop. In this guide, we’ll cover how to ring up a sale, add customers, apply discounts, and enable extra settings to make the register more efficient and secure.
Ring Up a Sale
From starting a transaction to collecting a customer’s payment, learn the basics of running a sale on your new register. Before following along, make sure to open a register shift to get things started.
If you have questions about ringing up sales, visit our Register FAQ.
Add & Remove Items
To start a sale, add the customer’s purchase items to the New Sale screen. Don’t worry if you make a mistake, you can remove items before completing the sale.
- Enter your 4-digit register code and tap 'Sign In'.
If you cannot sign in, visit our Login/Access Troubleshooting guide for help.

- Tap a shortcut, search by item name, SKU, or UPC, or scan an item to add it to the sale.
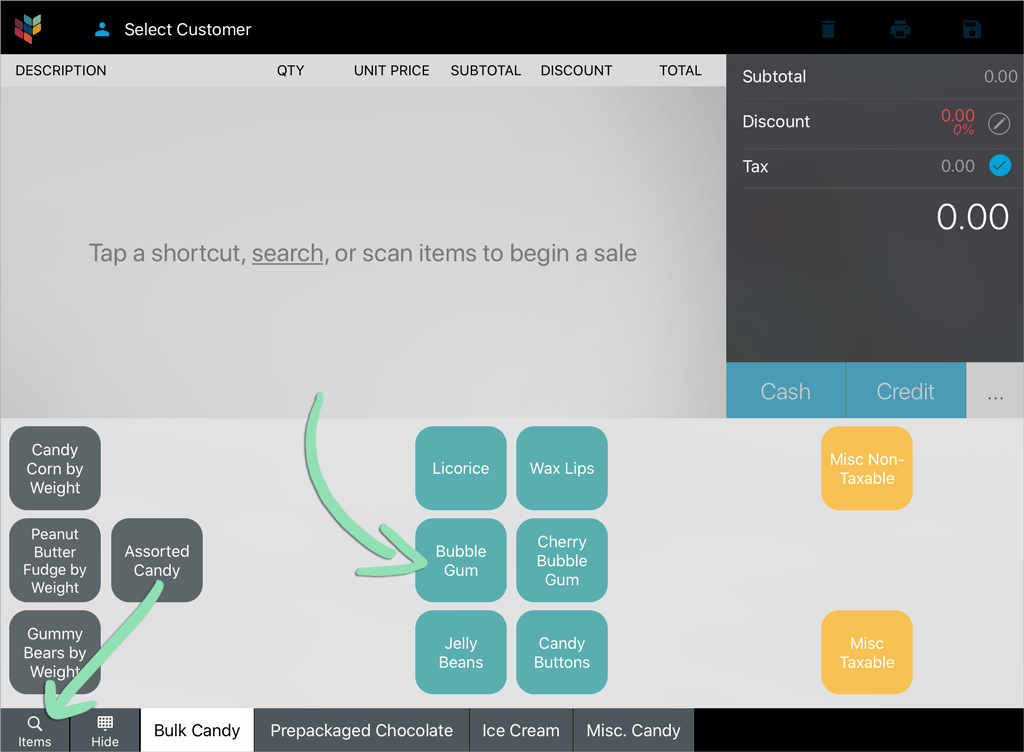
- (Optional) Swipe left across an item and tap 'Delete' to remove the item from the sale.
Or tap the trash can icon at the top to remove all items.

Unit Priced Items
Cheese, candy, and other specialty shops tend to sell some items in bulk by weight. Here we’ll show how to ring up one of the unit priced items we created in our BackOffice guide.
Learn how to weigh items using the integrated Star Micronics mG-S8200 Weight Scale on the Retail POS (S-Series) app for Android here.
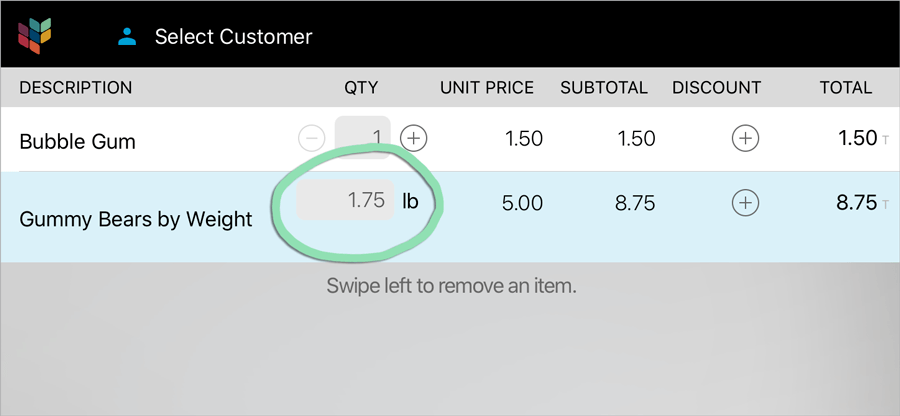
- Add a unit priced item to the sale.
- Use the keypad to enter the purchase quantity and tap 'Done'.
You can enter up to 4 decimal places.

- (Optional) Tap the quantity to change it.
To learn how to create unit priced items, visit our full Unit Priced Items article.
Complete the Sale
After ringing up the customer’s purchase, collect their payment to finish up the transaction.
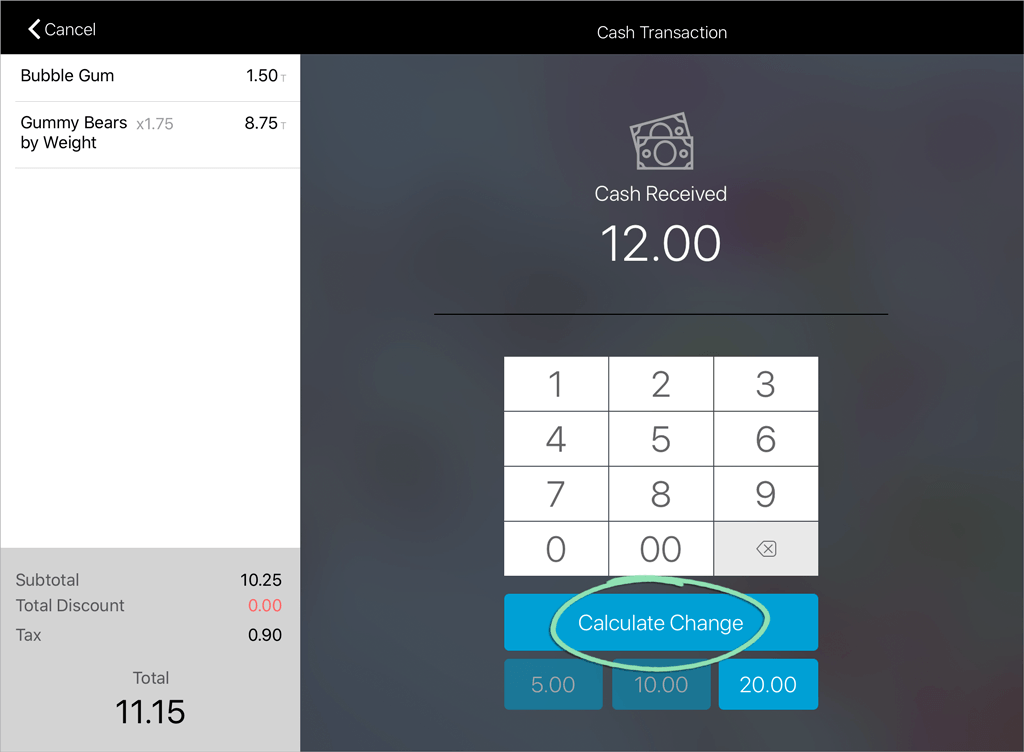
- Select the customer’s payment method.
‘Cash’, ‘Credit’, or tap ‘…’ to show additional tenders.

- For Cash, enter how much the customer gives you and tap 'Calculate Change' to confirm.
Tender buttons below ‘Calculate Change’ update dynamically based on the total transaction amount if it is over $20. For example, a total of 28.23 will have the buttons 29.00, 30.00, and 40.00.
-
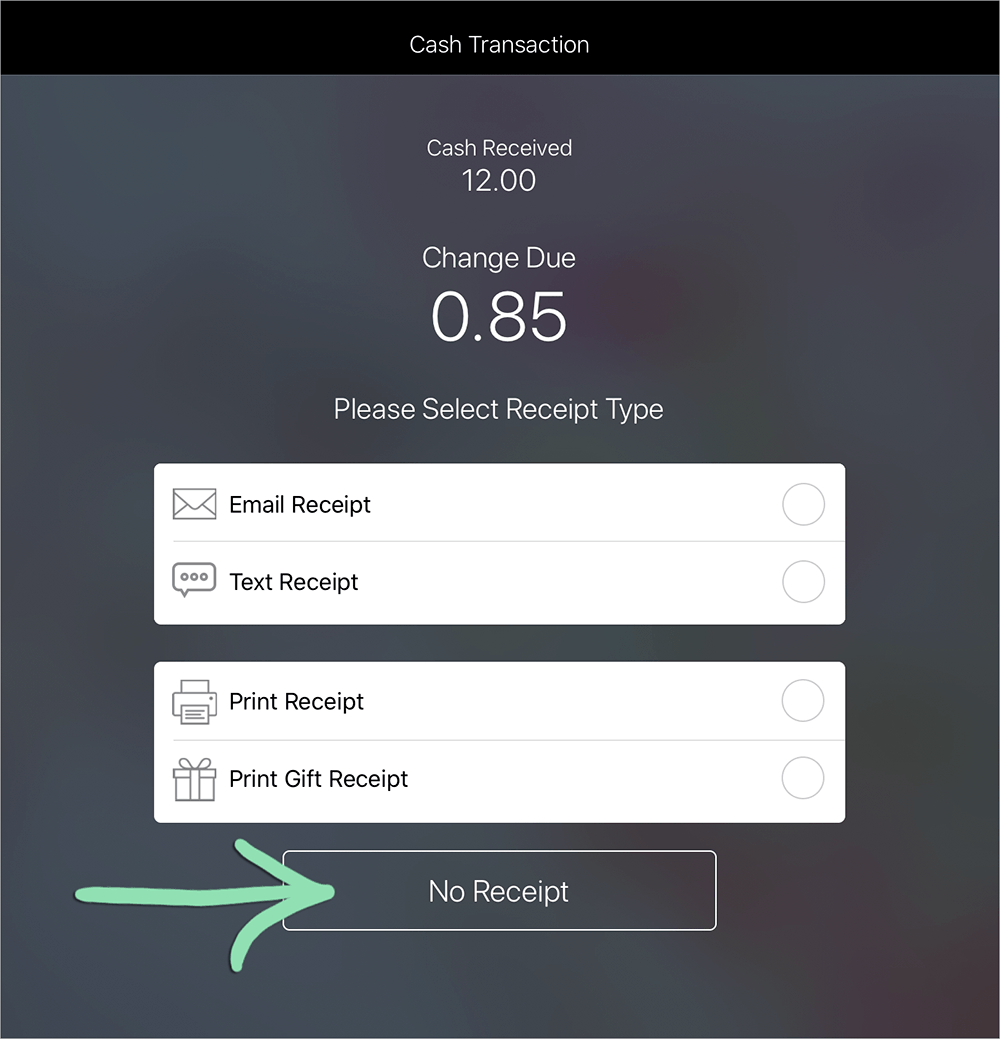
Select a receipt option and tap ‘Done’, or tap 'No Receipt'.

Visit our Running Sales at the Register article to learn more about running, modifying, and finishing sales.
Adding Customers
Add customers to the customer list to track their contact details and the purchases they make at your business. After adding a new customer, they will be automatically tagged to the current sale in progress at the register. With an active internet connection, customers sync to BackOffice, allowing you to use Mailchimp Integration to send marketing emails.
- Tap 'Select Customer' (iOS) or the customer icon (Android).
Add or tag a customer at any point before tendering the sale. A customer cannot be tagged during checkout after the sale is tendered.

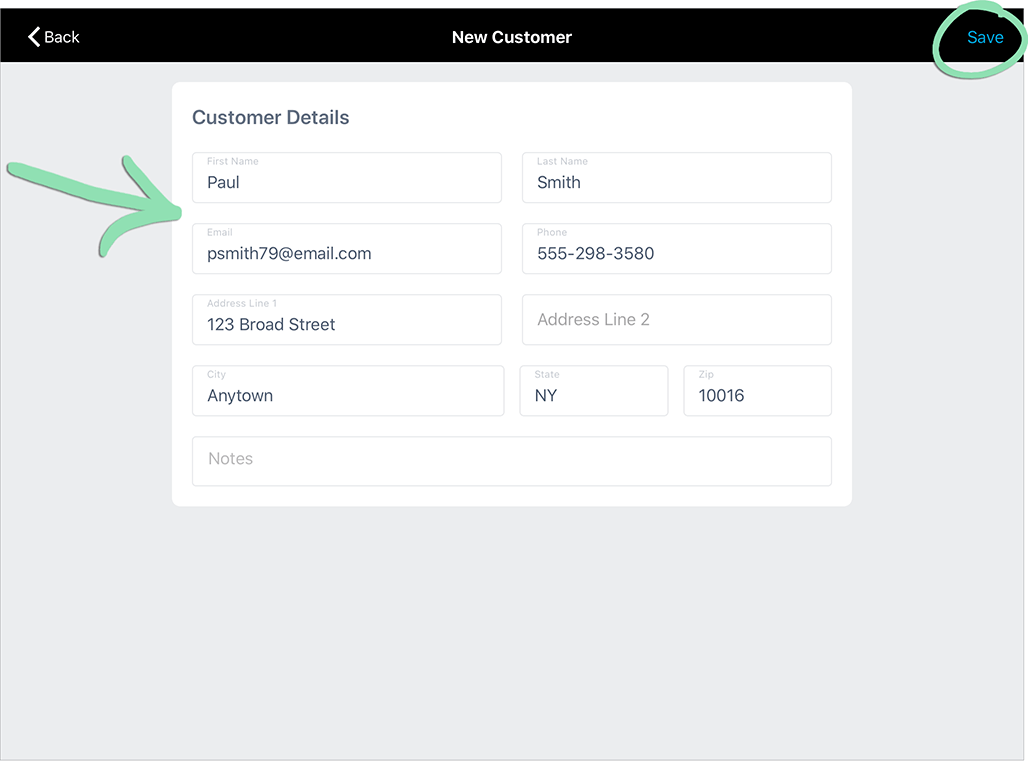
- Tap the '+' to create a new customer.

- Enter the customer’s information and tap 'Save' (iOS) or the disk icon (Android).
At minimum, one of the following must be entered: first or last name, email address, or phone number.
After saving, the new customer will automatically be tagged to the current sale. Learn how to change the customer tagged to the sale here.
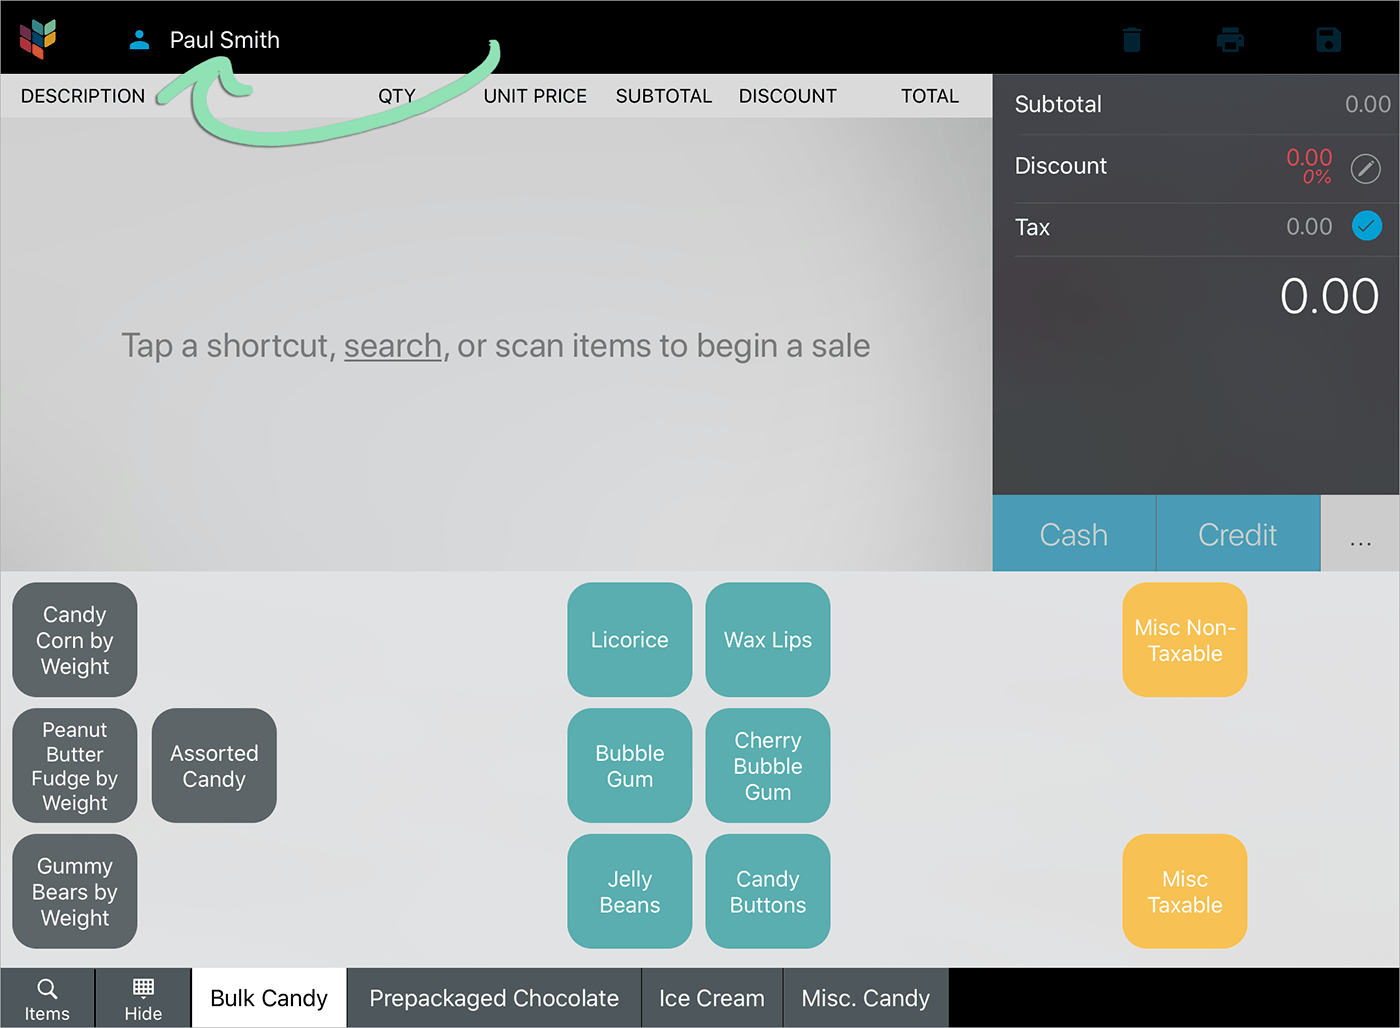
When the customer comes back in the future, tap their name on the customer list to tag them to the sale.

Visit our Manage Customers article to learn how to manage customers in BackOffice.
Discounts at the Register
Learn how to apply the discounts created in our BackOffice guide to sales at the register.
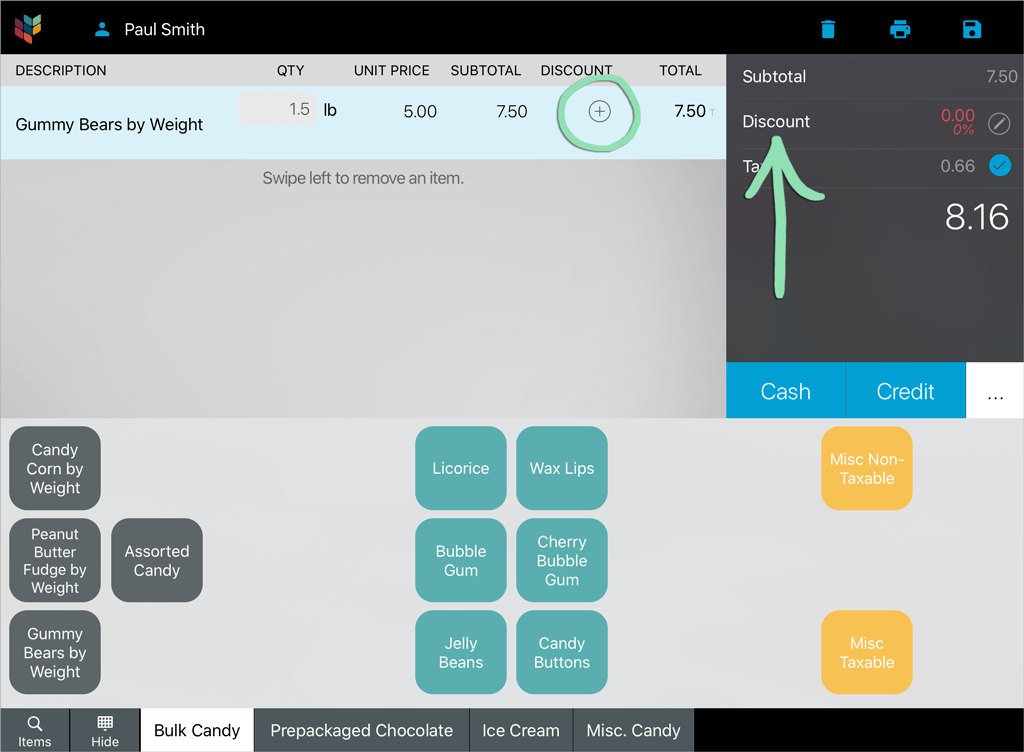
- Tap the discount button for a line item or for the entire sale.
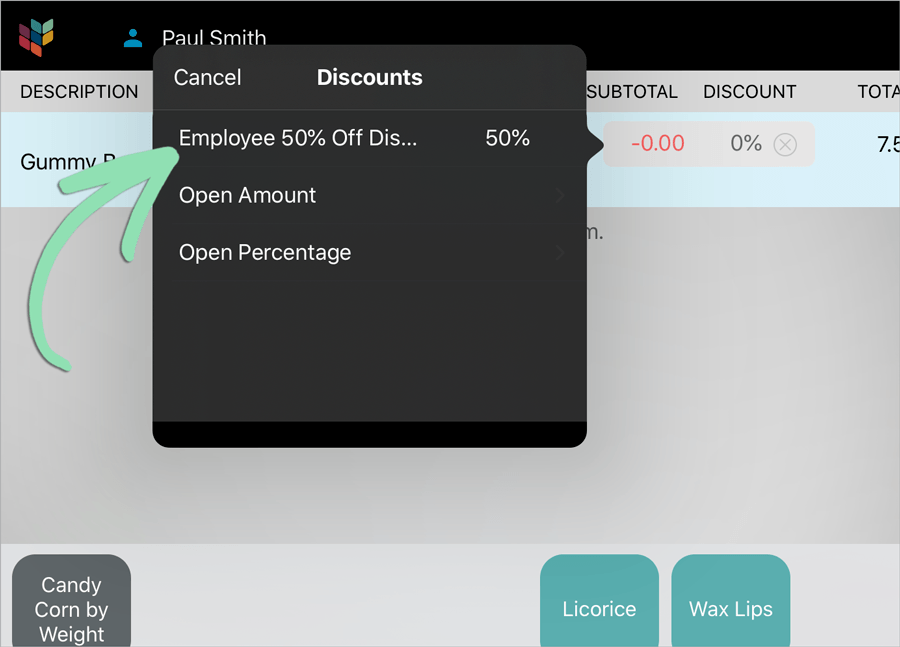
- Select a discount to apply to the sale.
‘Open’ means the cashier enters the discount amount or percentage.
Visit our full Discounts article to see how discounts appear on receipts and reporting.
Additional Settings
Here are some handpicked settings that specialty food shops can use to customize how the register works.
Always Print or Email Receipt
Switch on an automatic receipt option so cashiers don’t have to manually make a receipt selection at the end of every transaction.
- Open iPad Settings for Retail POS (S-Series).
For the Retail POS (S-Series) app for Android, access this setting from the ‘Setup’ section of the register menu.
- Toggle the switches to set your preference.
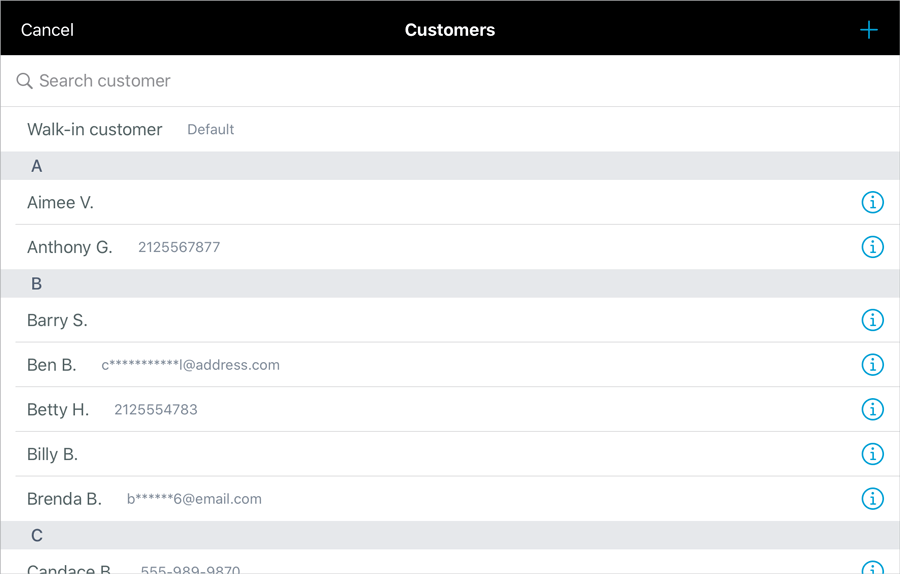
Mask Customer Information
Enable the Mask Customer Name and Email setting to protect your customers’ privacy when the register’s customer list is open.
Note: This feature is only available on the Retail POS (S-Series) app for iOS.
- Open iPad Settings for Retail POS (S-Series).
- Tap the switch to turn it on.

With this setting enabled, last names are hidden and email addresses are partially hidden.
Read our complete iPad Settings for Retail POS (S-Series) article to discover even more register settings.