Retail POS (S-Series) for Recreation & Entertainment
If you have not set up BackOffice yet, visit part 1: BackOffice Setup for Recreation & Entertainment.
From selling services to managing customers, this guide covers important register functions used to run a recreation or entertainment-based business, such as a dance studio or music school.
Daily Register Functions
Performing sales, returns, and applying discounts are all basic register features used on a regular basis.
If you have any questions about running sales or returns, visit our Register FAQ.
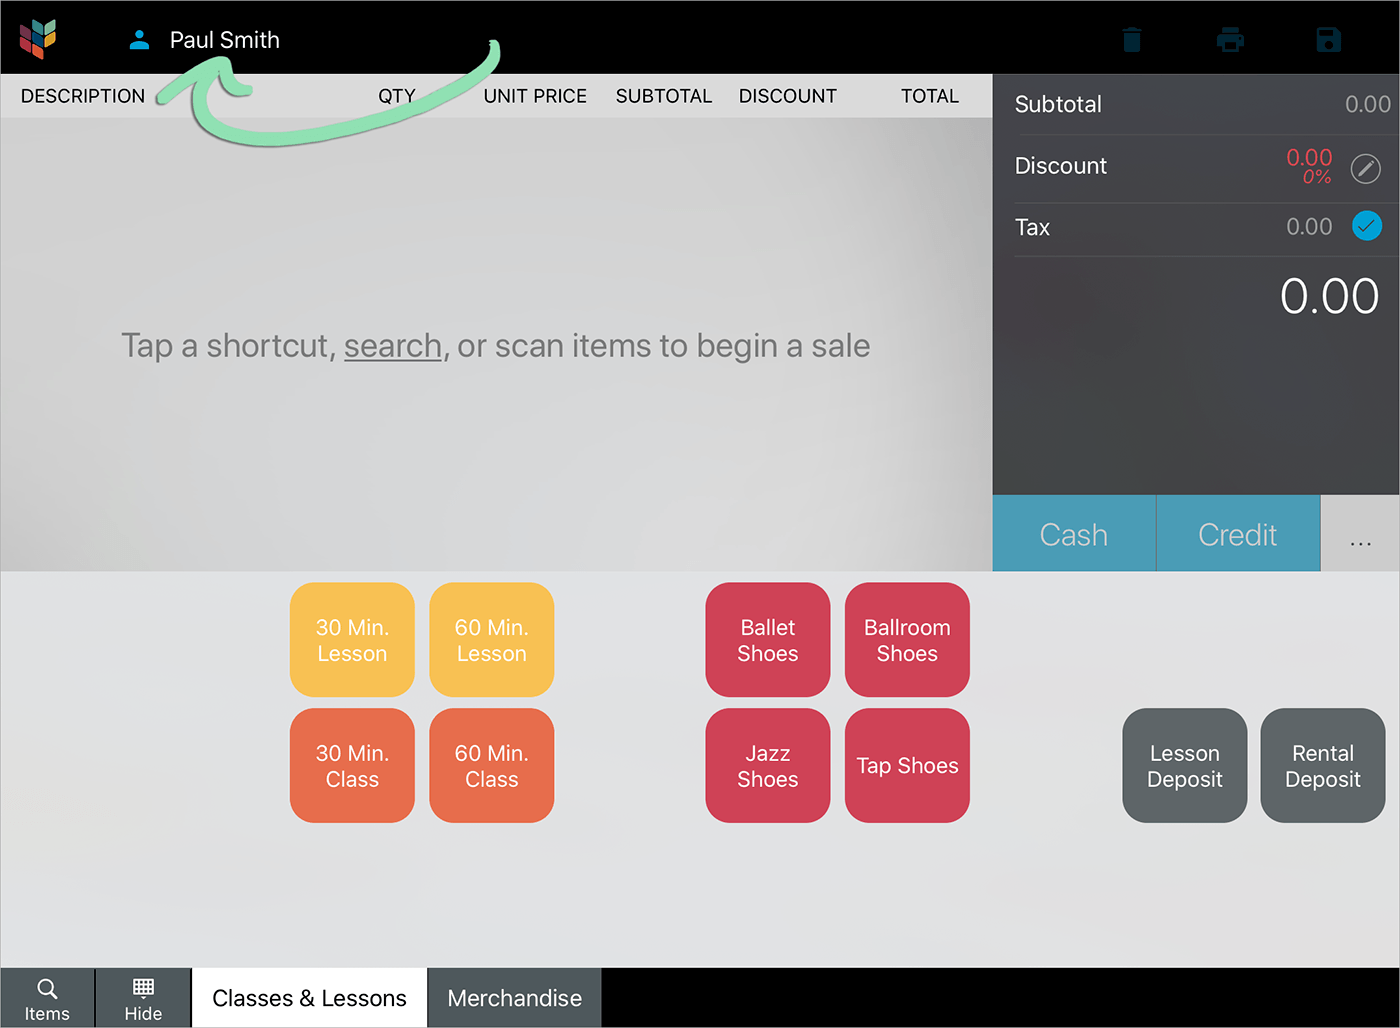
Sell Items, Services, and Deposits
Whether selling a product or service or collecting a deposit, the process at the register is the same. Follow along below to learn how to ring up and process a sale.
Watch our Run a Sale & Return video:
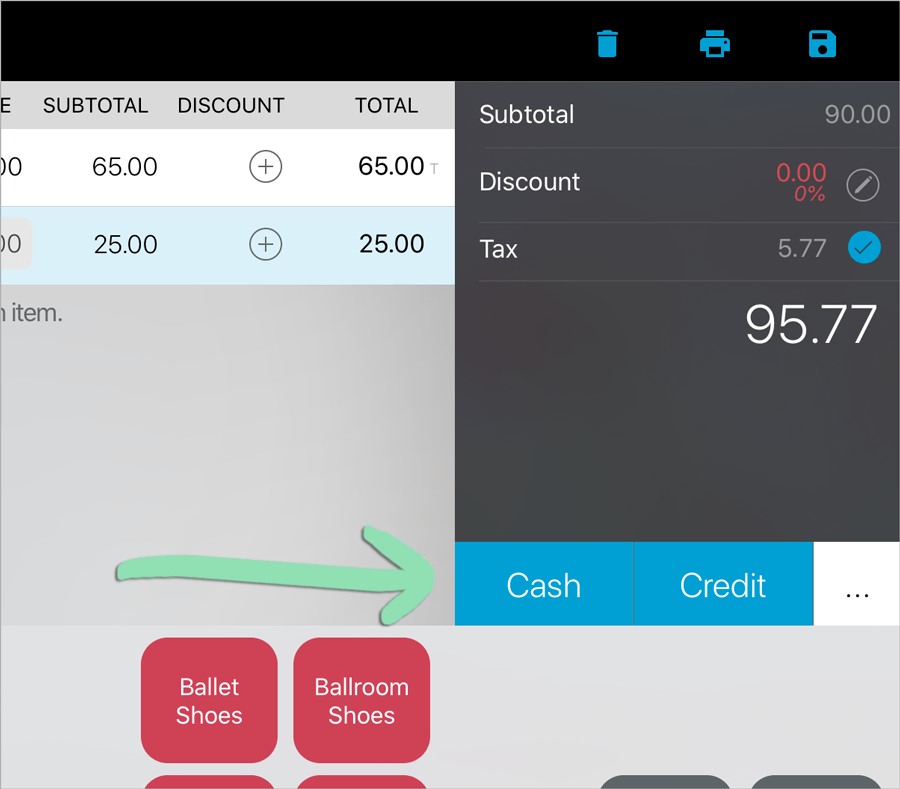
- Tap a shortcut, search by item name, SKU, or UPC, or scan an item to add it to the sale.

- (Optional) If an item is priced 'At the Register', enter its price and tap 'Done'.
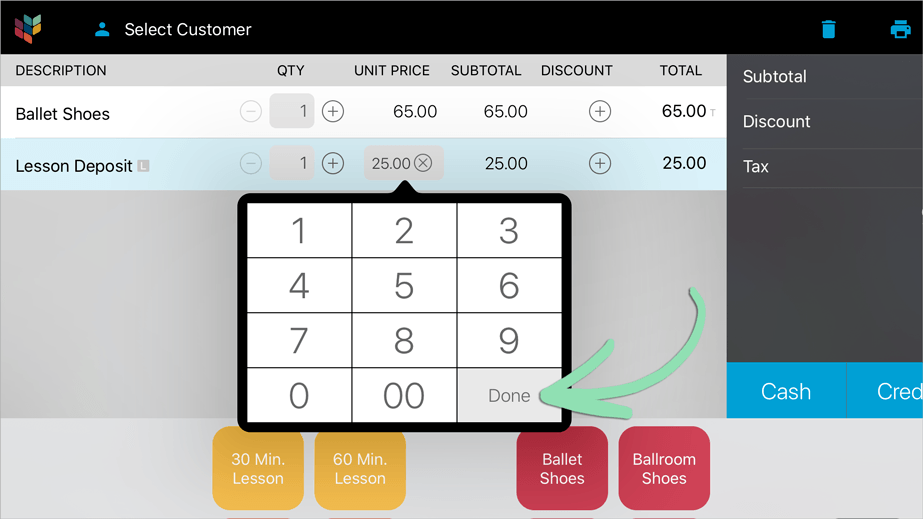
- Select a tender to complete the transaction.
Tap ‘…’ to reveal additional tender options.
Visit the complete Running Sales support article to learn other actions you can perform during a sale.
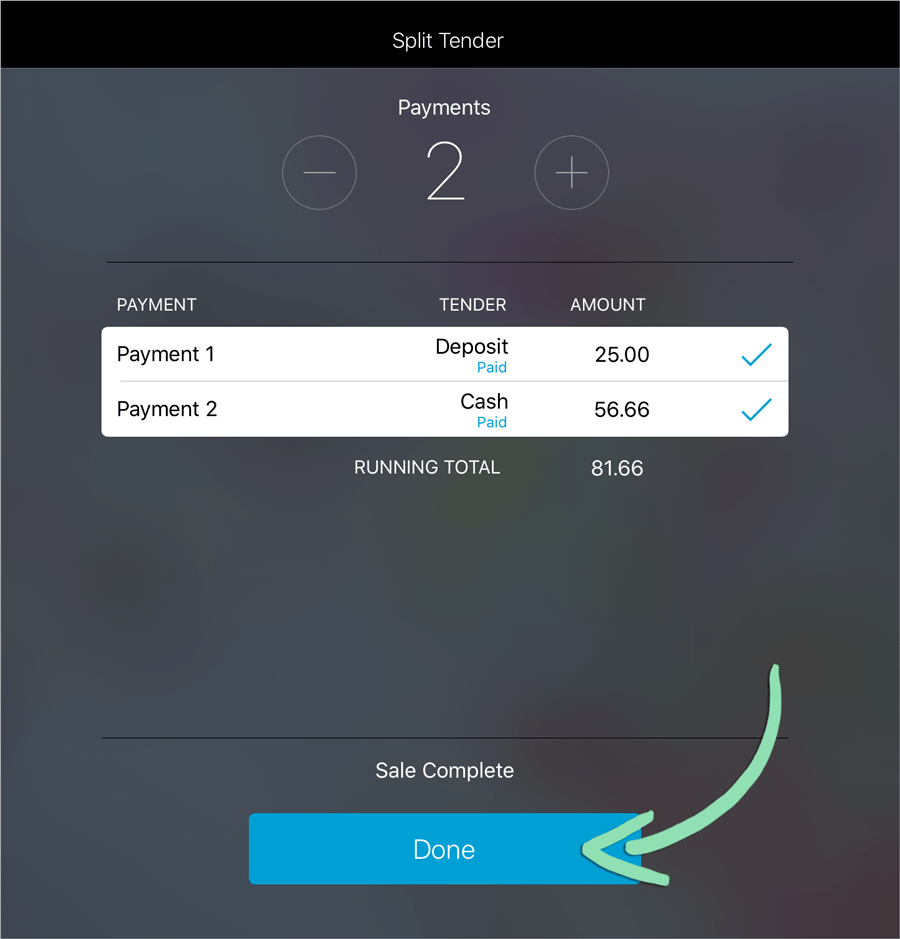
Apply a Deposit to a Sale
Perform a split tender transaction to apply a deposit paid for a service, such as a lesson, to the balance due for that service. Not sure how much deposit a customer paid? Manually look up their transaction via the Sales History screen.
- Ring up a sale for the service the customer is purchasing.
- Tap ‘...’ and select ‘Split Tender’.

- For payment 1, set the tender to ‘Deposit’ and enter the deposit amount already paid by the customer.
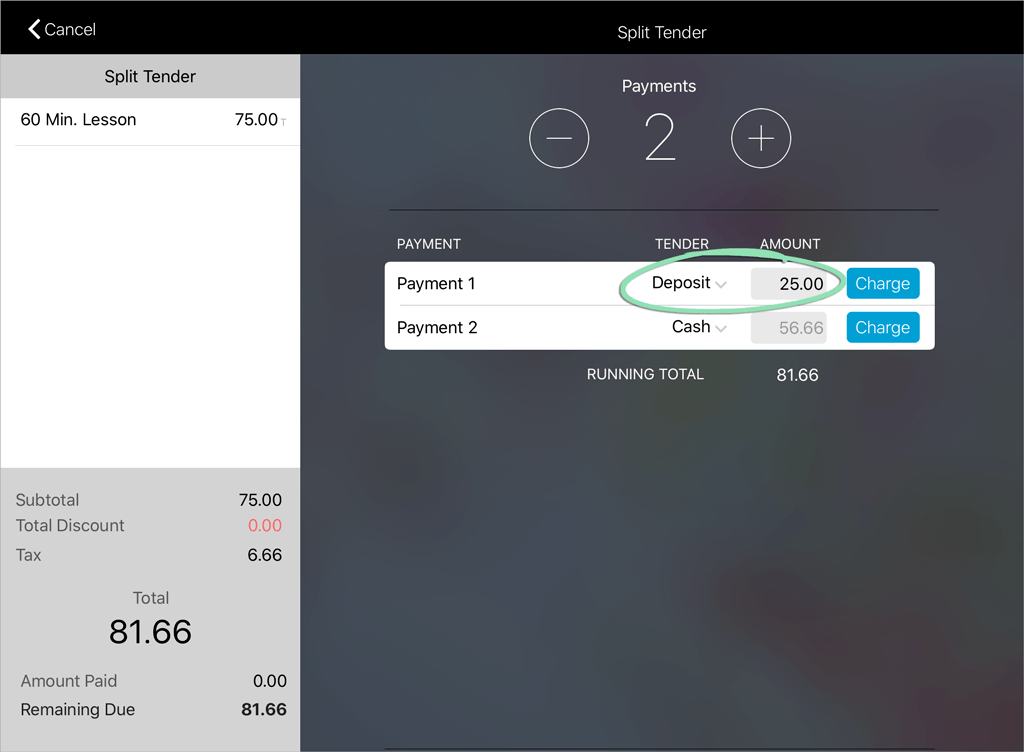
- Tap ‘Charge’ and follow the prompts to process payment 1.
- For payment 2, set the tender to the payment method the customer will use to pay the balance.
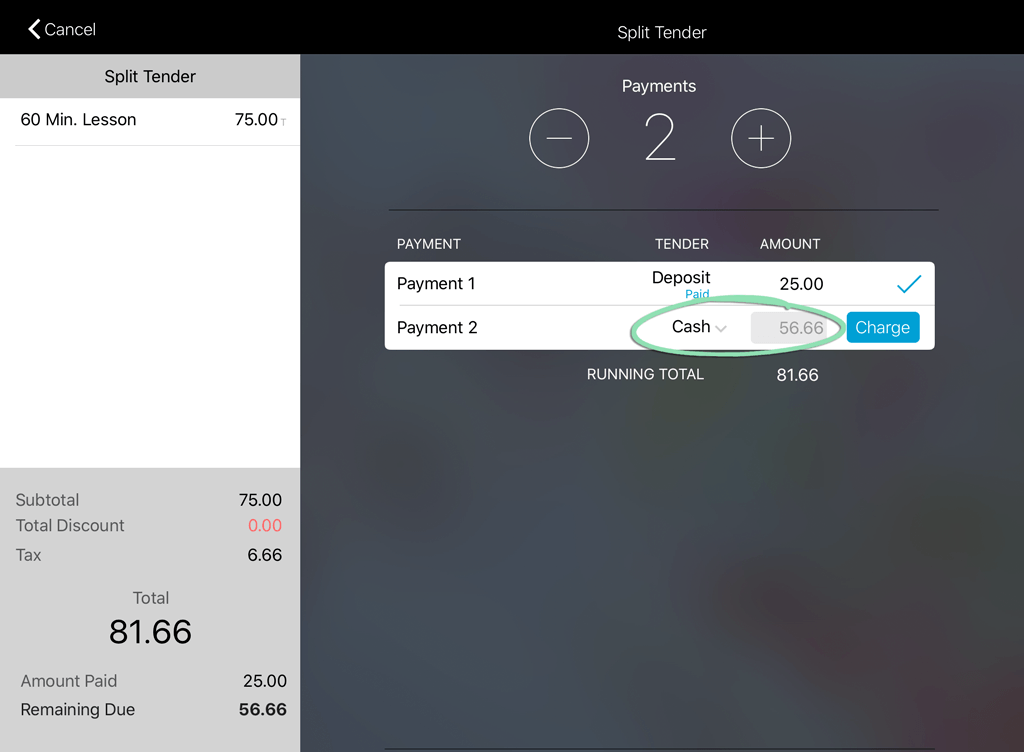
- Tap ‘Charge’ and follow the prompts to process payment 2.
- When all payments have been paid, tap ‘Done’ to finish the sale.
See more examples of how deposits are used at the register in our Liabilities and Redemptions article.
Apply Discounts
Some businesses offer promotional pricing or discounts to entice new customers. Here’s how to apply a discount to a sale at the register.
- Tap the discount button on the sale or on a line item.

- Select a discount to apply.

Check out the full Discounts support article to learn how to manage discount settings.
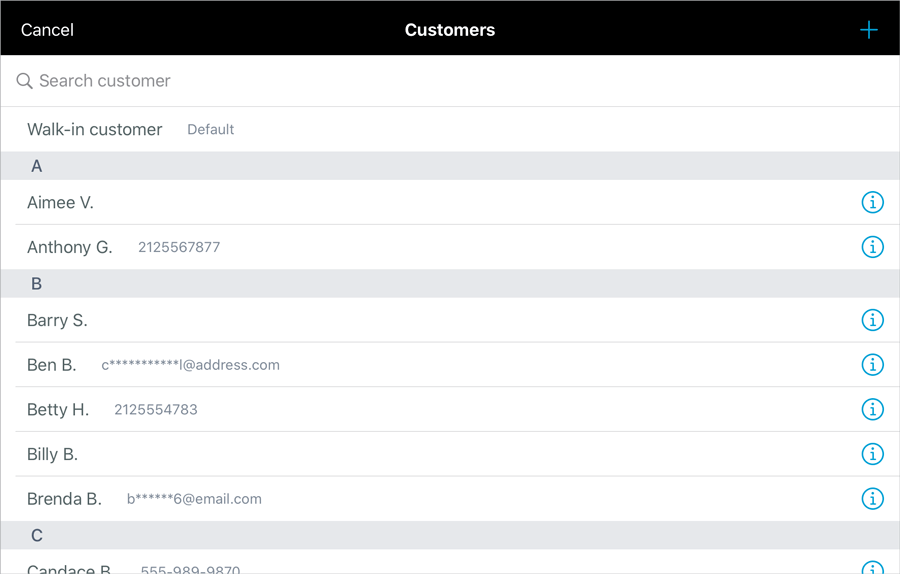
Add Customers
Add customers to the customer list at any point before tendering a transaction to send email receipts and track their purchases. After adding a new customer, they will be automatically tagged to the current sale in progress at the register.
- Tap 'Select Customer' (iOS) or the customer icon (Android).

- Tap the '+' to add a customer.
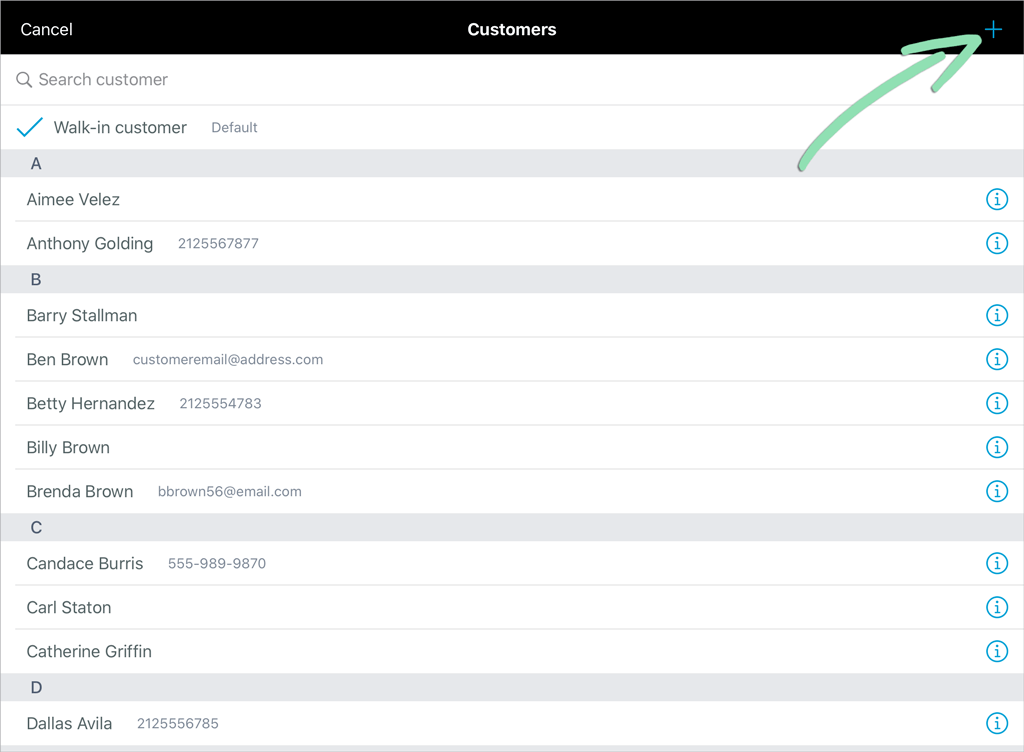
- Enter the new customer’s info and tap 'Done'.
At minimum, one of the following must be entered: first or last name, email address, or phone number.

After saving, the new customer will automatically be tagged to the current sale. Learn how to change the customer tagged to the sale here.
To learn how to edit customers or view their purchase history, visit the full Manage Customers article.
Additional Features
Here are a few additional features handpicked for recreation/entertainment-based businesses.
Sell Gift Cards
After ordering and setting up gift cards, issue them to customers right at the register.
- Ring up the 'Gift Card' item.
- Enter an amount to add to the gift card and tap 'Done'.

- Choose a tender to complete the transaction.
- When prompted, swipe the gift card to activate it.
Wondering how to check a gift card’s balance? Visit our full Gift Cards article for the answer.
Always Print/Email Receipts
Want receipts to print or email by default at the end of a sale? Switch on one of these options to make it automatic and save the cashier a step.
- Open iPad Settings for Retail POS (S-Series).
For the Retail POS (S-Series) app for Android, access this setting from the ‘Setup’ section of the register menu.
- Toggle the switches under 'Receipts' to set your preference.

Mask Customer Information
Masking customer information protects customer privacy by hiding part of customer names and email addresses when the register’s customer list is open.
Note: This setting is only available on the Retail POS (S-Series) app for iOS.
- Open iPad Settings for Retail POS (S-Series).
- Tap the switch next to 'Mask customer name and email' to turn it on.

With this setting enabled, last names are hidden and email addresses are partially obscured.