Manage Suppliers
The Supplier List allows you to organize inventory items by the vendors who provided them. Learn how to use suppliers in Lightspeed Retail, visit the Supplier List to add, rename, and delete suppliers, and assign suppliers to items in BackOffice or at the register.
Understanding Suppliers in Lightspeed Retail
To understand how suppliers in Lightspeed Retail impact inventory management, let’s define what they are, look at some examples, and review how they are used.
| Item | Supplier |
| Bottled Water | Grocery Supply Co. |
| T-Shirt | USA Shirts |
| Sheet Set | Bedding and More |
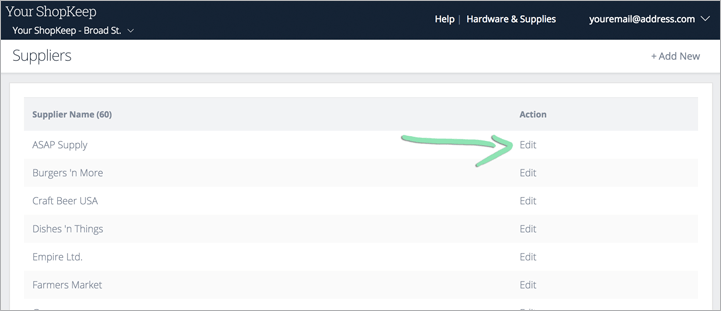
Supplier List
View a list of existing suppliers, add new suppliers, edit supplier names, and delete suppliers all from one BackOffice page.
For businesses with multiple linked locations, the same set of suppliers is used for each linked Lightspeed Retail store. The Supplier List for each linked location is identical, and adding, renaming, or deleting a supplier in one location will automatically make that change in all other locations. Item assignments must be managed separately for items in each location.
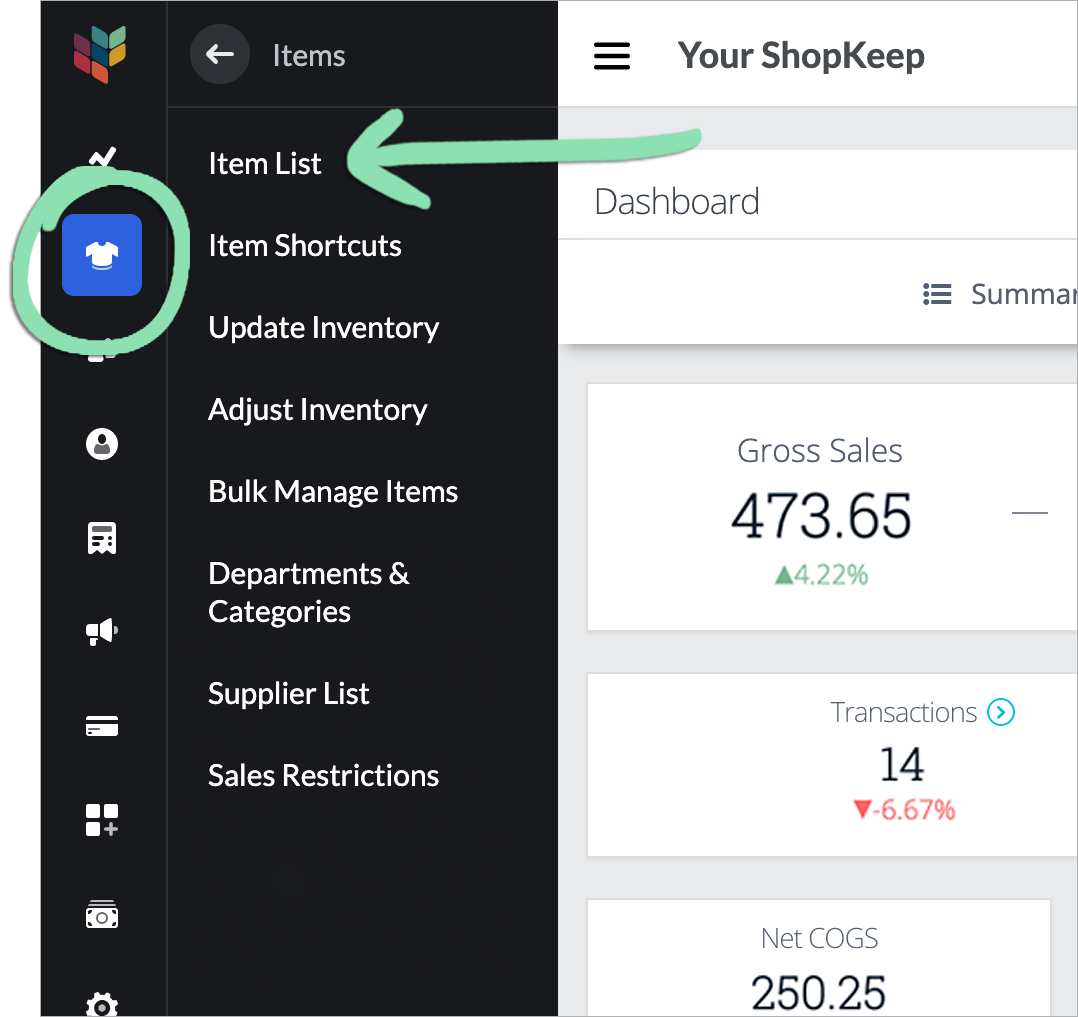
- In BackOffice, click ‘Items’, then ‘Supplier List’.

Add a New Supplier
- Click 'Add New'.

- Enter the supplier’s name and click ‘Continue’.
If you have multiple linked locations, the supplier will be added to all linked locations automatically.

-
Assign the supplier to inventory items obtained from that vendor.

- (Optional) Repeat step 3 in each other linked location to assign the supplier to items in those locations.
For help switching between linked locations in BackOffice, visit our Multi-Store Management article.
Rename a Supplier
- Click ‘Edit’ next to a supplier.
- Enter the updated supplier name and click ‘Continue’.
If you have multiple linked locations, the supplier will be updated in all linked locations automatically.
Renaming a supplier will also update its name in historical reporting. To learn more, visit the article for a specific report from our BackOffice support page.
Delete a Supplier
- Click ‘Edit’ next to a supplier.

- Select ‘Delete supplier’.
Note: If a supplier has items assigned to it, deleting it will automatically unassign the items. Follow the steps here to assign the items to a new supplier.

- Click 'Delete' to confirm.
If you have multiple linked locations, the supplier will be deleted from all linked locations automatically.

Item Assignments
Assign items to suppliers from BackOffice or the Retail POS (S-Series) app (employees with BackOffice permissions only) to organize the business’s inventory by vendor. For large inventories (50+ items), we recommend using Bulk Management to create or modify items.
- Visit the Item List in BackOffice or from the Retail POS (S-Series) app (employees with BackOffice permissions only.
- In BackOffice, click ‘Items’ and select ‘Item List’.
- In the Retail POS (S-Series) app for iOS, tap ‘Manage Items’ on the Main Menu. For the Retail POS (S-Series) app for Android, tap ‘Setup’ on the register menu, then select ‘Manage Items’.
Retail POS (S-Series) app for iOS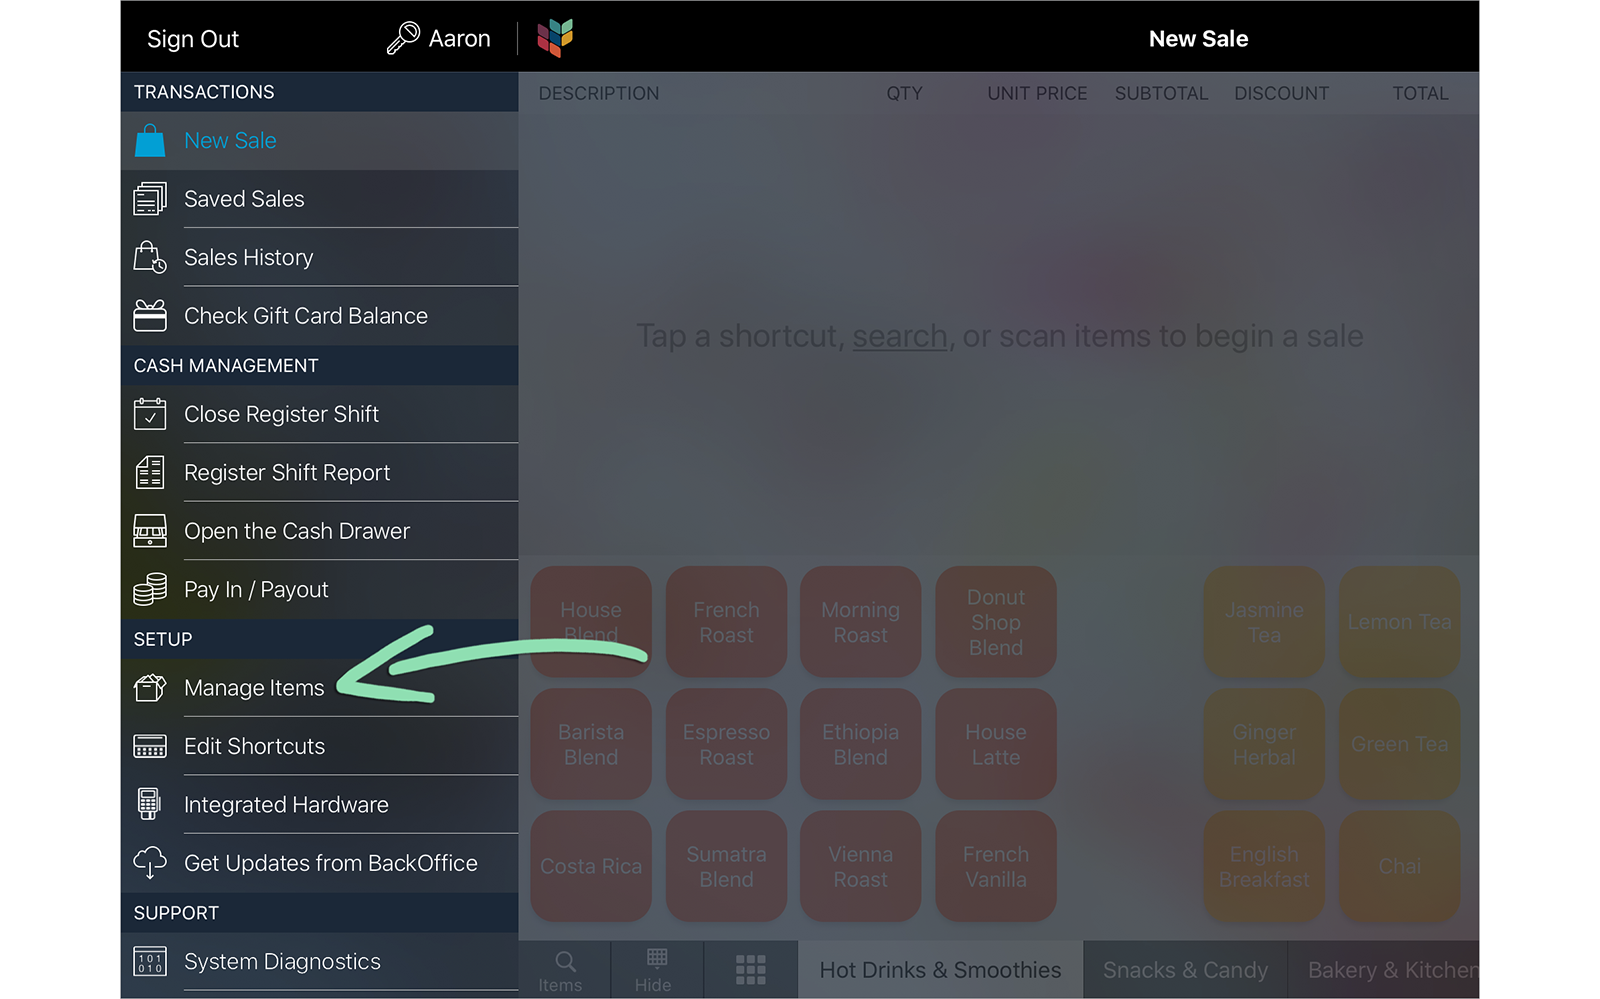 Retail POS (S-Series) app for Android
- Click ‘Add New’ to create a new item or select an existing item to edit.
To learn how to edit several existing items at once from the Item List, visit our Bulk Edit article.
 If adding a new item, visit one of the articles below for a complete walkthrough:
 - Choose a ‘Supplier’ or select ‘Add a new supplier’ from the drop-down to create a new one.
Changing the supplier assigned to an item will also update this information in historical reporting. To learn more, visit the article for a specific report from our BackOffice support page.
- (Optional) Enter the supplier’s item ID.

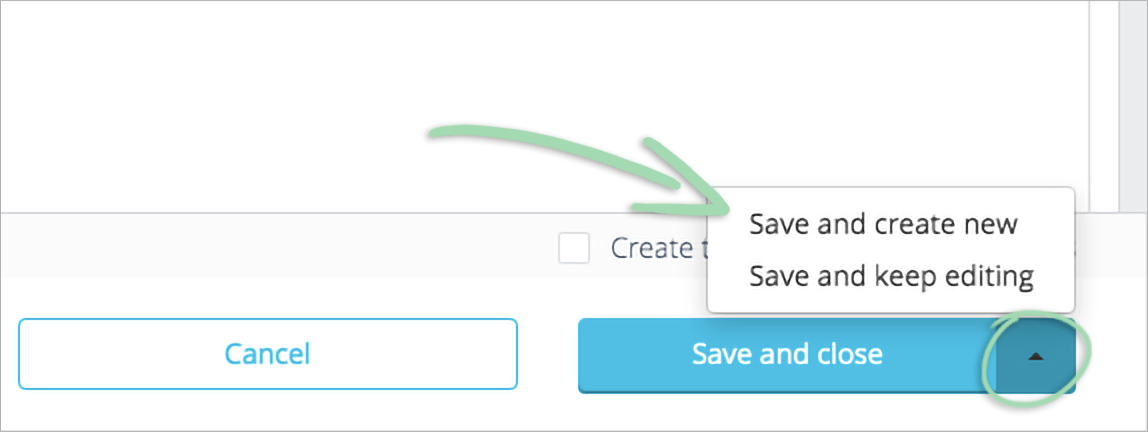
- Select a save option to save changes.
- If adding or editing the item in BackOffice, get updates on the iOS or Android register to sync the changes to the register.
Receiving an error while getting updates? Visit our troubleshooting guide for help.
- (Optional) Repeat steps 1 - 6 in each other linked location to assign suppliers to items in those locations.
For help switching between linked locations in BackOffice, visit our Multi-Store Management article.