Retail POS (S-Series) for
Food Trucks
If you have not set up your BackOffice yet, visit part 1: BackOffice Setup for Food Trucks.
For food trucks, the register needs to be efficient so the line moves and orders get out quickly. This guide covers ordering, payments, and some extra settings designed to help speed things up.
Orders at the Register
From starting an order to accepting payment, here are some processes you’ll use every day on the register.
If you have any questions about ringing up orders, visit our Register FAQ.
Begin an Order
Ring up a customer’s menu items, tweak their order with modifiers, and tender the sale to print tickets to the ticket printer.
- On the New Sale screen, tap an item to add it to the order.

- (Optional) If an item has modifiers, make selections and tap 'Done'.
If you have not yet set up modifiers, visit our BackOffice guide for help.

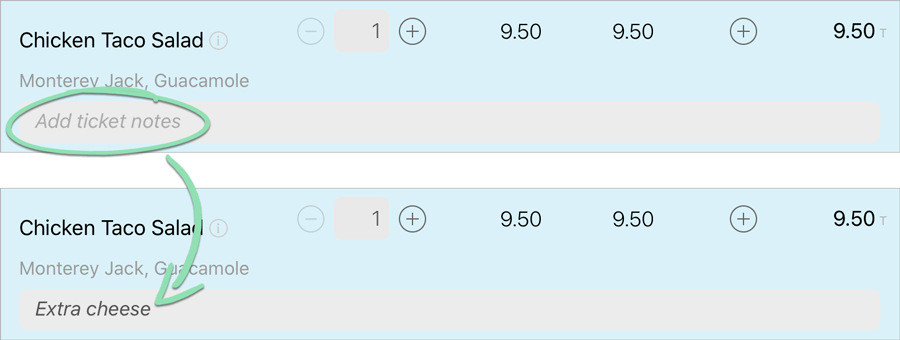
- (Optional) For items assigned to a kitchen ticket printer, tap 'Add ticket notes' to add notes for the kitchen.
For the Retail POS (S-Series) app on Android, follow the steps here to add notes to a ticket.
- Select the customer's payment tender to complete the sale.
A ticket automatically prints for any items assigned to a printer group.

Visit our Running Sales article to learn about additional ordering actions, such as changing quantities or removing items.
Apply Discounts
You saw how to create custom discounts in our BackOffice guide. Now learn how to apply a discount to an order at the register.
- Tap the discount button for the entire order or for a line item.
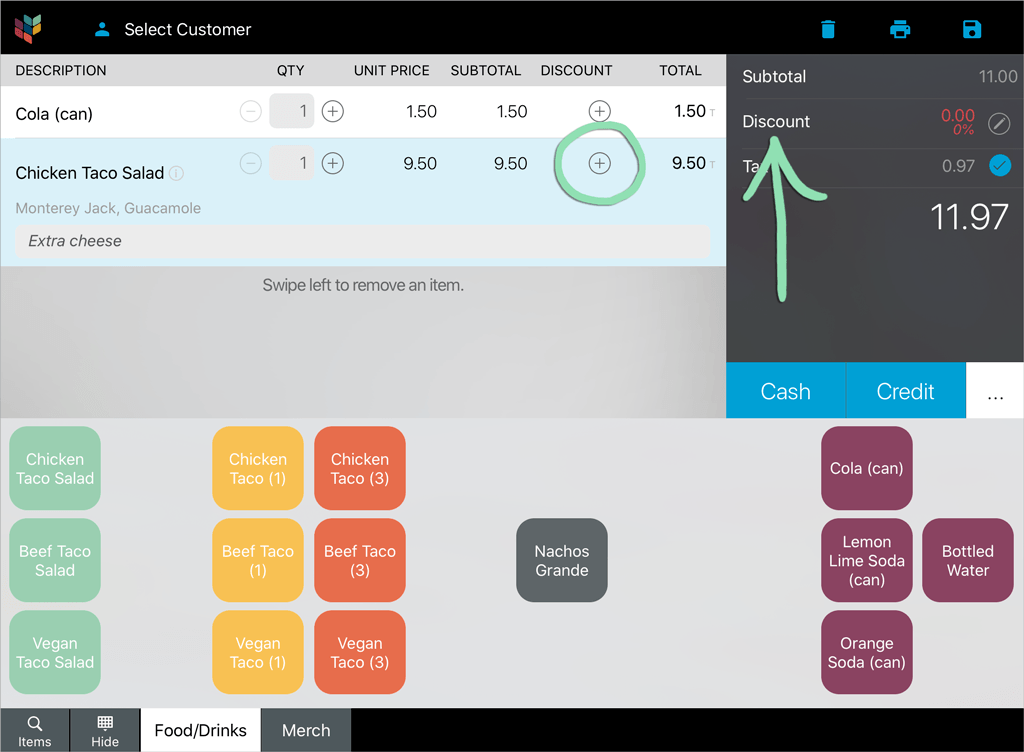
- Select a discount to apply to the sale.
‘Open’ means the cashier enters the discount amount or percentage.

Visit our full Discounts article to see how discounts appear on receipts and reporting.
Apple Pay
Customers use Apple Pay because it is a fast and convenient way to pay. A food truck must be set up with a compatible payment processor and credit card reader to be able to accept Apple Pay.
- Tap 'Credit' to tender an order.

- Have the customer hold their device within 1″ of the credit card reader.
Apple’s Wallet app opens automatically and allows the customer to select a credit card.
- The customer’s device prompts them to scan their fingerprint or face to approve the sale.
If the sale is not approved, visit one of our Credit Card Reader Troubleshooting guides for help.
- The cashier finishes the sale like a normal credit transaction.
Visit the full Lightspeed and Apple Pay support article for more information.
Customer Gratuity
Customers paying with Apple Pay, a credit card, or a gift card can leave a tip at the register. For convenience, most food trucks prefer for customers to sign and tip on the register’s screen.
If you have any questions about leaving or paying out gratuity, visit our Advanced Topics FAQ.
If you do not have EMV payments enabled or are using a Clover All-in-One Credit Card Reader and Printer, your process will be different than the steps below. Visit one of the following articles for help:
- Select the customer’s tender.a If paying with a credit card, tap ‘Credit’.b If paying with a gift card, tap ‘…’ then tap ‘Gift Card’.
- The customer selects a gratuity option or ‘No Tip’.

- The customer confirms the total, then taps 'Charge'.
- The customer swipes, taps, or inserts their credit card or gift card, or uses Apple Pay.
Gift cards are swipe only.
- Select a receipt option and tap ‘Done’, or tap 'No Receipt'.


Visit our Tips and Gratuity support article to learn how to pay out tips and view tip reporting.
X/Z Reports
Some food trucks operate without internet, so their sales do not sync to BackOffice until the register has an active internet connection. For an immediate overview of sales activity, view or print an X or Z report directly from the register.
- Select 'Register Shift Report' from the Main Menu.
- Scroll down to view the X/Z report information on screen.
- (Optional) Tap 'Print X Report' or 'Print Z Report' to print a copy to a connected receipt printer.
If the report does not print, visit one of our Printer Troubleshooting guides for help.

Visit our X and Z Reports article to learn how to reprint a Z report from a previous shift.
Additional Settings
Here are a couple handpicked settings that food trucks can use to customize how the register works.
For the Retail POS (S-Series) app for Android, access the settings below from the ‘Setup’ section of the register menu.
Card Signature Threshold
Set a card signature threshold to decide when customers have to sign for credit card transactions and when they do not.
- Open iPad Settings for Retail POS (S-Series).
- Tap 'Card signature threshold'.

- Select an amount to set as the threshold.
Any sale below the threshold will not require a signature.

Always Print/Email Receipt
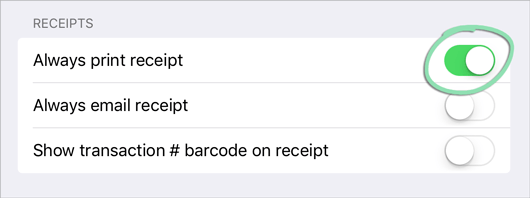
Switch on an automatic receipt option so cashiers don’t have to manually make a receipt selection at the end of every transaction.
- Open iPad Settings for Retail POS (S-Series).
- Toggle the switches to set your preference.
Visit the full iPad Settings for Retail POS (S-Series) article to learn about other settings you can enable.