Retail POS (S-Series) on The Station, Built by Clover, Setup
The Retail POS (S-Series) on The Station, built by Clover is a convenient, easy-to-set-up countertop solution for running transactions. The cashier manages the transaction flow on the main tablet display, while a separate thermal printer with an LED screen prompts customers about when to pay and when their transaction is complete. It also prints customer receipts and shift reports. Read below to learn how to set up and activate the register and printer.
Watch our setup video below:
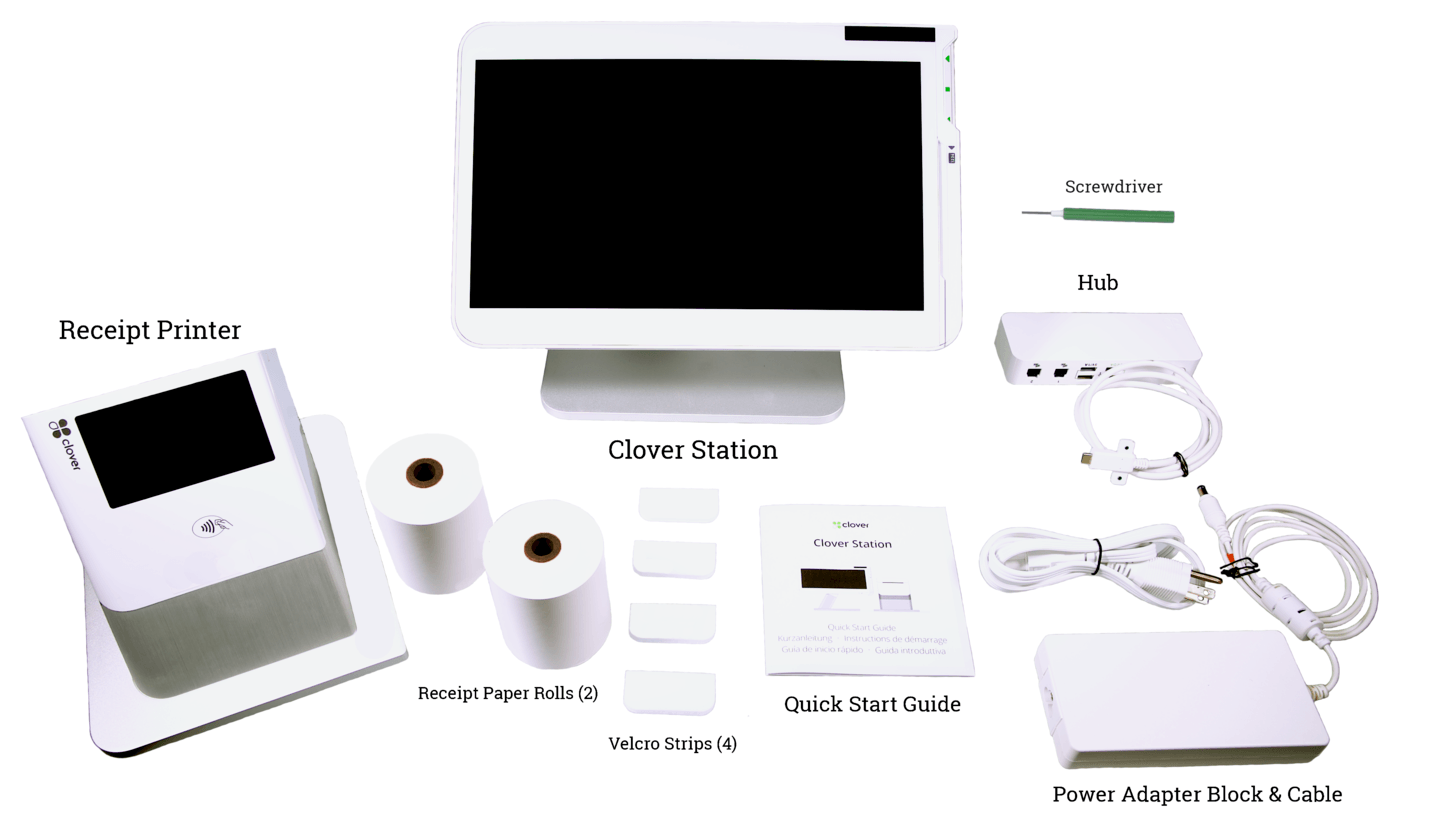
In The Box
The Station, built by Clover ships with the parts listed below:
Clover Station Setup
Follow the steps below to learn how to set up the Clover Station hardware.
- Place the Clover Station face down on a flat surface.
- Plug the receipt printer's cable into either of the connector ports on the bottom of the Clover Station.
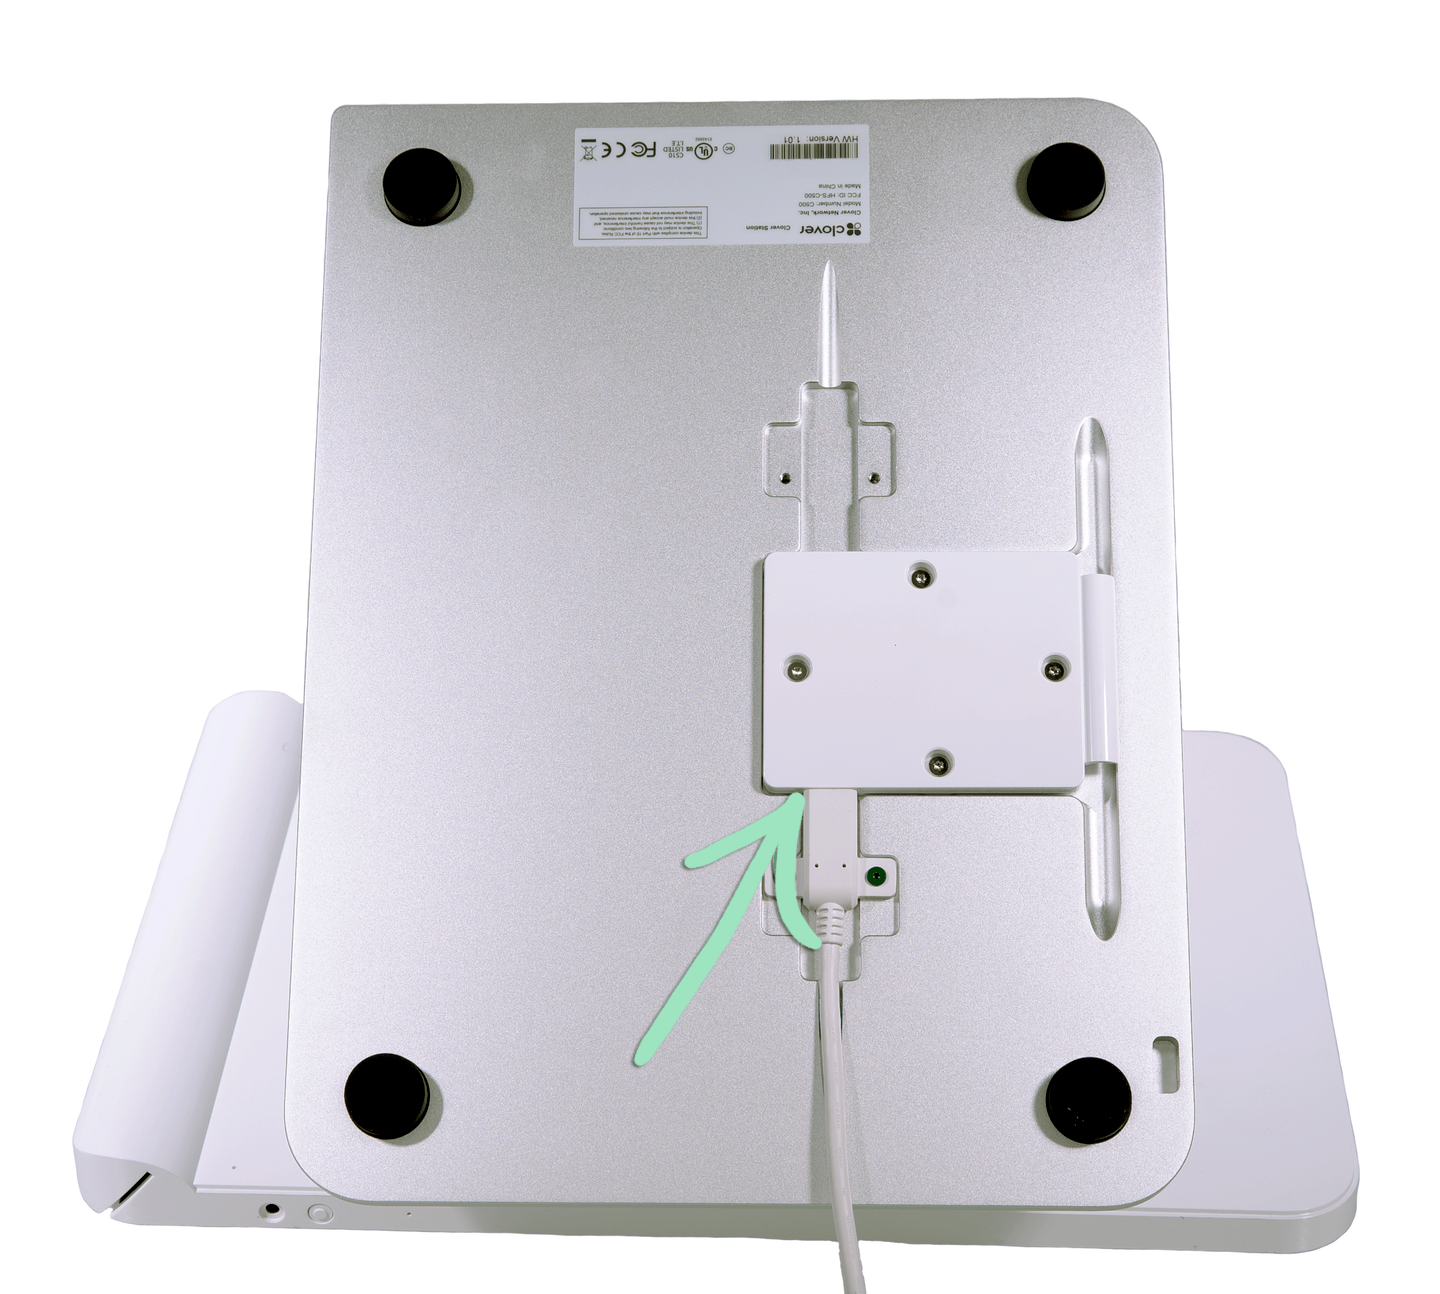
- Connect the Hub's cable to the other connector port.

- Tighten the screws on both connectors using the included screwdriver.

- Plug the power adapter into the round port on the Hub.

- Connect the power adapter cable to the power adapter block.

- Plug the power adapter into a power outlet.
- Connect an ethernet cable to an open port on your router.
- Plug the other end of the ethernet cable into the Hub’s network port.

- (Optional) Connect a cash drawer.
Lightspeed Retail APG cash drawers and Clover cash drawers are both compatible.
- For APG drawers, you must use the CD-101A cable included with the drawer. Purchase a new CD-101A cable here, if necessary.
- For the Clover cash drawer, you must use the cable that came with the drawer.
a Plug the small end of the cash drawer cable into the #2 port on the Hub.Do not plug the cash drawer into the #1 port as this will prevent the drawer from automatically opening when cash sales are performed.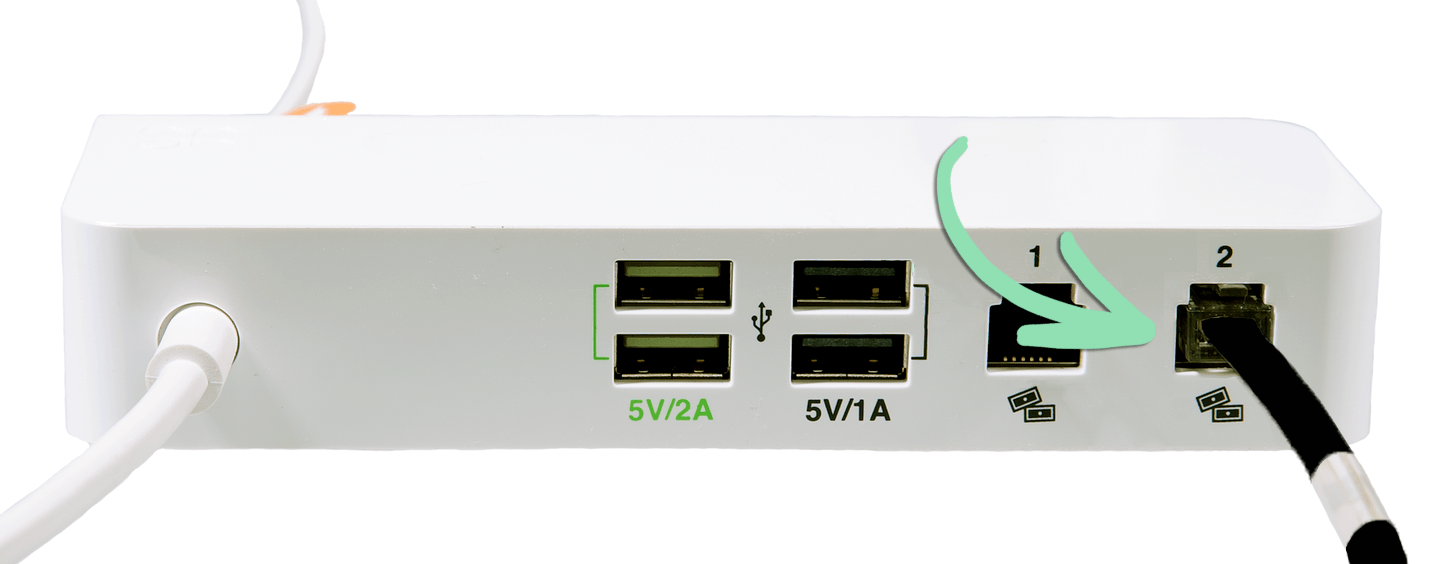
Attach the optional velcro strips to the hub for permanent placement near the register.
b Plug the larger end of the cash drawer cable into the bottom of the drawer.
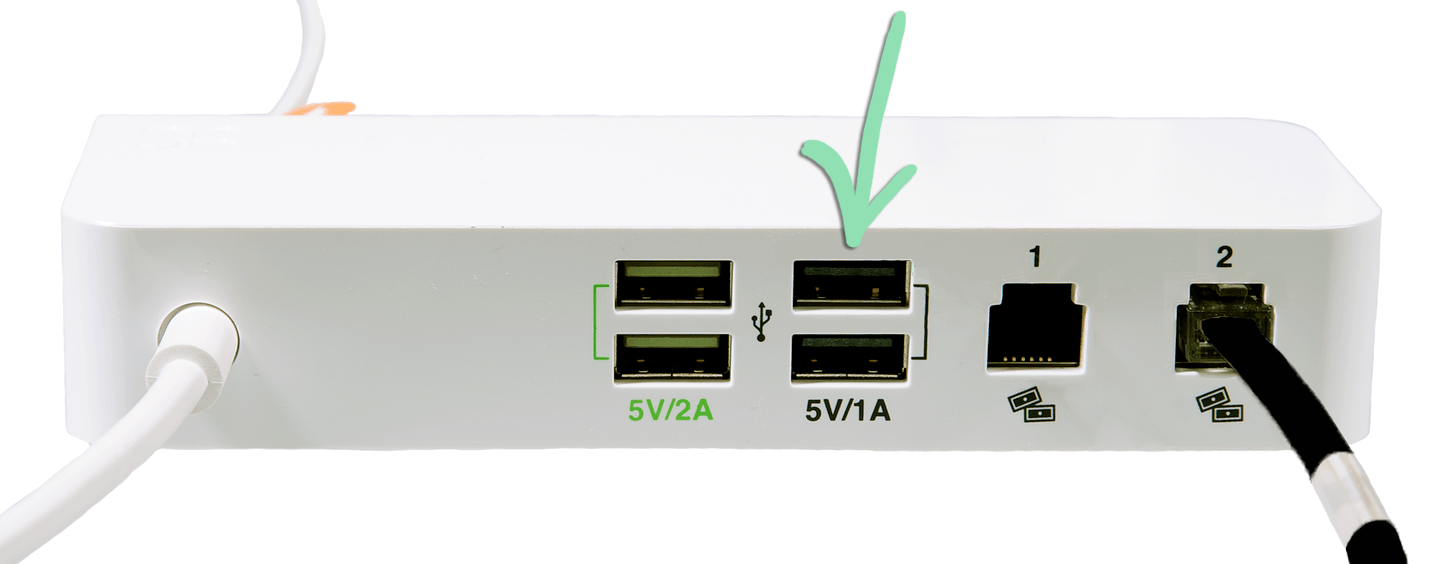
- (Optional) Connect a barcode scanner to an available USB port on the Hub.
The Station supports The Mini USB Barcode Scanner and the Zebra DS2208 and DS4608 2D Scanners. After connecting a Zebra scanner, you must follow steps 5 – 11 here in the Retail POS (S-Series) app to finish setting up the scanner. Failure to complete the additional Zebra scanner setup steps may prevent the scanner from working properly in the Retail POS (S-Series) app.
LED Printer Setup
Set up the LED receipt printer in a few easy steps to print customer receipts and display transaction information on the LED screen.
- Lift the door to open the printer.

- Press the green lever to open the printer cutter.
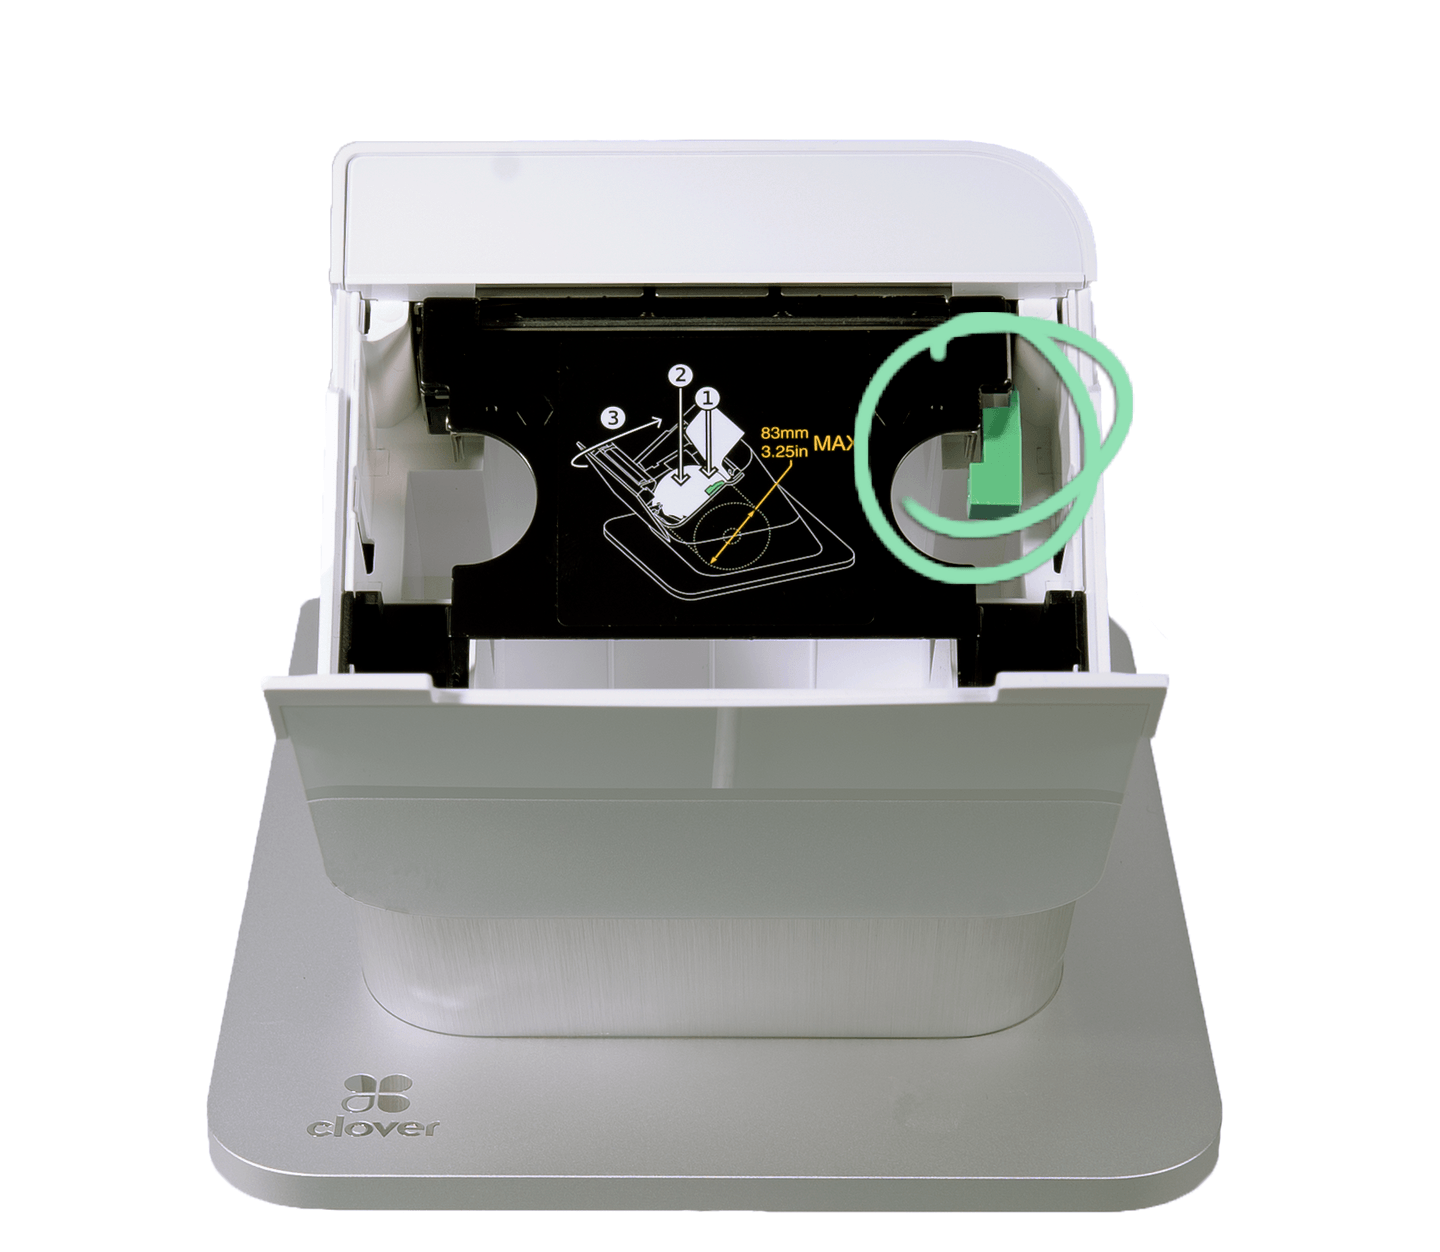
- Insert the paper with the lead coming up from the top over the roll.

- Push back and close the printer cutter until it clicks into place.

- Close the printer door.

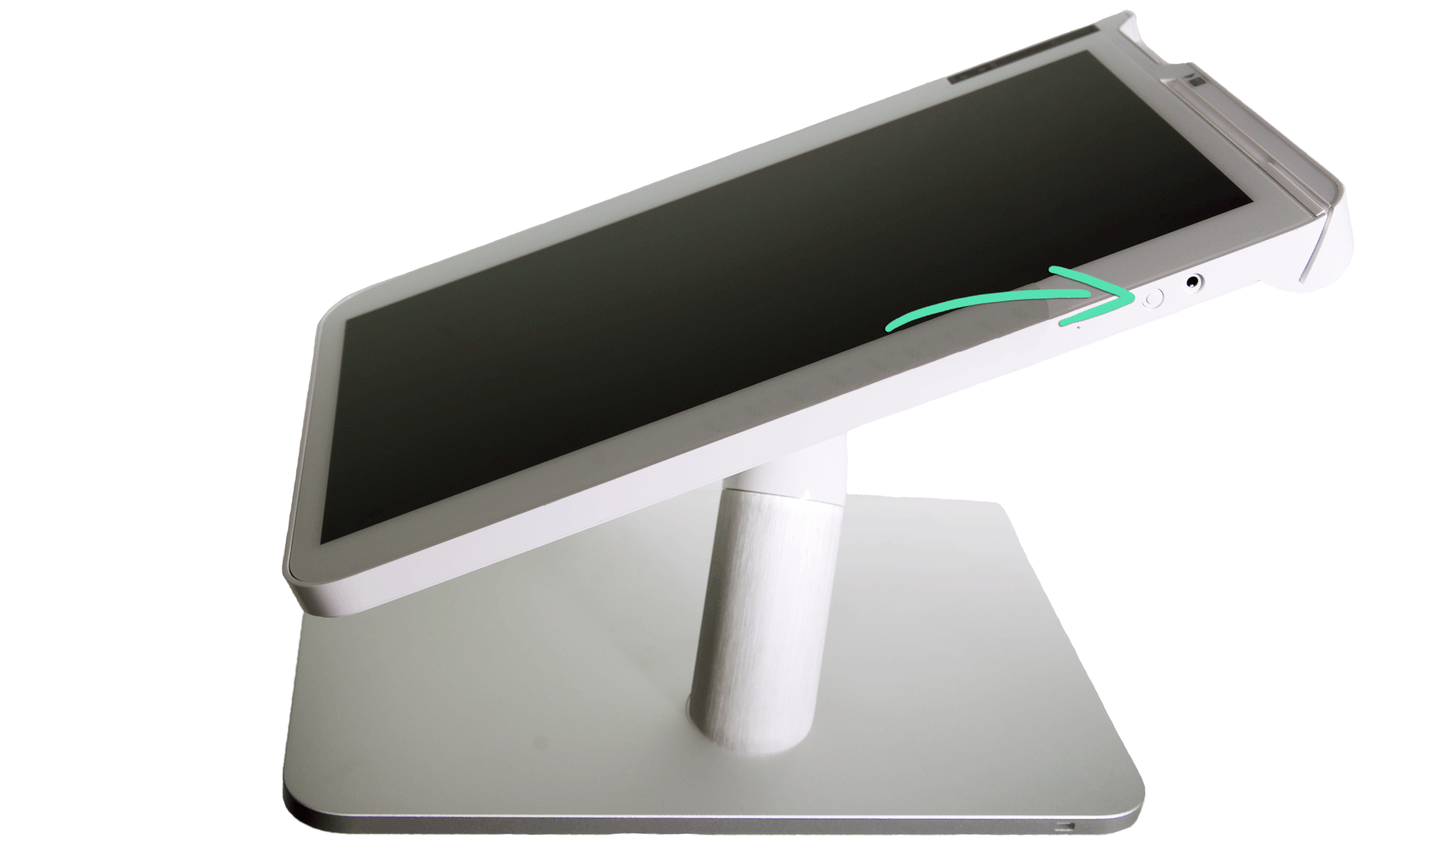
- Press and hold the power button on the main tablet until the Clover logo appears on screen.
Allow a few moments for the Station and LED printer to boot.
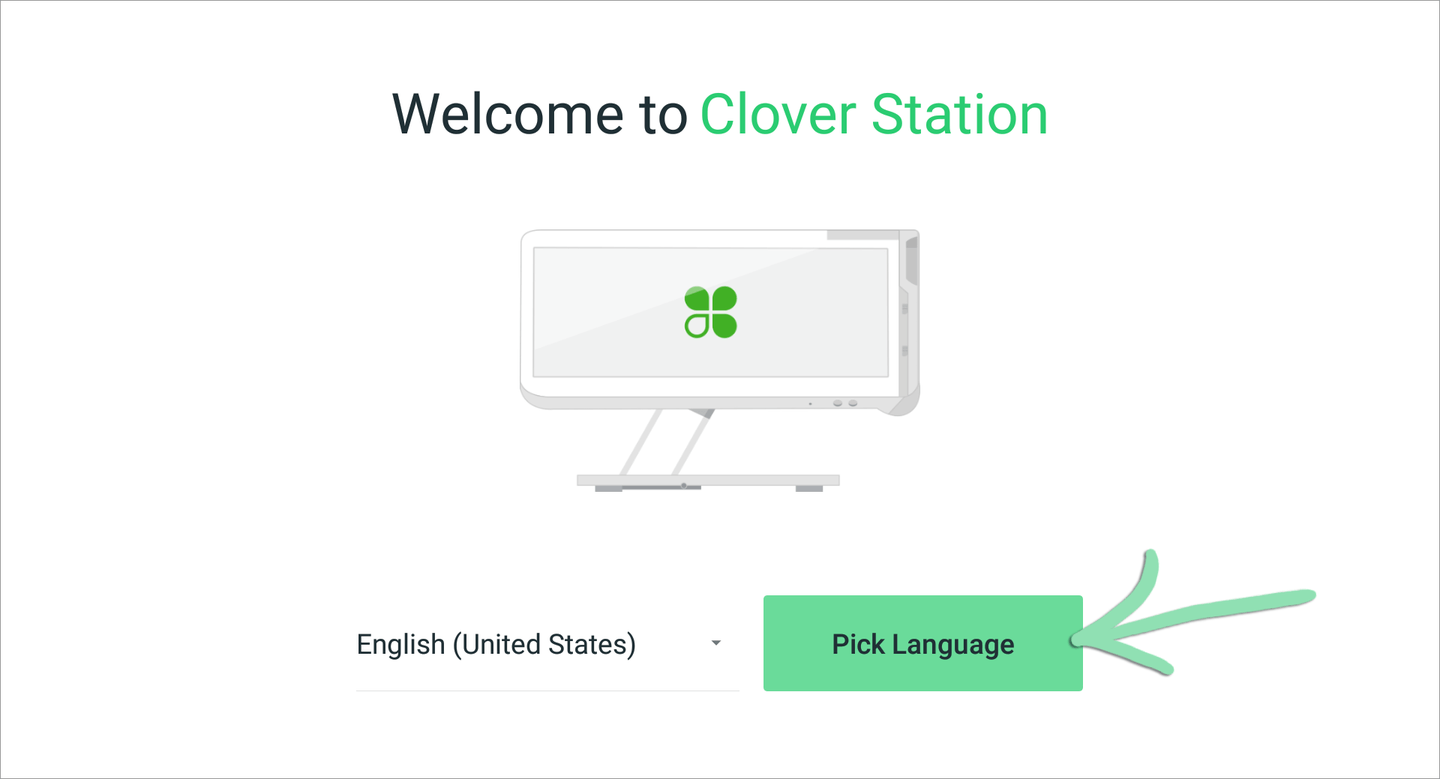
- Tap 'Pick Language' on the Clover Station screen.
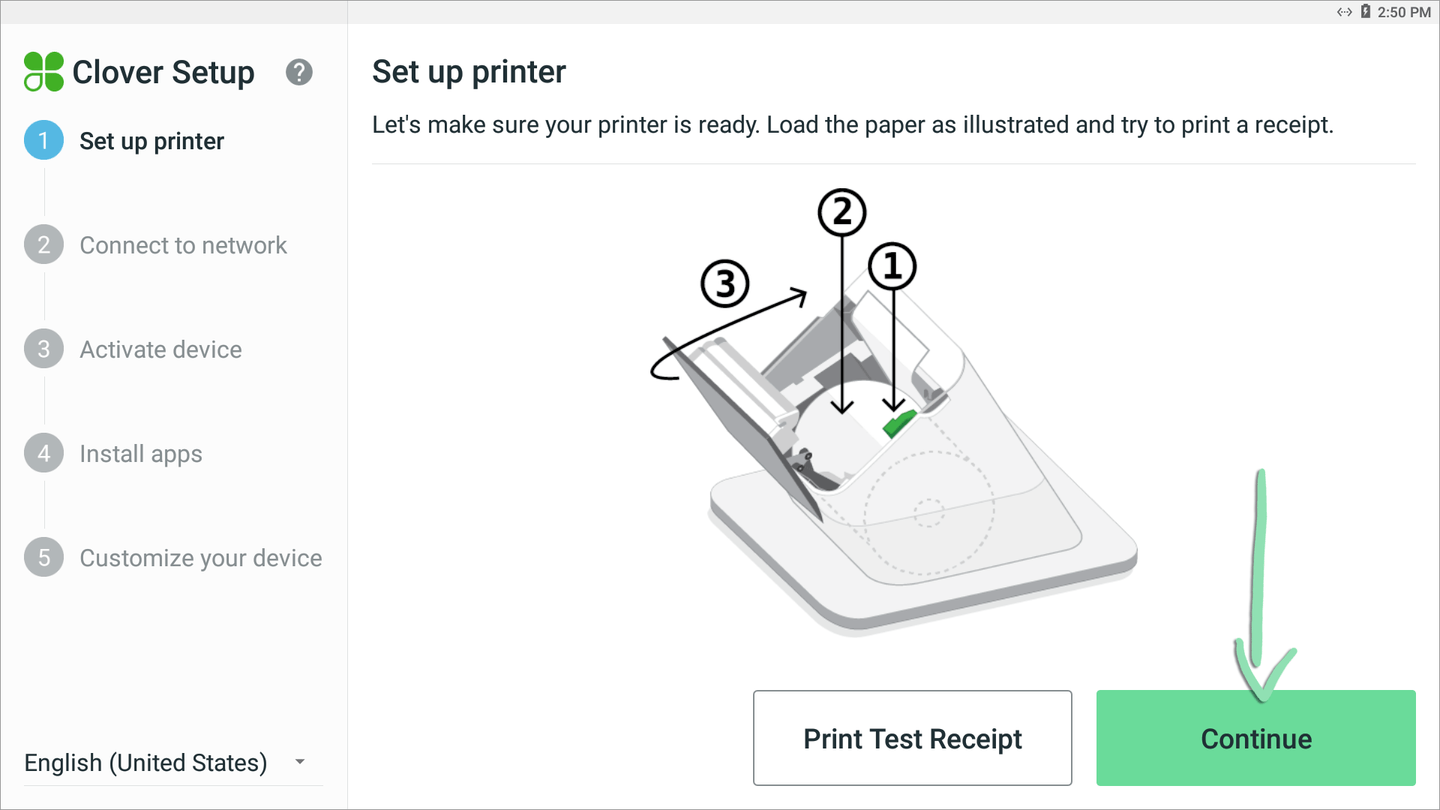
- Tap 'Print Test Receipt' to print a test receipt to confirm that printer setup is complete. Then tap 'Continue'.
Now you’re ready to activate the Station. Follow the steps below to learn how.
Device Activation
Connect the Clover Station to your network to activate the Station and the Lightspeed Retail POS.
- Confirm that there is an internet connection via ethernet, then tap 'Next'.
The Station is connected to the internet when the ethernet text box displays ‘Successfully connected to the server.’
If you would like to, you may tap ‘Wi-Fi’ to activate the device over your wireless network, but an ethernet set up is preferred for reliability and superior performance.

- Enter the eight-digit activation code for the device.
The activation code is sent to the Lightspeed Retail account’s Business Owner email address.
Click here to view a sample.
- Wait a few moments for the Clover Station to install the apps.

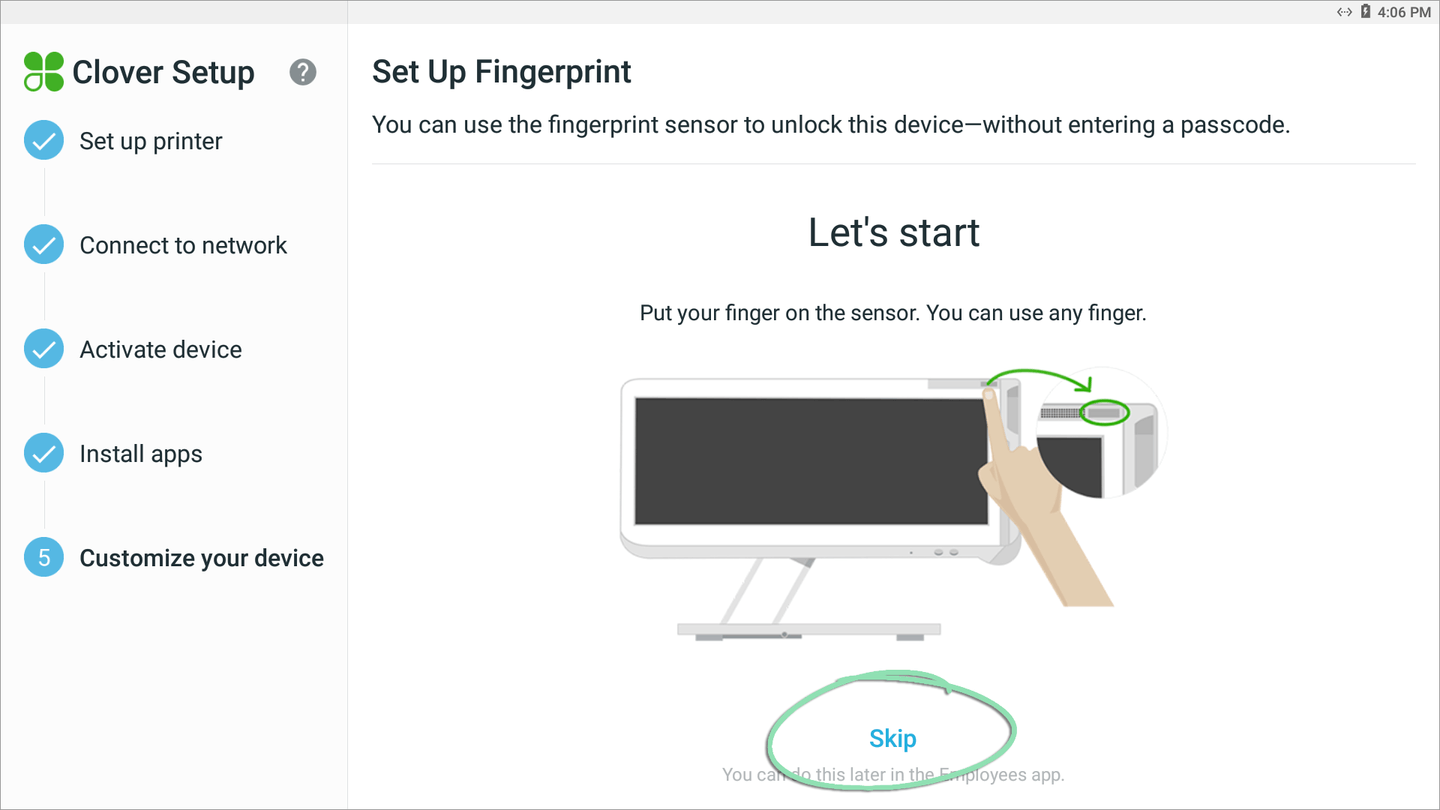
- Follow the instructions to set up fingerprint scanning or tap 'Skip' to set up later.
- (Optional) Customize the passcode setting for this device and tap ‘Continue’.
The Station only accepts tips and signatures on screen, so there is no need to change the second setting. Tip and signature preferences are controlled from your Receipt Settings.

- On the Home screen, open the Retail POS (S-Series) app.
Now continue to the directions below to activate the register.
Activate Register
With the device itself activated, activate the Retail POS (S-Series) app to start running sales.
- In the Retail POS (S-Series) app, tap 'Activate Your Register'.

- Enter your store name and manager code, then tap 'Activate'.
The store name is lowercase with no spaces. The manager code is the 4-digit code found in BackOffice.

- Enter the manager code and tap 'Sign In' to start using the register.
