Retail POS (S-Series) on The Mini, Built by Clover, Setup
Retail POS (S-Series) on the Mini, built by Clover, is an easy-to-set-up, all-in-one solution for running sales, performing returns, printing receipts, and more. Follow the steps below to learn how to set up and activate your register.
The 1st-gen Mini no longer supports updated versions of the Retail POS (S-Series) app. If using a 1st-gen device, you can continue to receive app updates by upgrading to a 2nd-gen Mini or other supported register device. Learn which type of Mini you have by visiting Clover support.
In the Box
The Mini, built by Clover, ships with the parts listed below.

Hardware Setup
Complete the basic steps of setting up The Mini’s hardware and connecting it to power. After setup, the device can be activated to get started running sales.
IMPORTANT: This device must be connected to your network either physically to the router via ethernet cable or wirelessly over Wi-Fi. If connecting using ethernet, set up the hardware near the router.
- Plug the power cable into the power adapter block.

- Plug the power adapter into the round port on the Hub.

- Connect the Hub to your router via the included ethernet cable.An ethernet connection is recommended for the most reliable performance. Prefer to connect wirelessly? Skip this step and select your Wi-Fi network later during activation.a Plug the ethernet cable into the Hub’s network port.
 b Plug the other end of the ethernet cable into an open numbered port on your router.
- Pull open the printer cover on the rear of the device.

- Load the printer paper so it feeds up from the top of the roll.Purchase additional rolls of thermal receipt paper from the Lightspeed Store.
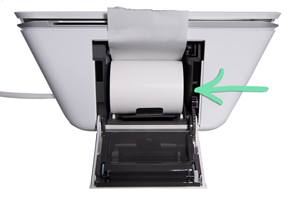
- Close the cover on the paper.
- (Optional) Connect a barcode scanner to an available USB port on the Hub.
The Mini supports The Mini USB Barcode Scanner and the Zebra DS2208 and DS4608 2D Scanners. After connecting a Zebra scanner, you must follow steps 5 – 11 here in the Retail POS (S-Series) app to finish setting up the scanner. Failure to complete the additional Zebra scanner setup steps may prevent the scanner from working properly in the Retail POS (S-Series) app.
- (Optional) Connect a cash drawer.
Lightspeed Retail APG cash drawers and Clover cash drawers are both compatible.
- For APG drawers, you must use the CD-101A cable included with the drawer. Purchase a new CD-101A cable here, if necessary.
- For the Clover cash drawer, you must use the cable that came with the drawer.
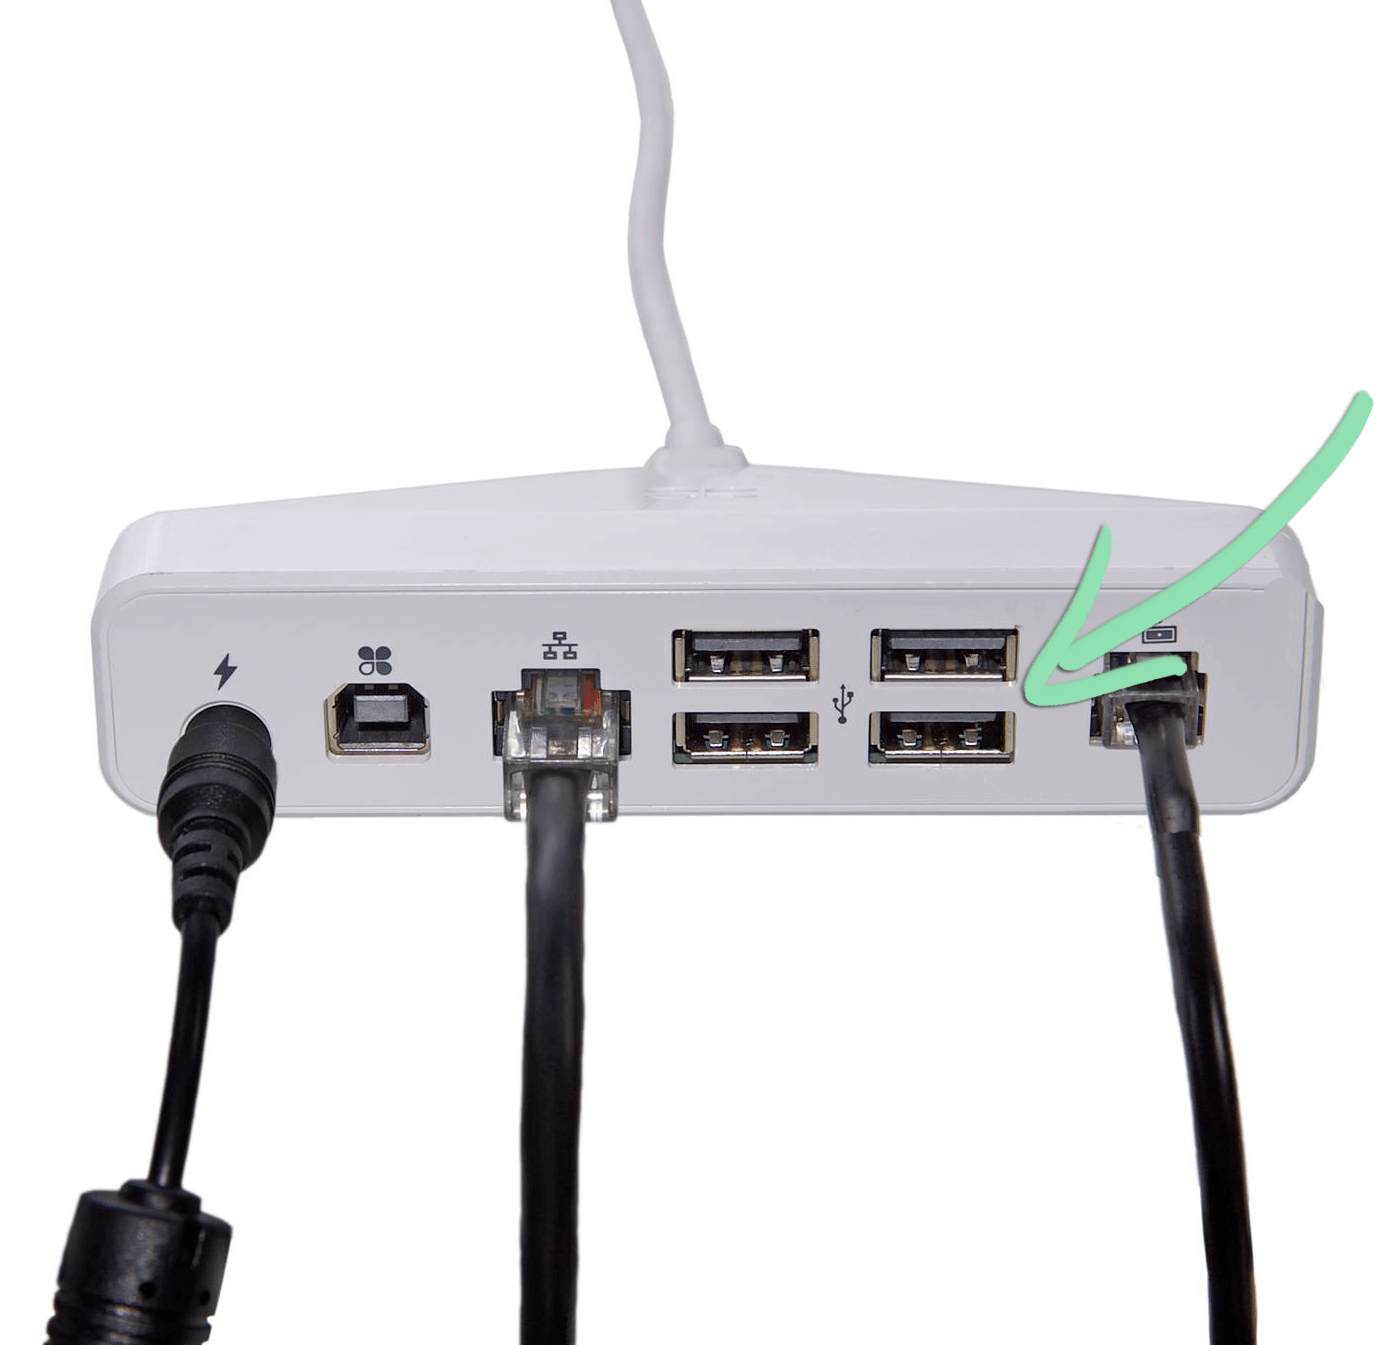
a Plug the small end of the cash drawer cable into the Hub’s rightmost port.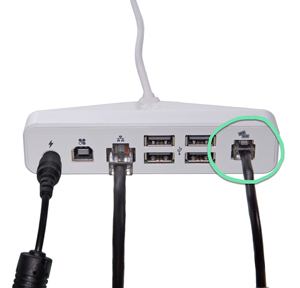 b Plug the larger end of the cash drawer cable into the bottom of the drawer.
- Plug the power cable into a power outlet.
The device boots up automatically. After a few startup screens, the setup wizard appears.
- Follow the steps below to activate the device.
Device Activation
After setting up The Mini, use the setup wizard to complete the device activation process. Once activated, the device will be ready to activate the Retail POS (S-Series) app.
- Locate your activation email and make note of the activation code.
The email is sent to the Lightspeed Retail account’s Business Owner email address with the subject ‘Your Activation Code‘.

- On the device, select your language and tap ‘Pick Language’.
- Connect the device to your network.a If you plugged the Hub into your router via ethernet cable, tap ‘Next’.
 b If you did not plug the Hub into your router, tap ‘Configure’ to connect to your Wi-Fi network.
- After the device checks for updates, tap ‘Continue’.
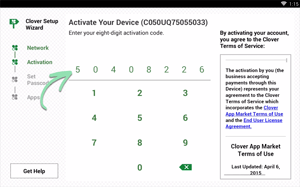
- Enter the 8 digit activation code from step 1.
- Set a 4 or 6 digit passcode and tap ‘Set Employee Passcode’.
This is used to unlock the device when you reboot it or wake it up from sleep mode. For security purposes, it is best not to share this passcode.
 The passcode cannot be changed on the device itself, so pick one that you will remember.
 - Enter the passcode again and tap ‘Confirm Passcode’.
- Wait for the default apps to download and install, then tap ‘Next’.
- (Optional) Customize the passcode setting and tap ‘Continue’.
The Mini only accepts tips and signatures on screen, so there is no need to change the second setting. Tip and signature preferences are controlled from your Receipt Settings.

- On the Home screen, open the Retail POS (S-Series) app.
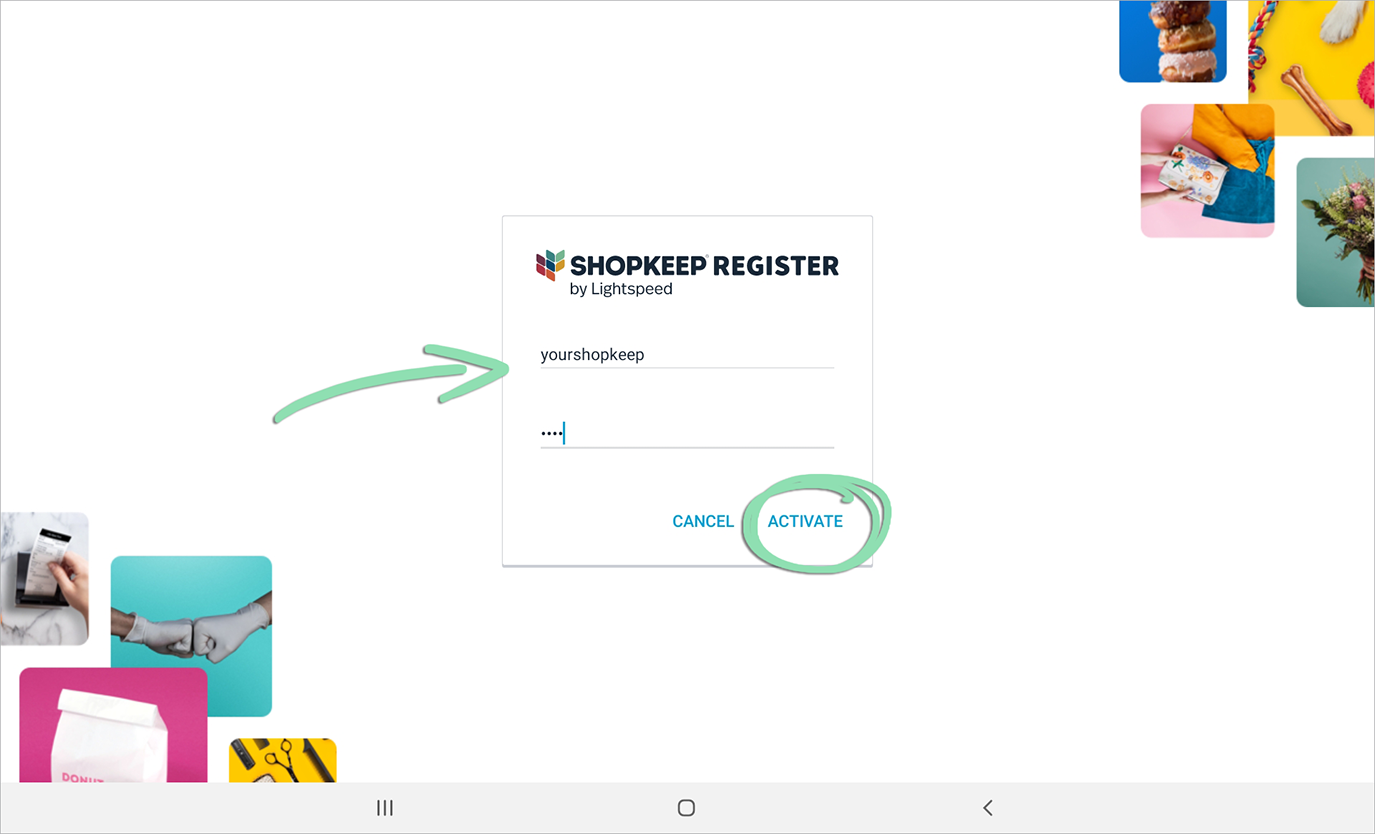
- Tap 'Activate Your Register'.

- Enter your store name and manager code. Tap 'Activate'.
The store name is all lowercase with no spaces.
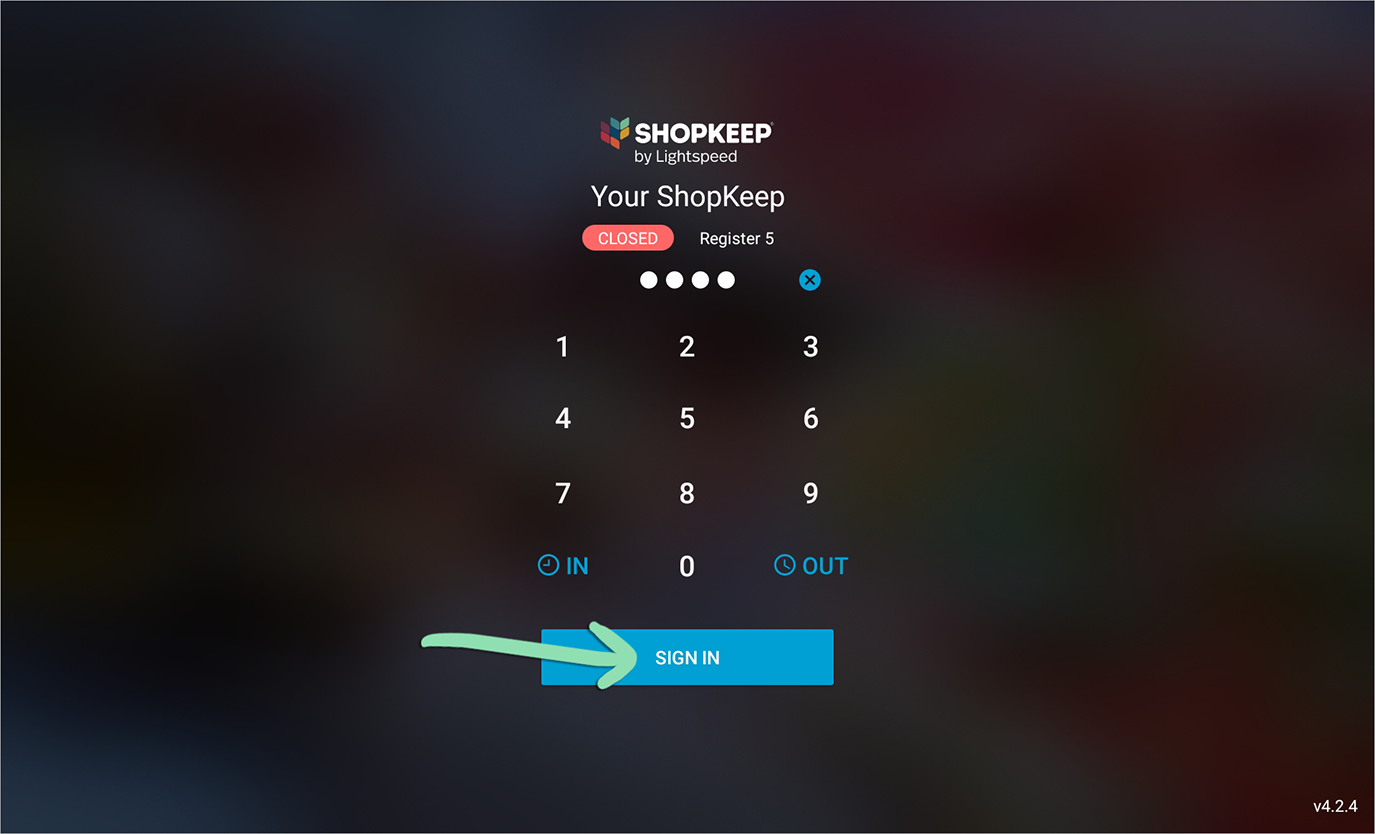
- Enter the register code, then tap 'Sign In' to get started using the register.
- Lay The Mini face down on a flat surface.
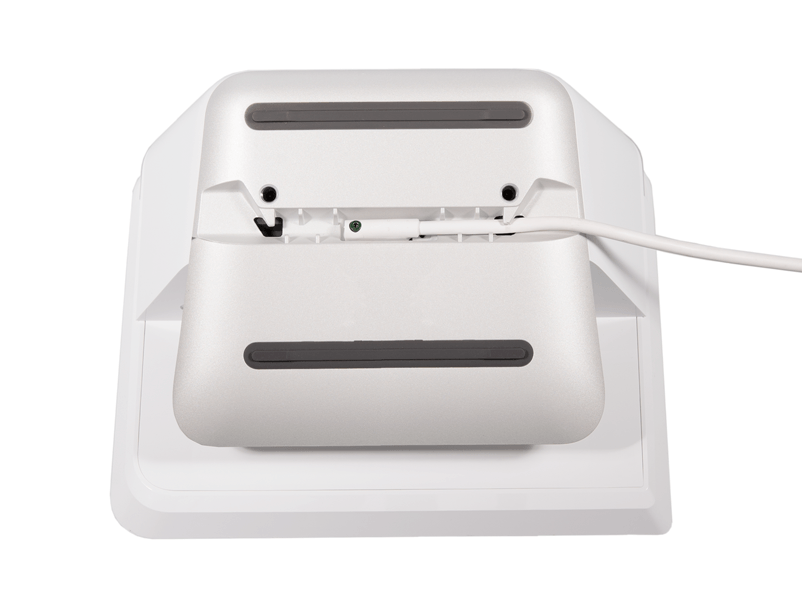
- Place the stand on The Mini’s base so its 2 screws align with the screw holes.
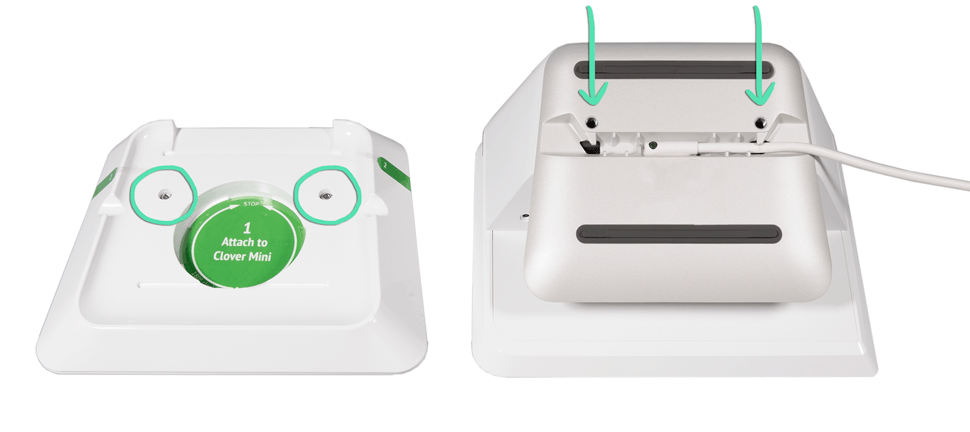
- Tighten the screws to secure the stand to The Mini.

- Peel off the arrow stickers on the stand.

- (Optional) Mount the stand to a countertop.
- To use the adhesive, peel the backing from the pads on the bottom of the stand and firmly press the stand onto a surface.

- To use the screws, refer to the included quick start guide and mounting template for help.


Activate Register
Now that setup is complete, activate the register to get started using the Retail POS (S-Series) app.
Swivel Stand Installation
The Mini Swivel Stand allows cashiers to rotate the register so customers can see the screen. Set the stand on a counter or securely mount it with the included adhesive and screws.
The stand ships with the following parts: the Mini Swivel Stand, a screwdriver, 4 screws, a cable tie with mount, a quick start guide, and a mounting template.
What's Next?
Now that your register is activated and ready to use, check out these articles for features and additional support for The Retail POS (S-Series) on The Mini, built by Clover:
Retail POS (S-Series) on The Mini, built by Clover FAQ
Retail POS (S-Series) on The Mini, built by Clover vs. Lightspeed for iOS
Retail POS (S-Series) on The Mini, built by Clover Troubleshooting