Using DYMO Software to Print Labels
The DYMO Connect and DYMO Label software allow you to print labels from a computer to a connected DYMO LabelWriter printer using a spreadsheet of inventory items. Use this label printing method if you are already familiar with DYMO software or prefer to print from a spreadsheet. This article covers the differences between DYMO software and Lightspeed Label Printing and the steps to print using DYMO software.
DYMO Connect and DYMO Label are third-party software that allow you to print labels in bulk from a desktop or laptop computer running Windows or macOS to a DYMO printer. The DYMO printer cannot be used with an iPad. If you need help with DYMO software, contact DYMO directly for support.
DYMO Software vs. Lightspeed Label Printing
There are two ways to print labels for inventory items: via the DYMO Connect / DYMO Label software or directly from the BackOffice. Learn about the advantages of each method first to decide which solution is best for your business.
DYMO Connect or DYMO Label Software
DYMO’s label printing software. Use this if you:
Lightspeed Label Printing
Lightspeed’s BackOffice solution for printing labels. Use this if you:
DYMO Installation
Download and install the DYMO drivers to prepare your computer to start printing labels.
DYMO Connect and DYMO Label are third-party software. For help using DYMO software, contact DYMO directly for support.
- Connect the DYMO printer to a computer and load the labels.
The DYMO printer cannot be connected to an iPad. Visit the DYMO LabelWriter Setup article for help completing this initial setup step.
- Visit DYMO Support and download the latest version of the DYMO Connect software for your LabelWriter 450 series or 5 series printer.
Do not install the CD included with the printer, it may not contain the most up-to-date DYMO drivers.
- Open the file (.dmg for Mac or .exe for Win) and run it.
The images below are for Mac. Windows installation will look different.


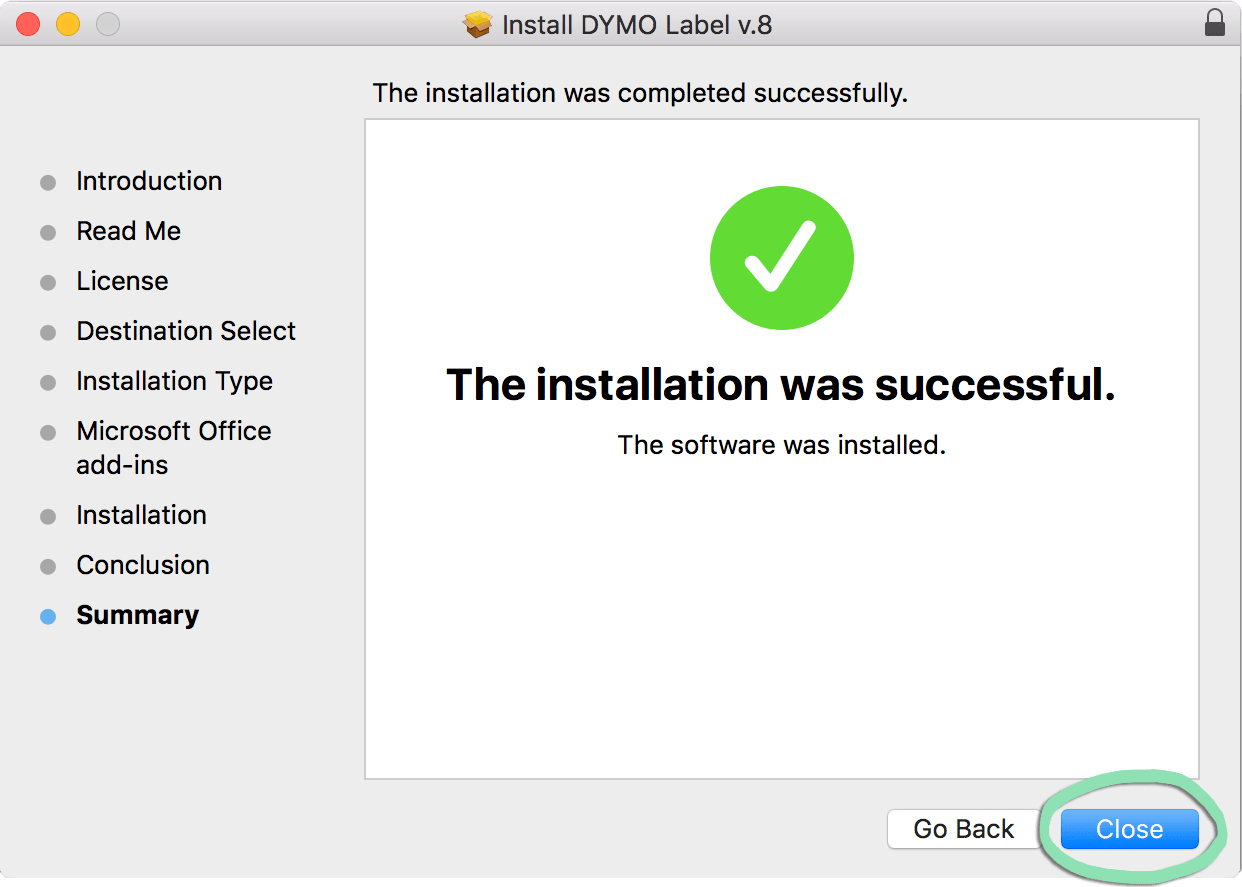
- Follow the prompts to proceed with installation.
- Click 'Close' to complete setup.
- Click the link below to download the template for your labels.
- Open the download to unzip the label template file.
- In BackOffice, click 'Reports' and select 'Stock Items'.

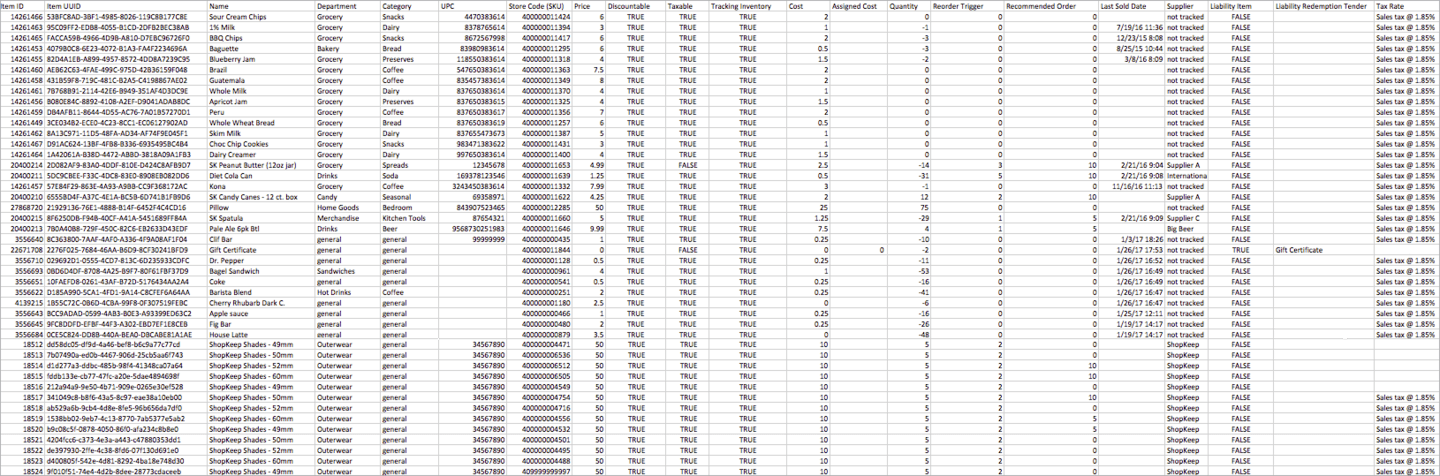
- Click 'Export Stock Items' to download the stock items export spreadsheet to your computer.
The Stock Items Export spreadsheet lists Basic and Variant items together. Items with variants are listed on individual lines just like Basic items.
 Steps 3 – 6 are only required if you want to print multiple copies of each label.
 - Open the export in spreadsheet software.
- Check the formatting of the 'Store Code (SKU)' column.
Some software converts long numbers to scientific notation. If numbers in this column look similar to ‘4E+11’, adjust the formatting of the cells to display the entire number.
- Duplicate rows for items that require multiple labels.
For example: if you need to print 5 labels for an item, that item’s row should be copied 5 times.
- Save the spreadsheet as a .CSV file.
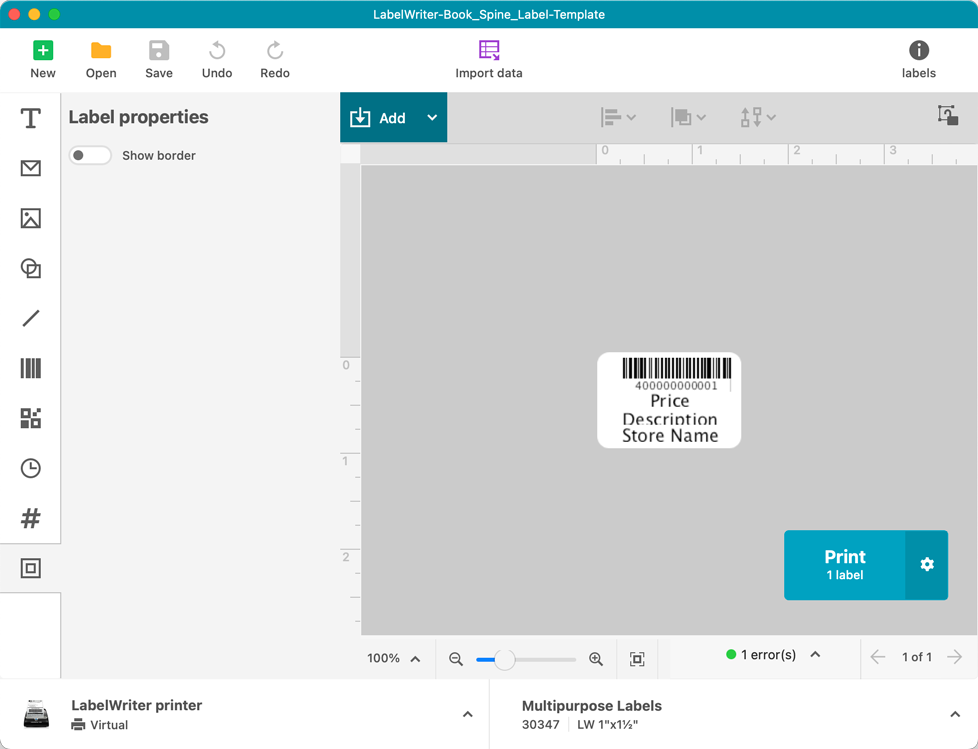
- Open the previously downloaded label template.
The template file will be named similar to: LabelWriter_[SIZE]_Label-Template.label
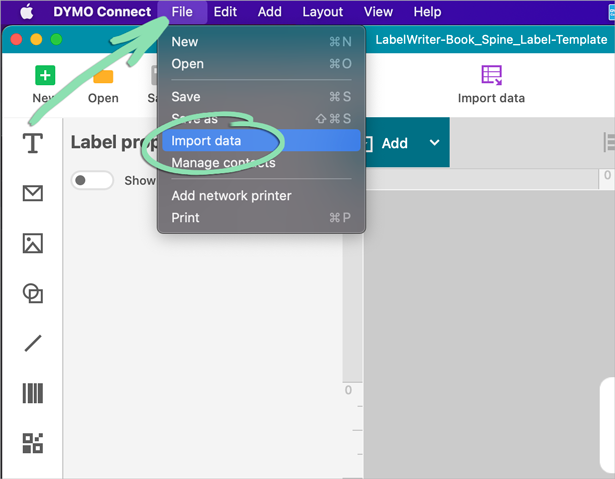
- Click 'File' and select 'Import data'.
- Click 'Browse'.

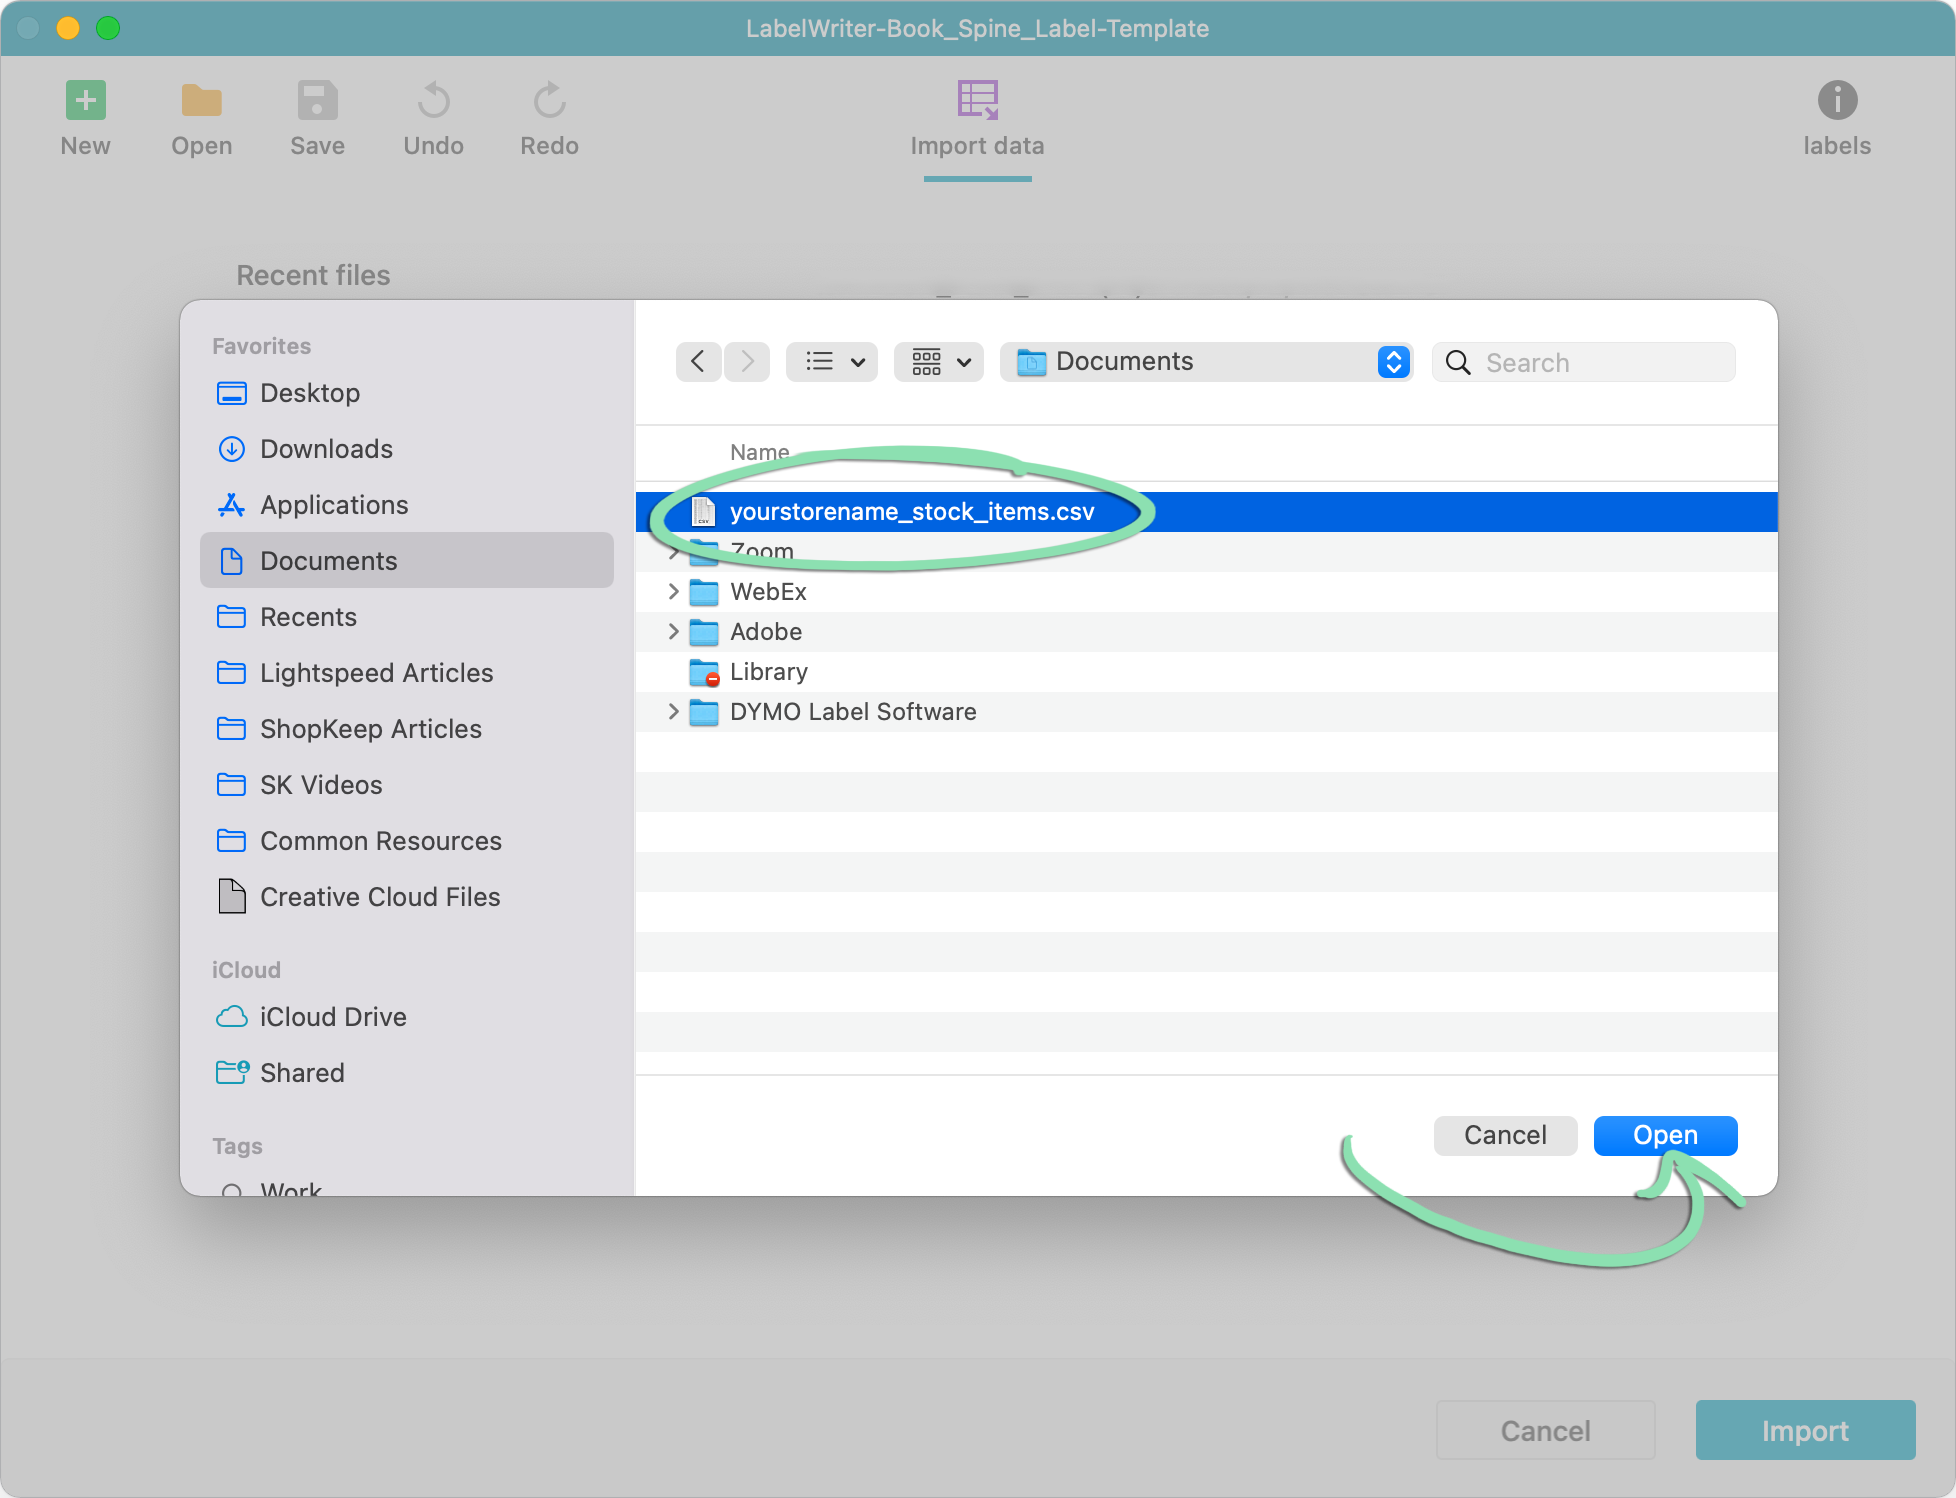
- Select your inventory spreadsheet, and click 'Open'.
The spreadsheet file will be named similar to: storename_stock_items.csv
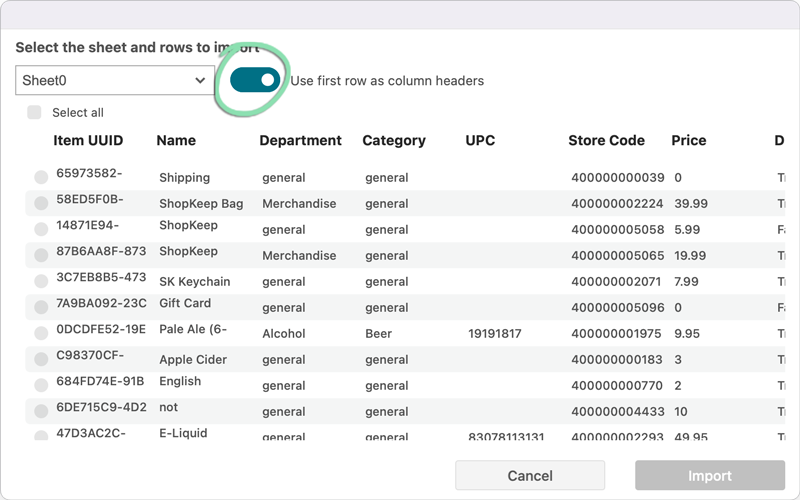
- Toggle on the switch for 'Use first row as column headers'.
- Enable each item row that you want to print a label for, or click 'Select all' to enable all rows.
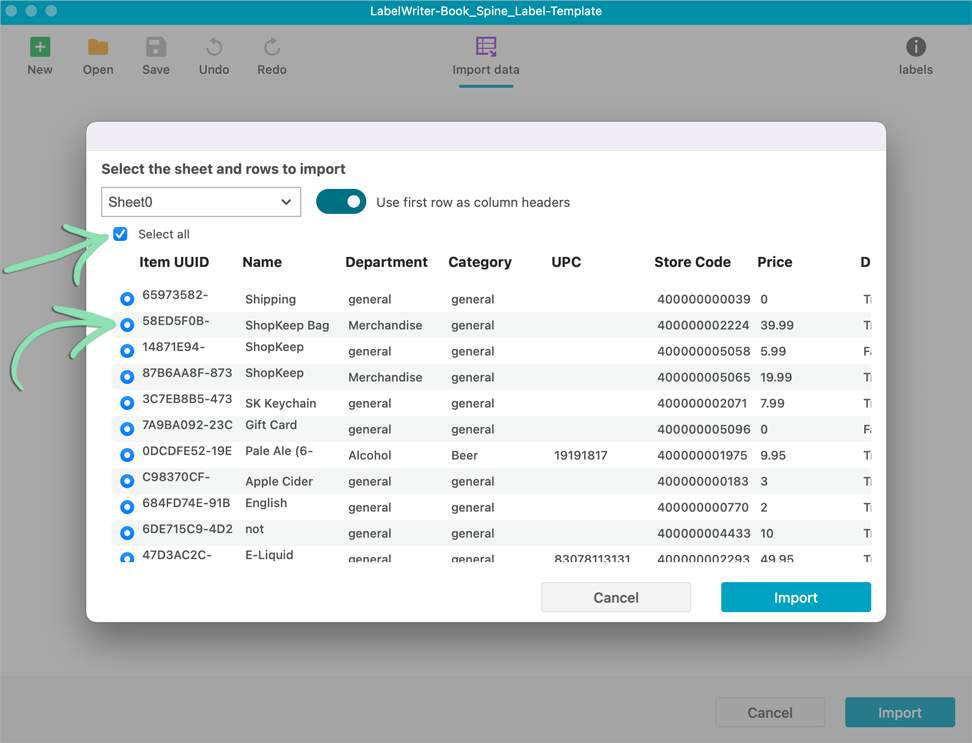
- Click 'Import' to import the selected rows.
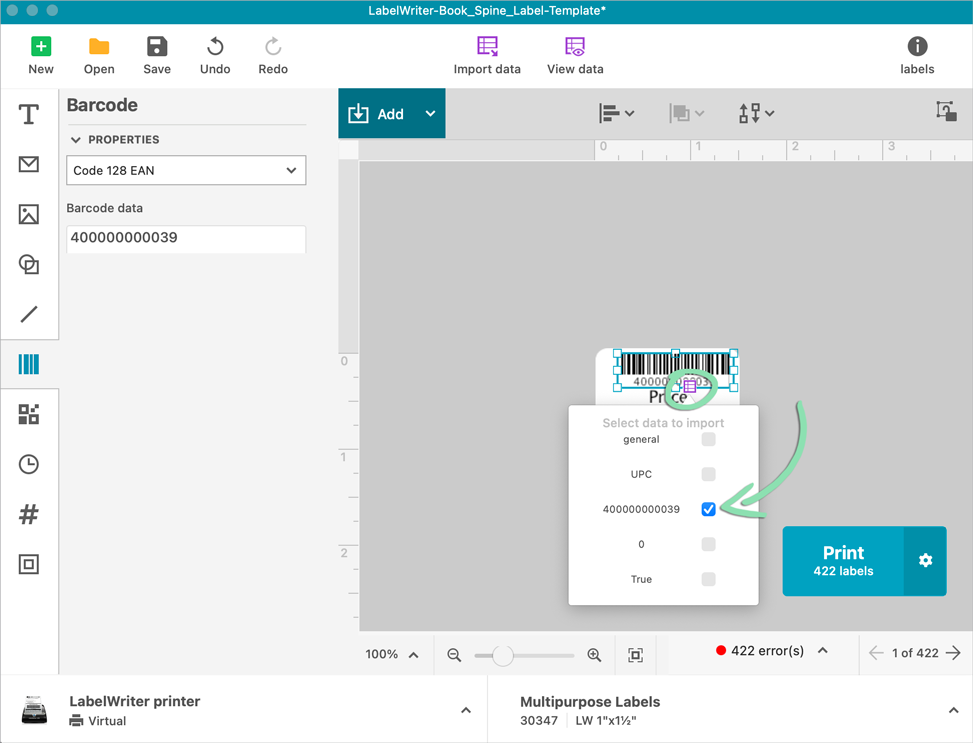
- Click the barcode on the label template.
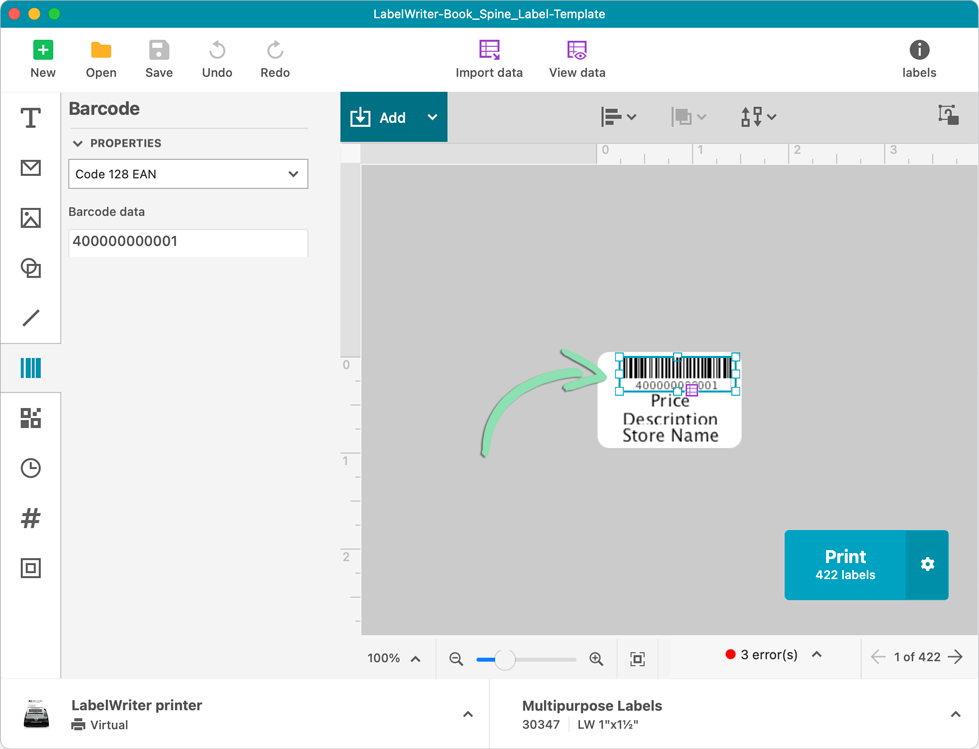
- Delete the number in the 'Barcode data' field.

- Click the purple icon under the barcode on the template, then select the 'Store Code (SKU)' column from the stock item export.
- Double-click the 'Price' field on the template, then delete the 'Price' text.

- Click the purple icon under the price field on the template, then select the 'Price' column from the stock item export.

- Repeat steps 11 - 12 for the 'Description' field.
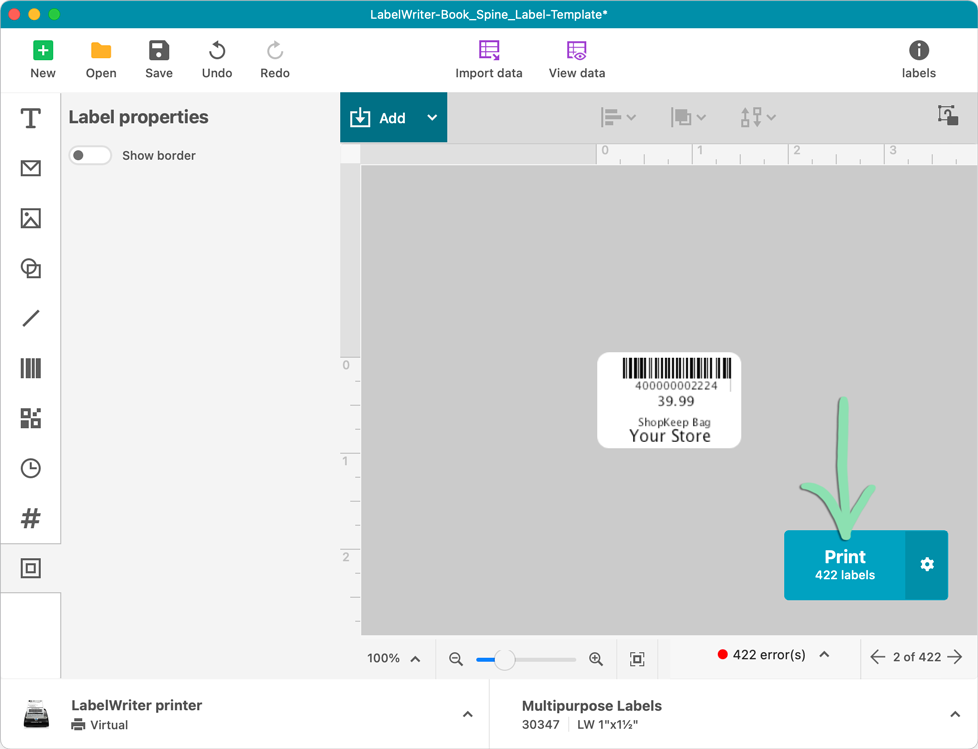
- Enter your business name in the 'Store Name' field on the template.
- Click 'Print' to print labels for all items selected in step 6.
- Open the previously downloaded label template.
The template file will be named similar to: LabelWriter_[SIZE]_Label-Template.label

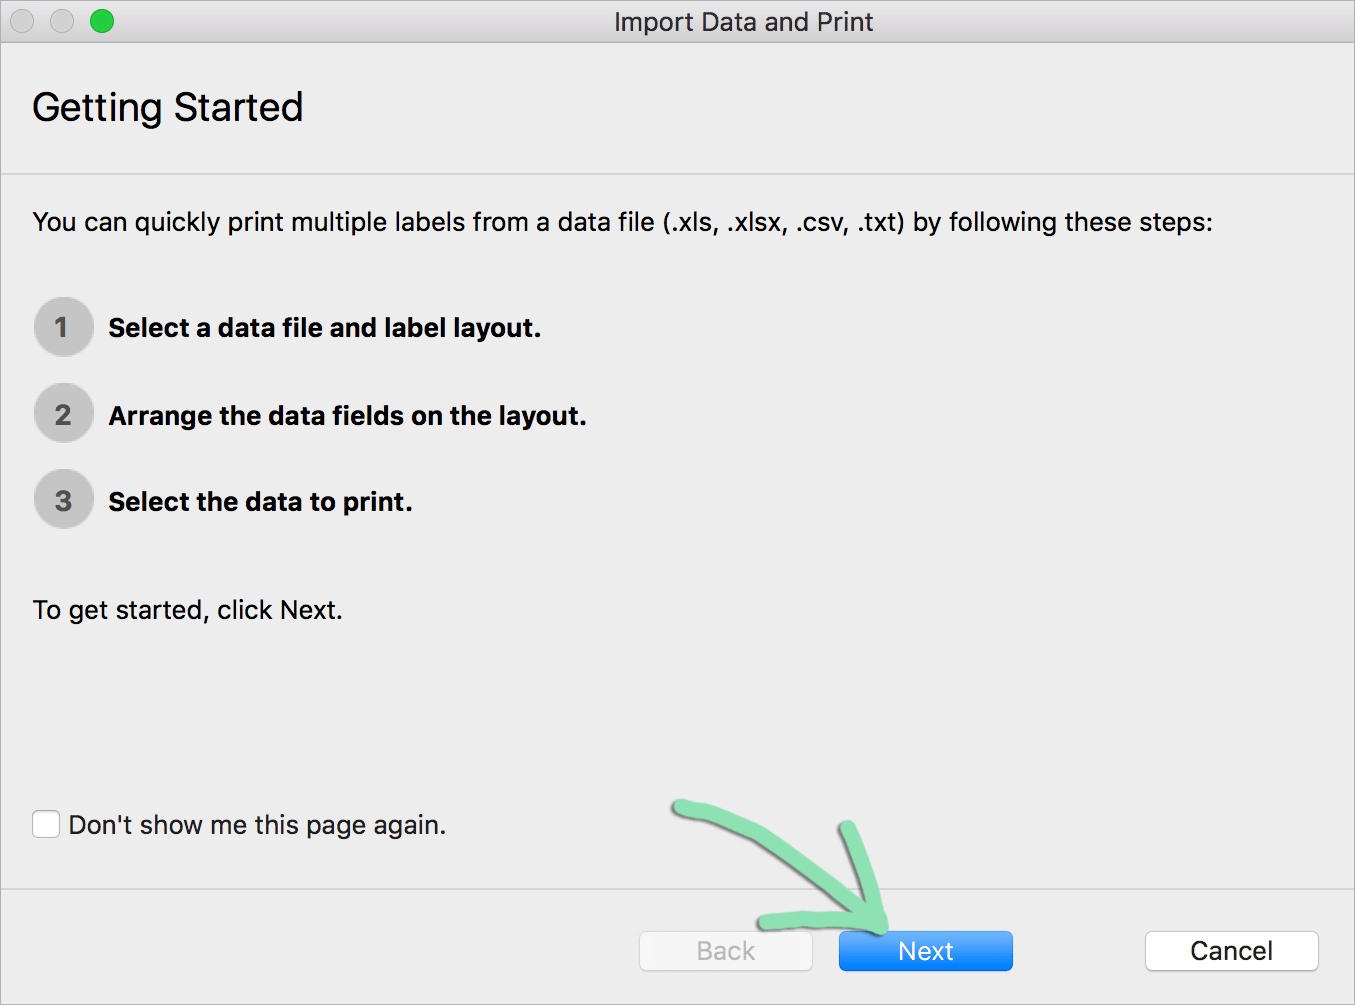
- Click 'File', select 'Import Data and Print', and click 'New'.

- Click 'Next' on the Getting Started screen.
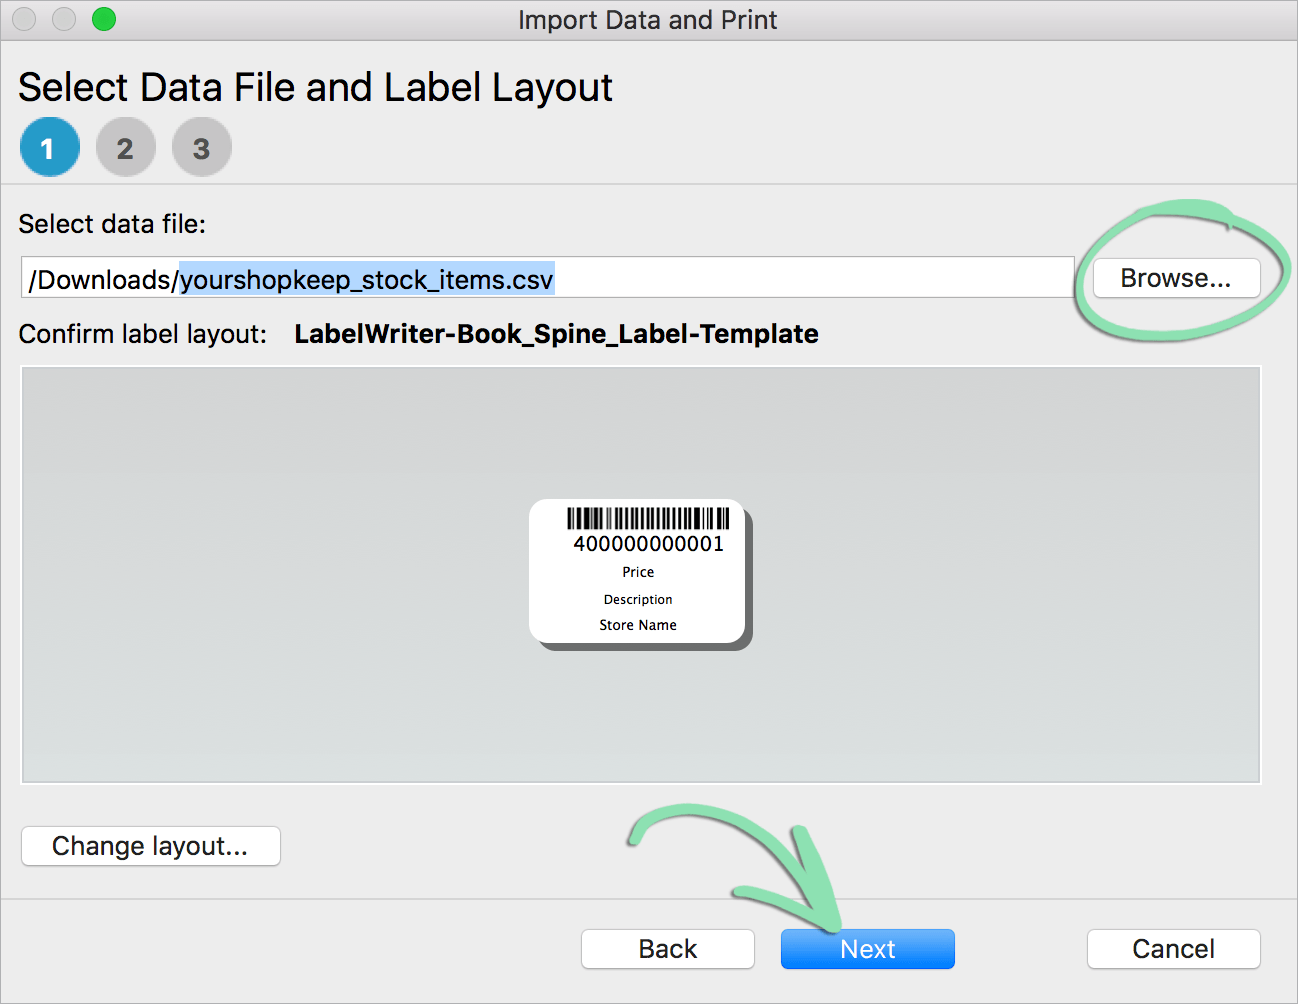
- Click 'Browse', select your inventory spreadsheet, and click 'Next'.
- The spreadsheet file will be named similar to: storename_stock_items.csv
- To switch to a different label template, click ‘Change layout’ before proceeding.
- Check the box for 'Use first row as field names'

- Drag and drop 'Store Code (SKU)' into the first field on the label.
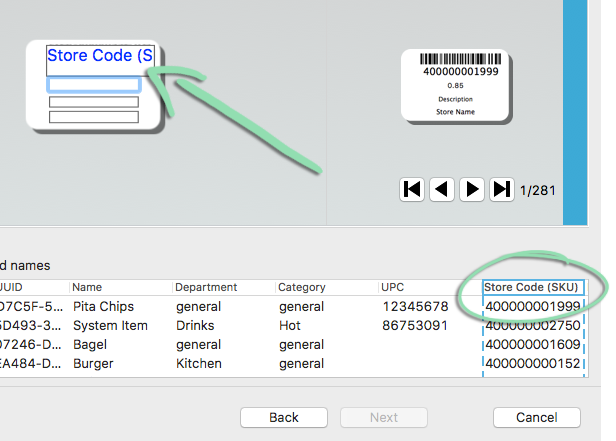 IMPORTANT: Delete the space after ‘Store Code (SKU)’ on the label or barcodes will NOT scan.
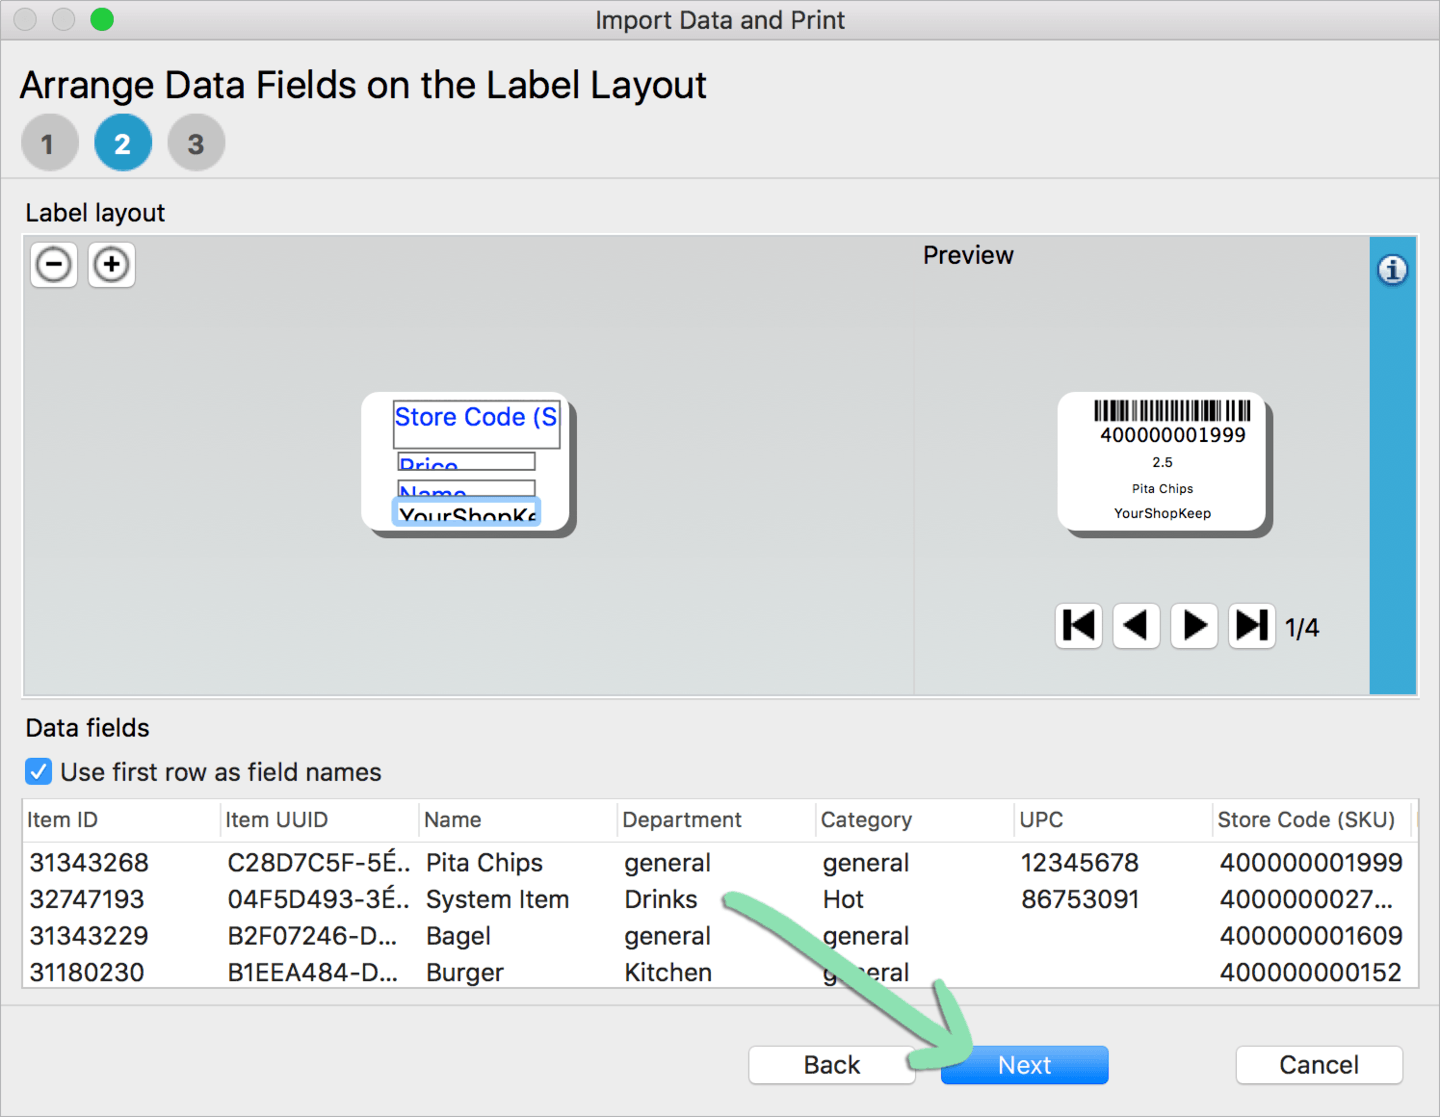
- Drag 'Name' and 'Price' fields into the other template fields. Enter your business name in the final field.
- Click 'Next'.
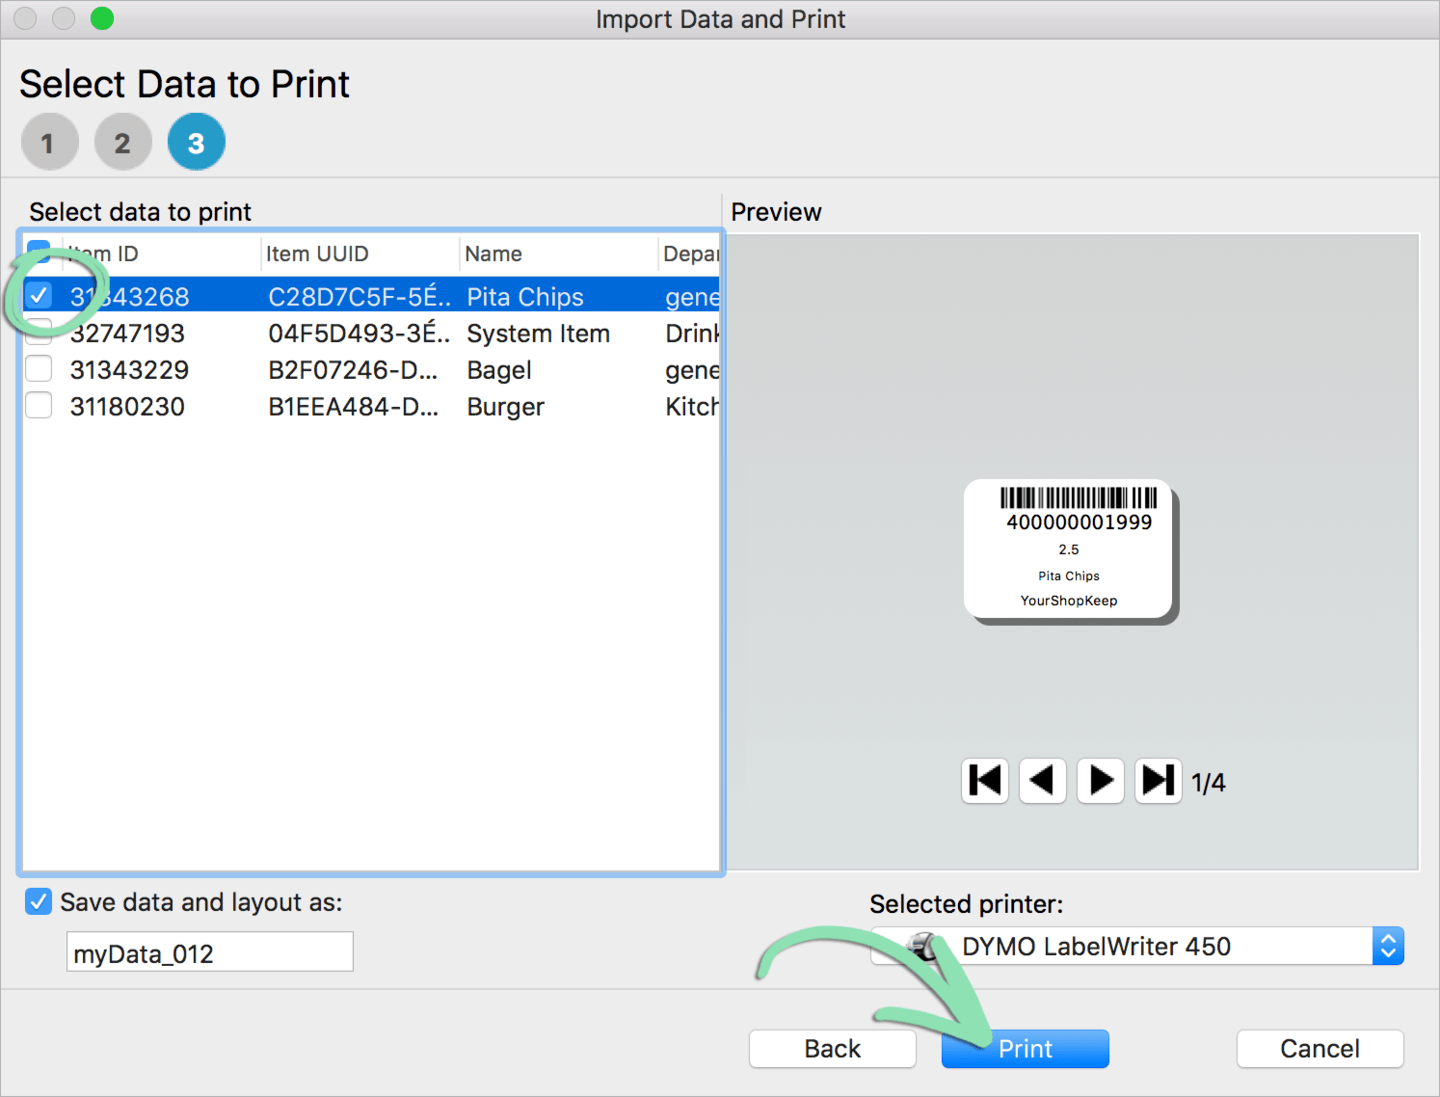
- Select which labels to print and click 'Print'.
Uncheck the boxes for any items you don’t want to print.
Download Templates & Inventory
Before printing, you must download a template for your labels and spreadsheet of your BackOffice inventory.
Label Template Downloads
Lightspeed only supports printing Bookspine and Medium DYMO labels via DYMO software. Follow the steps below to download the correct template so your labels print properly in DYMO Connect or DYMO Label.
Purchase labels from the Lightspeed Store here.
Export Inventory
DYMO software creates labels from a spreadsheet of your BackOffice inventory items. Follow the steps below to export your inventory and prepare the spreadsheet for import into DYMO.
Print Labels with DYMO Connect
With all the files installed and downloaded, you’re ready to open DYMO Connect and print labels. This section shows how to print with the DYMO Connect software. If you’re using DYMO Label, follow the steps in the section below instead.
DYMO Connect is third-party software. For help using DYMO software, contact DYMO directly for support.
Print Labels with DYMO Label
With all the files installed and downloaded, you’re ready to open DYMO Label and print labels. This section shows how to print with the DYMO Label software. If you’re using DYMO Connect, follow the steps in the section above instead.
DYMO Label is third-party software. For help using DYMO software, contact DYMO directly for support.
Purchase labels from the Lightspeed Store here.