ShopKeep iPad Stand
The ShopKeep iPad Stand provides a versatile way of displaying a register at checkout. Learn how to set up the stand with or without an iDynamo credit card reader and how to remove the PivotTable base if desired.
Watch our setup video below:
In the Box
The ShopKeep iPad Stand ships with all of the parts listed below.

Stand Setup - With iDynamo
Install your iPad and iDynamo credit card reader in the ShopKeep Stand using the included assembly tool, screws, and brackets. If you don’t have an iDynamo, follow the setup steps in the next section instead.
If you have trouble setting up the stand, visit our troubleshooting guide for help. After setup, visit our best practices guide to learn how to care for the stand.
- Place the stand face down on a flat surface.
- Using the assembly tool, remove the screws and bracket on the side with 2 screws.

- Loosen, but do not remove, the 4 screws on the other side.
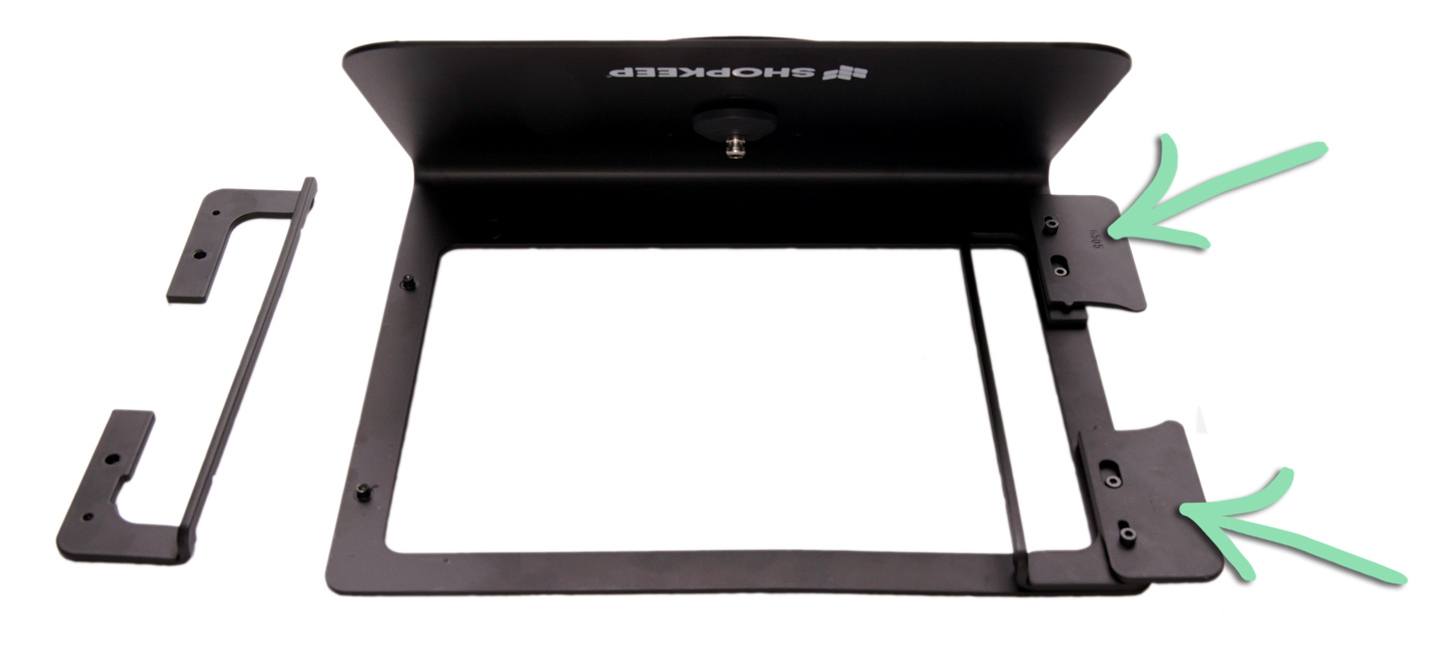
- Spread apart the 2 supports located on the side with 4 screws.

- Position the iDynamo face down between the supports and close them on the reader.
The ridges on the supports fit into the holes on the sides of the iDynamo.

- Attach an adapter clip to each of the 2 notches on the bracket still connected to the stand.
- These are required for all iPads except 5th and 6th-gen iPads, 12.9″ iPad Pros, and 1st-gen iPad Airs.
- For the iPad mini 4, put the included foam pieces between the clips and iPad for a more secure fit.

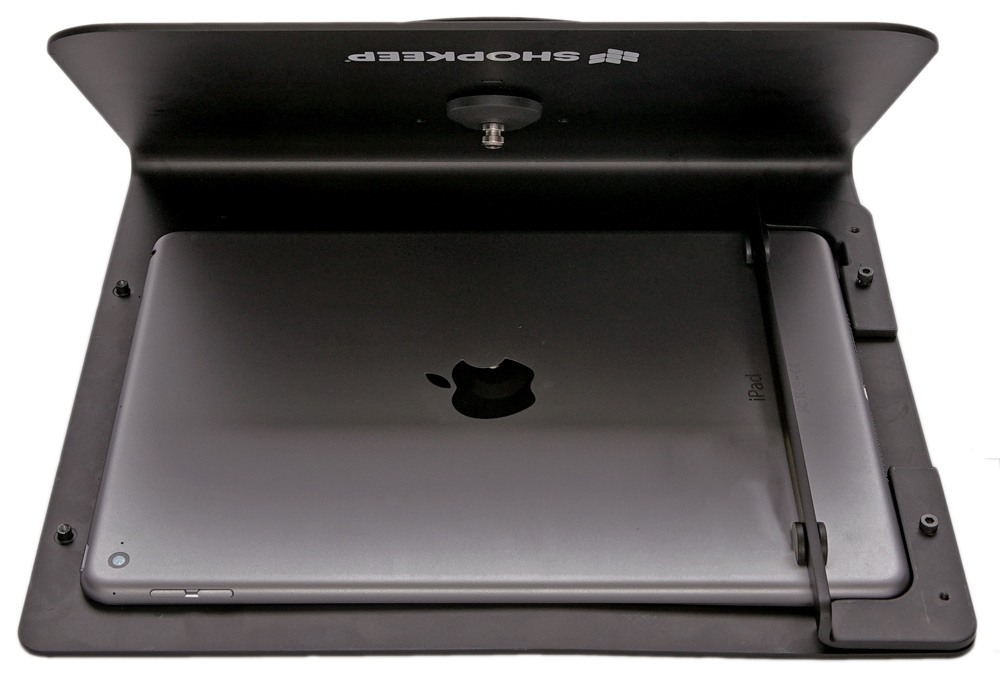
- Slide the iPad face down under the bracket and connect it to the iDynamo.

- On the removed bracket, attach an adapter clip to each of the notches.

- Place the loose bracket over the unsecured side of the iPad and reinsert the screws.

- Gently tighten all 6 screws until you begin to feel resistance.
Be careful not to over tighten.
- (Optional) Affix an adhesive disk to the bottom of the PivotTable base.
- The permanent disk has adhesive on both sides, allowing the stand to adhere to a surface.
- The temporary disk has foam on one side, allowing the stand to move around as needed.
 Don’t want the stand to rotate or prefer to bolt it down? Follow the steps to remove the PivotTable.
 - (Optional) To charge the iPad, plug a micro USB cable into the port on the back of the iDynamo and connect the other end of the cable to the iPad’s charger.
Charge the iPad only when needed as rotating the stand with the cable attached can damage the charging port on the reader.
Stand Setup - Without iDynamo
Install your iPad in the ShopKeep Stand using the included assembly tool, screws, and brackets. If you have an iDynamo credit card reader, follow the setup steps in the section above instead.
If you have trouble setting up the stand, visit our troubleshooting guide for help. After setup, visit our best practices guide to learn how to care for the stand.
- Place the stand face down on a flat surface.
- Using the assembly tool, remove the screws and bracket on the side with 2 screws.
- On the other side, remove the 2 outer screws and the 2 iDynamo supports.

- Loosen, but do not remove, the 2 remaining screws.
- Attach an adapter clip to each of the 2 notches on the bracket still connected to the stand.
- These are required for all iPads except 5th and 6th-gen iPads, 12.9″ iPad Pros, and 1st-gen iPad Airs.
- For the iPad mini 4, put the included foam pieces between the clips and iPad for a more secure fit.

- Slide the iPad face down under the bracket.
- On the removed bracket, attach an adapter clip to each of the notches.

- Place the loose bracket over the unsecured side of the iPad and reinsert the screws.

- Gently tighten all 6 screws until you begin to feel resistance.
Be careful not to over tighten.
- (Optional) Affix an adhesive disk to the bottom of the PivotTable base.
- The permanent disk has adhesive on both sides, allowing the stand to adhere to a surface.
- The temporary disk has foam on one side, allowing the stand to move around as needed.
Don’t want the stand to rotate or prefer to bolt it down? Follow the steps to remove the PivotTable.
Remove PivotTable Base
The optional PivotTable gives cashiers the ability to swivel the register. Remove the PivotTable if you don’t want the stand to rotate or would like to bolt it to a counter.
Make sure to save the PivotTable base and assembly pieces in case you decide to reinstall it later. For help reinstalling the PivotTable, visit our troubleshooting guide for help.
- Using the assembly tool, remove the PivotTable screw and ClickSafe anchor.

- Remove the PivotTable cap.

- Lift the stand off the PivotTable base.