QuickBooks
Bluetooth Credit Card Reader Setup
The QuickBooks All-in-One Bluetooth Credit Card Reader connects wirelessly to the Lightspeed Retail POS for iOS to process EMV, swiped, and contactless credit payments. After signing into your QuickBooks Payments account in BackOffice, charge the rechargeable battery of the reader and connect the reader to the Lightspeed Retail POS to use it to accept credit cards.
Lightspeed Retail supports the QuickBooks All-in-One Card Reader but not the QuickBooks Chip and Magstripe Reader. Not sure which reader you have? View photos of each here.
In the Box
The QuickBooks All-in-One Bluetooth Credit Card Reader ships with the parts listed below.

Connect QuickBooks Payments
Connect your QuickBooks Payments account in BackOffice to integrate credit card processing with your Lightspeed Retail account. After connecting QuickBooks Payments, charge and set up the QuickBooks credit card reader to use with the Lightspeed Retail POS.
- Sign into BackOffice as the Business Owner.
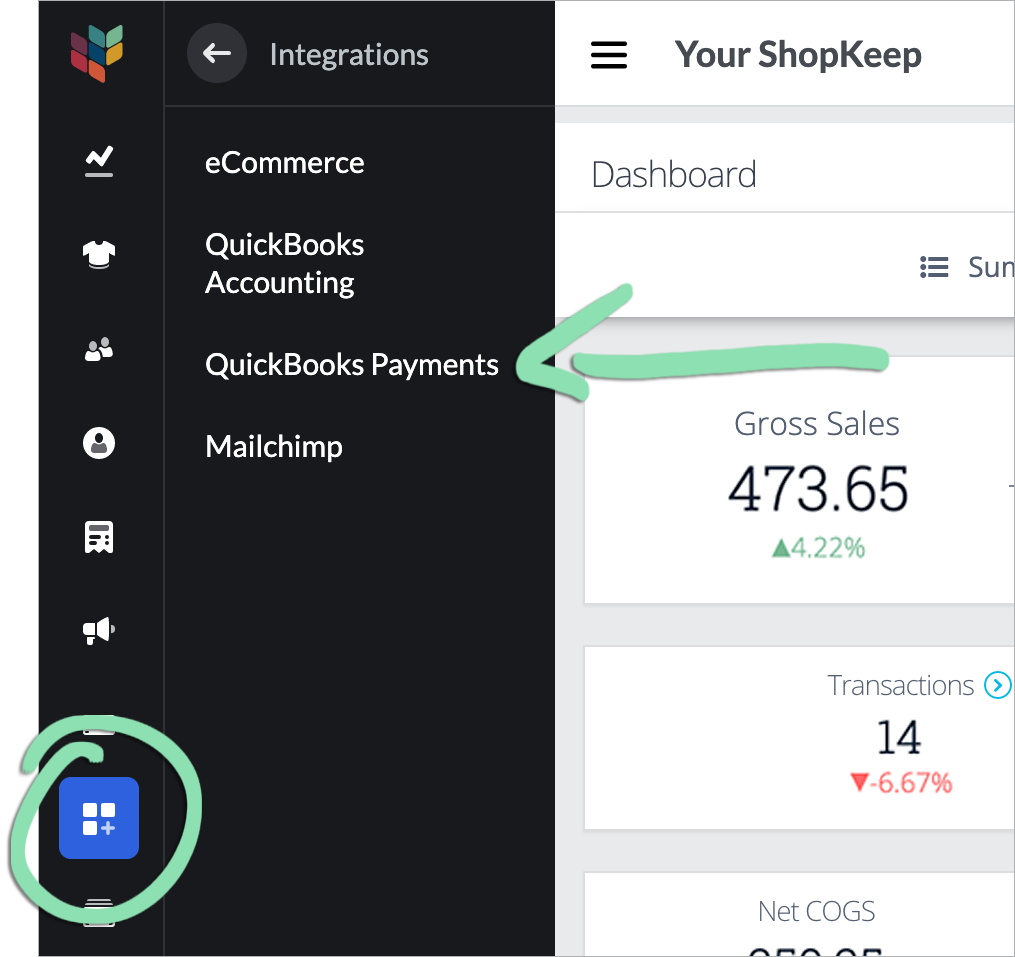
- Click ‘Integrations’ and select ‘QuickBooks Payments’.
Don’t see ‘QuickBooks Payments’? Visit our troubleshooting guide for help.
- Click ‘Connect to QuickBooks’.

- Enter your QuickBooks Payments username and password into the pop-up and click ‘Sign In’.
Don’t see a pop-up? Learn to disable your pop-up blocker here.

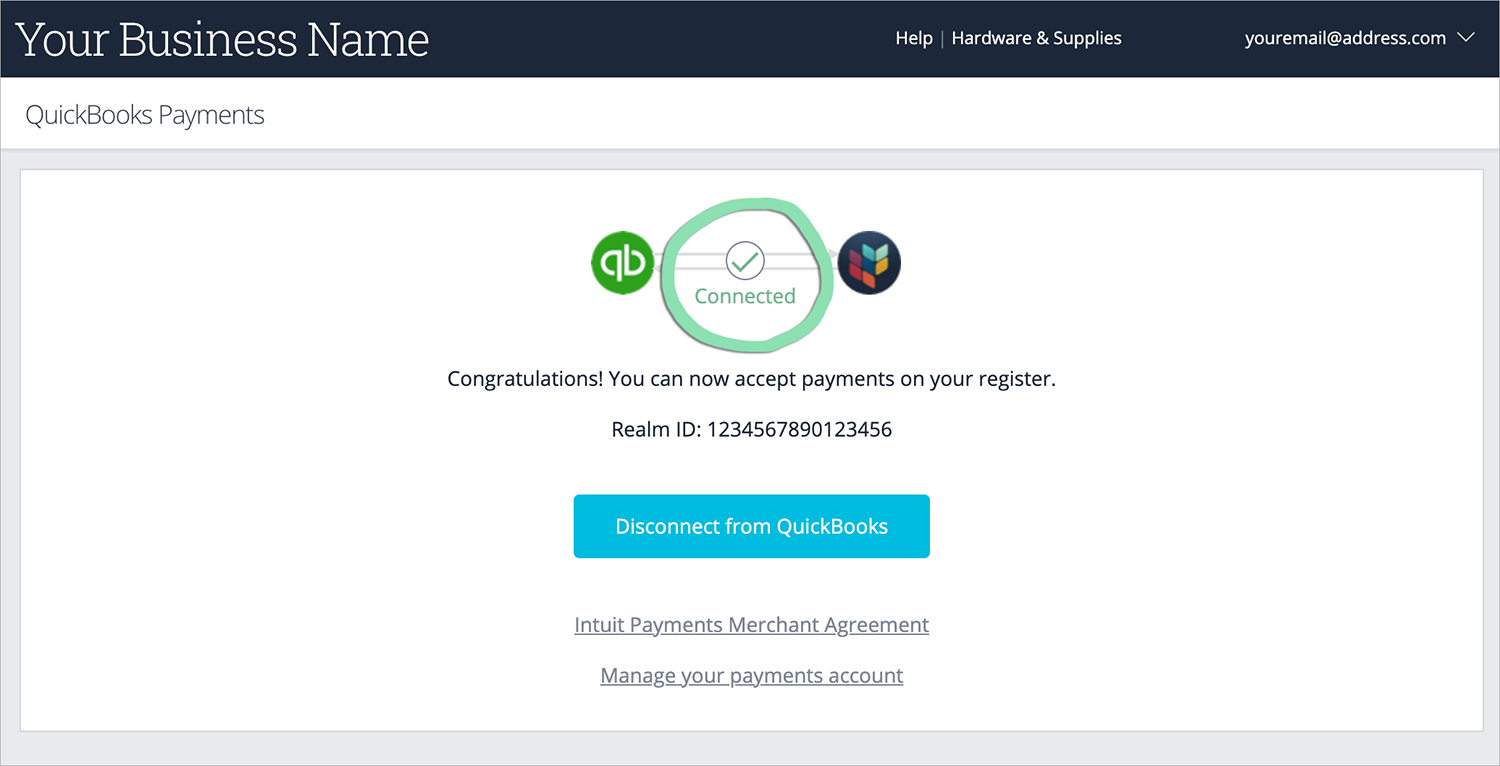
- In BackOffice, wait for the status to change to 'Connected'.
Use the ‘Realm ID’ listed on this page to identify your QuickBooks Payments account when contacting Intuit support.
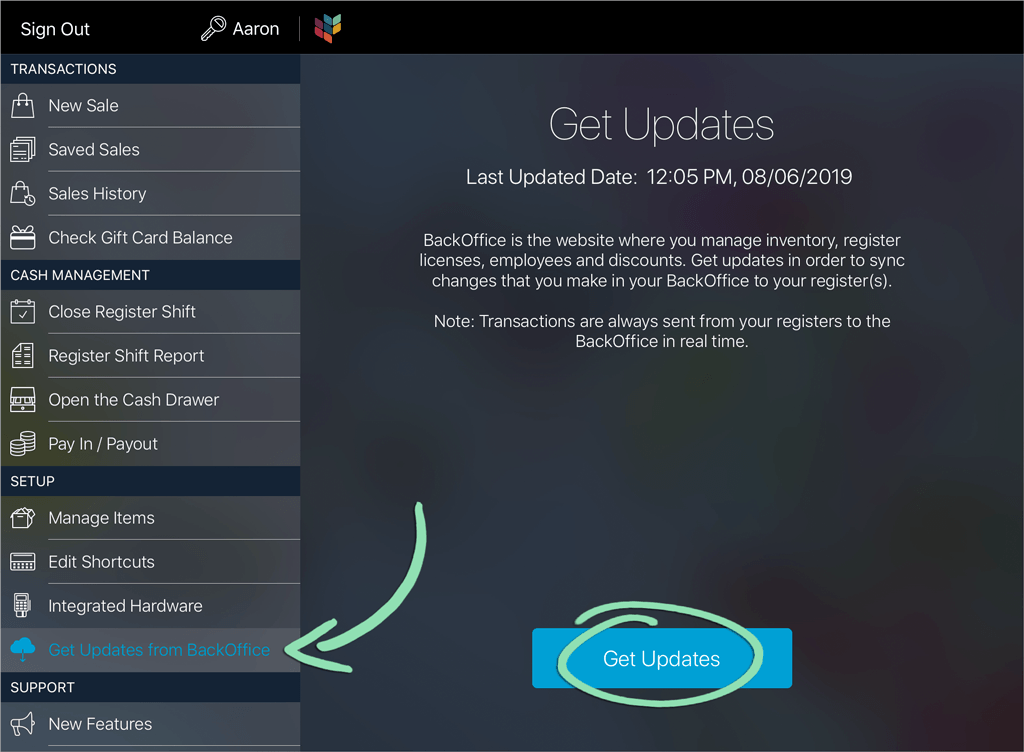
- In the Retail POS (S-Series) app, open the Main Menu and tap ‘Get Updates from BackOffice’, then ‘Get Updates’.
Charge the Reader
The QuickBooks credit card reader operates on battery power and needs to be charged to function. Charge the reader before using it the first time and whenever its battery is running low with the included USB cable or charging dock.
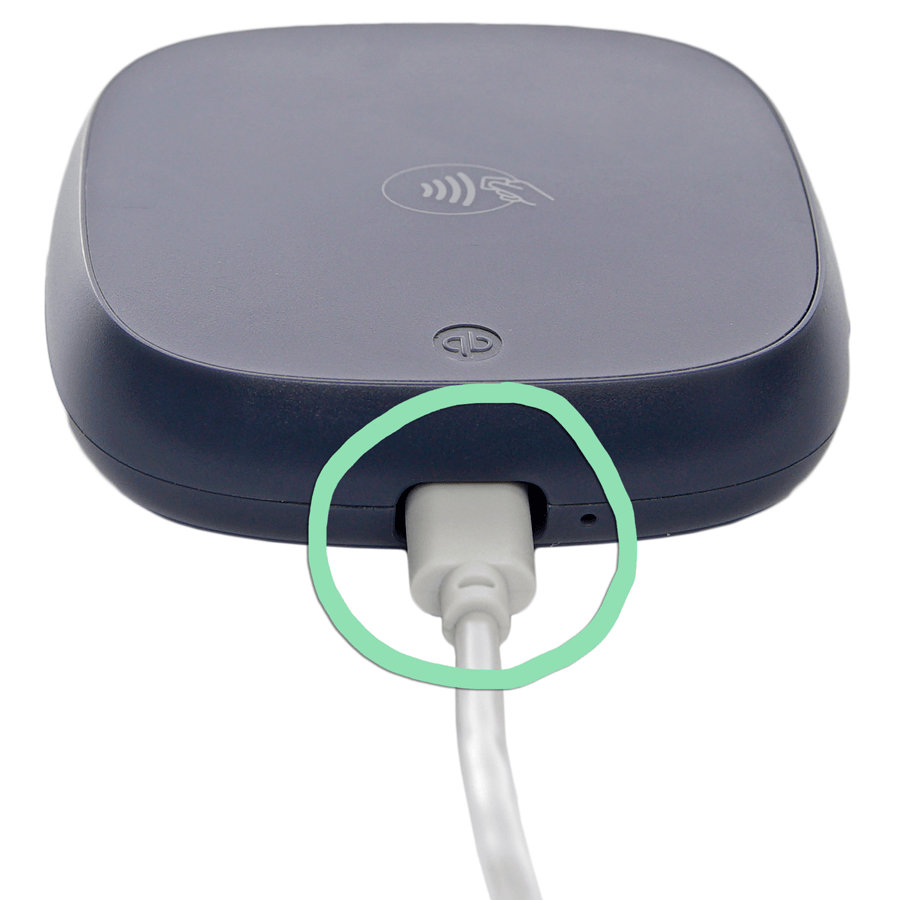
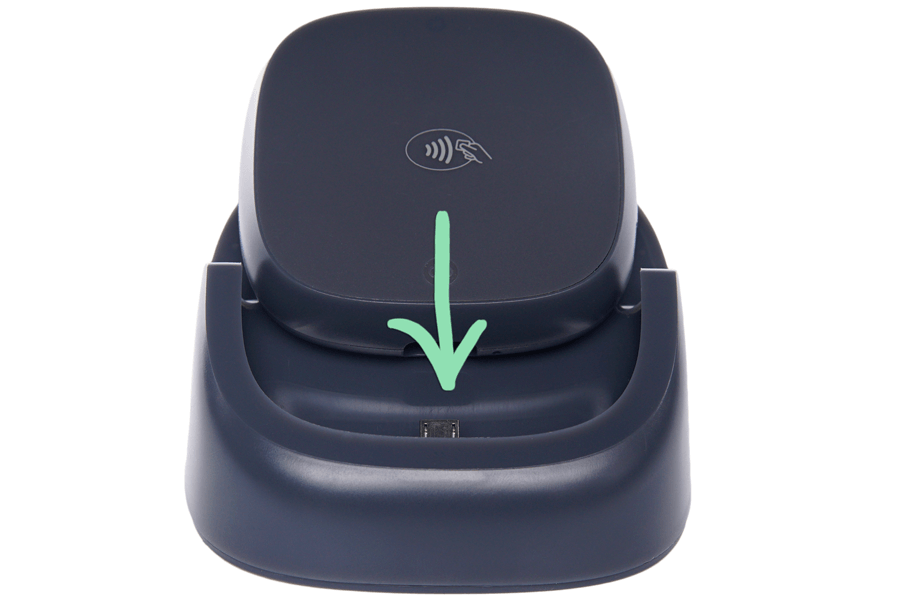
- Plug the micro USB cable into the charging port on the reader or dock.

- Plug the other end of the micro USB cable into a wall charger (sold separately).
- Plug the wall charger into a power outlet.
- If charging the reader via the charging dock, slide the reader into the dock.
- If setting up for the first time, charge the reader for at least 20 minutes.
When fully charged, the reader can last for up to 115 transactions.
Connect Reader to Lightspeed
With your QuickBooks Payments account connected and the QuickBooks credit card reader charged, open the Retail POS (S-Series) app to connect and finish setting up the reader.
Before following the steps below, make sure Bluetooth and Location Services are enabled in the Settings app.
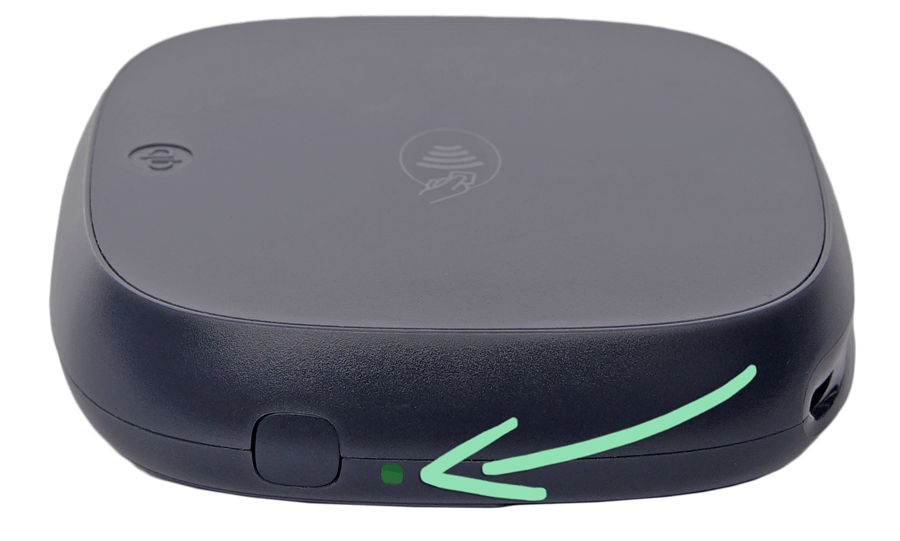
- Make sure the QuickBooks reader is powered on. When on, the status light will light up or blink.
If the reader is not on, hold the power button for 2 seconds until you see a green light. If it will not power on, visit our troubleshooting guide for help.
- In the Retail POS (S-Series) app, open the Main Menu and tap ‘Integrated Hardware’.

- Select ‘Card Readers’.

- Tap ‘Add a new card reader’.

- When the reader appears on screen, tap it to connect.
If the reader does not appear, visit our troubleshooting guide for help resolving the issue.

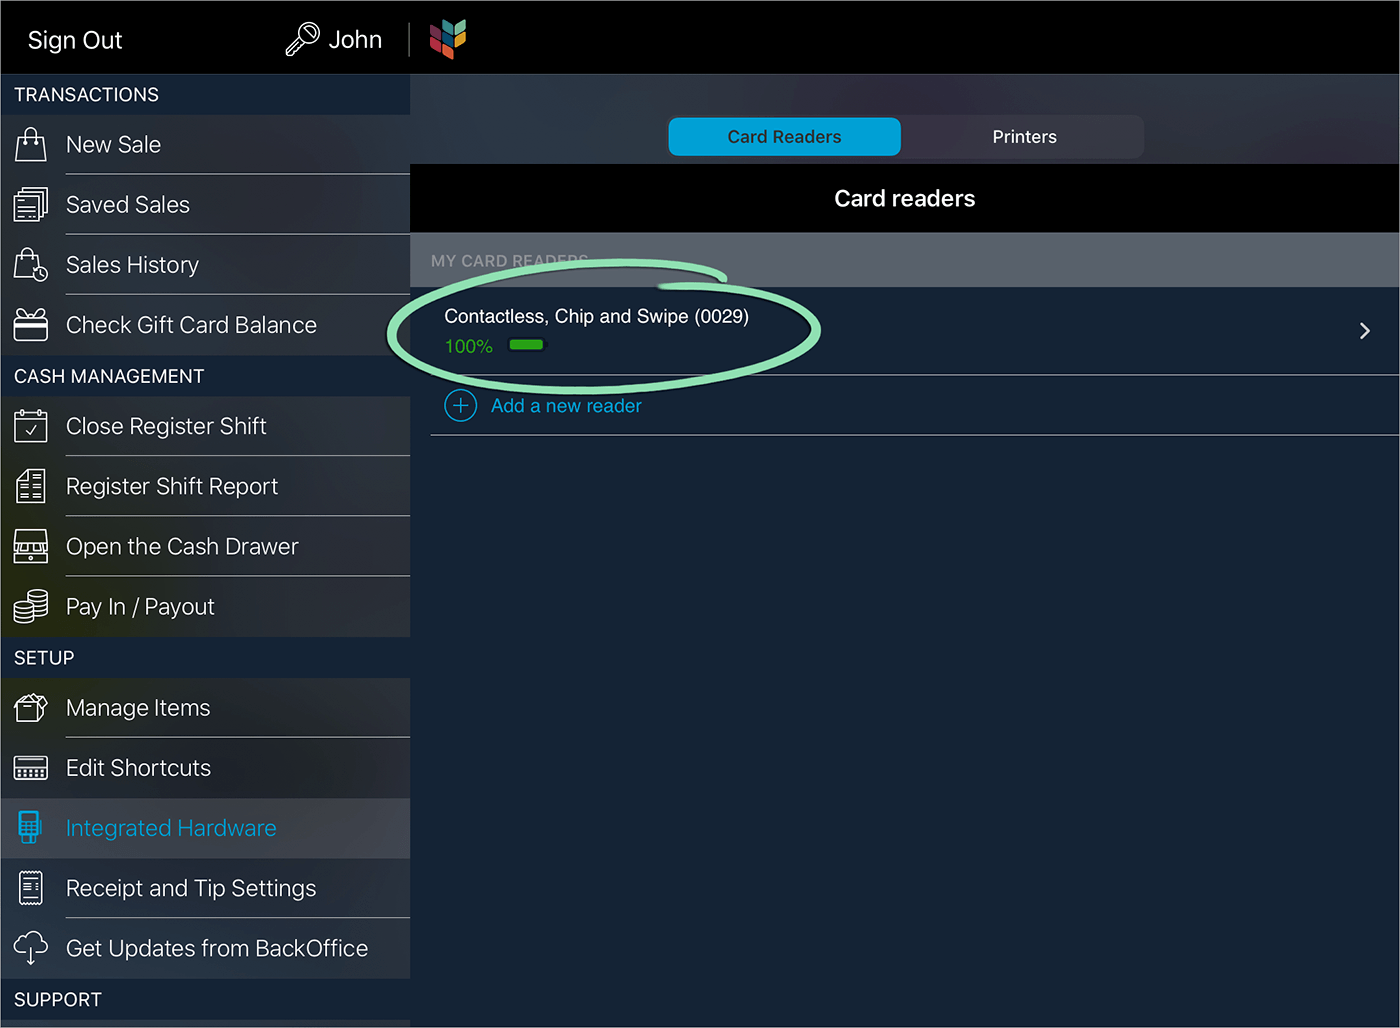
- In the Retail POS (S-Series) app, wait for the reader to appear under 'My Card Readers'.
The QuickBooks credit card reader is now ready to process credit cards in the Retail POS (S-Series) app.
- Run a test transaction to complete setup.a In the Retail POS (S-Series) app, ring up a sale and tap ‘Credit’.b Tap ‘Okay, I understand’, then ‘Allow While Using App’ to enable location services for the Retail POS (S-Series) app.Tapping ‘Don’t Allow’ will prevent the register from being able to run credit transactions.

 c Swipe, insert, or tap a card or payment device as shown below.
 d Follow the prompts to complete the sale.To learn how to refund this charge, visit our Performing Returns article.
Accepting Credit Cards
The QuickBooks credit card reader supports multiple types of credit payments. Follow the steps below to learn the basics of accepting EMV chip cards, swiped credit cards, and contactless payments.
EMV
If a customer has a card with a chip in it, run an EMV transaction.
- In the Retail POS (S-Series) app, ring up a sale and tap 'Credit'.
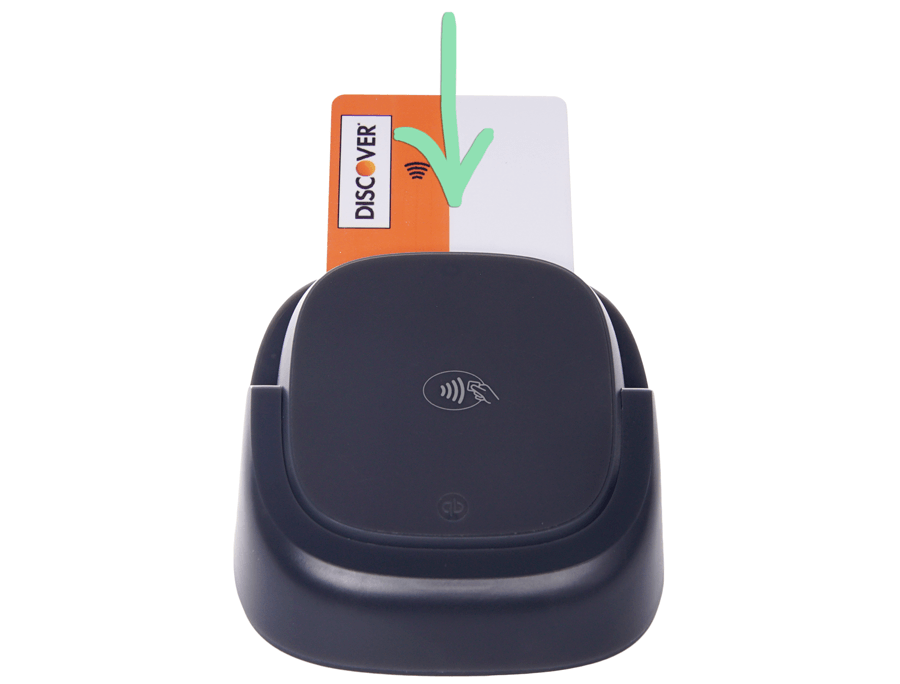
- Insert the card into the slot on the reader (chip end first with the chip facing the top of the reader).
- When prompted in the Retail POS (S-Series) app, remove the card.
- Continue closing the sale.
Swipe
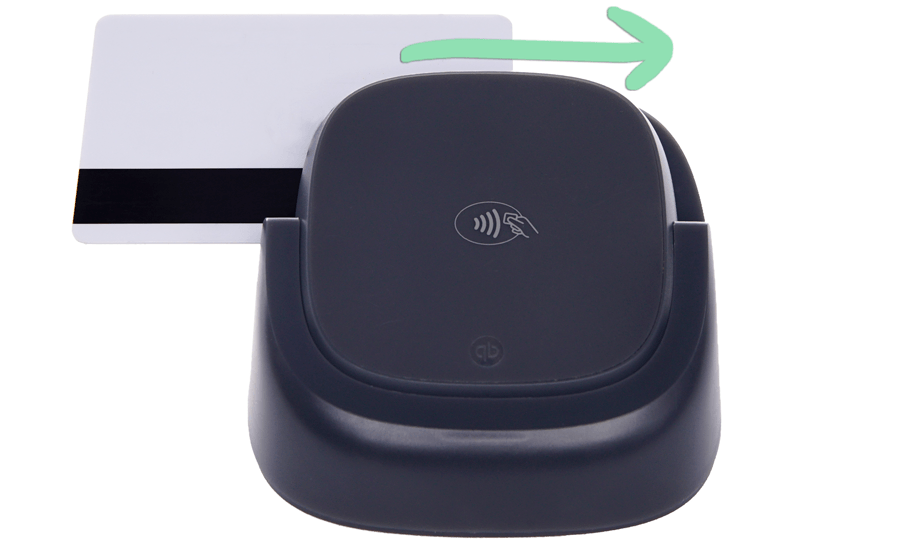
When a customer has a card with only a magnetic stripe or if you are not set up to accept EMV, process a swiped credit card sale.
- In the Retail POS (S-Series) app, ring up a sale and tap 'Credit'.
- With the card stripe facing up, slide the card in either direction through the top slot on the reader.
- Wait for payment to be approved and continue closing the sale.
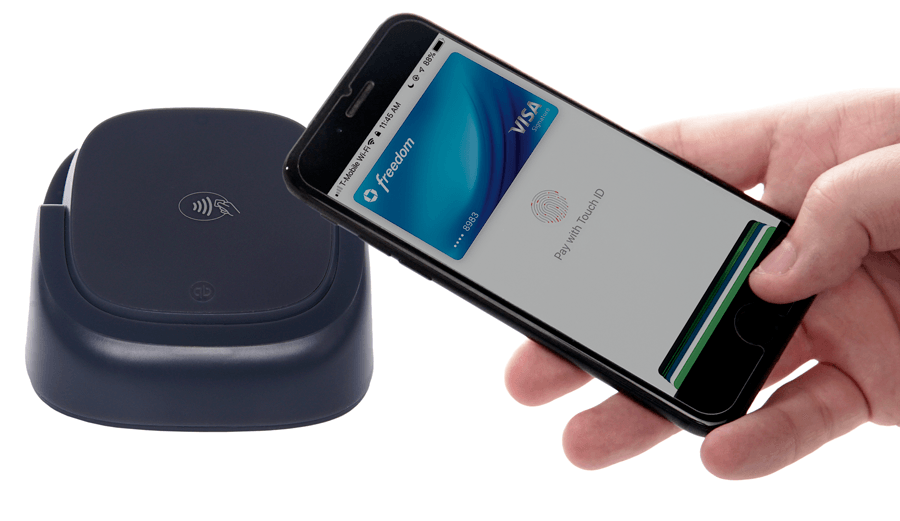
Contactless
For customers who wish to use a contactless payment method, the QuickBooks credit card reader supports Apple Pay, Google Pay, and other types of NFC payments.
- In the Retail POS (S-Series) app, ring up a sale and tap 'Credit'.
- Customer holds their card or device near the reader.
- Cashier waits for payment to be approved and continues closing the sale.
Manual Card Entry
Manual card entry allows a cashier to enter credit card information to process a card without inserting or swiping it.
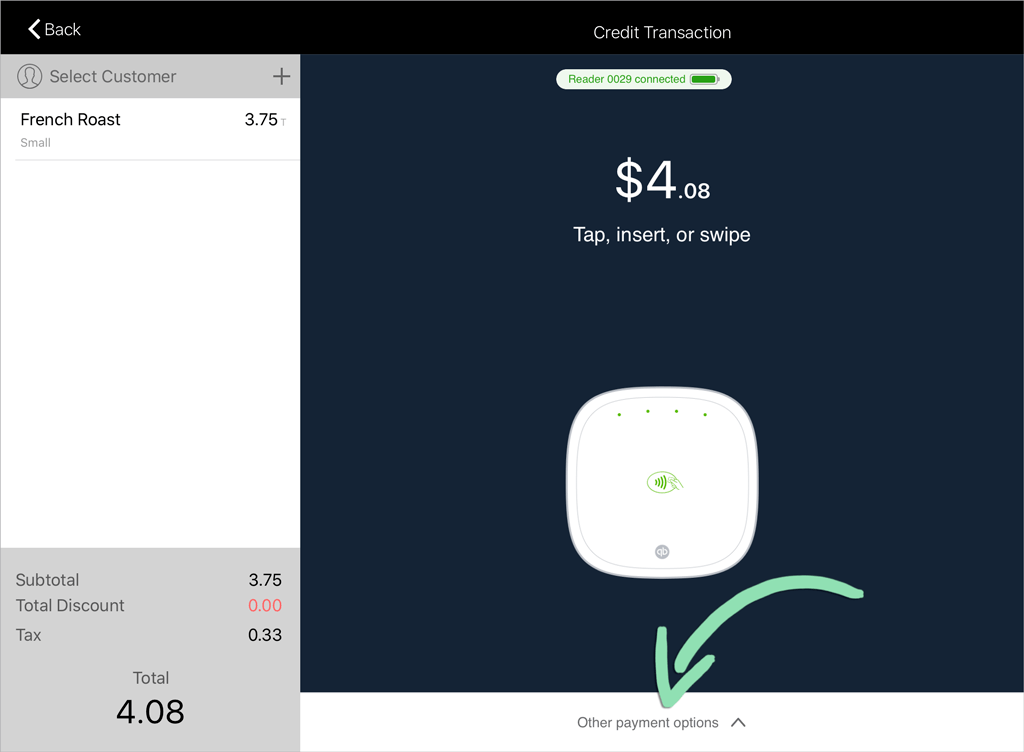
- In the Retail POS (S-Series) app, ring up a sale and tap 'Credit'.
- Tap ‘Other payment options’.
- Tap 'Key Card'.
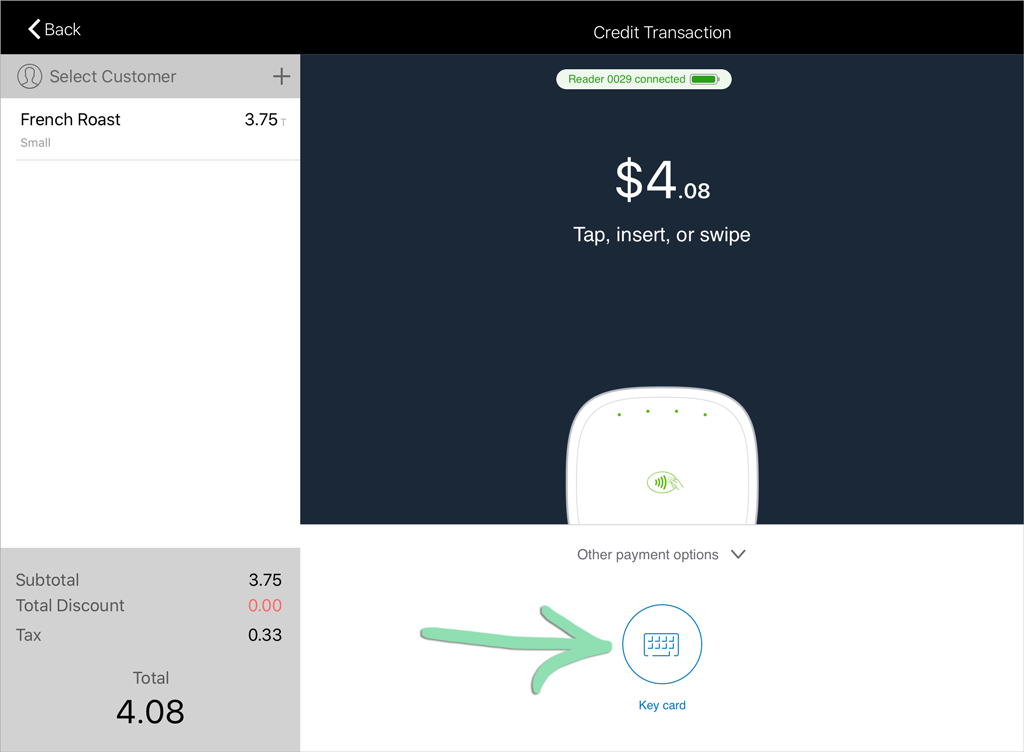
- Enter the credit card details and tap ‘Next’.

- Continue closing the sale.
Turn the Reader Off and On
Turn the QuickBooks credit card reader off to conserve battery power when it will not be used for an extended period of time. When the reader is needed again, turn it back on.
- Unplug the reader from power, if connected.
- To turn the reader off, hold the power button until the status light turns off.
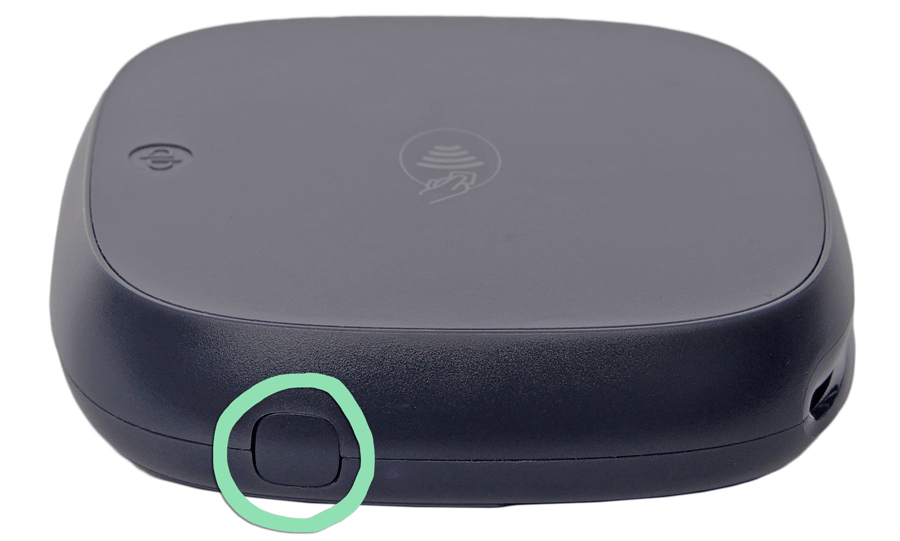
- To turn the reader on, hold the power button until the status light turns on.