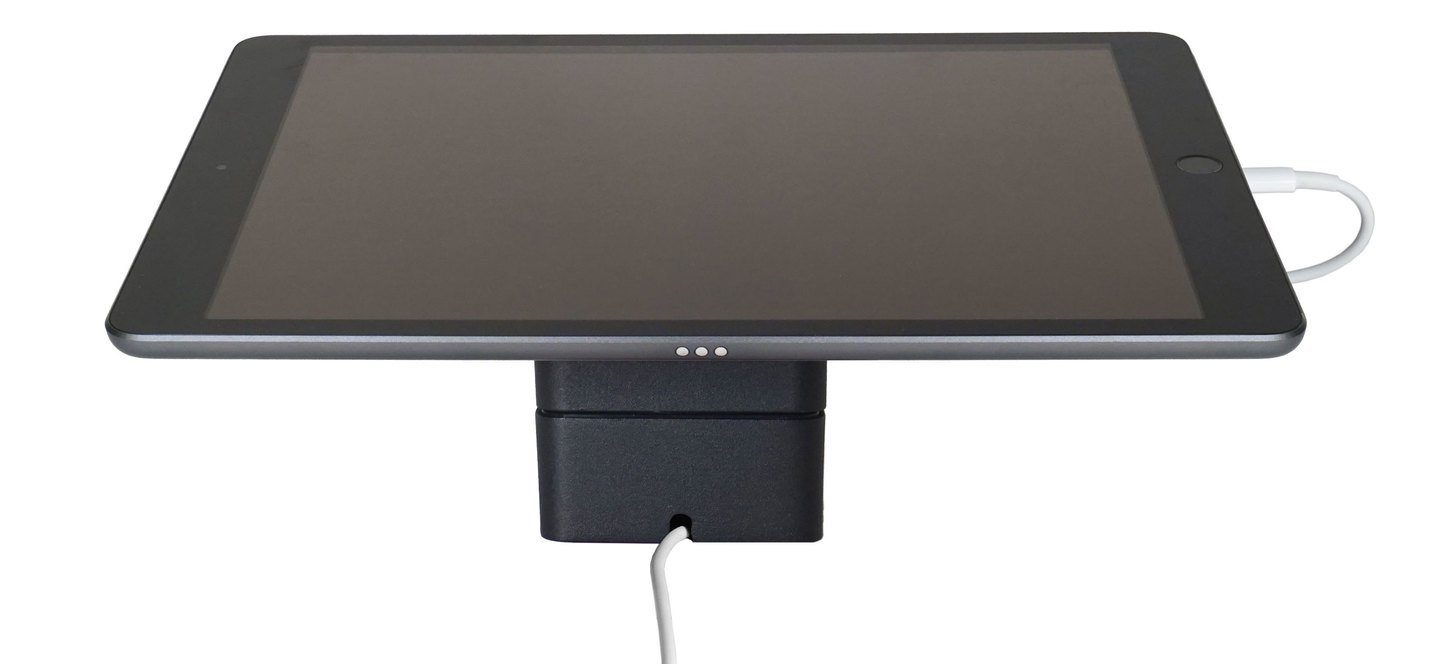
The BOSSTAB Universal Tablet Stand, compatible with iPads and Android tablets 6″ and larger with a flat back, rotates 180°, conceals the tablet’s charging cable, and allows the tablet to be easily removed from the stand for added mobility. Set up the stand with the Freestanding Base to be able to move it around the countertop as needed, or mount the stand using the included materials to secure it in place.
Table of Contents
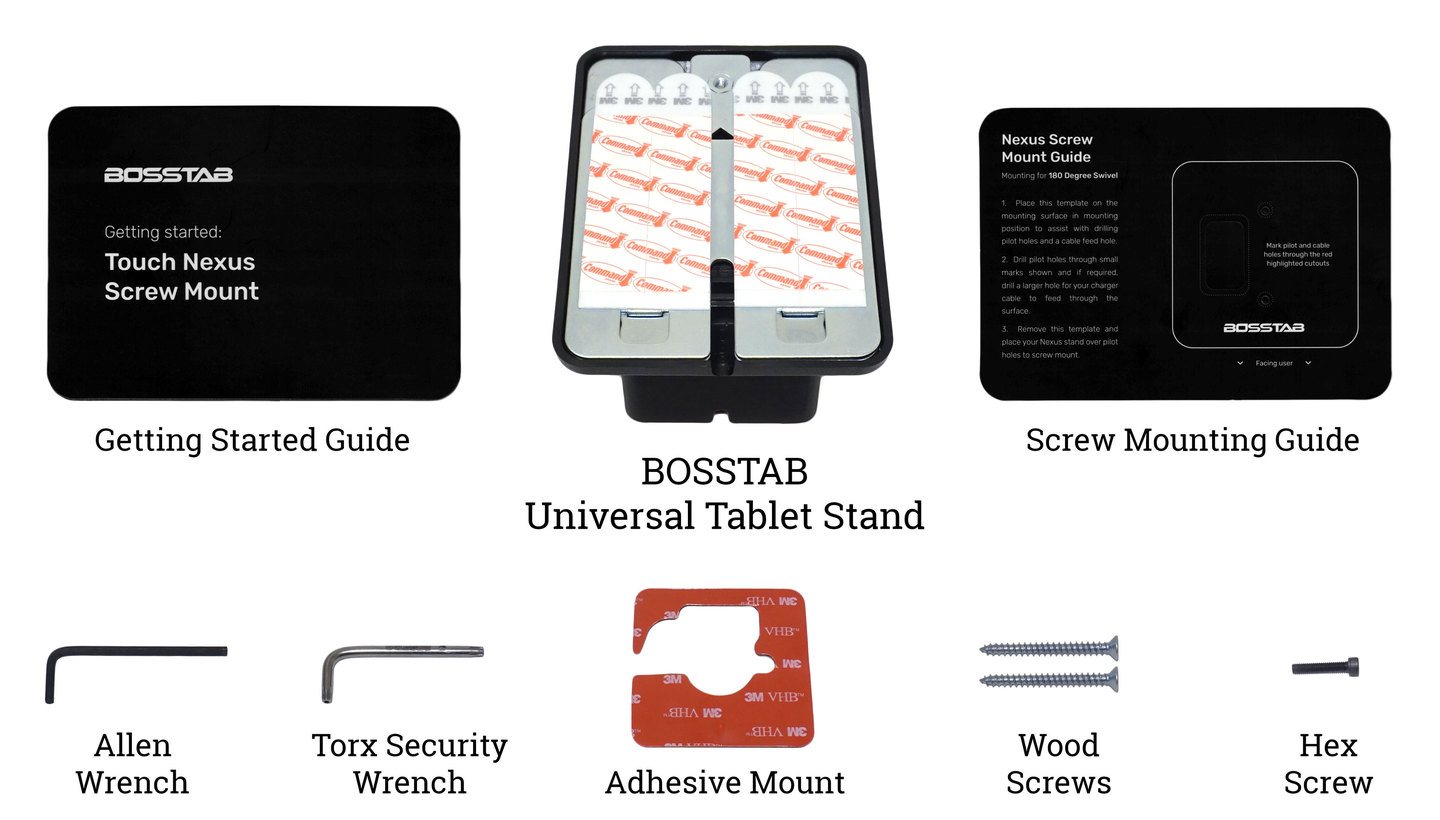
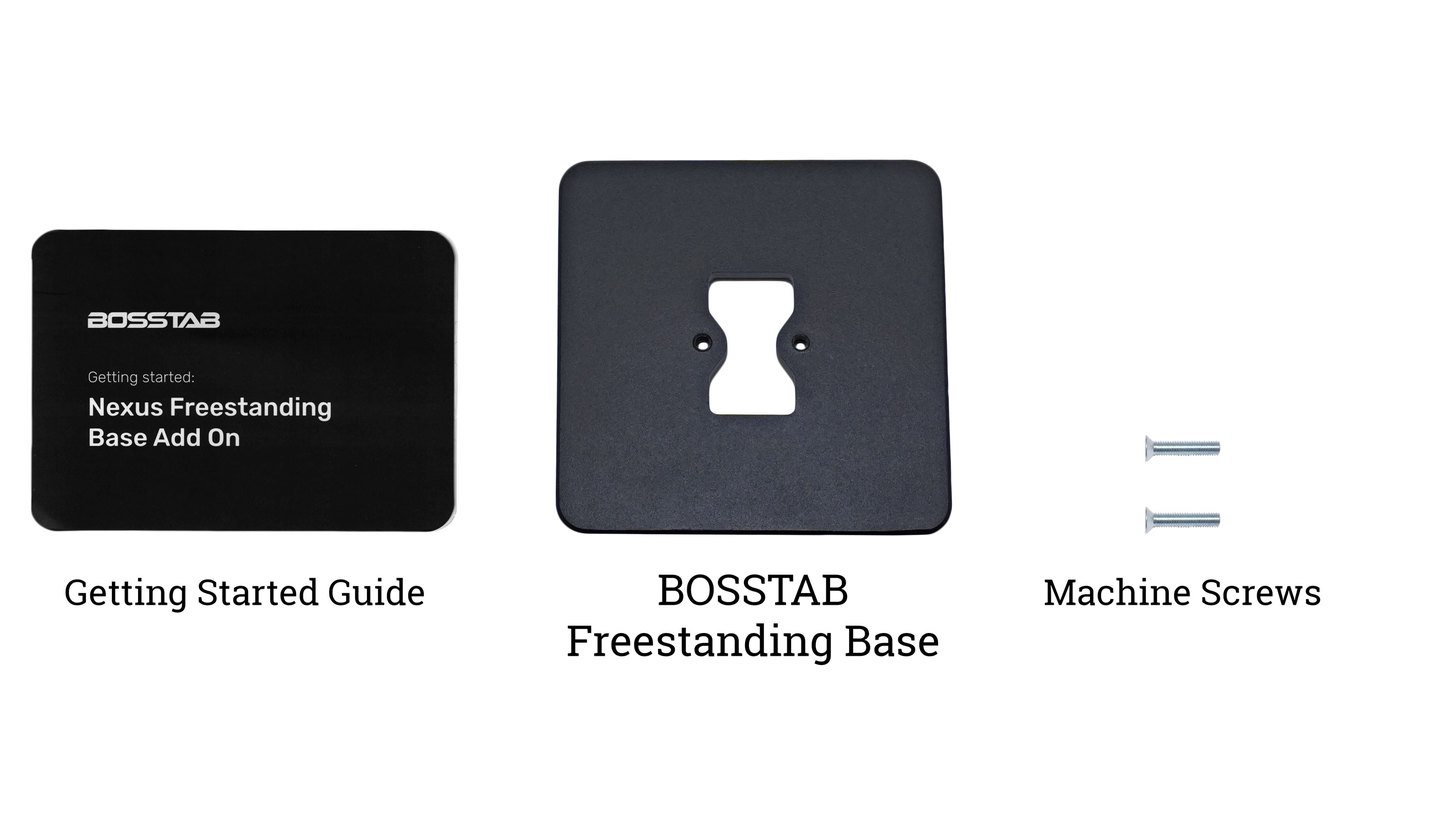
In the Box
The BOSSTAB Universal Tablet Stand and Freestanding Base ship in separate packaging and include the parts listed below.
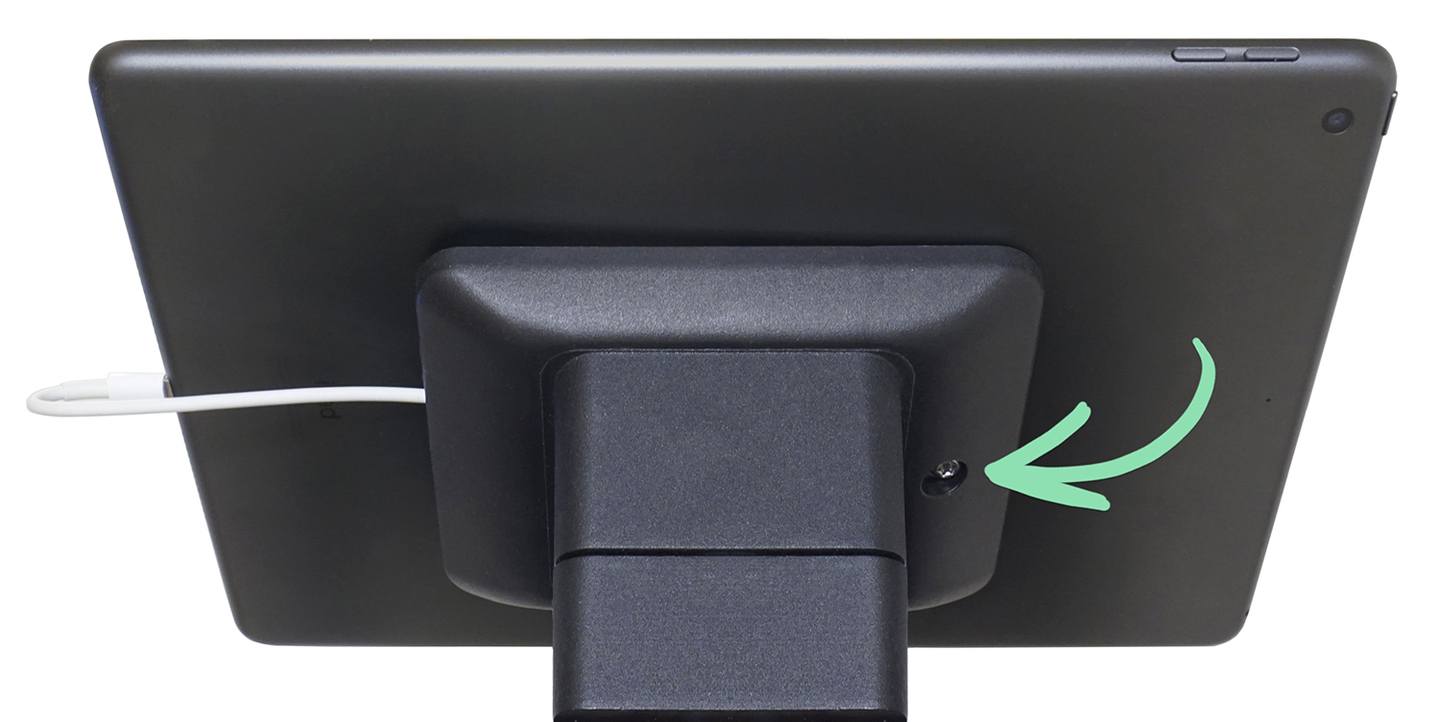
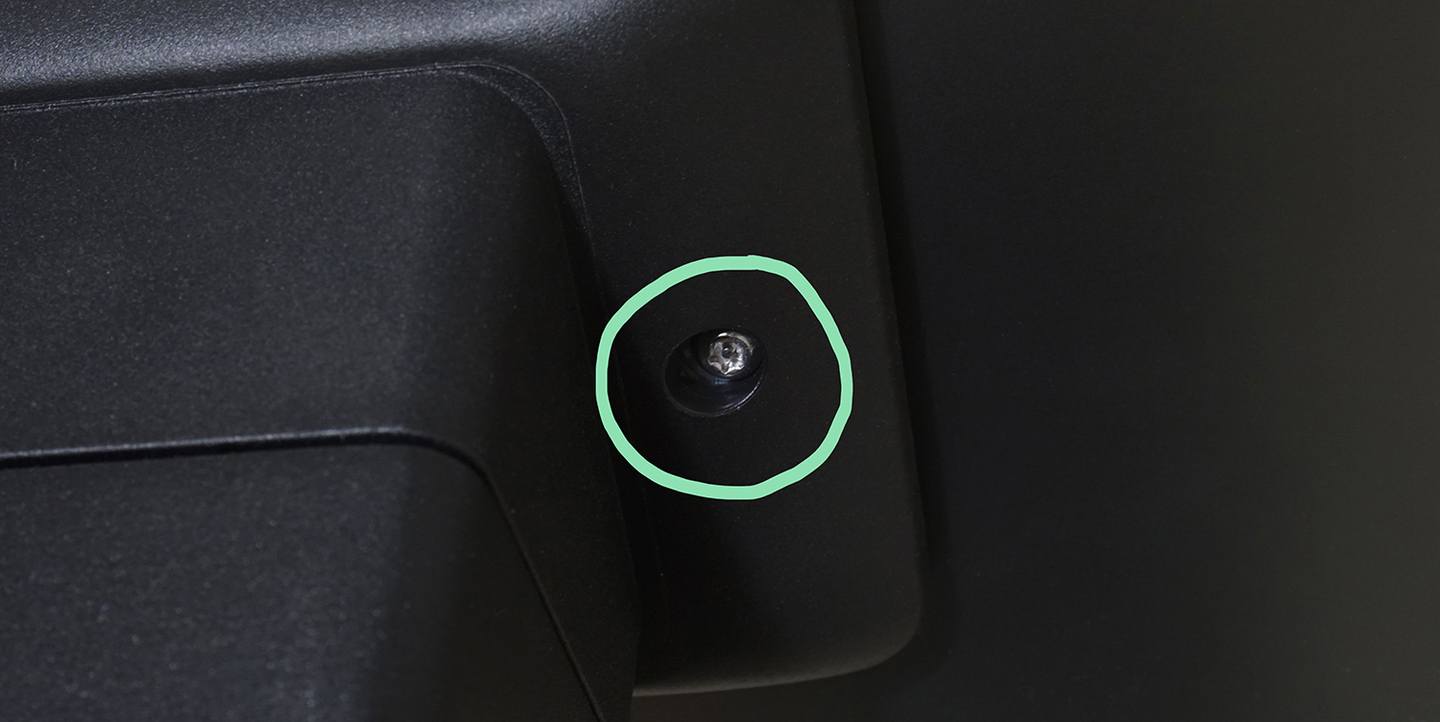
Install an iPad or Android tablet* in the stand, then attach the Freestanding Base or mount the stand using the included adhesive or screws. Lock the tablet in the stand with a security screw, or omit the screw to allow the tablet to be removed from the stand as needed.
*Tablets must be 6″ or larger and have a flat back to be compatible with the stand.
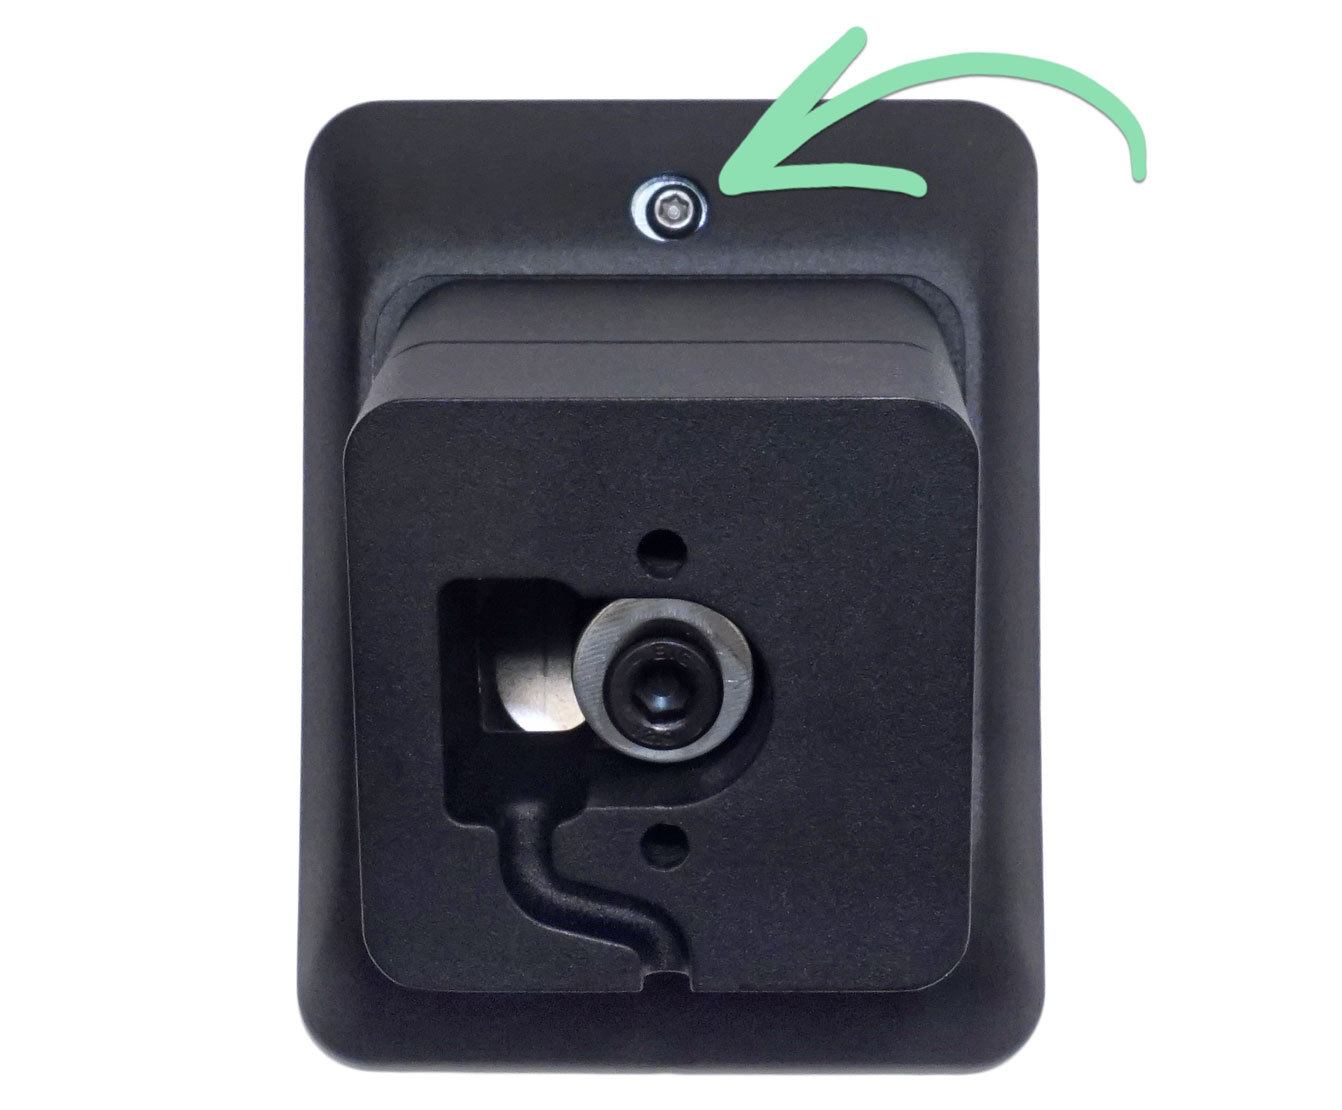
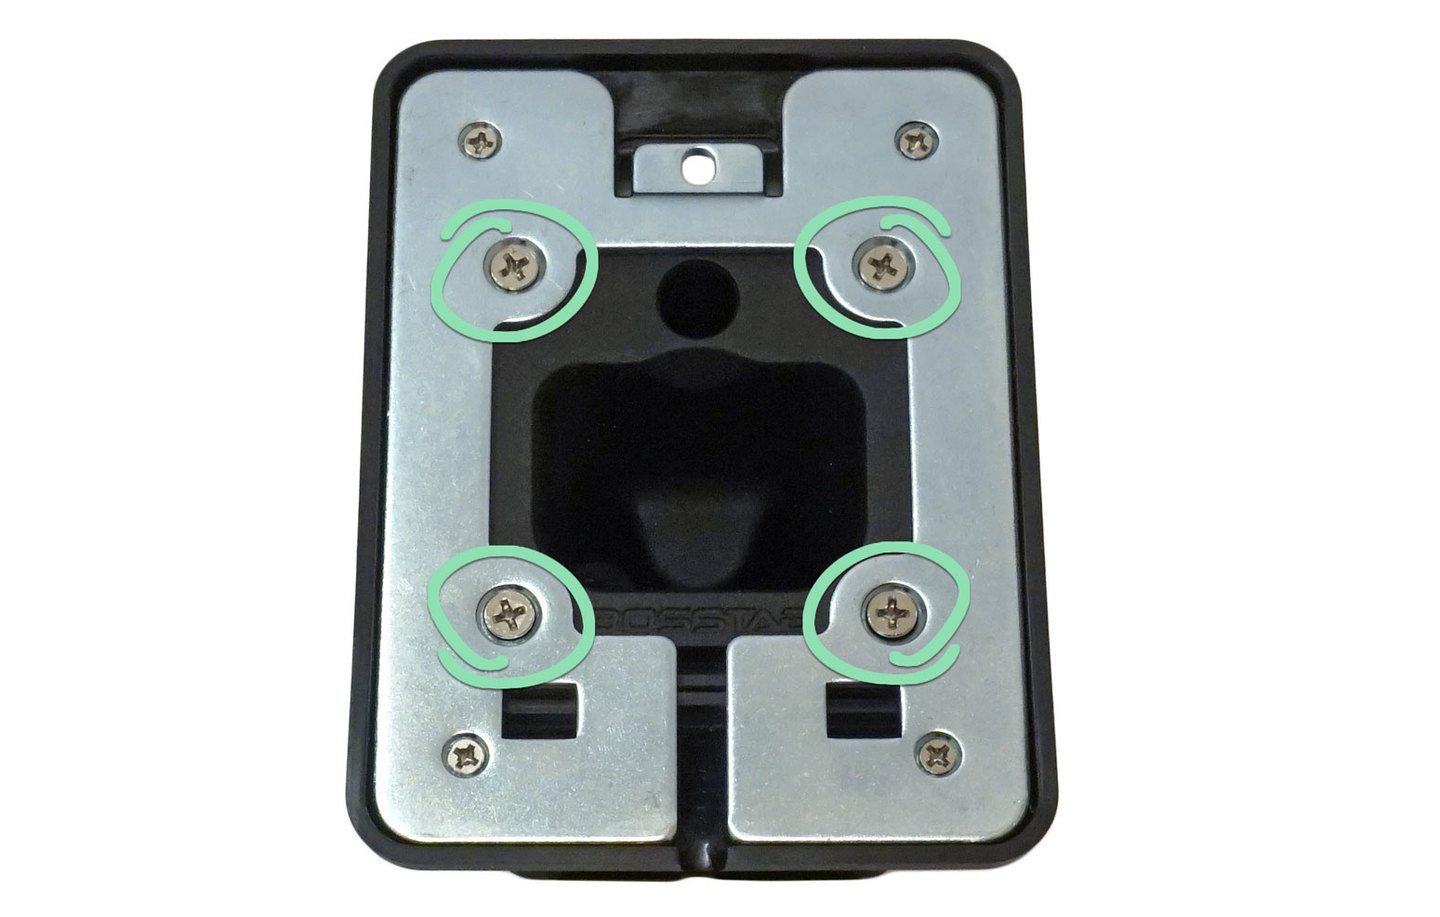
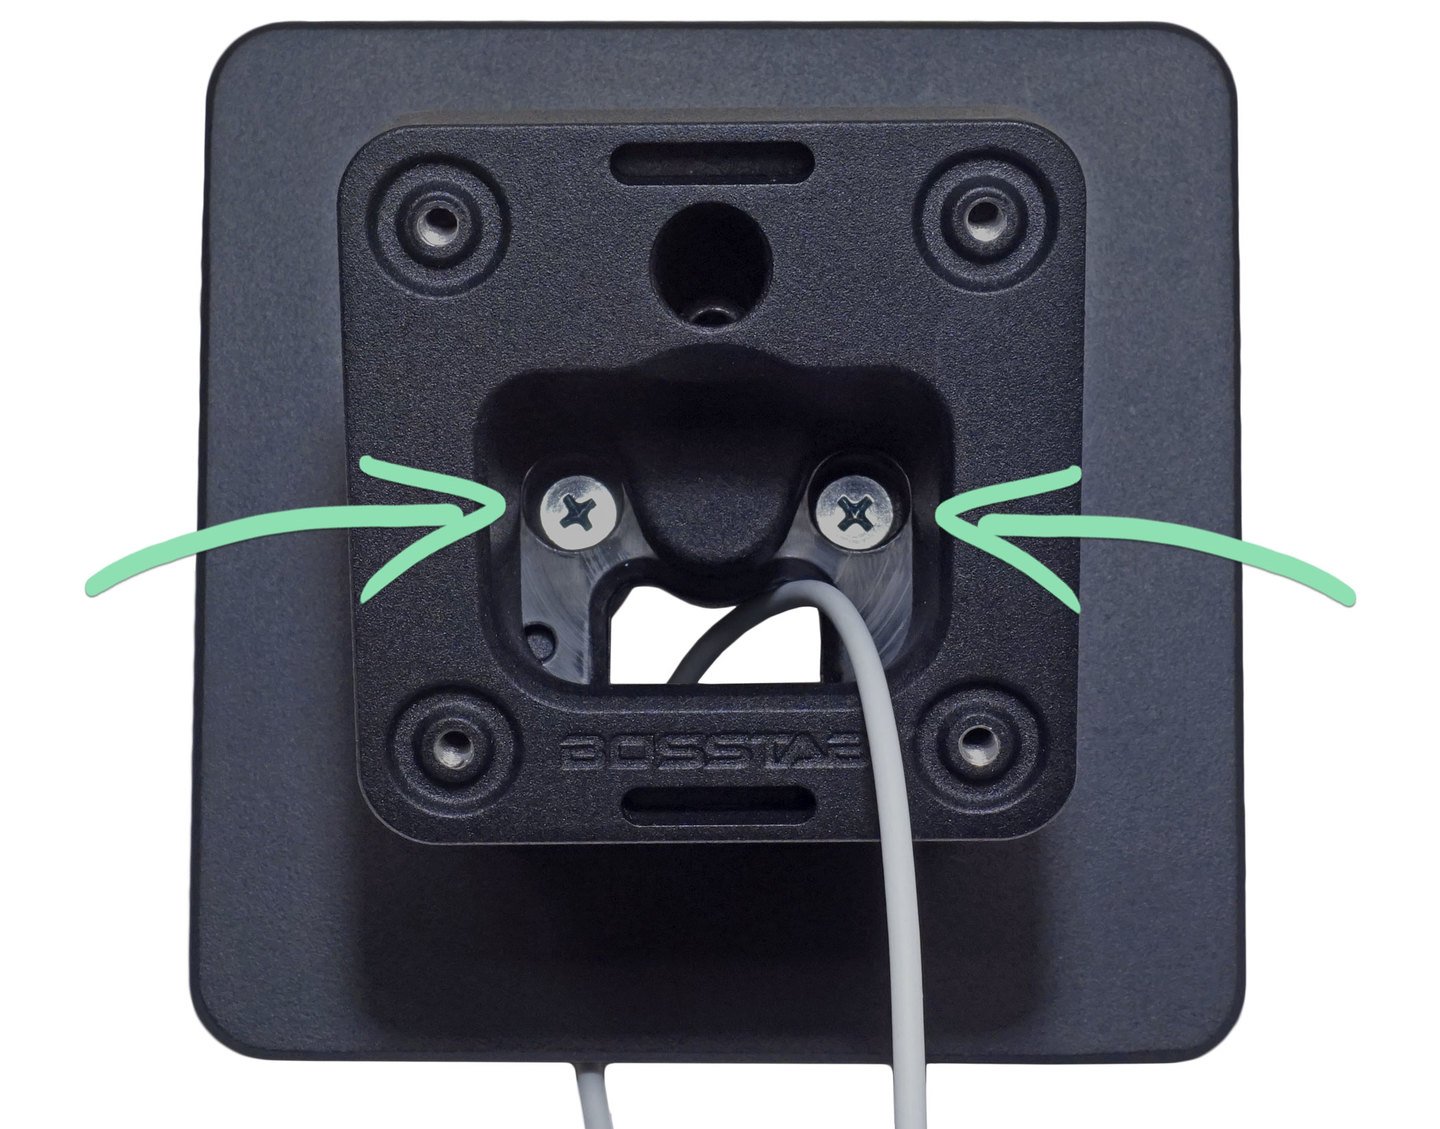
With the stand face down, use the star-shaped Torx wrench (included) to remove the security screw holding the top bracket in place.
This screw is used in step 12 to optionally lock the tablet in the stand.
Place the stand on the countertop in the specific orientation for the desired setup.
To allow the stand to rotate, position it so the notch in the bottom faces the cashier. This ensures the tablet charging cable will be hidden from customers as it exits the stand through the notch.
To prevent the stand from rotating, position it so the notch in the bottom points to the cashier’s left as they face customers. This allows the stand rotation to be locked, but the tablet charging cable may be visible to customers as it exits the stand through the notch.
Feed the charging cable for the tablet through the stand, with the tablet connector end coming out the top of the stand.
Use the charging cable included with the tablet as other cables may not fit through the stand. If necessary, connect an extension cable to lengthen the charging cable.
Wait 24 hours for the adhesive to cure before using the stand.
Failure to complete this step may cause the tablet to separate from the stand while in use.
Having issues with the BOSSTAB Universal Tablet Stand? Visit our troubleshooting guide for help.
Attach Freestanding Base
Attach the Freestanding Base to the BOSSTAB stand to allow the stand to move freely on a countertop. The Freestanding Base does not secure the stand to the counter.
Before following the steps below, you must complete steps 1 – 6 in the ‘Stand Setup’ section above.
Feed the charging cable for the tablet down through the hole in the center of the Freestanding Base.
Click to Enlarge
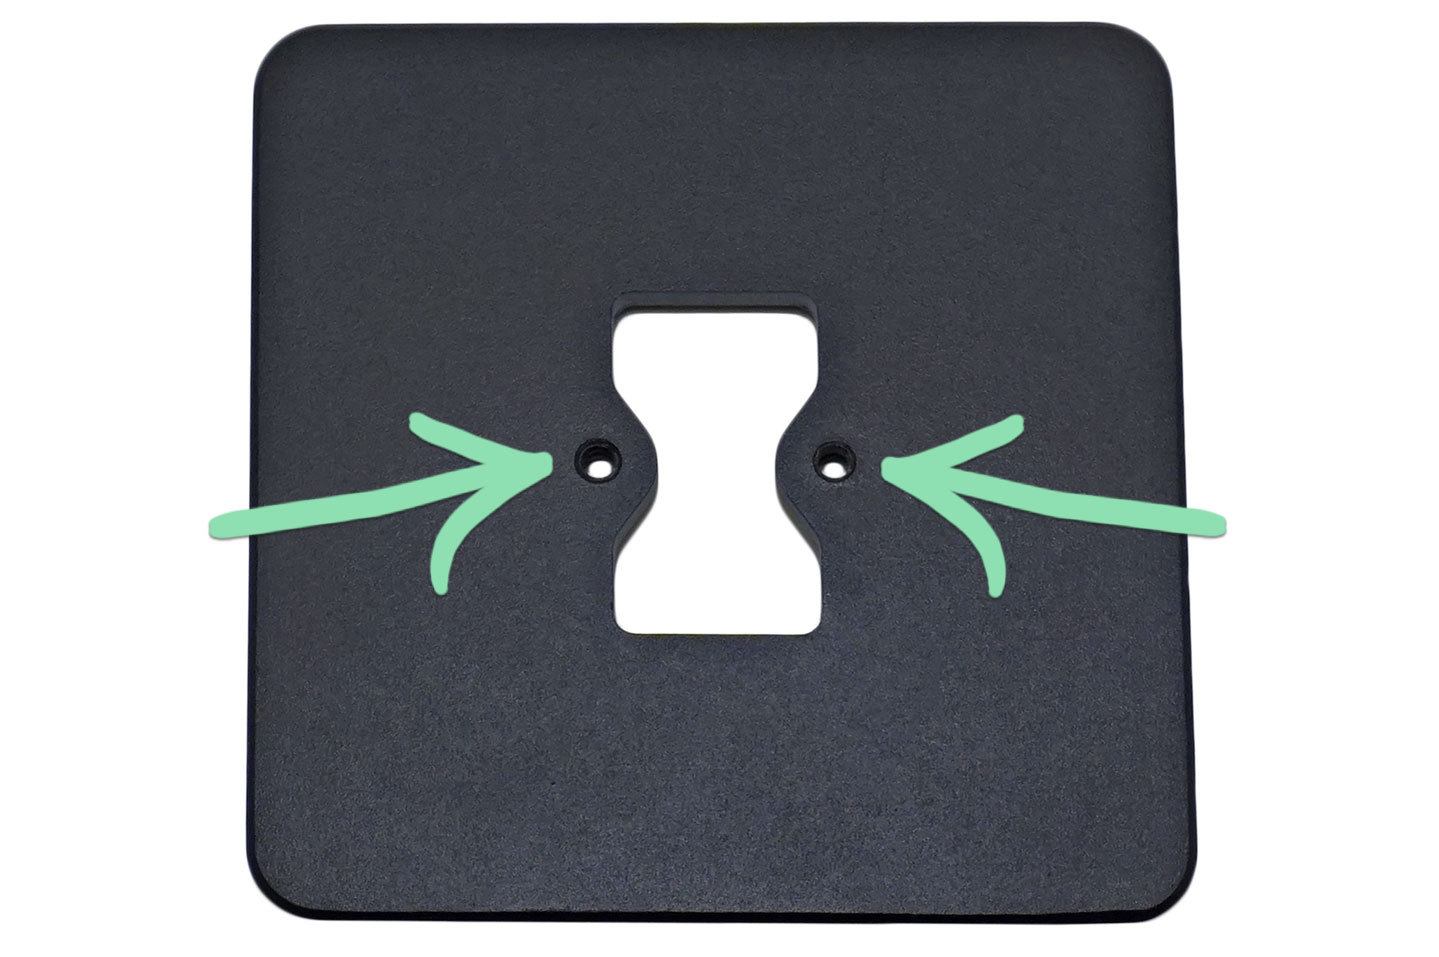
Align the screw holes on the bottom of the stand with those on the base.
Rotate the top of the stand until both screw holes are visible through the top.
Click to Enlarge
Insert the machine screws included with the Freestanding Base through the holes in the stand and tighten using a Phillips screwdriver (not included).
Click to Enlarge
Follow steps 8 - 13 in the 'Stand Setup' section above to finish setting up the stand.
Mount Using Adhesive
Mount the stand using the included adhesive to securely adhere the stand to a countertop without drilling holes. If necessary, the adhesive can later be removed using an oscillating tool (sold separately).
Before following the steps below, you must complete steps 1 – 6 in the ‘Stand Setup’ section above.
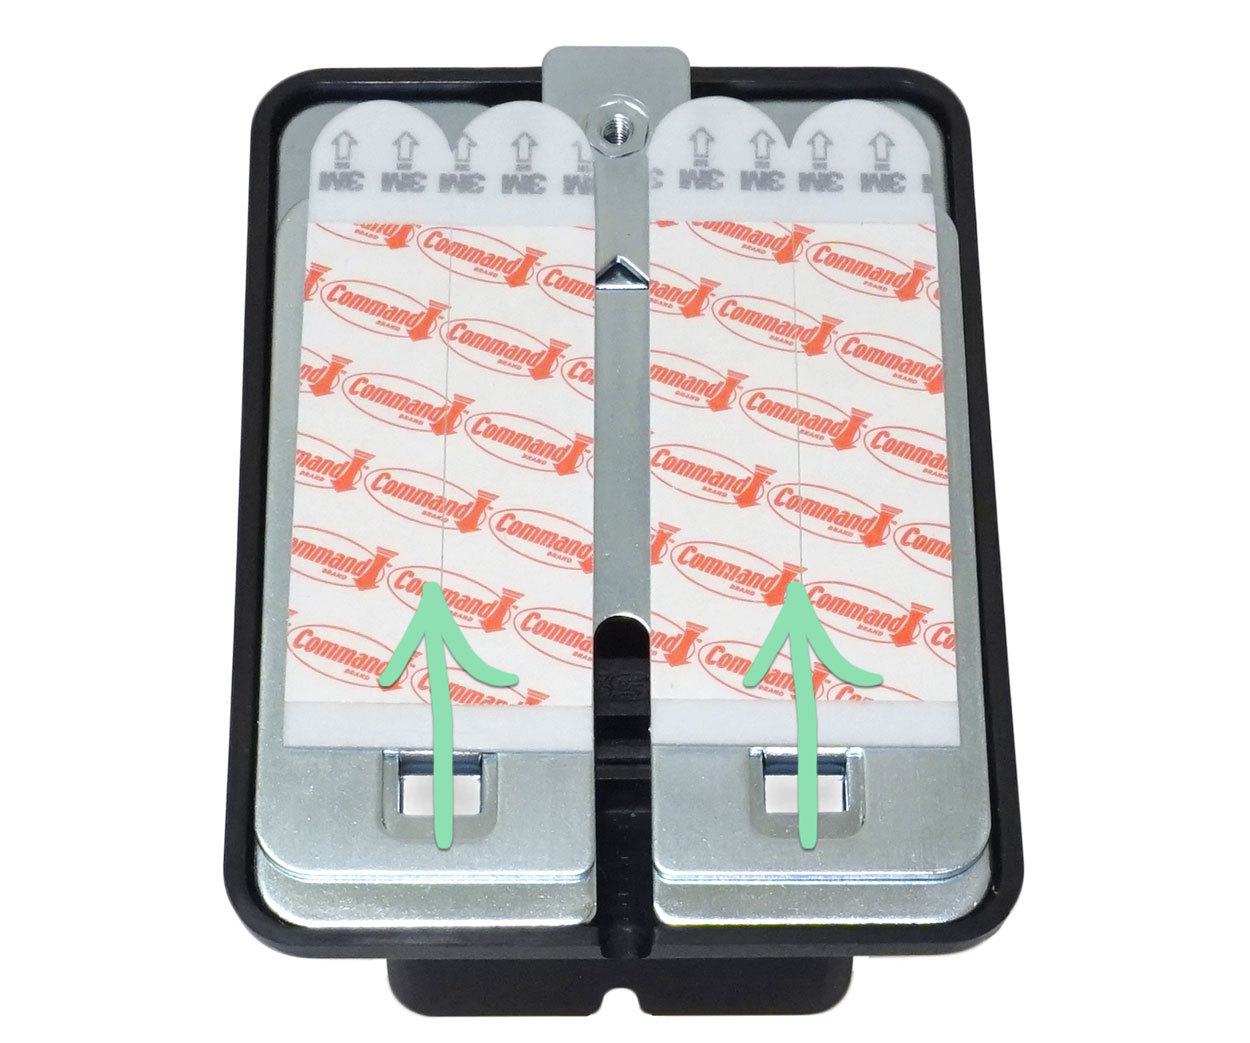
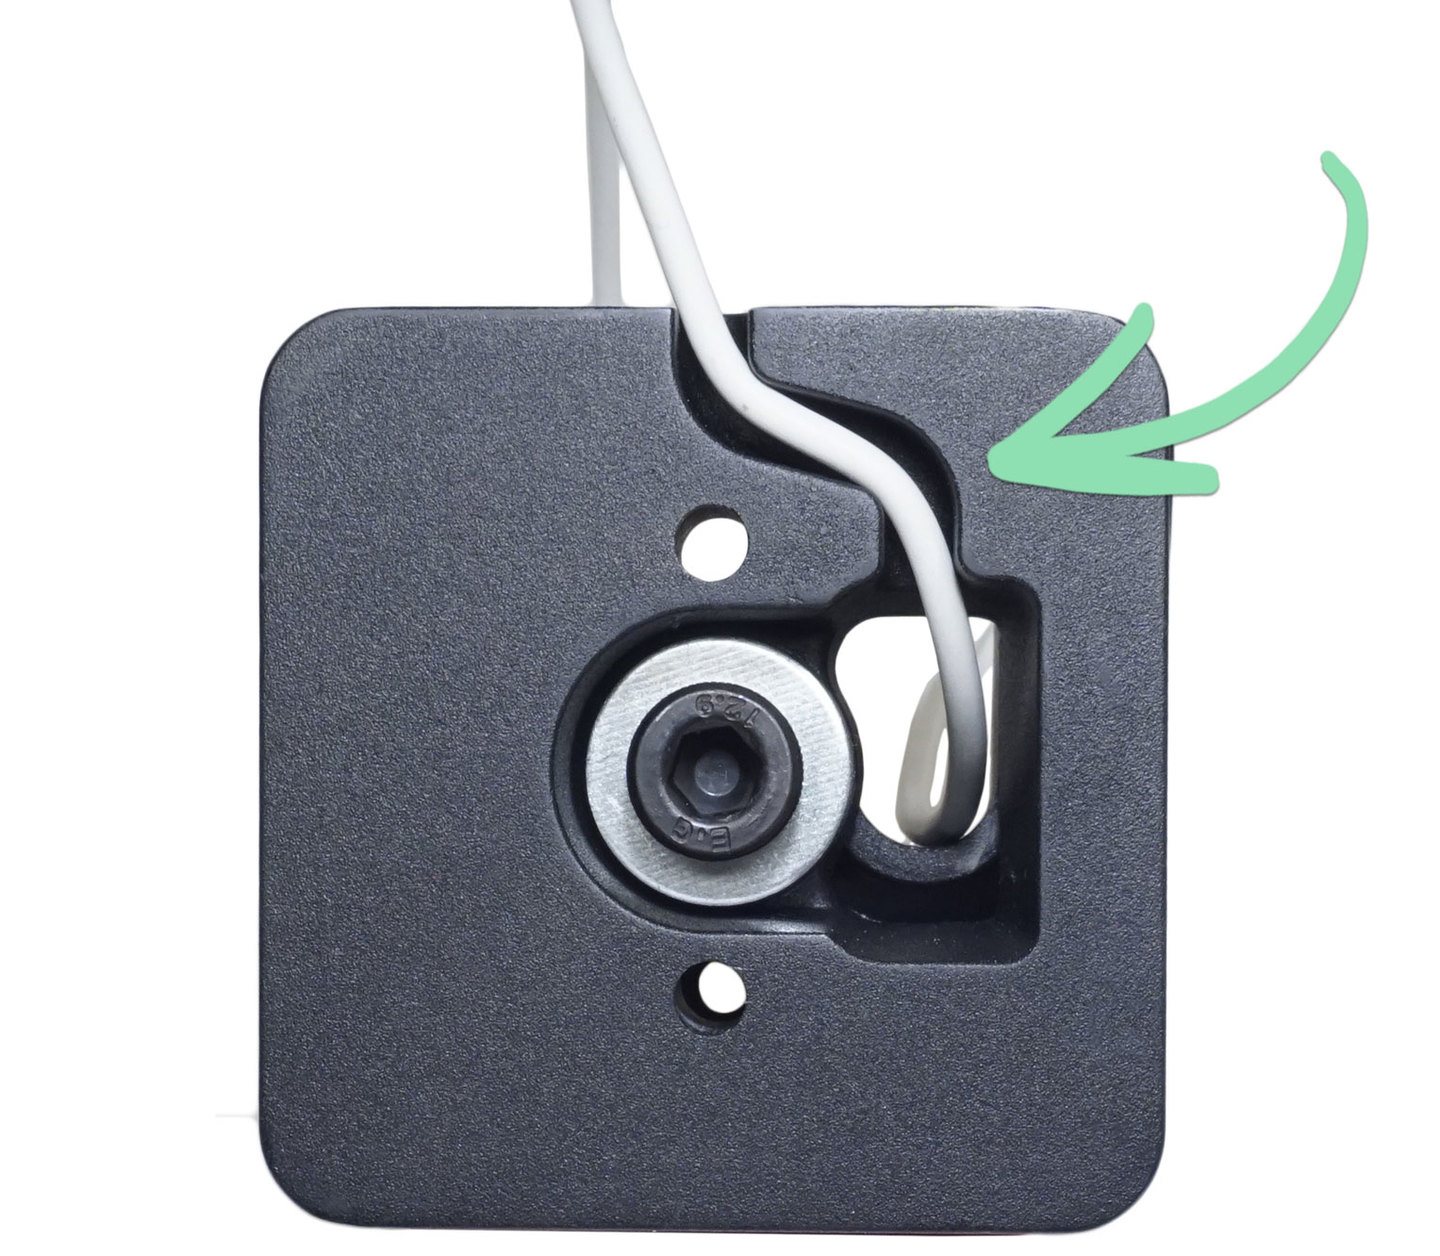
Fit the charging cable for the tablet into the grooves in the bottom of the stand.
Click to Enlarge
Make sure there is enough slack in the cable to plug it into the tablet once the stand is fully assembled.
After mounting the stand to the countertop in step 8 below, you will be unable to adjust the cable.
Wipe the bottom of the stand and the countertop with an alcohol wipe (not included), then wait for both surfaces to dry.
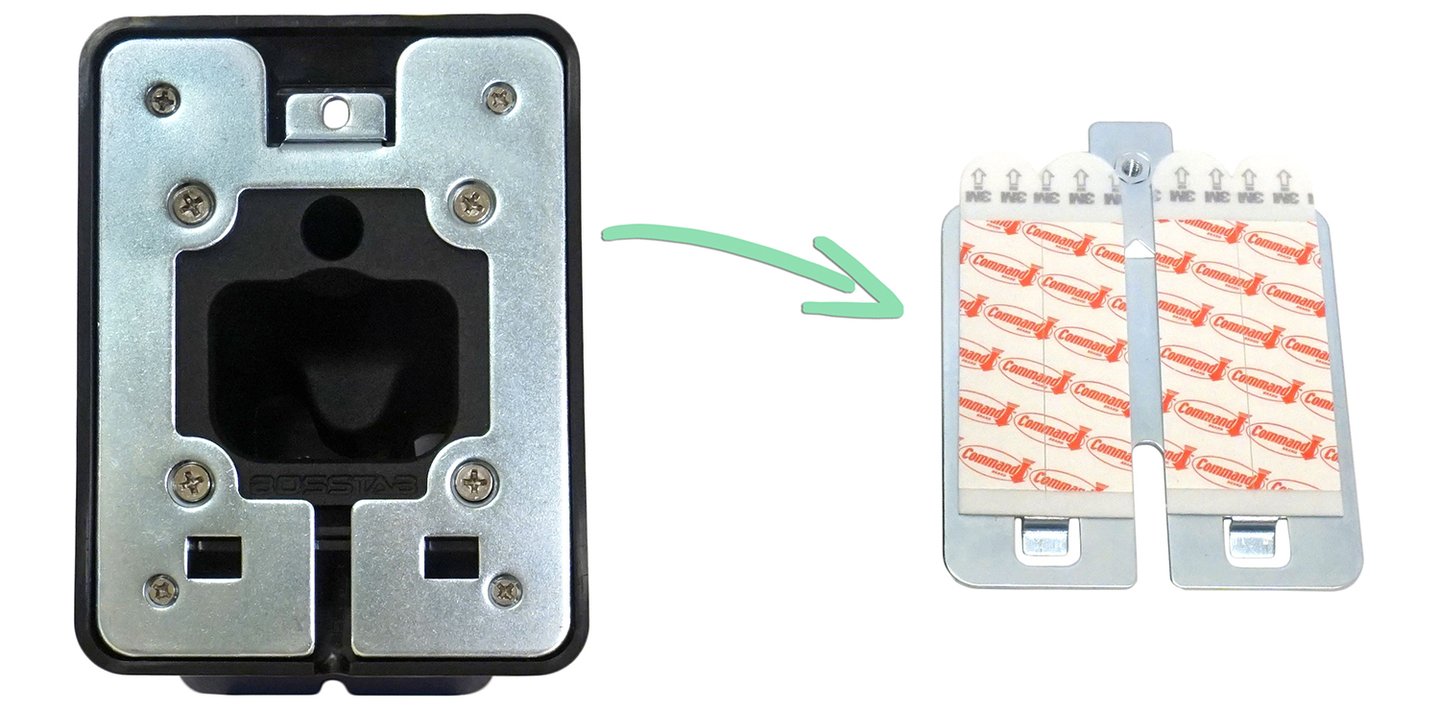
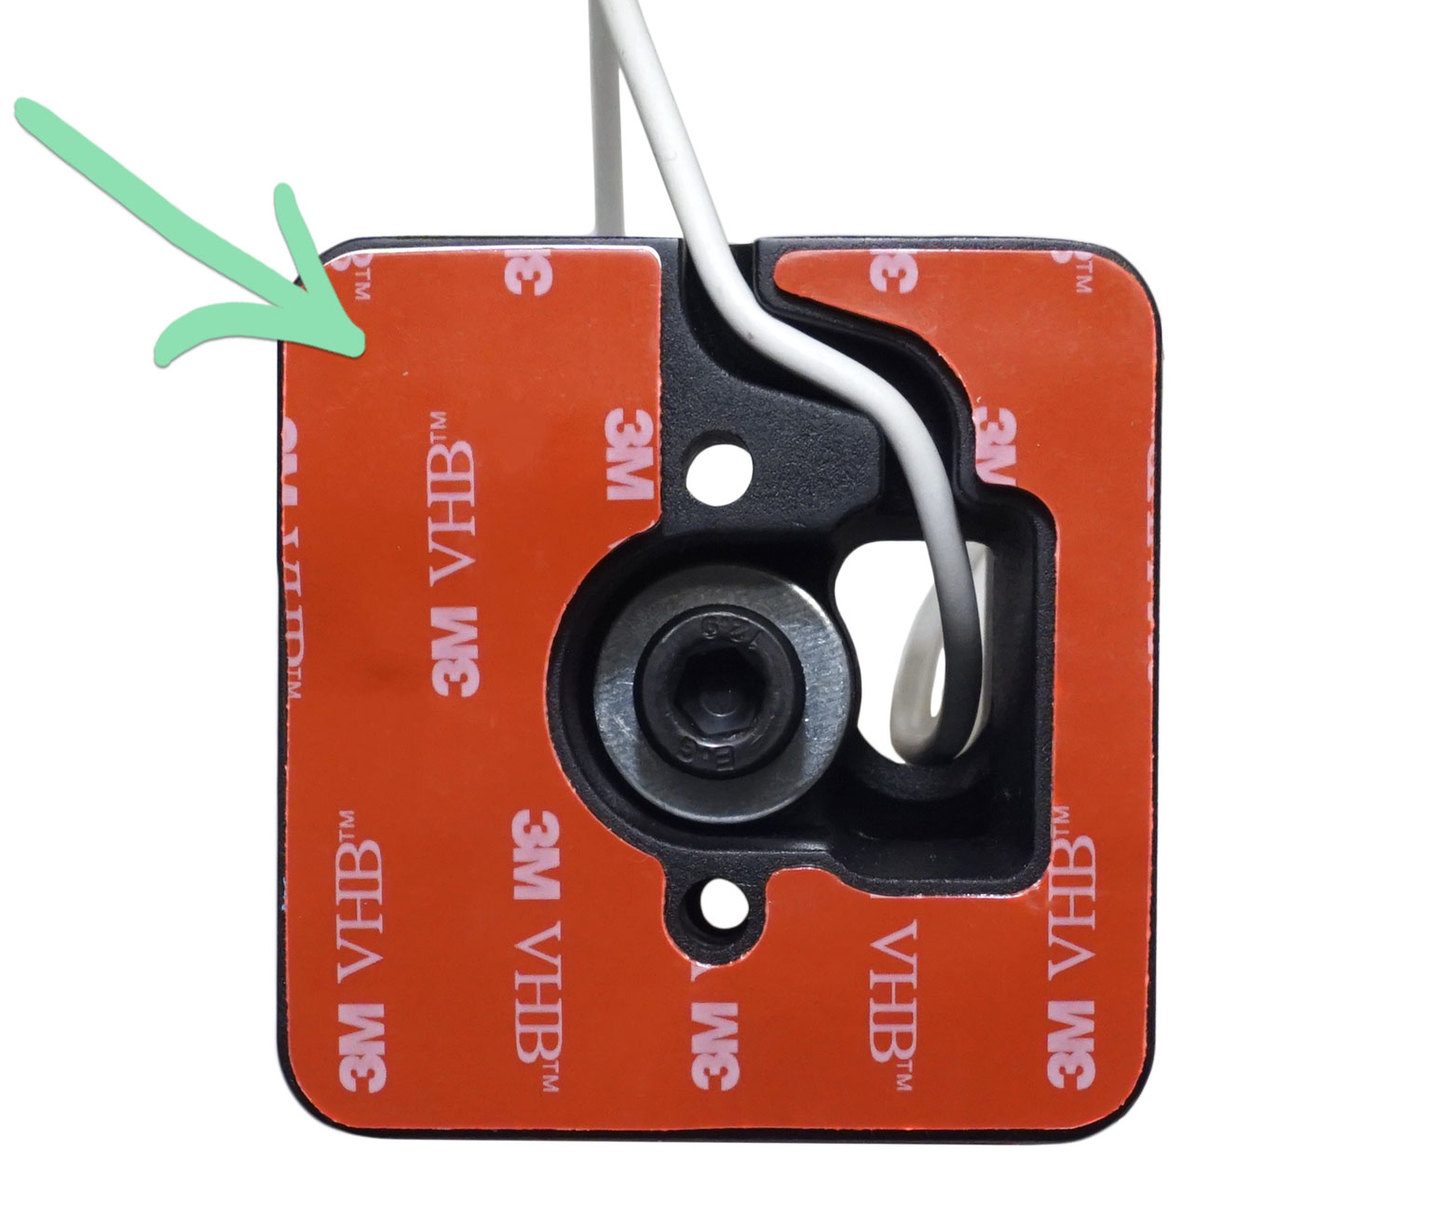
Remove the white backing from the included adhesive mount.
Align the adhesive with the cutouts on the bottom of the stand.
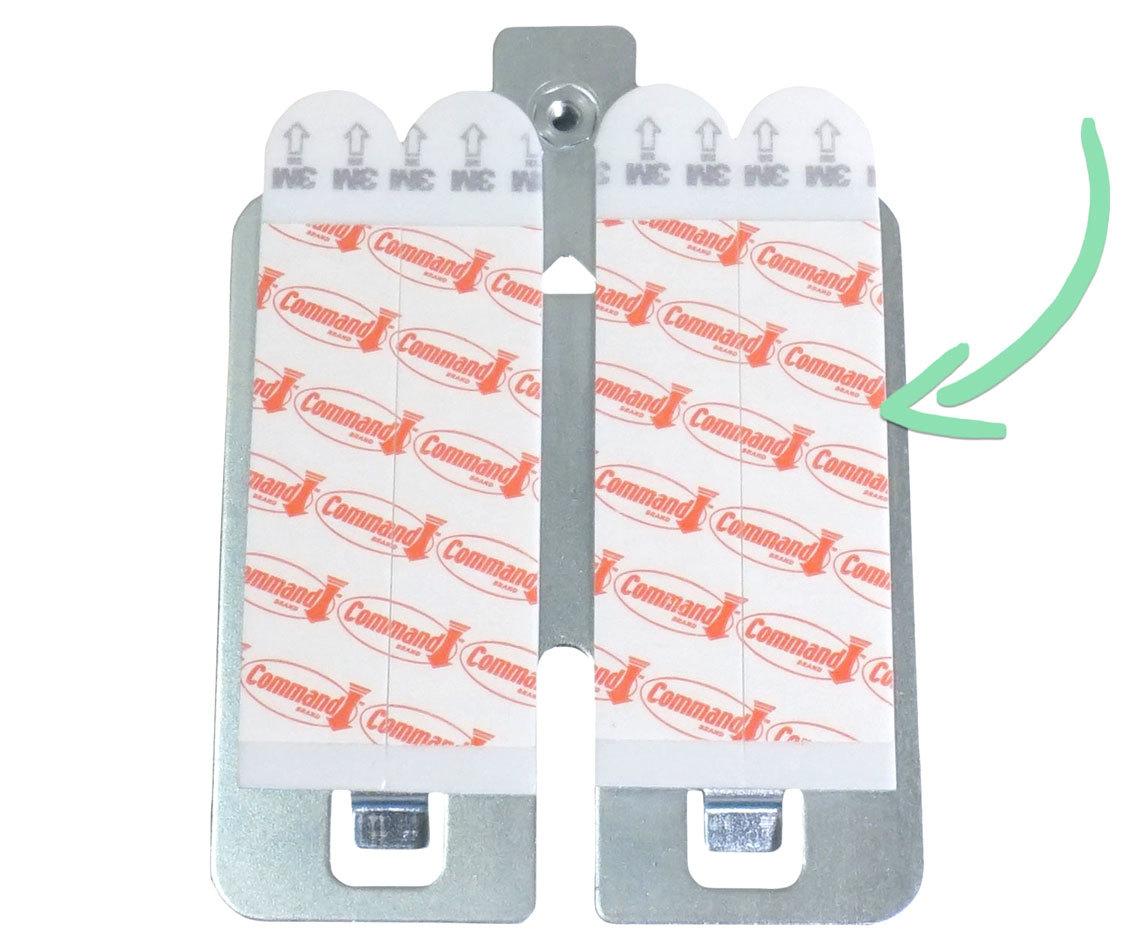
Stick the adhesive to the stand and hold firmly in place for 30 seconds.
Click to Enlarge
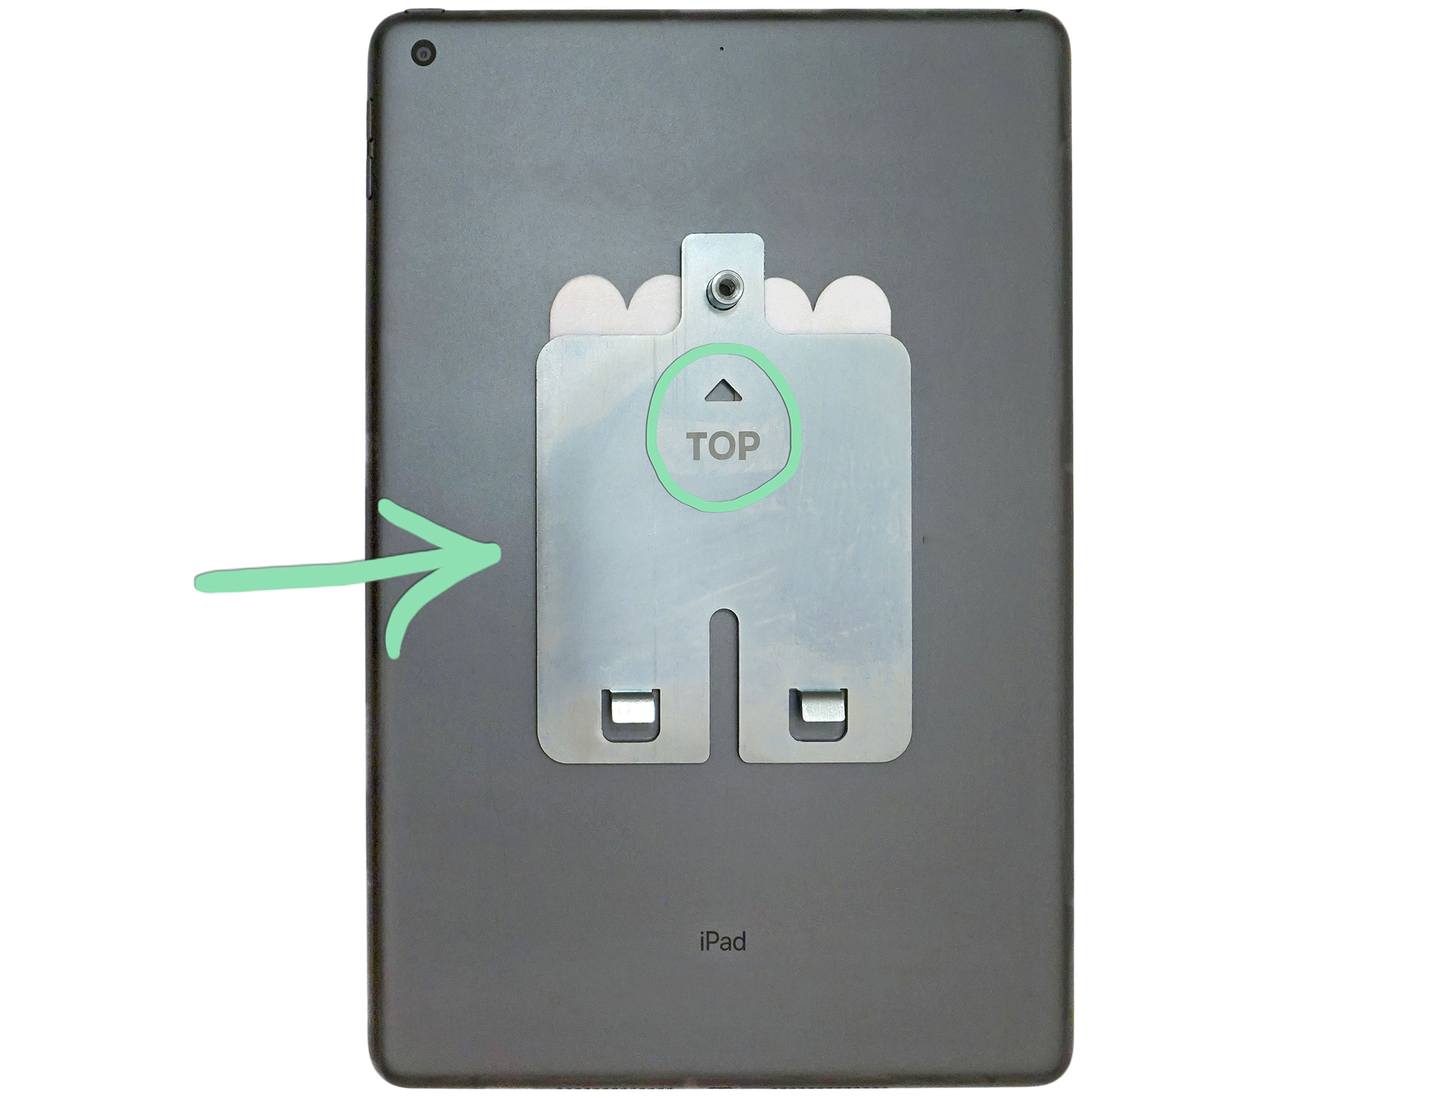
Remove the remaining backing from the adhesive.
Place the stand on the countertop and hold firmly in place for 30 seconds.
Follow steps 8 - 13 in the 'Stand Setup' section above to finish setting up the stand.
Mount Using Screws
Mount the stand using the included wood screws to more securely attach the stand to a countertop. Drilling holes into the counter is required to mount the stand in this way.
Before following the steps below, you must complete steps 1 – 6 in the ‘Stand Setup’ section above.
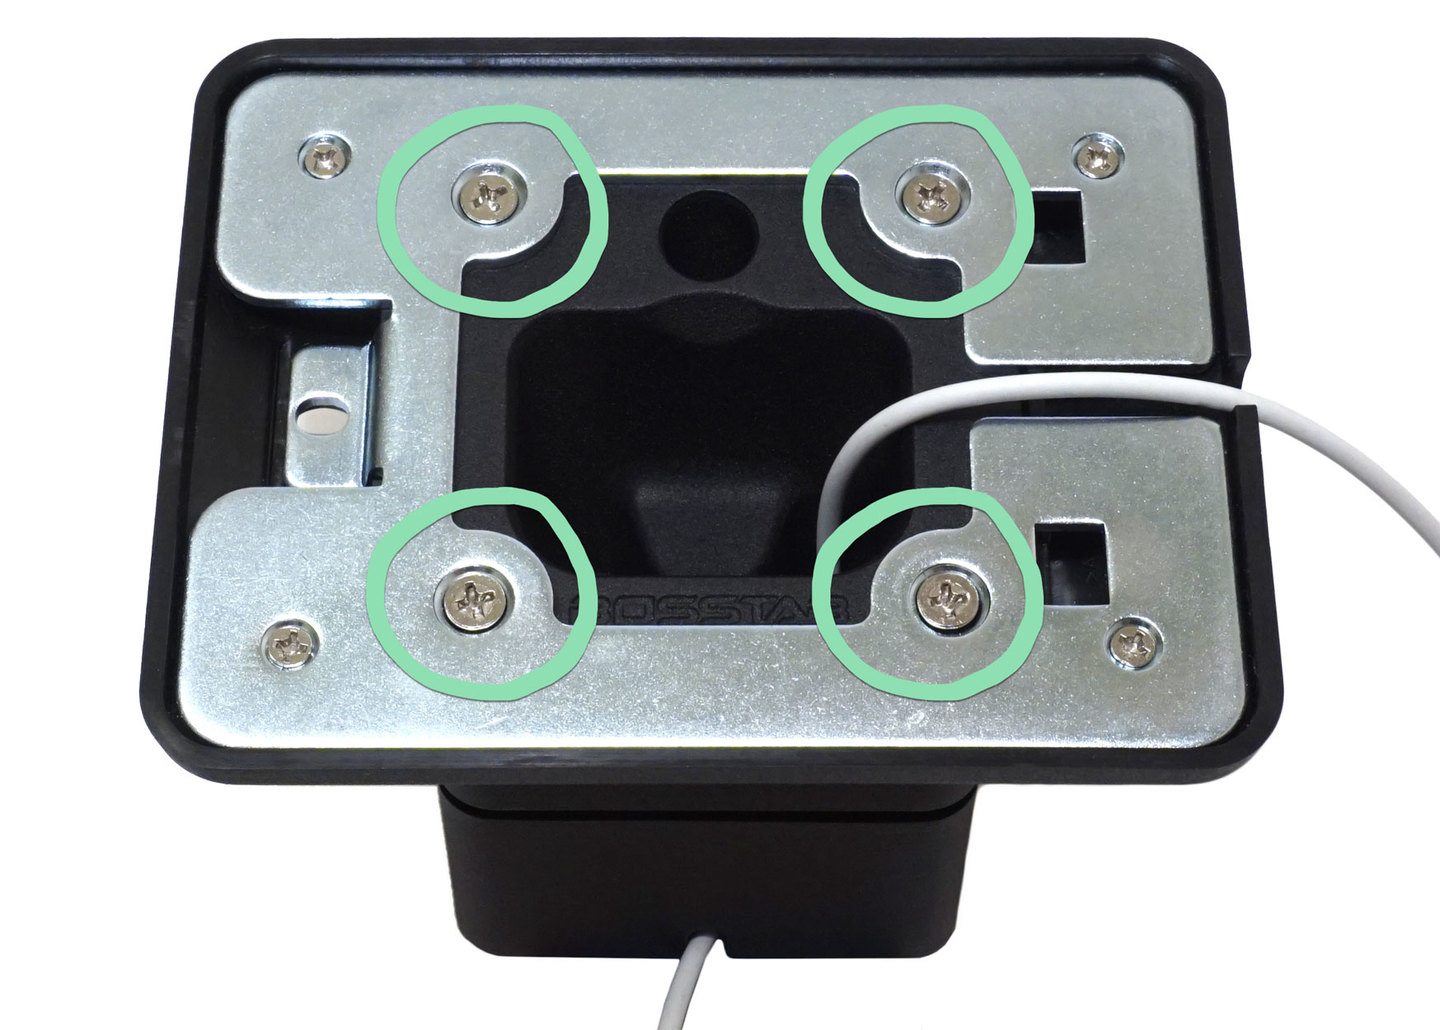
Use the included mounting guide to drill holes into the counter that align with the 2 screw holes in the bottom of the stand.
(Optional) Drill an additional hole to feed the charging cable for the tablet through the counter.
Fit the charging cable into the grooves in the bottom of the stand, OR feed it through the hole drilled in step 2.
Click to Enlarge
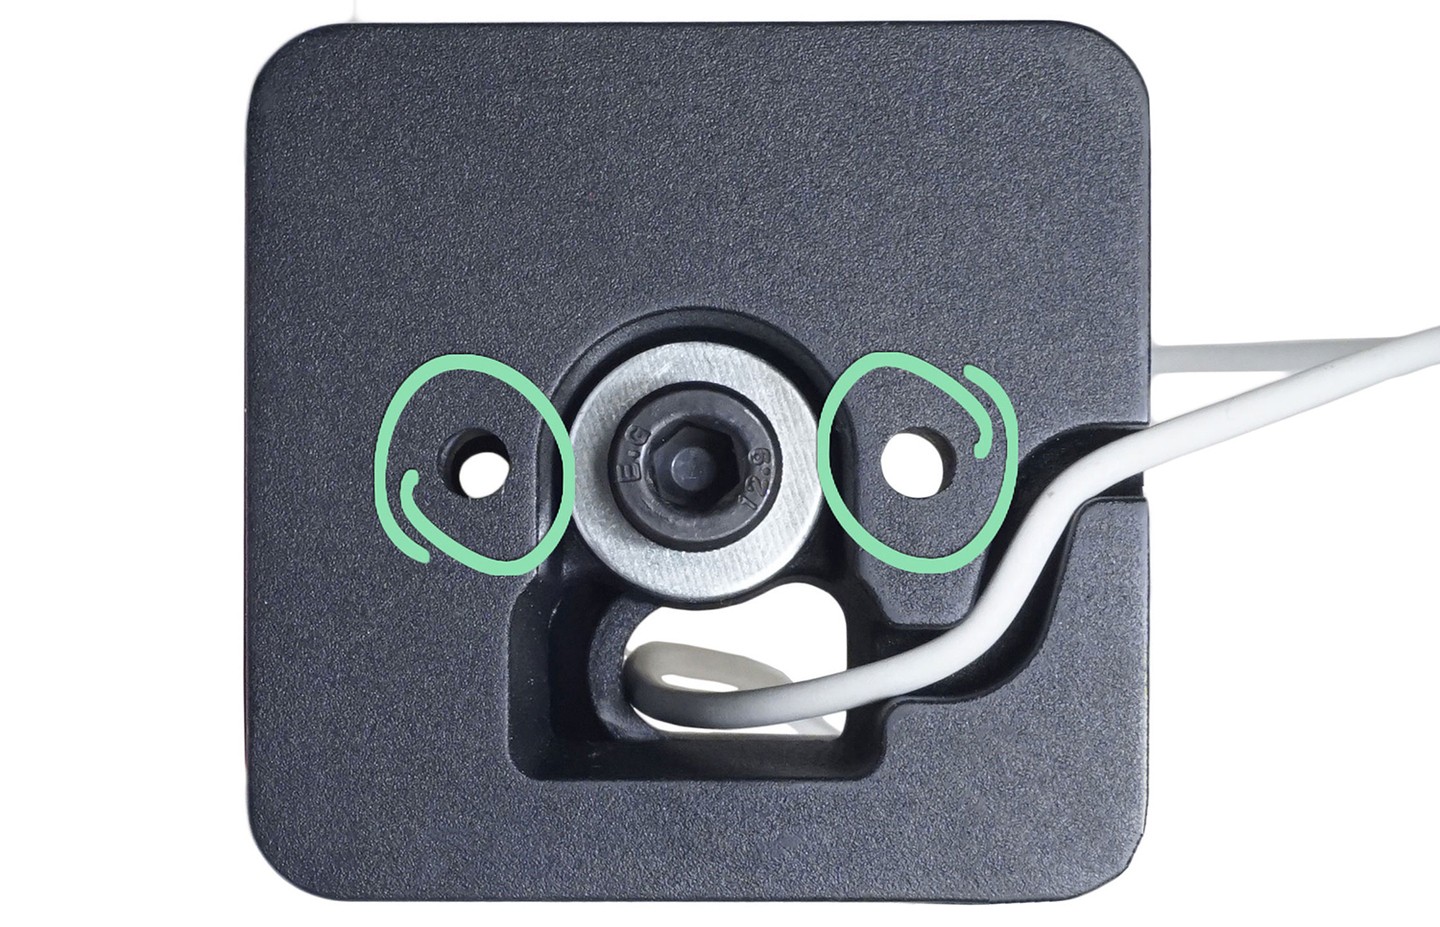
Rotate the top of the stand until the 2 screw holes are visible through the top.
Click to Enlarge
Align the screw holes on the bottom of the stand with those drilled in the counter.
Click to Enlarge
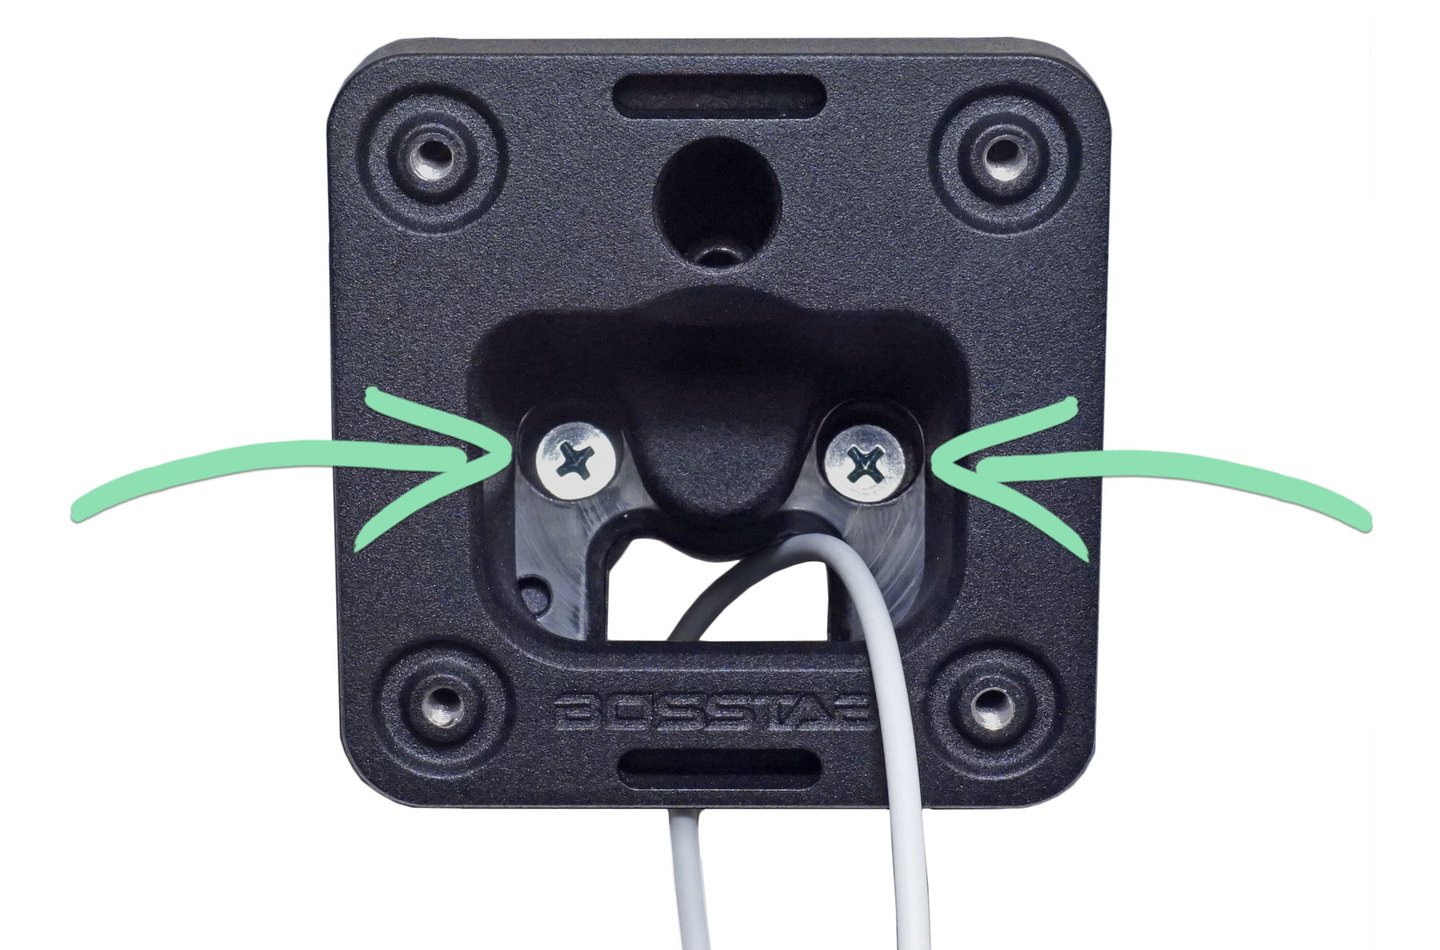
Insert the wood screws included with the stand through the holes in the top of the stand, then tighten the screws to secure the stand to the counter.
Click to Enlarge
Follow steps 8 - 13 in the 'Stand Setup' section above to finish setting up the stand.