ShopKeep iPad Stand Troubleshooting

This guide focuses on solving issues related to setting up the ShopKeep iPad Stand. For help assembling the stand for the first time, visit our setup guide.

Need help with the BOSSTAB Universal Tablet Stand or Freeform iPad Stand instead? Visit one of the articles listed below. If you are not sure which stand you have, view a photo of each here.

Table of Contents

My iPad does not fit in the stand.

This issue occurs if you skipped a step during setup or ordered the wrong stand for your iPad model.

  1. Check the iPad's model.
  2. Make sure the iPad is compatible with the stand.
    • The iPad Stand supports 5th and 6th-gen iPads, the 9.7″ iPad Pro, and the iPad Air / Air 2.
    • The iPad Mini Stand supports all iPad Mini models.
    • The iPad Pro Stand supports the 12.9″ iPad Pro.
  3. If necessary, attach the included adapter clips and/or foam pieces to the stand.
    • Adapter clips are required for the iPad Air 2, 9.7″ iPad Pro, and all iPad Mini models.
    • The foam pieces are required for the iPad Mini 4.
    • Visit our setup guide for help with this step.
  4. If you purchased the wrong stand, exchange it for the correct one within 30 days of receipt.

I want to connect an iDynamo but already set up my stand without one.

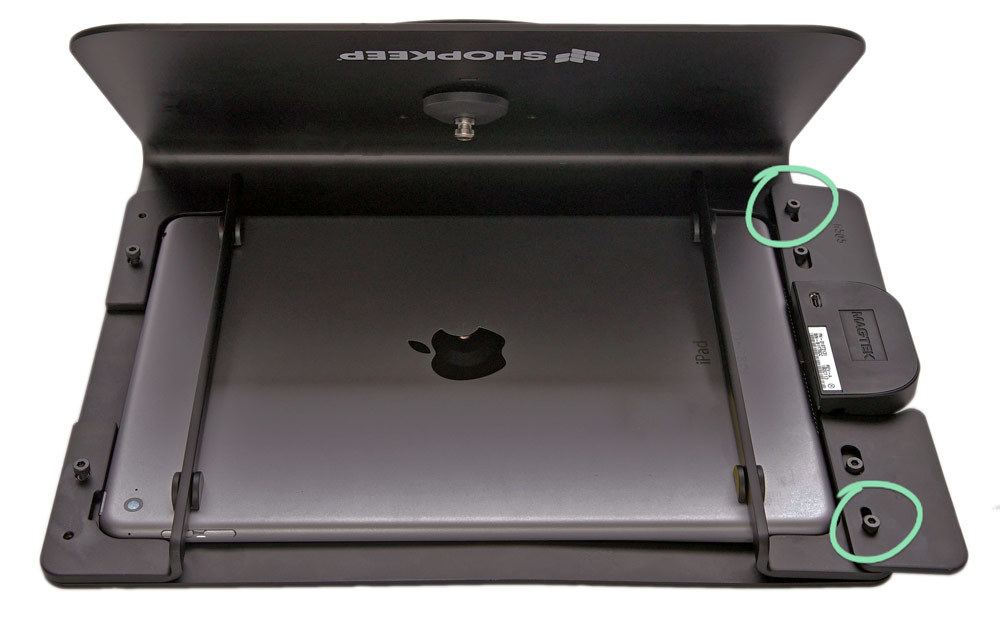
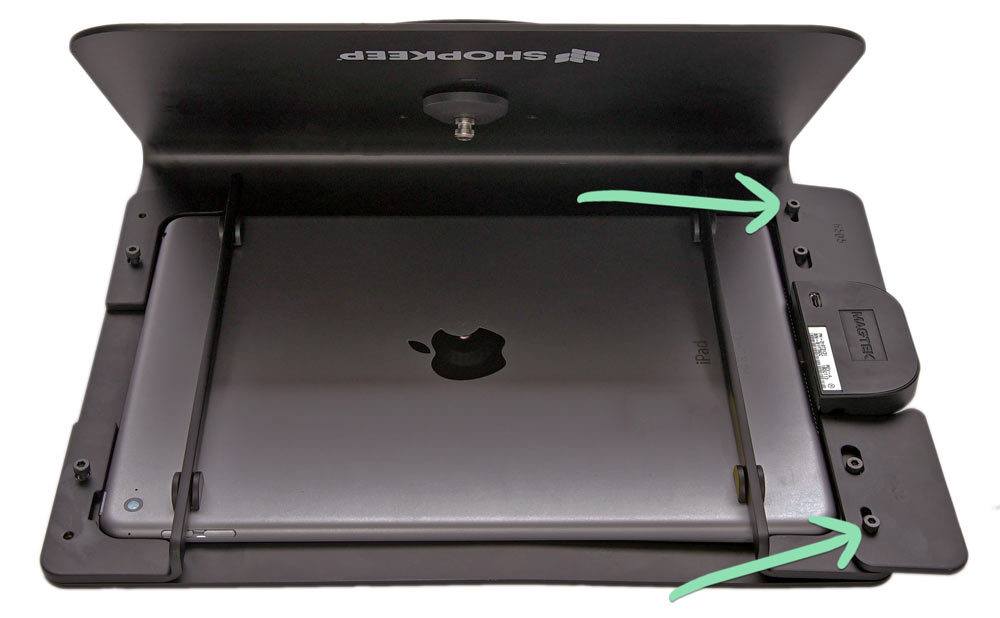
Follow the steps below to connect an iDynamo credit card reader to the iPad and reattach the stand’s iDynamo supports using the screws and assembly tool included with the stand.

If you cannot locate the supports, screws, or assembly tool, see below for help.

  1. Place the stand face down on a flat surface.
  2. Plug the iDynamo into the iPad's charging port.
    Click to Enlarge
  3. Position the supports so their ridges fit into the holes on the sides of the iDynamo.

    Do not use the iDynamo without the supports as they hold the reader in place while it is in use.

    Click to Enlarge
  4. Insert the two screws into the outer holes in the supports and tighten them with the stand assembly tool.
    Click to Enlarge

I set up my stand with an iDynamo but now want to remove it.

Follow the steps below to remove the stand’s iDynamo supports using the included stand assembly tool and disconnect the credit card reader.

If you cannot locate the assembly tool, see below for help.

  1. Place the stand face down on a flat surface.
  2. Using the assembly tool, remove the two outer screws on the side with the iDynamo.
    Click to Enlarge
  3. Remove the iDynamo supports.

    Put the supports and screws in a safe place in case you decide to reconnect the iDynamo.

    Click to Enlarge
  4. Unplug the iDynamo from the iPad.

I lost an assembly tool or part of the stand.

The ShopKeep iPad stand comes with two different sized assembly tools and a variety of parts. Follow the specific step below that describes what you lost.

  • If you lost an assembly tool:
    1. Check the size of each tool below, then visit a hardware store to purchase the one you need.

      Stand Assembly Tool | 2.5mm hex key
      PivotTable Assembly Tool | 5/64″ hex key

  • If you lost the PivotTable:
    1. Contact us to order a replacement.
  • If you lost screws, brackets, or a part not listed above:
    1. Contact Heckler Design for support.

    How do I reinstall the PivotTable base?

    If the PivotTable was removed from the stand, reinstall it to allow the register to rotate.

    1. Set the stand on the PivotTable base.
    2. Place the cap on top.
      Click to Enlarge
    3. Insert the assembly screw through the ClickSafe anchor into the cap, then tighten the screw.
      Click to Enlarge
    4. (Optional) Affix an adhesive disk to the bottom of the PivotTable base.
      • The permanent disk has adhesive on both sides, allowing the stand to adhere to a surface.
      • The temporary disk has foam on one side, allowing the stand to move around as needed.
      Click to Enlarge