How Do POS Systems Work? Let ShopKeep Break it Down for You
If you’ve never used a POS system, the thought of using one for your business might seem a little overwhelming.
After all, how exactly does a POS system work? How do you know which is the right one for your business? Will it cost more than a cash register and can you afford it? And is that potential extra cost really worth it? Or, maybe you’re thinking about upgrading your current system but the thought of transferring over your data and learning a new system have you more freaked out than an IKEA instruction booklet.
Don’t worry, we completely understand your apprehension and yes, it’s totally justified. The fear of the unknown can make people a little anxious. It’s also a little insulting to tell you not to worry, when in fact, you’ll do it regardless. So take a deep breath (don’t forget to exhale), have a little faith and read on — the experts are here to put your mind at ease.
How to Operate a POS System
So, how does a POS system really work? The honest answer is that there is no answer. Or at least no definitive answer. Regardless of how the system is designed and meant to be used, every merchant will fundamentally use it in their own unique way based on their specific business needs. Why? Because no one system will work exactly the way it would if you had designed it.
The key is to do your research and choose the POS system most suited for your needs and to know what your deal breakers are — features you absolutely cannot live without. Regardless of the POS you choose, there are some basic operational components that will be available in all reliable point of sale systems.
Setup
First and foremost, in learning how a POS system works, is becoming familiar with the setup process. This will consist of both the physical hardware components as well as the software and system data. Once the account has been set up through your POS provider, you (or the provider, depending on the nature of the agreement) can get started with adding inventory, employees, customers, or anything else that needs to be customized to your business.
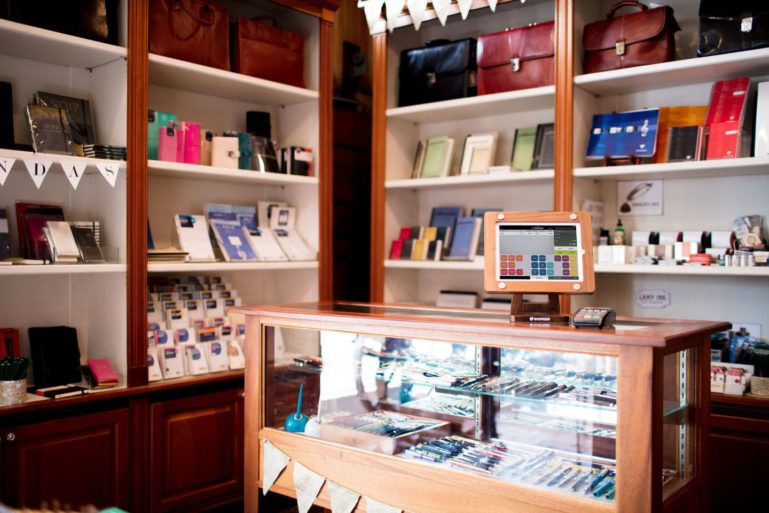
The hardware side of the equation will vary depending on your specific business type. For example, in a retail business using a cloud-based solution like ShopKeep, your POS terminal will be in the form of an iPad cash register that will run the software to process sales. In the most common setup, it will connect to a cash drawer, a receipt printer, and a barcode scanner — collectively these are known as peripherals. All of these peripherals will need to be configured in order to ‘talk’ to the software. This can be done in a variety of ways depending on which exact peripherals you are using. For example, pairing a Bluetooth barcode scanner to ShopKeep’s iPad cash register would be similar to pairing a Bluetooth headset to your cell phone. The data communication avenue (Bluetooth) is the same, therefore, the setup approach will be the same.
Sales and Returns
Just like standard electronic cash registers, you will need to be able to perform the basic business functions of sales and returns with your new point of sale system.
If working in retail, ringing up an item with a barcode scanner is simple. You simply scan the UPC of the product and the product information — such as name, price, and tax — will populate in the POS. If you don’t have a barcode scanner (although we strongly suggest it if your business type falls under retail), with ShopKeep, you can always manually add an item to a transaction by tapping on the corresponding button or search for it by name. Once all the items are added to the order, you will then select the payment method and close out the sale.
All POS systems will process returns a little differently, so it is just a matter of getting to know how yours works (the flow) and the steps required. With ShopKeep, returns are quick, easy, and flexible, with a similar workflow to making a sale.
Reporting and BackOffice
As a business owner, you will spend a lot of time reviewing sales reports, managing inventory, managing employees, and managing customers. Not to mention a myriad of other aspects for your business in the back office of your point of sale system.
Your back office is an inside look at your POS system’s software capabilities — which you will learn more about in the next section. A big part of your back office is reporting. You need to track inventory, know what you’re selling, who’s buying it and at what price — just to name a few.

How Does Point of Sale Software Work?
Your point of sale software is the application that you will be using to run the key daily operations of your business. Your employees, your customers, and you will spend a lot of time engaging with it so make sure you are choosing the right POS software for your business.
The software is really the first step in determining the ‘how’ in “how does a POS system work?” It’s what holds all the functionality, capabilities, and features together so that the system can function as a whole. This includes the software, hardware, and the back office.
Let’s take a look at a basic retail transaction in ShopKeep as an example. Here’s what you see on the surface. A customer steps up to the register to check out. If ringing up items, the employee will scan items with a barcode scanner. Once the items are scanned, they will be added to this specific transaction. When all of the items are added to the transaction, the employee will select the payment type, complete the sale, and print or email the customer a receipt.
Behind the scenes in the software, however, is where all the action happens. All of those items that were part of the sale will be deducted from inventory and included in reports such as sales by item, sales by department, and sales by tender. If there is a customer tied to the order or any discounts or modifiers, those will also be reported, accordingly. Lastly, the sales data will be included in the X and Z reports, the shift summary, transaction report, and your analytics dashboard.
As you can see, one simple sale has an impact on all of these data points in a POS system, but that’s kind of the whole point, right? If there wasn’t a need for this data, merchants would probably still be using archaic cash registers. Data is key to providing insight into business performance and with the development of POS systems like ShopKeep, data isn’t just for the big guys anymore. It’s for merchants like you.
How Does POS Hardware Work?
As we said, software is the first part in determining the ‘how’ in the “how does a POS system work?” Naturally, the hardware is the second part of this equation. And if the software is the brains, then the hardware is the brawn of the operation. It’s meant to be strong and to support the software.
While nearly every merchant will use a cash drawer, the use of peripherals will vary from one business to the next based on operational needs. For example, a deli will most likely need to use a scale because they sell weighted products. A convenience store, although similar in nature, may not need a scale because they do not sell weighted goods.
The type of connection or communication method between the peripherals and the register will also vary depending on the nature of the business and your preferred setup. If you are a mobile business such as a food truck using ShopKeep with ShopKeep Payments, you would typically connect to the internet via a mobile hotspot. You will then connect your iPad to the hotspot’s WiFi network, then connect a receipt printer and an Ingenico iCMP credit card reader to the iPad via Bluetooth.
If you are a brick-and-mortar retail store, your connectivity approach may vary. You will still have the iPad cash register, but you may also add a Bluetooth scanner to easily scan a product’s UPC at checkout which will allow for a faster and smoother process. As for the printer and a credit card reader, rather than going the Bluetooth route, you’d have the option for an Ethernet or WiFi connection for those peripherals.
What About Integrations and Add-Ons?
When learning how to use your retail POS software, it’s also important to understand how it integrates and works alongside the other software you use to run your business. In fact, one of the biggest benefits of mobile POS (mPOS) systems and cloud-based software in general, is the interoperability with other programs.
For example, there’s a good chance that you use (or will use in the future) apps for email marketing, customer loyalty programs, accounting, and more. If your POS system connects to these tools, it allows you to run a smarter and more efficient business. Here’s what we mean:
- Email addresses collected with your POS are automatically sent to your email marketing platform, saving you from having to do this manually.
- The day’s sales data is automatically sent to your accounting software, saving you time while also ensuring more accurate accounting.
- When one of your regulars comes in and buys something, their customer record in your loyalty program is automatically updated, saving you from tracking this by hand.
- When you sell something through your ecommerce store, your real-time inventory tracking automatically updates your stock levels, preventing out of stock issues and giving your customers a top-tier omnichannel experience.
Now that you have an understanding of what an integration is and how it can affect your business, let’s look at how you actually set them up. Good news for you, it’s usually pretty easy. Most of the time it’s as simple as heading to the integrations section of your POS software and clicking on the one you want to enable. From there, you typically need to enter your login credentials for the service you want to integrate, and that’s it.
Depending on how sophisticated the tools you’re integrating, there may be some additional configuration steps, but usually, with modern POS software, that’s pretty easy also. For example, you might want to schedule sales data to sync to your accounting software at a specific time of day or add all of your new email subscribers to a specific list like “New Subscribers” vs. “Current Subscribers” in your email program.
Credit Card Processing
One final piece to understand is credit card processing. We’ve written about how credit card processing works in the past, so that’s not something we’re going to focus on in this post. However, it’s important to understand how you actually get processing set up with your POS, otherwise, you won’t be able to accept credit cards, debit cards, mobile payments, and more.
The first thing you’ll want to do is select a credit card processor (also called a merchant account). We recommend choosing a merchant account that offers interchange-plus pricing for the most affordable and transparent rates. If you use ShopKeep, we offer our own payment processing solution, ShopKeep Payments. However, we can also work with pretty much any payment processor. Once you’ve selected your processor and gone through their underwriting experience, you simply need to fill out our ISO boarding form. Once we have that form, our team will test your credentials and let you know when setup is complete. After that, you’ll want to run a test transaction to make sure everything is working as intended. Otherwise, you’re good to go.
If you don’t want to signup for a merchant account, you can work with a payment services provider (PSP) like Square. PSPs typically offer simplicity at the expense of much higher transaction fees. This eats into your profit margins and overall revenue. The other downside is that if you use a PSP, you must also use their POS software. You can connect a PSP to another POS solution like ShopKeep, limiting your ability to get the best possible POS software.
SEE ALSO: How is ShopKeep Different from Square?
How to Use ShopKeep
Now that you have a solid idea of the components that make up a point of sale system and a better understanding of how a POS system works as a whole, let’s take a closer look at how to use ShopKeep in a retail setting.
Inventory management is a big pain point for most retailers, so let’s start there and work our way to the register. Also, not to boast, but ShopKeep’s inventory management features go above and beyond what most merchants actually use — which is a good thing for you! You’ll never be unprepared.
ShopKeep allows merchants to create two distinct types of items for different inventory scenarios: basic items and items with variants. Basic items are what they sound like, one-off items like a Diet Coke or a dress shirt that only comes in a single style. Items with variants, on the other hand, really showcase the depth of ShopKeep’s inventory management functionality. For example, if you sell a specific style of men’s running shoes, let’s say ‘Mikey Heir Max’, that comes in multiple sizes and colors, you would benefit by using items with variants. In the ShopKeep BackOffice, you would go to the Items List and select Add New. You would then choose an Item Type, in this case, it would be Item with Variants. The ‘Mikey Heir Max’ would be the Name of the (parent) product. You would then create a variant for size and another for color. Under the size variant, you would include all the size options such as 10, 10.5, 11, 11.5, and so on. Under the color variant, you’ll include all the color options such as white, gray, black, green, and so on.

ShopKeep will then create a matrix, or combination of items (children) based on these variants. Each can have their own unique SKU and price. Each item can also be tracked separately for inventory purposes and have their own order trigger. In your market, there might be a particular shoe size and color that is more popular than others. Therefore, you want to have more of those in stock and have a higher order trigger number than some of the other child items.
From the cash register perspective, there isn’t a whole lot that changes with adding variants to an item. If you’re using a barcode scanner and the child items have unique SKUs, you won’t notice anything different during the checkout process than if you were ringing up an item that did not have variants. If you are using a barcode scanner, but the child items have the same SKU as another child item, ShopKeep will prompt the cashier to select the specific item. Once the item is selected, it will be added to the order and the checkout process will move forward as usual.
With very little change from an inventory input perspective and zero change from a cashier operational perspective (using a barcode scanner and unique SKUs), the use of variants will allow you to keep tighter control of your inventory.
While the benefits and features of ShopKeep are far greater than what has been mentioned above, we hope we’ve shed some light and insight into your understanding of how POS systems work and how to use these systems based on your business and retail environment. Have additional questions or feedback? We want you to feel confident in your knowledge of POS systems, so feel free to leave feedback or questions in the comment section below.

Want to try ShopKeep for yourself?
Just answer a few easy questions.
Need help finding the right point of sale?
Just complete the form. We’ll call you right back to explain how ShopKeep can work for you.
Hit the ground running.Sprinting, in fact!
Read our free, comprehensive guide, Small Business 101, to learn all you need to know about starting a thriving business.