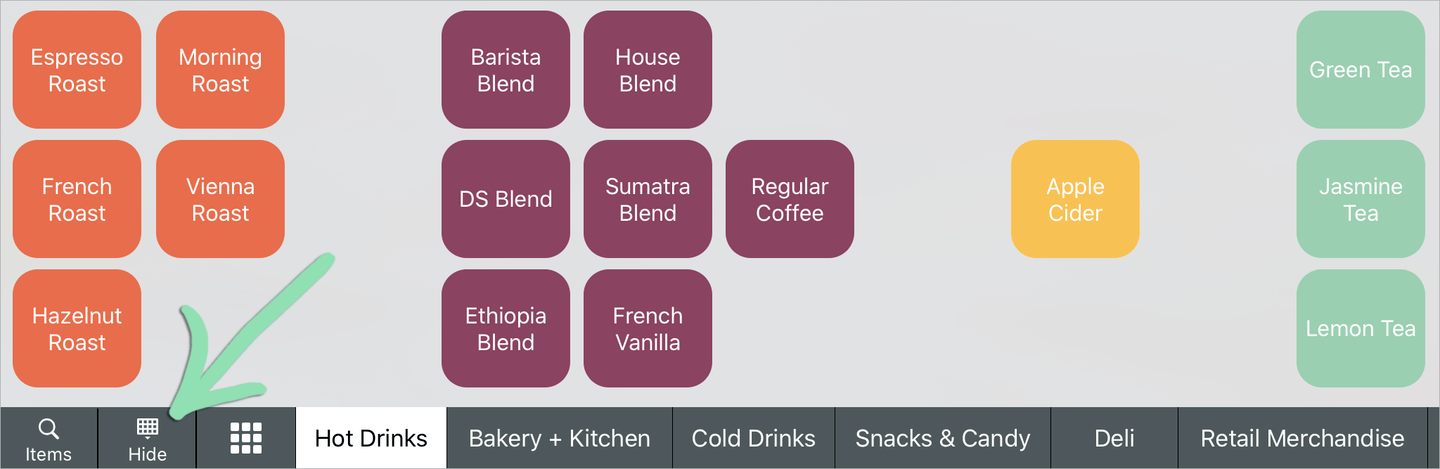
Item shortcuts are the buttons that make up the register layout, which cashiers tap to ring up inventory items. Customize the item shortcuts layout panel by adding item shortcuts, moving and removing them, creating, renaming, and deleting pages, and changing shortcut colors, text, and sizes.
Adding shortcuts
The drag-and-drop interface makes adding and arranging shortcuts on the item shortcuts setup page in BackOffice quick and easy. Employees with the relevant BackOffice permissions also have the ability to create item shortcuts from the Retail POS (S-Series) app.
-
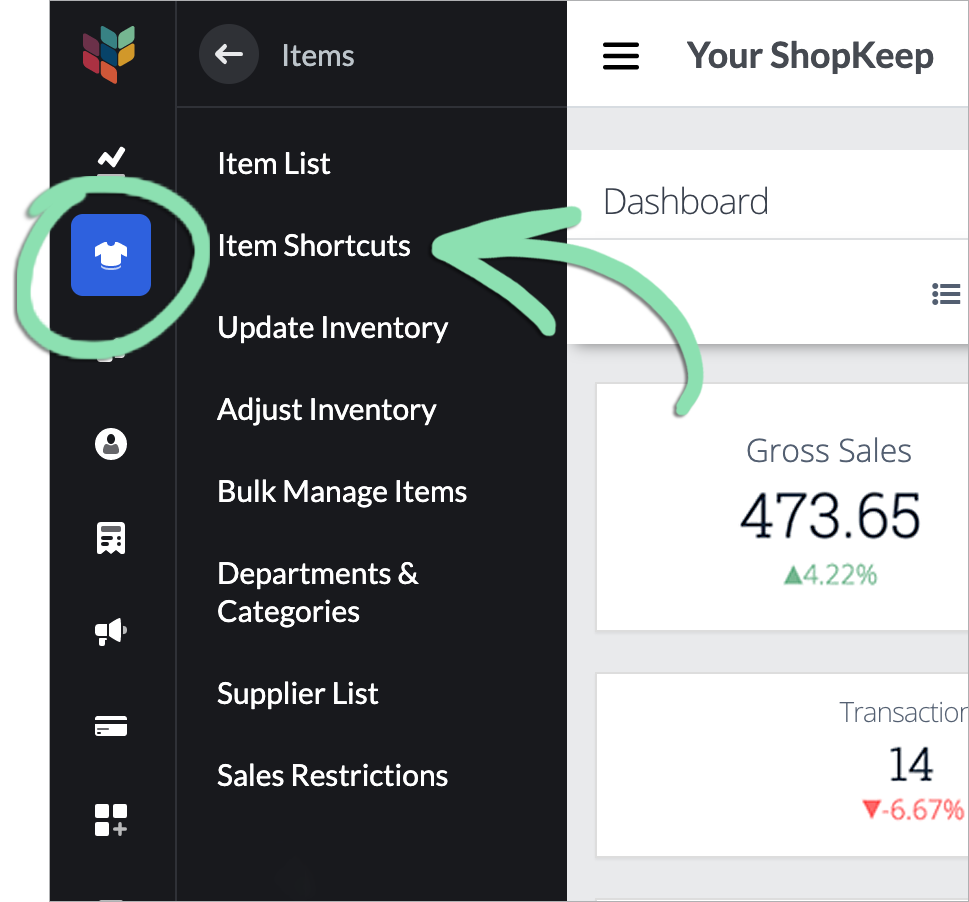
In BackOffice or the Retail POS (S-Series) app, click Items and select Item Shortcuts. You will need BackOffice permissions to do this.
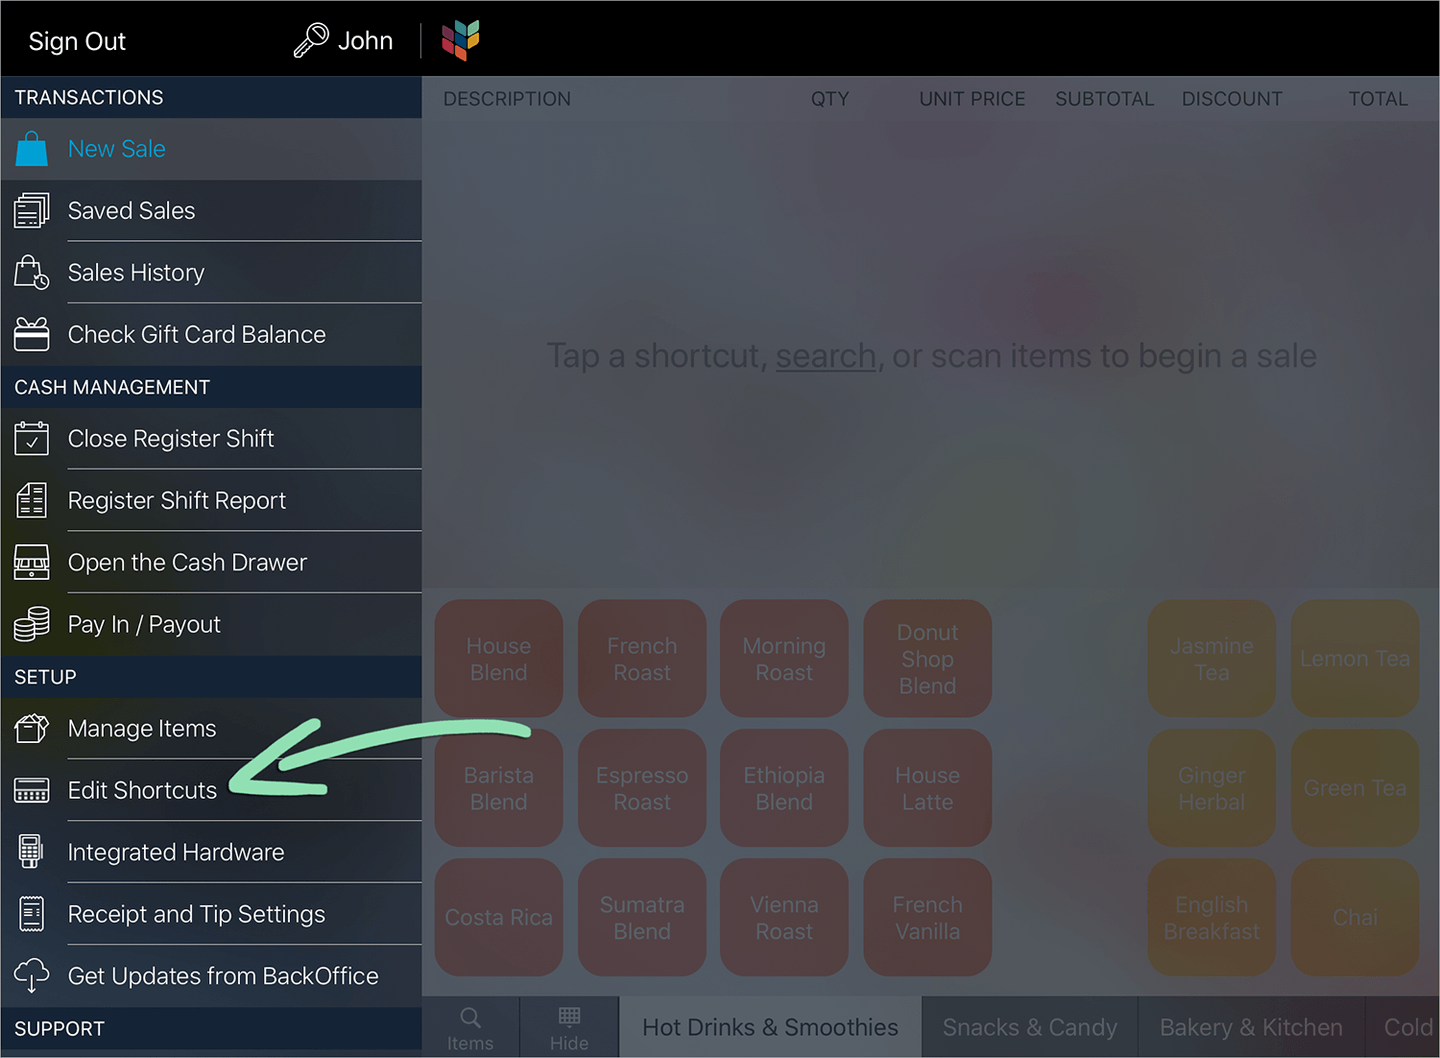
- In the Retail POS (S-Series) app, tap Edit Shortcuts on the Main Menu.
Don’t see Edit Shortcuts? Visit our troubleshooting guide for help.
-
Search for an item by name, department, category, supplier, UPC code, or SKU, or scroll through the list.
Can’t find an item on the list? Visit our troubleshooting guide for help.

-
If the layout has multiple pages, select a page to add the shortcut to.

-
Drag an item from the list to a position on the shortcuts layout panel.
If an item is made inactive after being added to the shortcuts layout panel, its shortcut will remain on the BackOffice item shortcuts setup page until manually removed.

- (Optional) Repeat steps 2 - 4 to add shortcuts for additional items to the shortcuts panel.
- If adding item shortcuts from BackOffice, get updates on the iOS register to sync the changes to the register.
If you have questions about adding shortcuts to the shortcuts panel, visit our Setup FAQ for answers.
Moving and removing shortcuts
Move shortcuts on the item shortcuts setup page to change their position on the sale screen at the register. Remove shortcuts to prevent them from appearing on the layout at the register.
Removing shortcuts from the shortcuts panel doesn't prevent items from being sold at the register, as items can still be rung up by searching or scanning barcodes.
Moving shortcuts
-
To move a shortcut to a new position on the same page, drag the shortcut across the shortcuts panel.

-
To move a shortcut to a different page, drag the shortcut over the tab of another page, wait for that page to open, then place the shortcut on the new page.
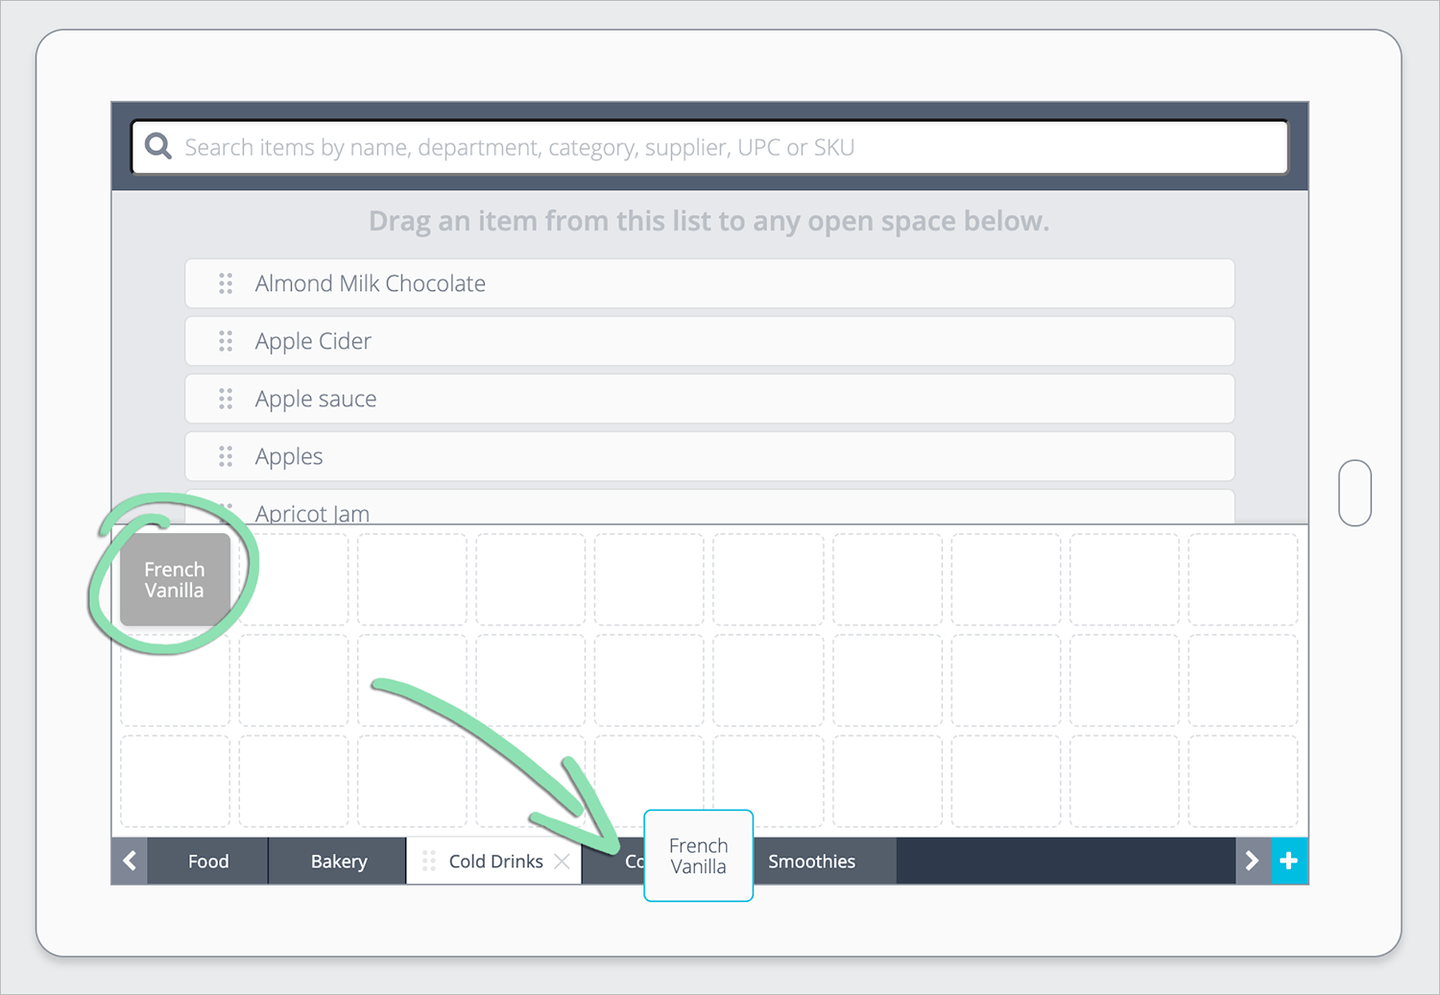

- (Optional) Repeat steps 1 - 2 to move additional shortcuts around the shortcuts panel.
- If moving shortcuts in BackOffice, get updates on the iOS register to sync the changes made to the register.
Removing shortcuts
-
Drag a shortcut up to the list to stop it from appearing on the shortcuts panel.
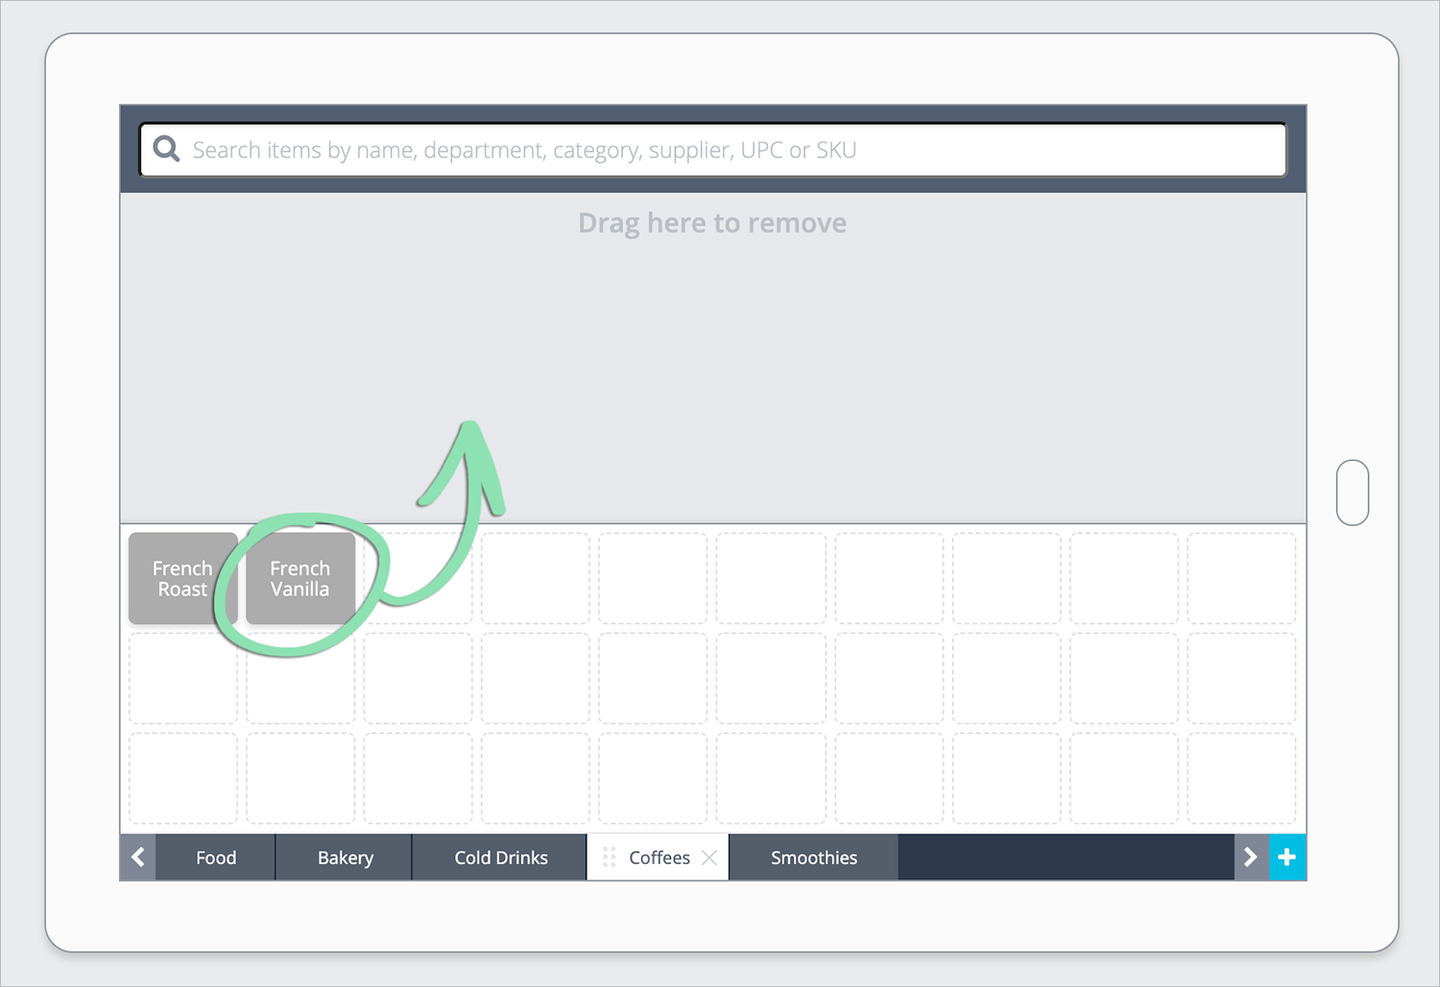
- (Optional) Repeat step 1 to remove additional shortcuts from appearing on the shortcuts panel.
- If removing shortcuts in BackOffice, get updates on the iOS register to sync the changes made to the register.
Managing pages
Create additional pages to make room for more shortcuts or to organize shortcuts into specific groups of your choosing. Change the order in which pages appear, rename pages, and delete pages to further organize the item shortcuts.
-
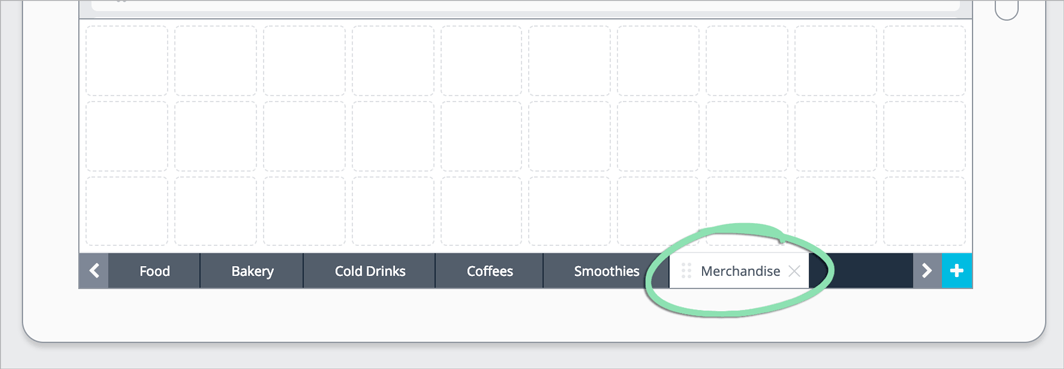
Click the + to add a new page.

-
Click the new page name to edit it.

-
Enter a name for the new page.
The name saves automatically after navigating away from the text field.
-
(Optional) Drag a page to change the order in which it appears.

- To rename a page:
- Select a page to rename.
-
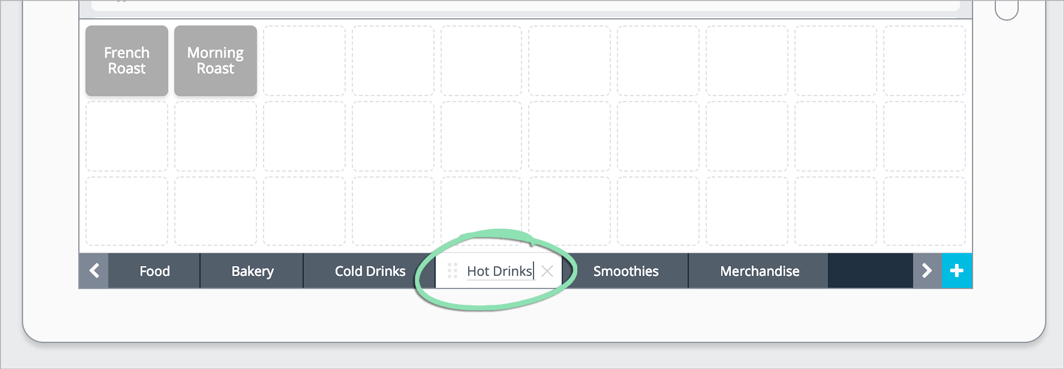
Click to edit the page name.

-
Enter a new name for the page.
-
To delete a page, click the X next to its name. If prompted, select Continue to confirm.
Deleting a page will automatically remove the shortcuts on that page from the shortcuts panel and return those items to the list at the top.


- (Optional) Repeat steps 1 - 6 to add, rename, and delete additional pages.
- If managing pages in BackOffice, get updates on the iOS register to sync the changes made to the register.
Shortcut customization
Change the colors, labels, and sizes of shortcuts to customize how shortcuts appear on the sale and return screens at the register for added visibility and flair.
Changing shortcut colors and labels
-
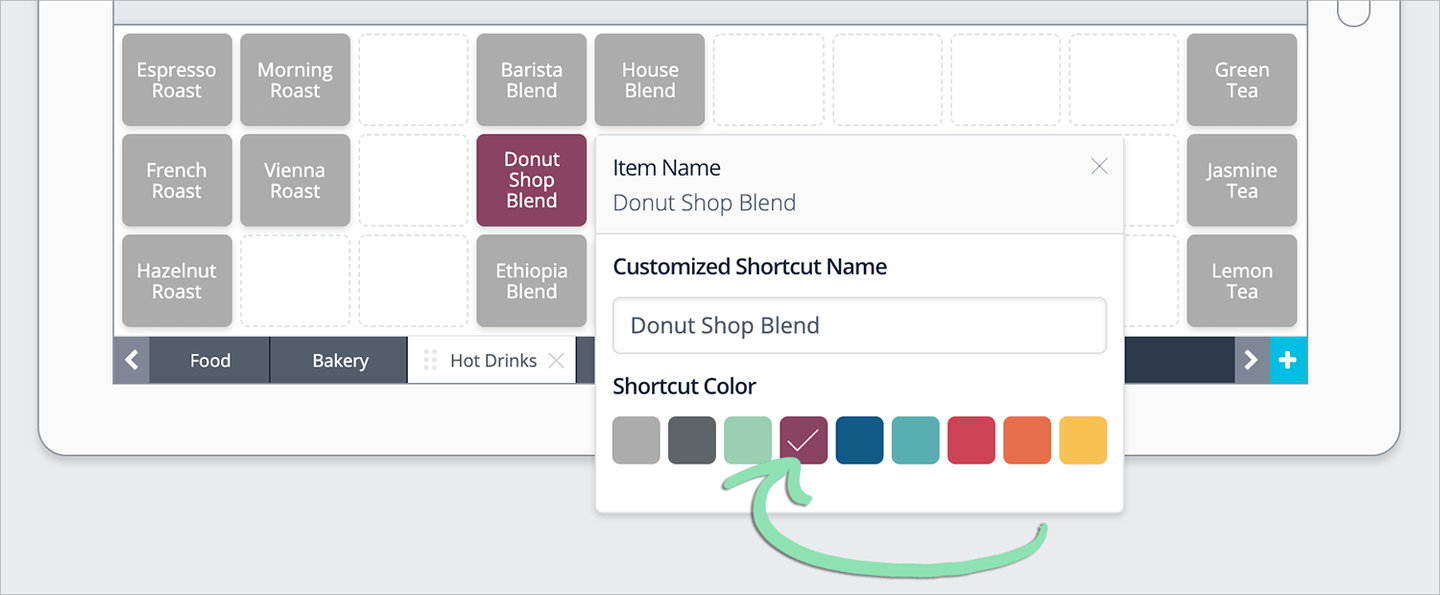
Click a shortcut on the layout.

-
(Optional) Select a shortcut color.
-
(Optional) Enter text in the Customized Shortcut Name field to relabel the shortcut.
This text appears only on the item shortcuts panel, not in reporting, on kitchen tickets, or on receipts.
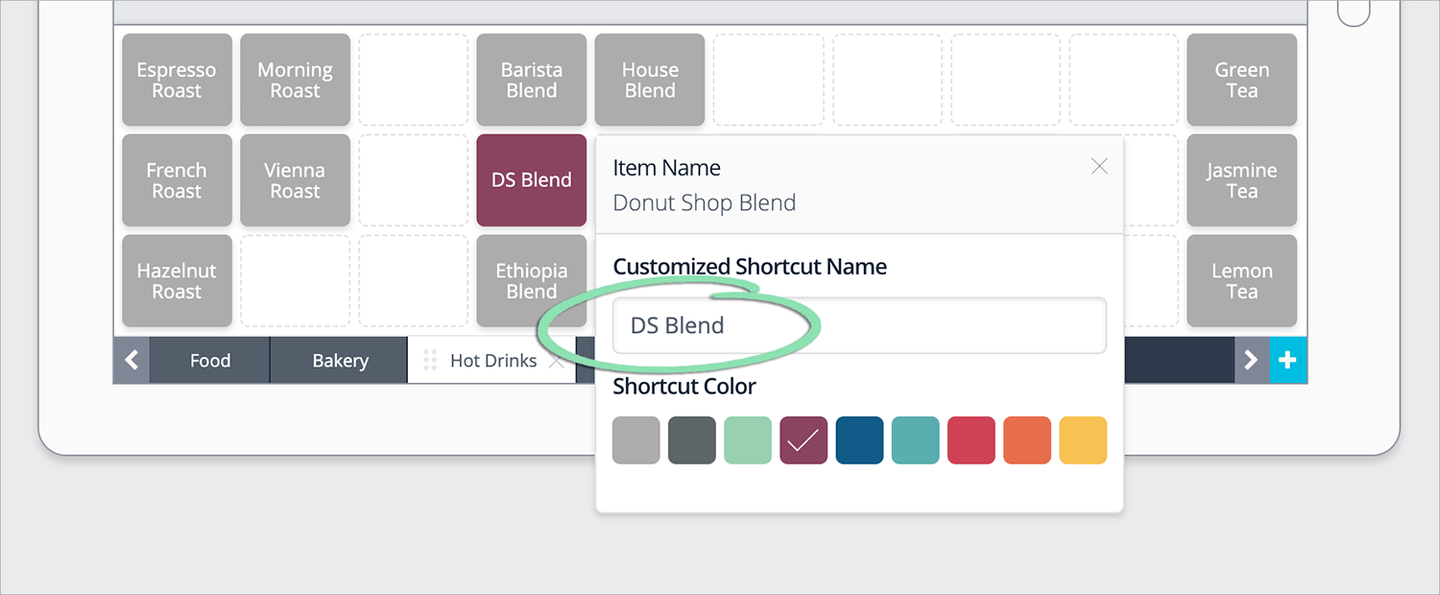
- (Optional) Repeat steps 1 - 3 to customize additional shortcuts.
- If customizing shortcuts in BackOffice, get updates on the iOS register to sync the changes to the register.
Resizing shortcuts
-
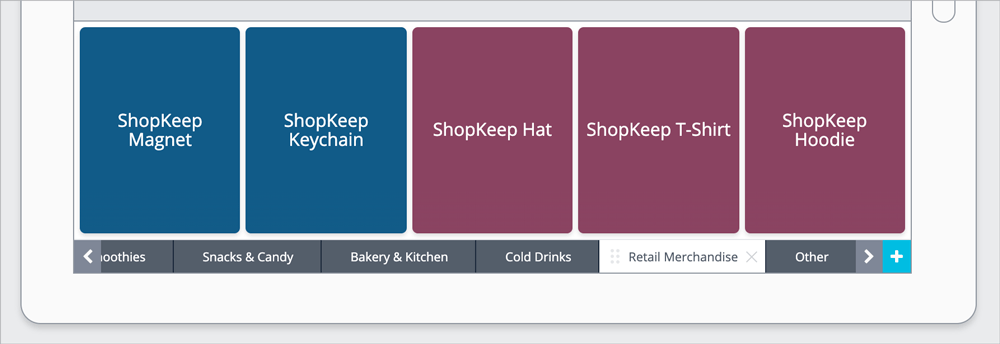
Click and hold any corner of a shortcut on the layout.

-
Drag the shortcut to the desired size.
Shortcuts can be resized to fit any number of empty spaces on the panel, from 1 to all 30. If an existing shortcut is in the way, move or remove that shortcut before resizing.

-
(Optional) Repeat steps 1 - 2 to resize additional shortcuts.
- If customizing shortcuts in BackOffice, get updates on the iOS register to sync the changes to the register.
Copying shortcuts to linked locations
Businesses with multiple linked locations can automatically copy, or apply, the item shortcuts layout from one location to the others. The copied layout will replace the existing shortcuts layout in all linked locations.
This feature is available for merchants with linked locations and is only visible to the Business Owner in BackOffice.
-
Make sure items on the layout of the current store exist in each linked location.
Items missing from inventory in other locations will not be added to the layouts of those stores. For help identifying missing items, visit our troubleshooting guide.
-
From the BackOffice item shortcuts setup page, click Apply to linked locations.
This will overwrite the existing layout in all linked locations with the layout from the current store.

-
Review the message box and click Apply to confirm.

-
Switch to another location, and visit the Item Shortcuts page to check the status of the layout being copied to that location.
Once finished copying to this location, the Work in progress notification will disappear. If necessary, switch to other linked locations to see the progress there as well.

- Get updates on the iOS register to sync the changes to the register.
Shortcuts at the register
Learn the different ways of navigating between pages of item shortcuts at the register to quickly and efficiently find the item you need to ring up.
To move between adjacent pages, swipe left and right on the shortcuts panel.
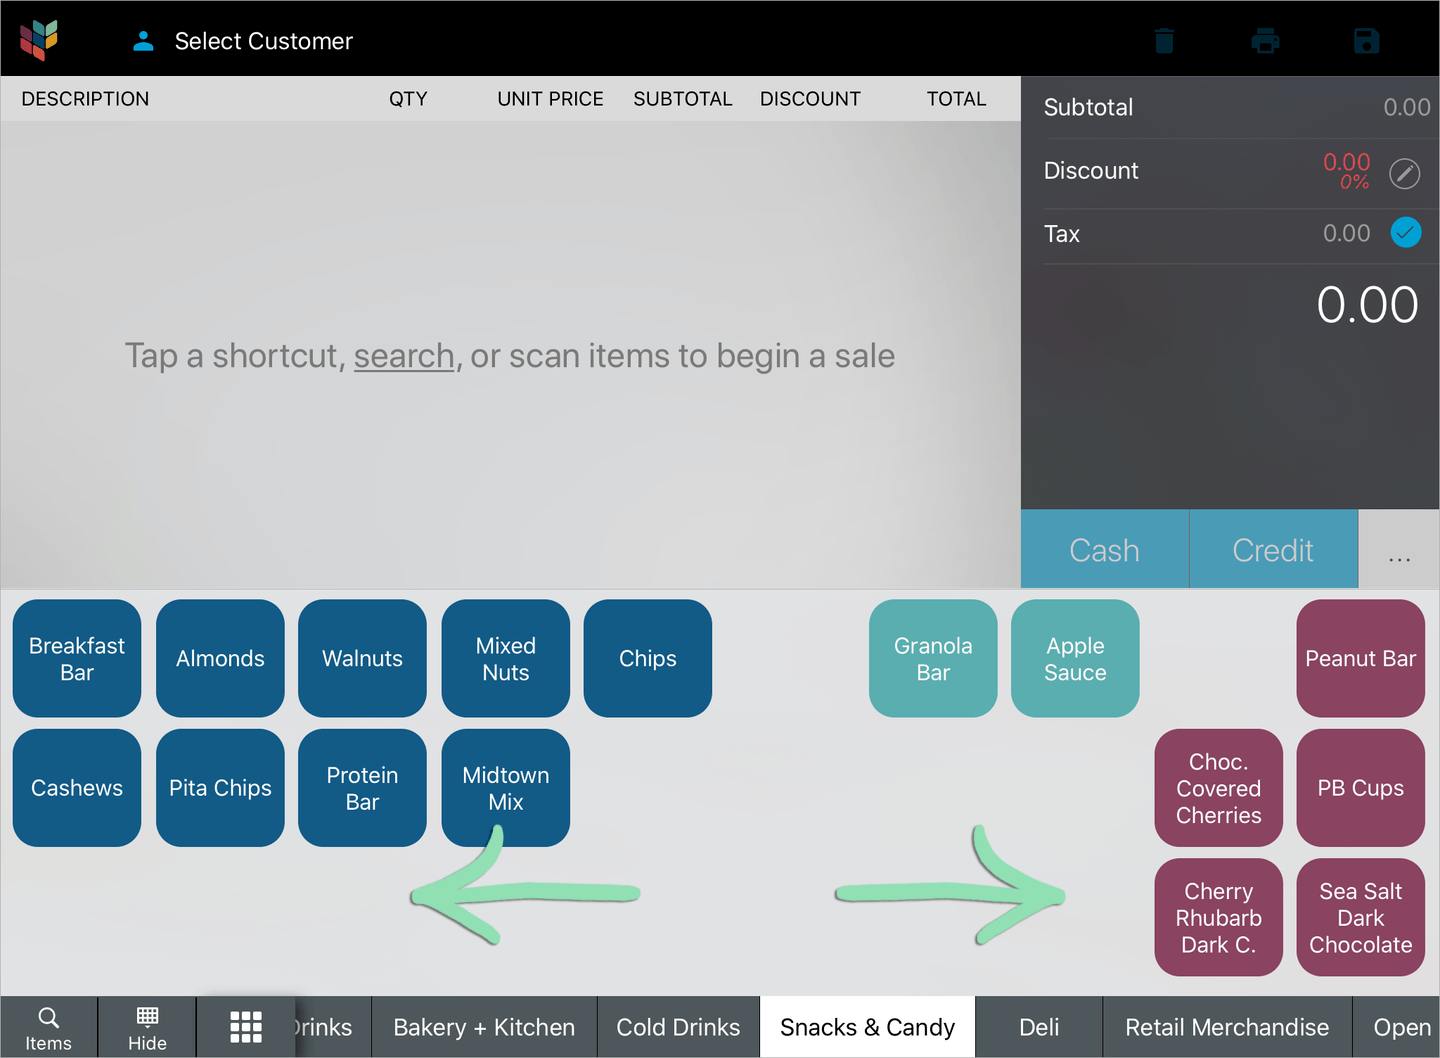
To find a specific page, scroll through the page tabs and tap on a page.

To view an alphabetized index of pages, tap the grid icon and select a page.

To hide or unhide the item shortcuts, tap Hide or Show.