Sunmi T2 Lite Setup
The Sunmi T2 Lite is a dual-screen countertop solution for running sales and returns with the Retail POS (S-Series) app. As the cashier runs a transaction on the main display, the other screen shows the customer details of their sale or return. Follow the steps below to learn how to set up and activate this register.
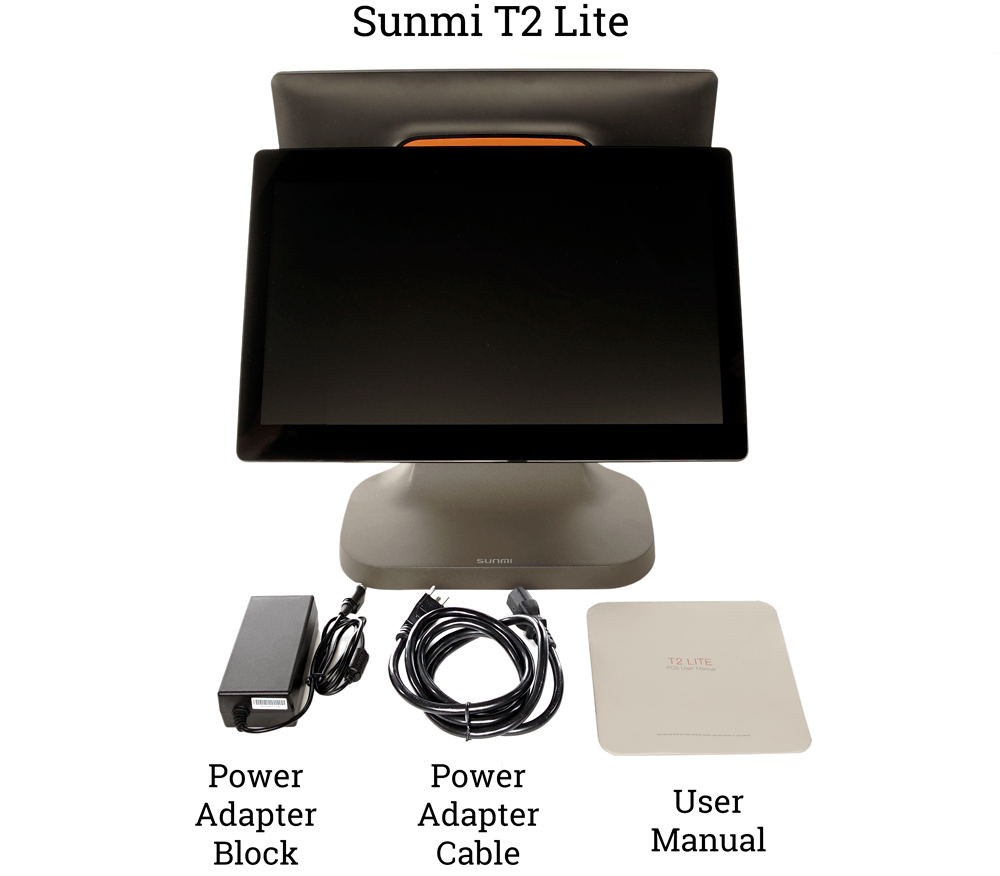
In the Box
The Sunmi T2 Lite ships with the parts listed below.
Hardware Setup
Complete the basic steps of setting up and powering on the Sunmi T2 Lite hardware. Once on, the device can be activated for use with the Retail POS (S-Series) app.
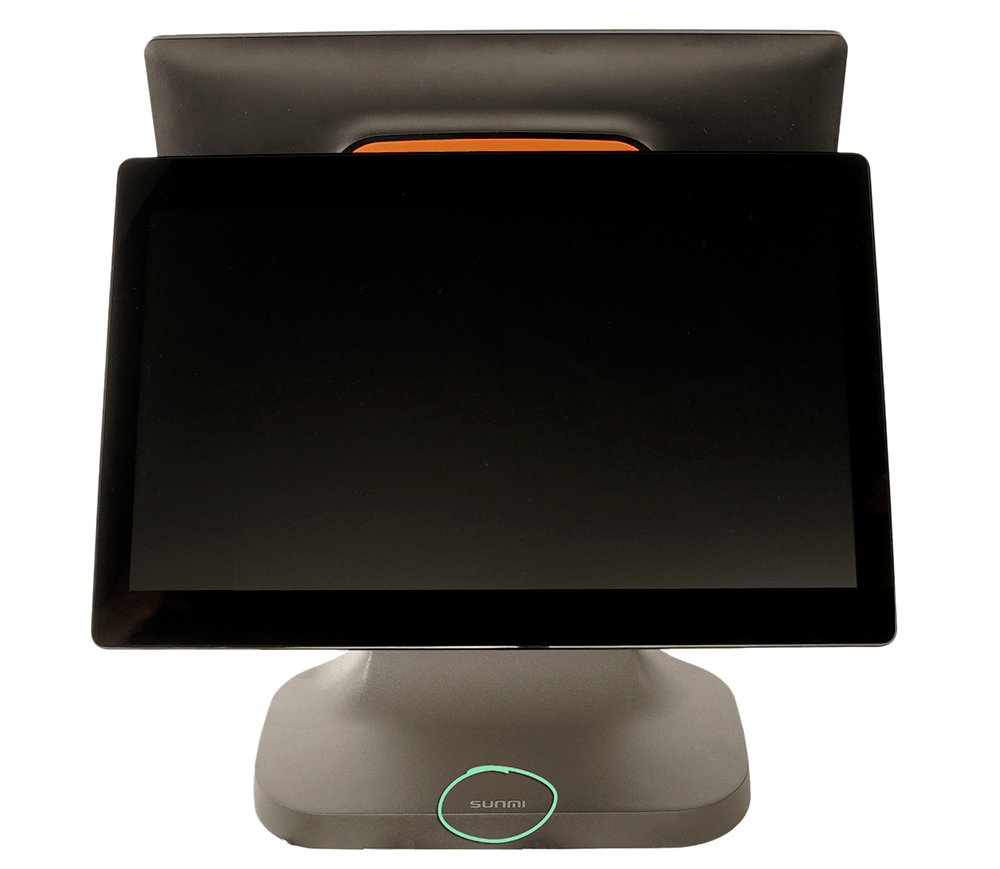
- Place the Sunmi T2 Lite on a flat surface with the ‘Sunmi’ logo on the base facing you.
- Tilt both screens backward until the screen closest to you is almost horizontal.

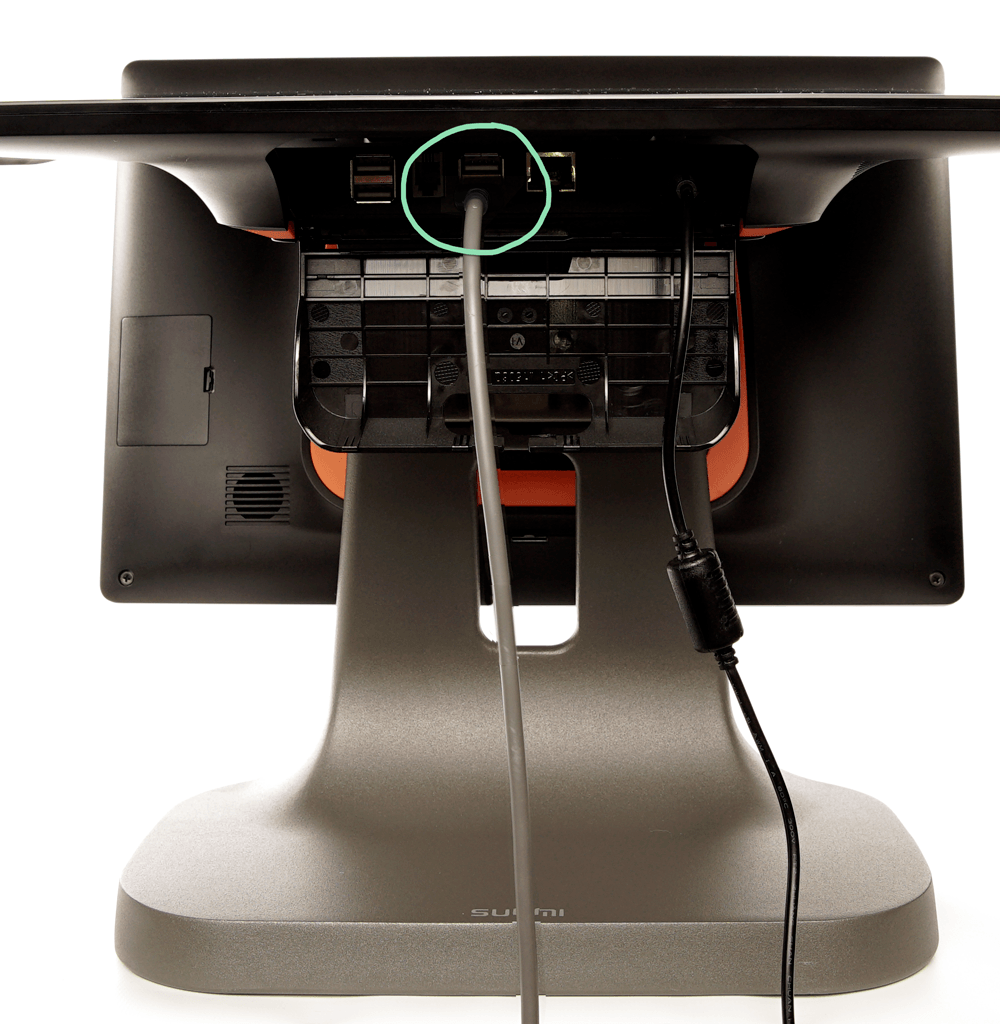
- Pull down to open the port cover.
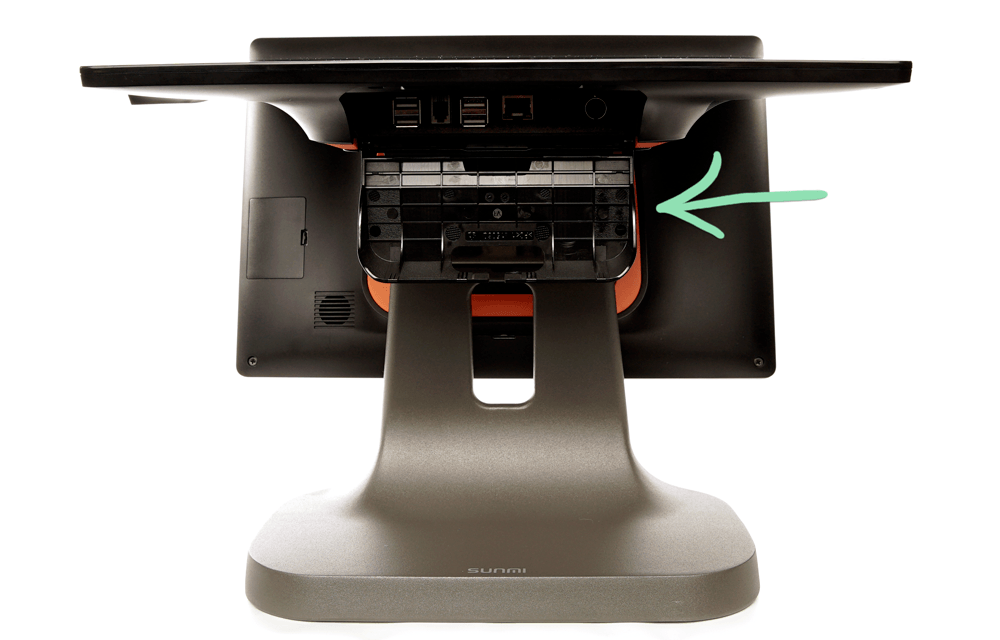
- Plug the power cable into the rightmost port.

- Close the port cover, then readjust the screens as desired.
- Plug the power cable into the power adapter block.

- Plug the power cable into a power outlet.
- Hold the power button to turn on the Sunmi.

- Continue to the next section below to activate the device.
Device Activation
After setting up the Sunmi T2 Lite hardware, use the setup wizard to complete the device activation process. Once the device is activated, you will be ready to activate the Retail POS (S-Series) app.
- Tap ‘Start Setup’.

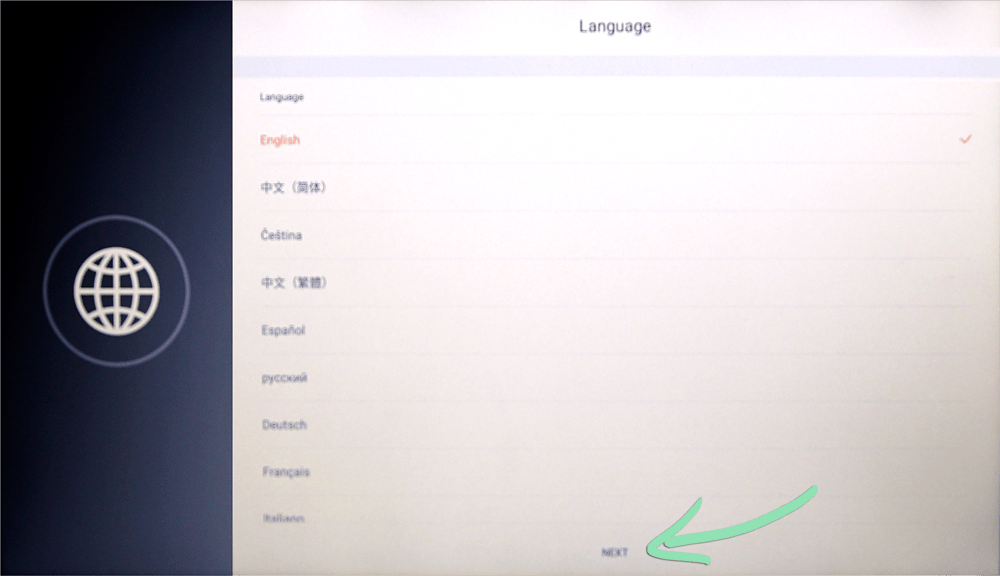
- Tap ‘Next’ to select English as the language.
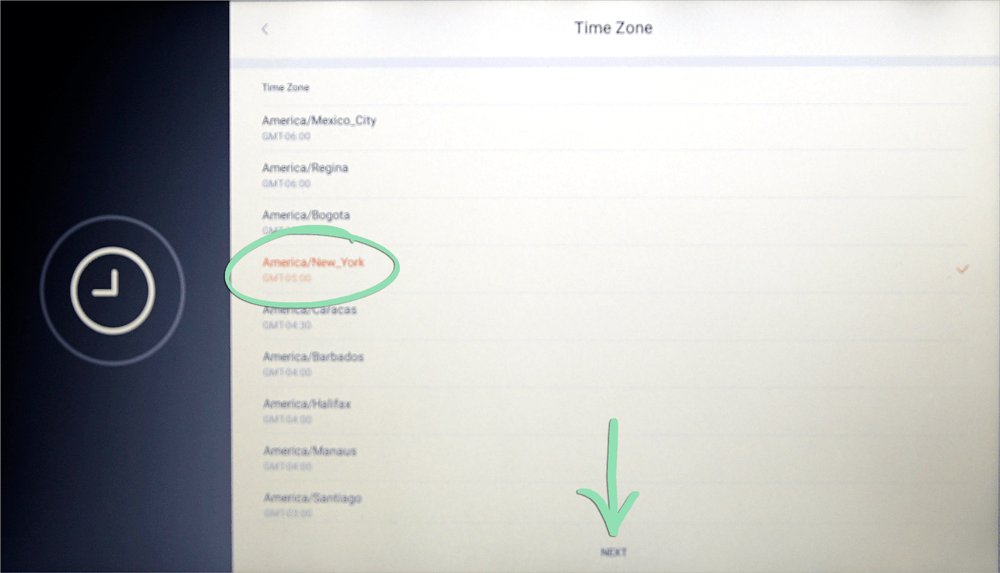
- Select your time zone and tap ‘Next’.
- If connecting via Wi-Fi, tap 'WLAN'.
To connect via ethernet, plug an ethernet cable into the ethernet port on the Sunmi and connect the other end of the cable to your router.

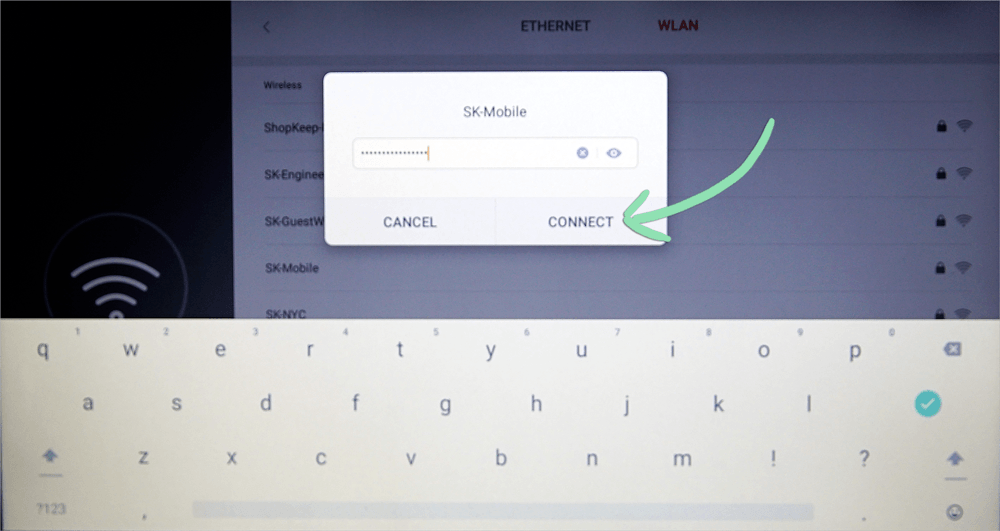
- Select your Wi-Fi network.

- Enter the network password, then tap 'Connect'.
- Once connected, tap 'Next'.

- Tap 'Start Config'.

- Wait for the Sunmi to configure its custom content and download and install all apps.
Once finished, the home screen will automatically load.


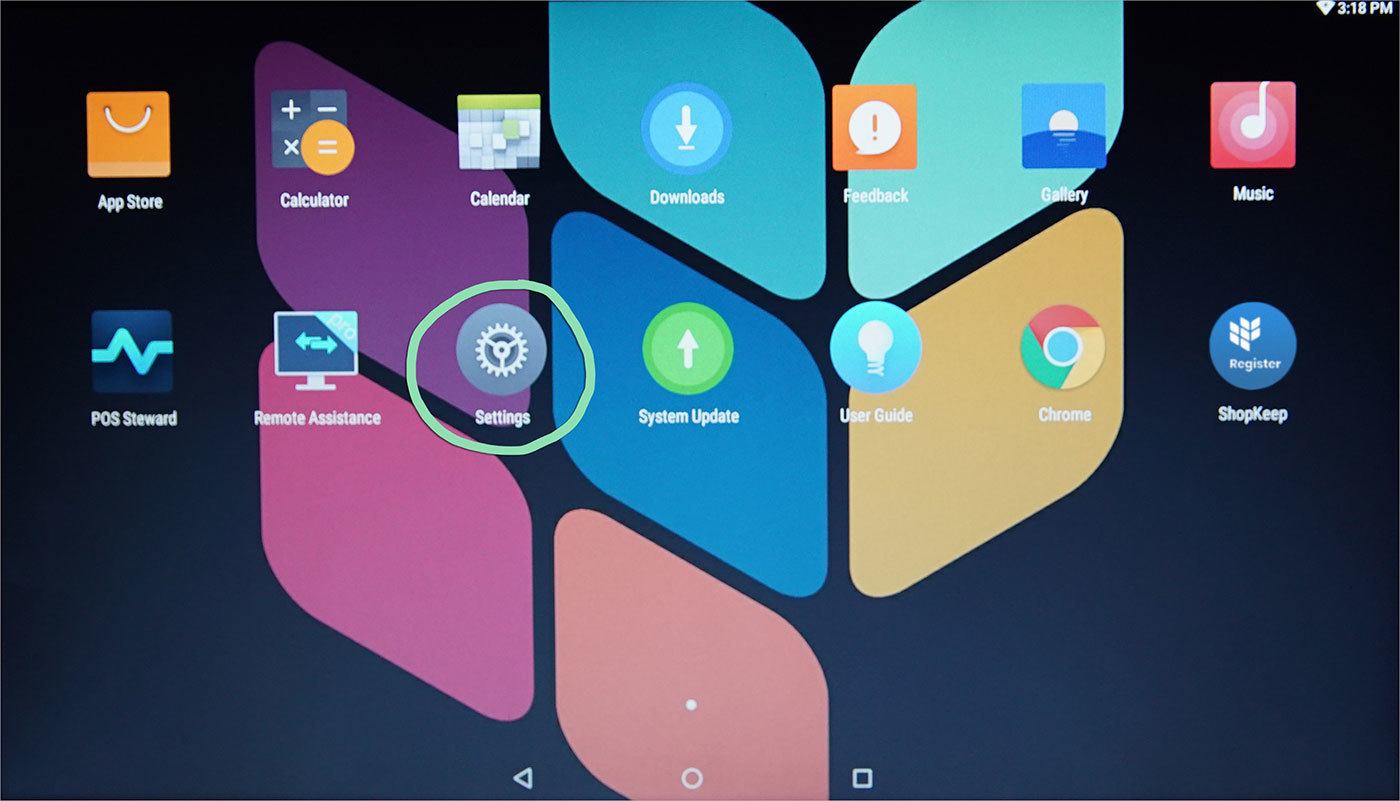
- (Optional) Enable touch input for the customer-facing screen of the Sunmi.a From the home screen, open the ‘Settings’ app.
 b In Settings, tap ‘Lab’.
 c Enable ‘TP of custom display(Mirror Mode)’.
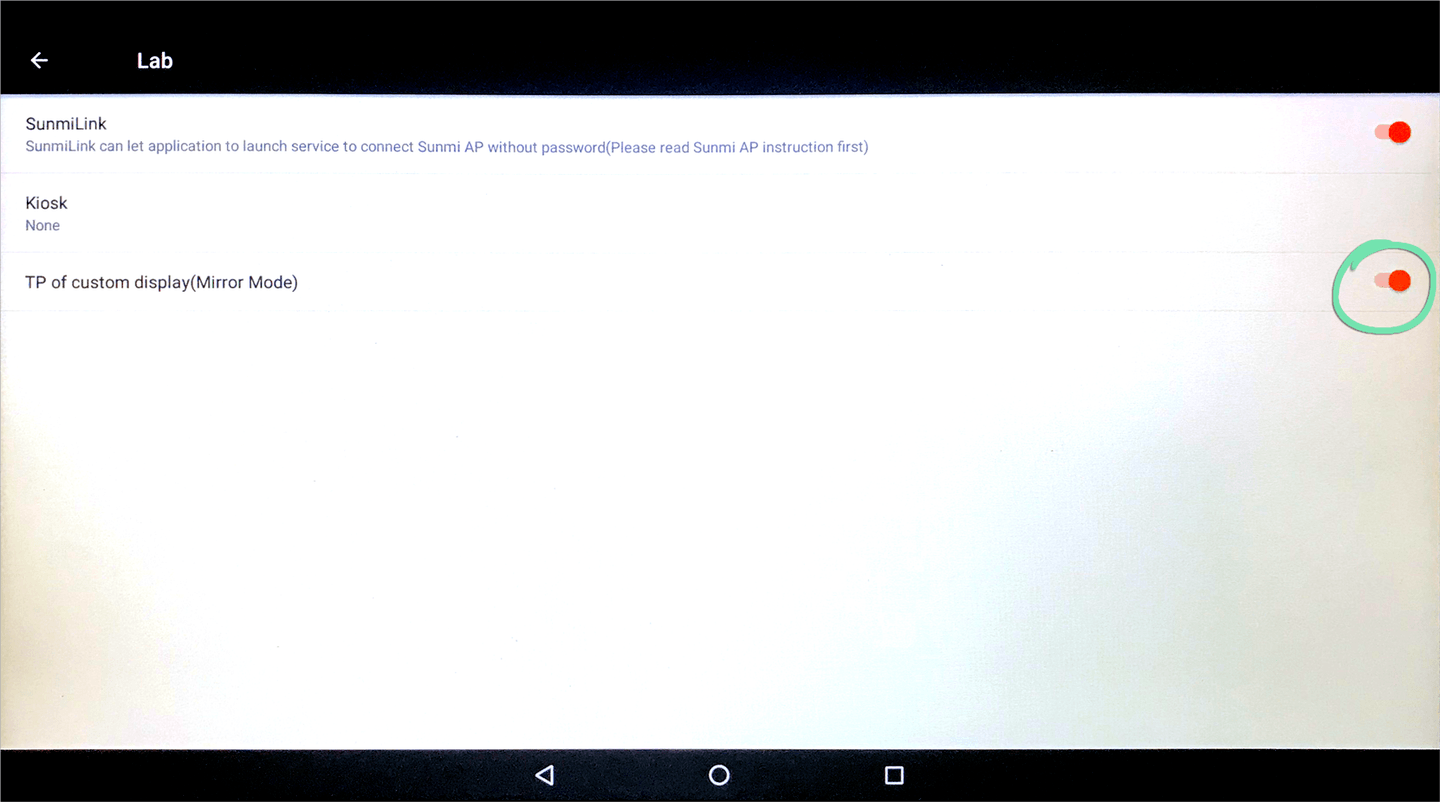
- Follow the steps below to activate the Retail POS (S-Series) app.
Activate Retail POS (S-Series)
With the Sunmi T2 Lite powered on and activated, open and activate the Retail POS (S-Series) app to begin ringing up sales.
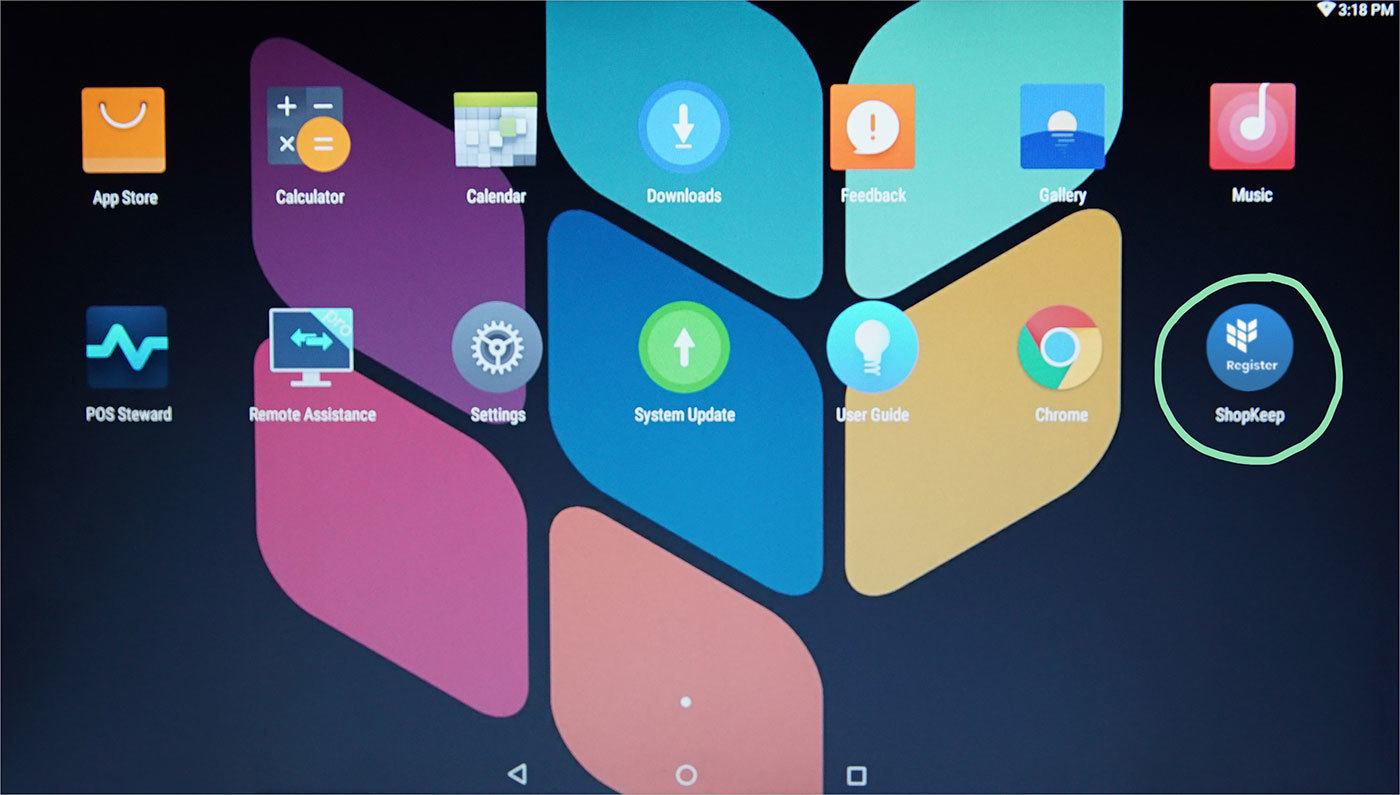
- From the home screen, open the Retail POS (S-Series) app.
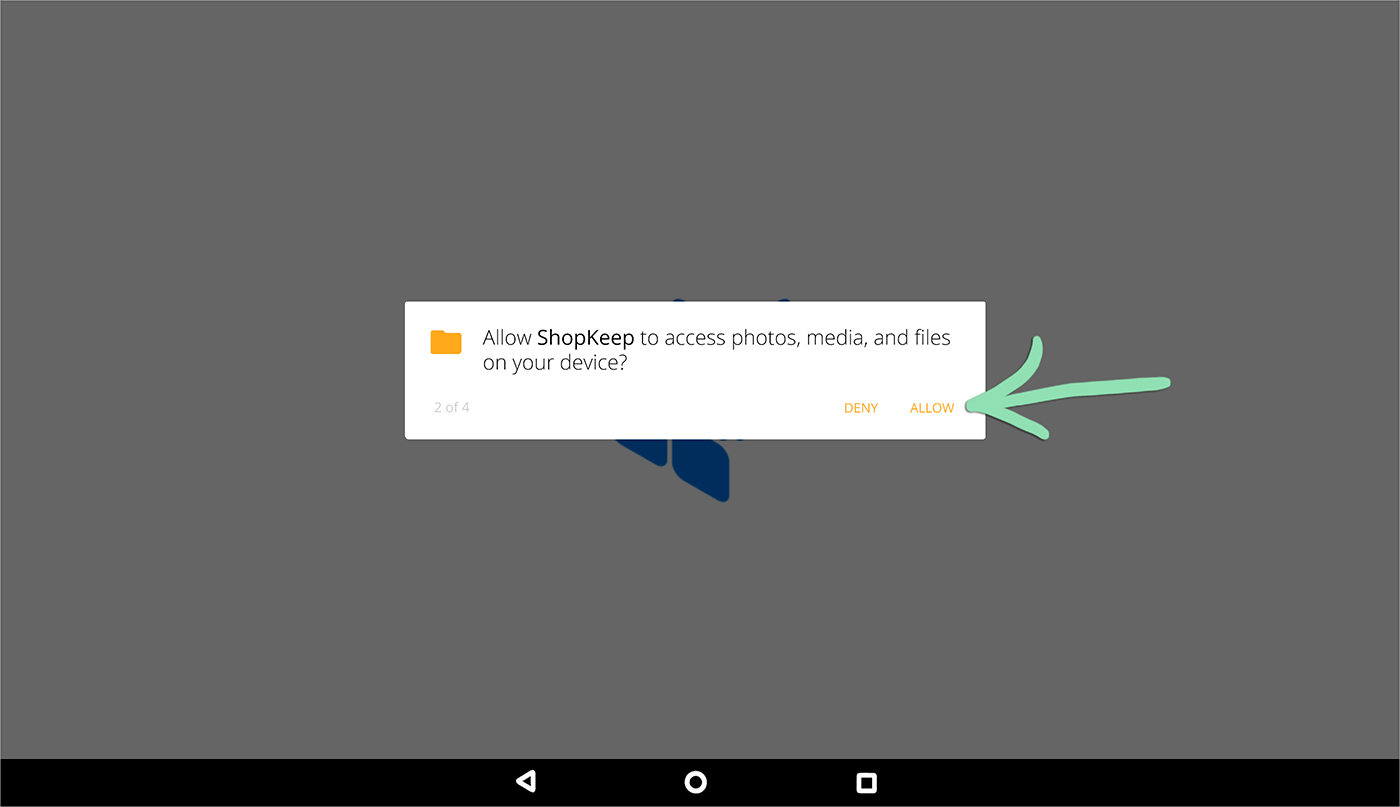
- Tap 'Allow' on each prompt to grant the Retail POS (S-Series) app the necessary permissions.
- Tap 'Activate Your Register'.

- Enter your store name and manager code, then tap 'Activate'.
Store Name | Lightspeed Retail account name, with no spaces or punctuation, found in your welcome email.
Manager Code | 4-digit code which can be found in the BackOffice staff list.
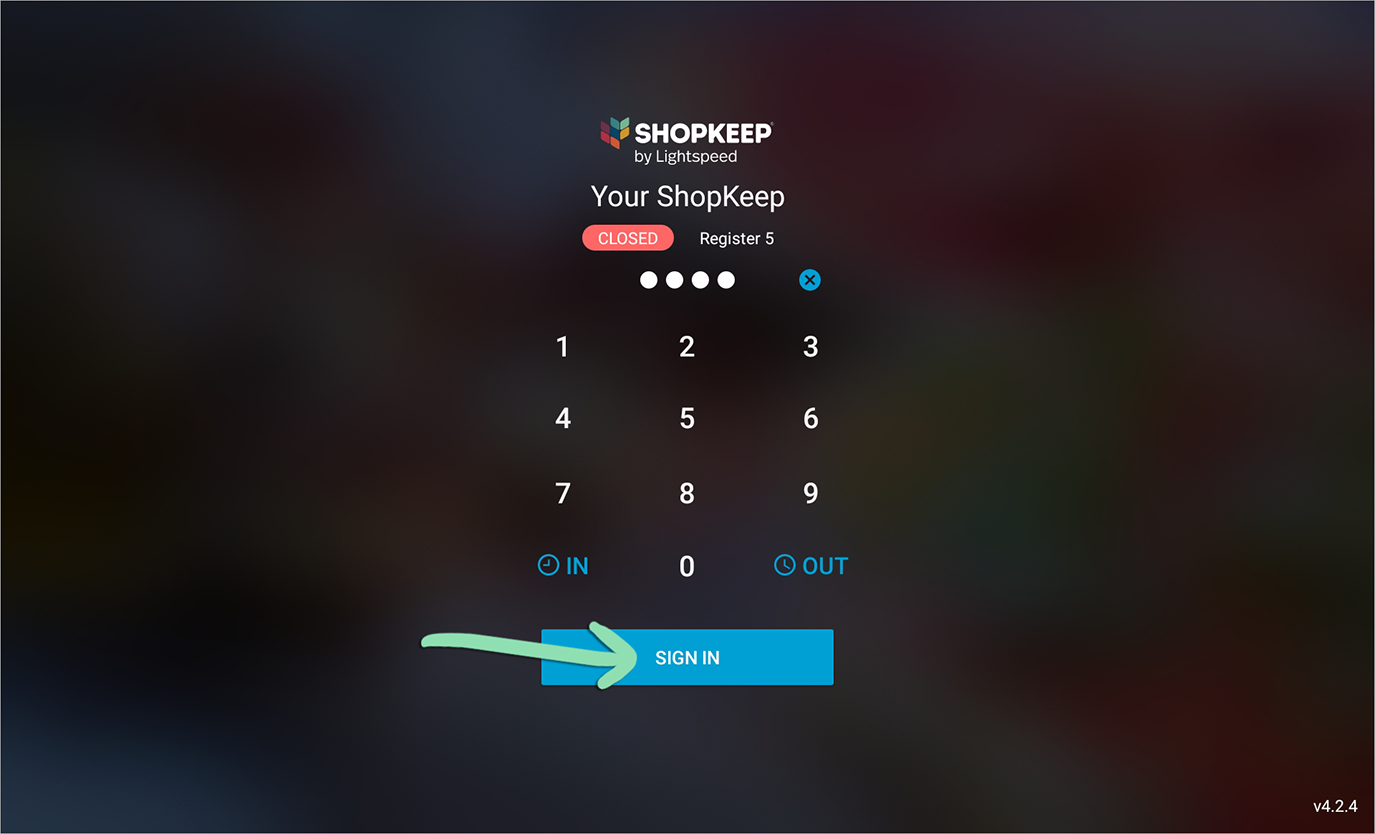
- Enter the manager code and tap 'Sign In' to start using the register.
Register Peripherals
Learn how to set up our supported barcode scanner, credit card reader, receipt printer, and cash drawer for use with the Sunmi T2 Lite. Each accessory is optional, so set up only what you would like to use with the register.
Barcode Scanner Setup
Set up the Zebra DS2208 or DS4608 barcode scanner and stand with the Sunmi T2 Lite to verify age-restricted products by scanning customer state-issued driver’s licenses, IDs, and passports (DS4608 only) and to ring up products by scanning barcodes. Put the barcode scanner in the stand to enable hands-free scanning for easy access and speedy transactions.
The barcode scanner ships with the following parts:
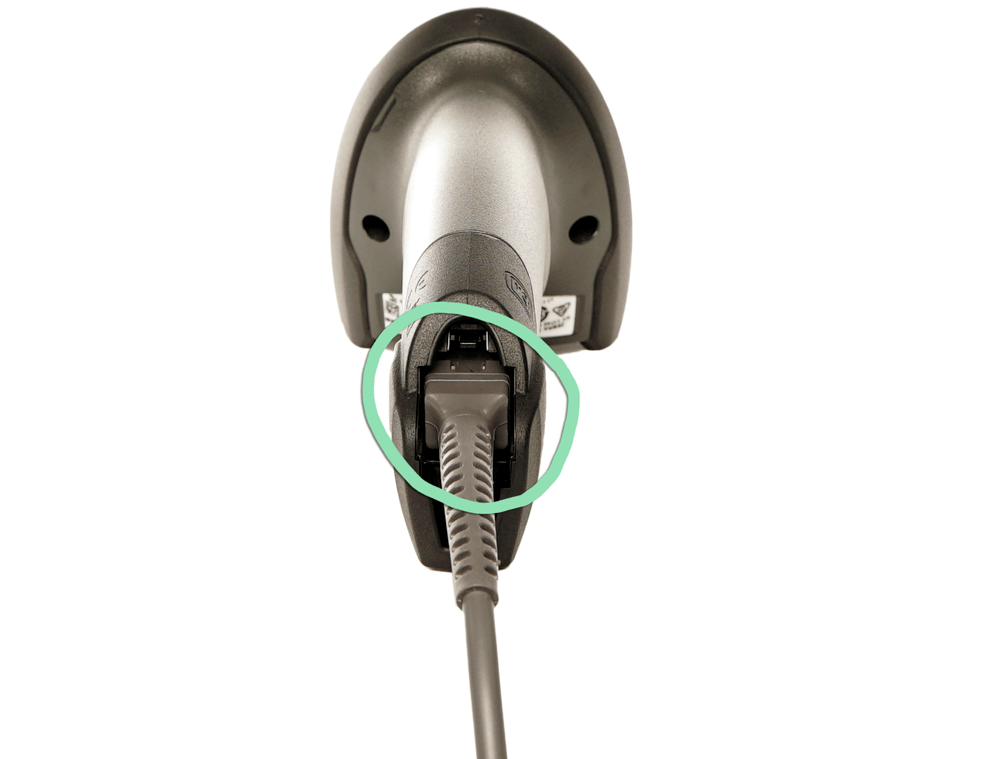
- Plug the non-USB end of the scanner cable into the barcode scanner.
-
Plug the USB end of the scanner cable into any available USB port on the Sunmi, either on the bottom or side of the device.USB port on bottom of Sunmi T2 Lite
 USB port on side of Sunmi T2 Lite
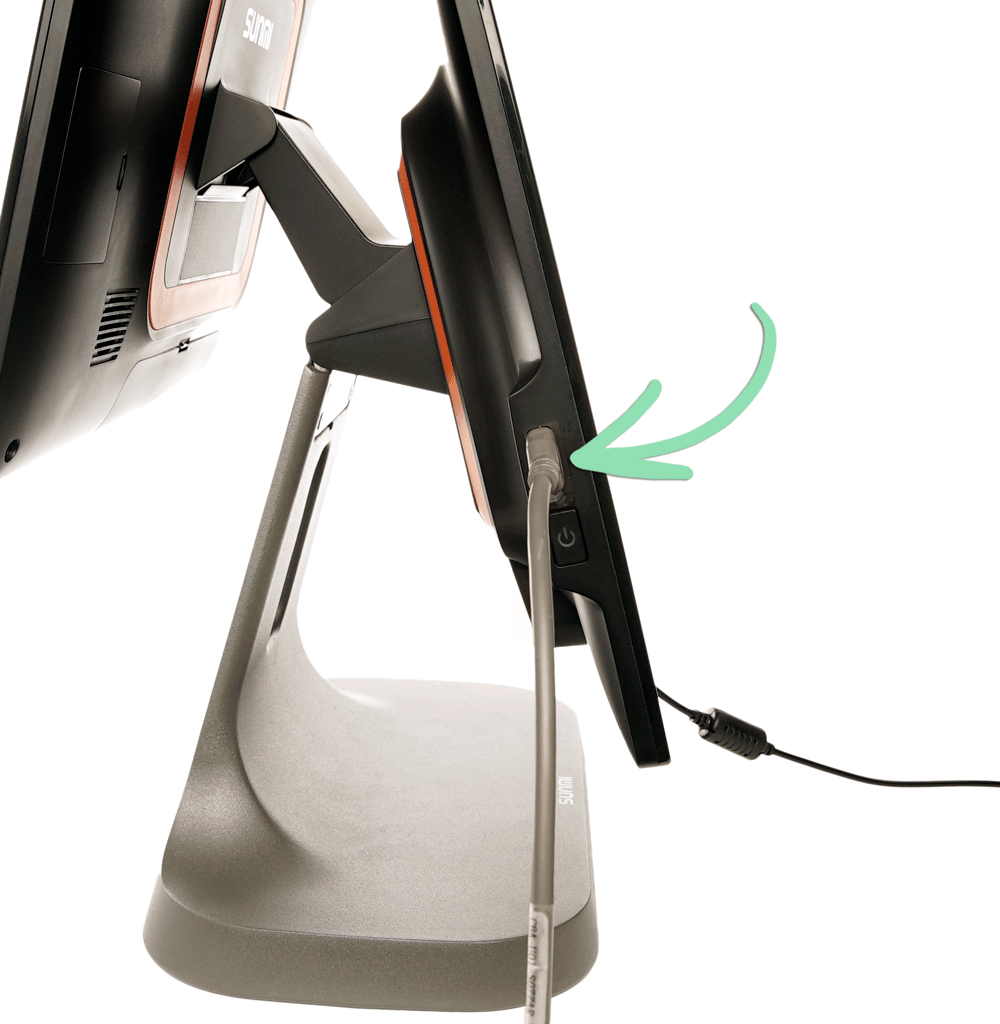
- In the Retail POS (S-Series) app, tap ‘OK’ if prompted.
- (Optional) Assemble the scanner stand.a Unscrew the wingnut from the stand shaft.
 b Insert the shaft into the stand base and tighten the wingnut.
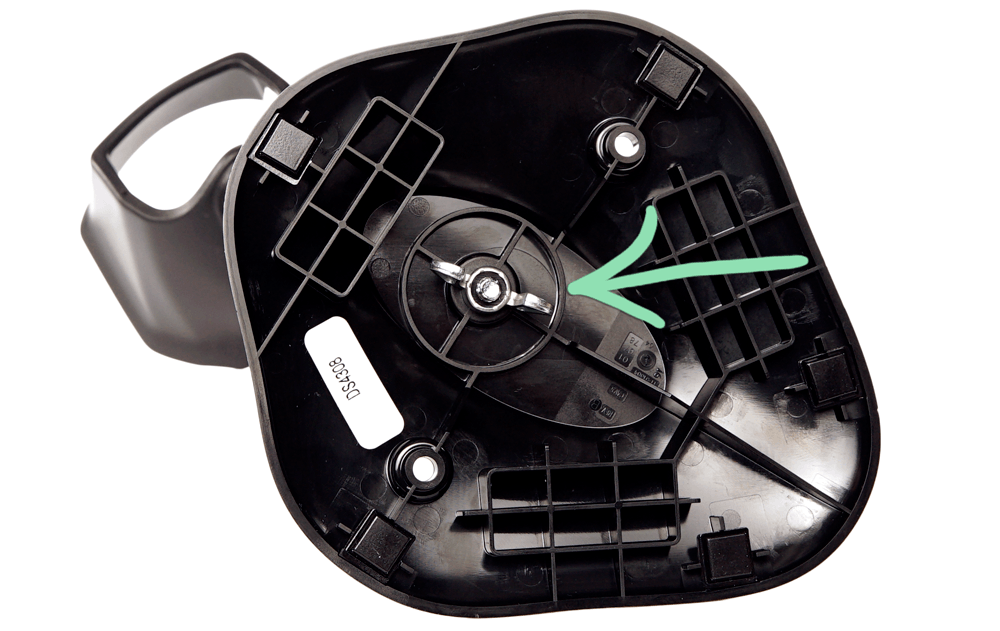 c Place the scanner in the stand.
- Follow steps 5 - 11 here in the Retail POS (S-Series) app to finish setting up the scanner.
Failure to complete these additional steps may prevent the scanner from working properly in the Retail POS (S-Series) app.
Clover Go Credit Card Reader
The Clover Go Bluetooth Credit Card Reader connects wirelessly to the Sunmi T2 Lite to process EMV, swiped, and contactless credit payments. With its small size and rechargeable battery, the Go is the perfect portable credit card reader to go wherever the register is needed.
The credit card reader ships with the following parts:
Before following the steps below, make sure Bluetooth and Location settings are enabled in the Settings app.
- Follow the steps here to charge the reader.
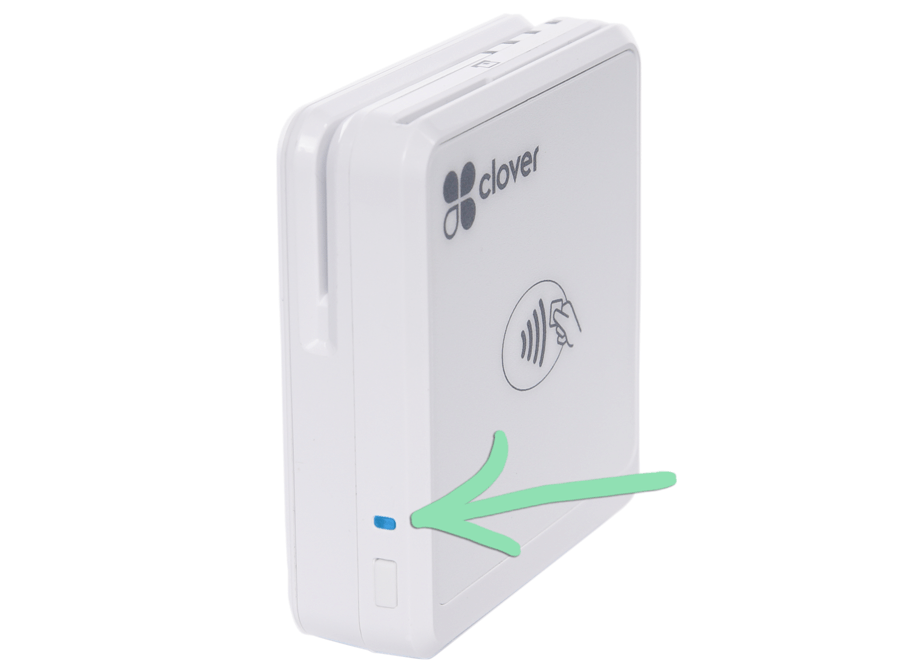
- Make sure the Clover Go is powered on. The blue status light will blink if on.
If the Go is not on, hold the power button for 5 seconds until you see the blue light. If the Go will not power on, visit our troubleshooting guide for help.
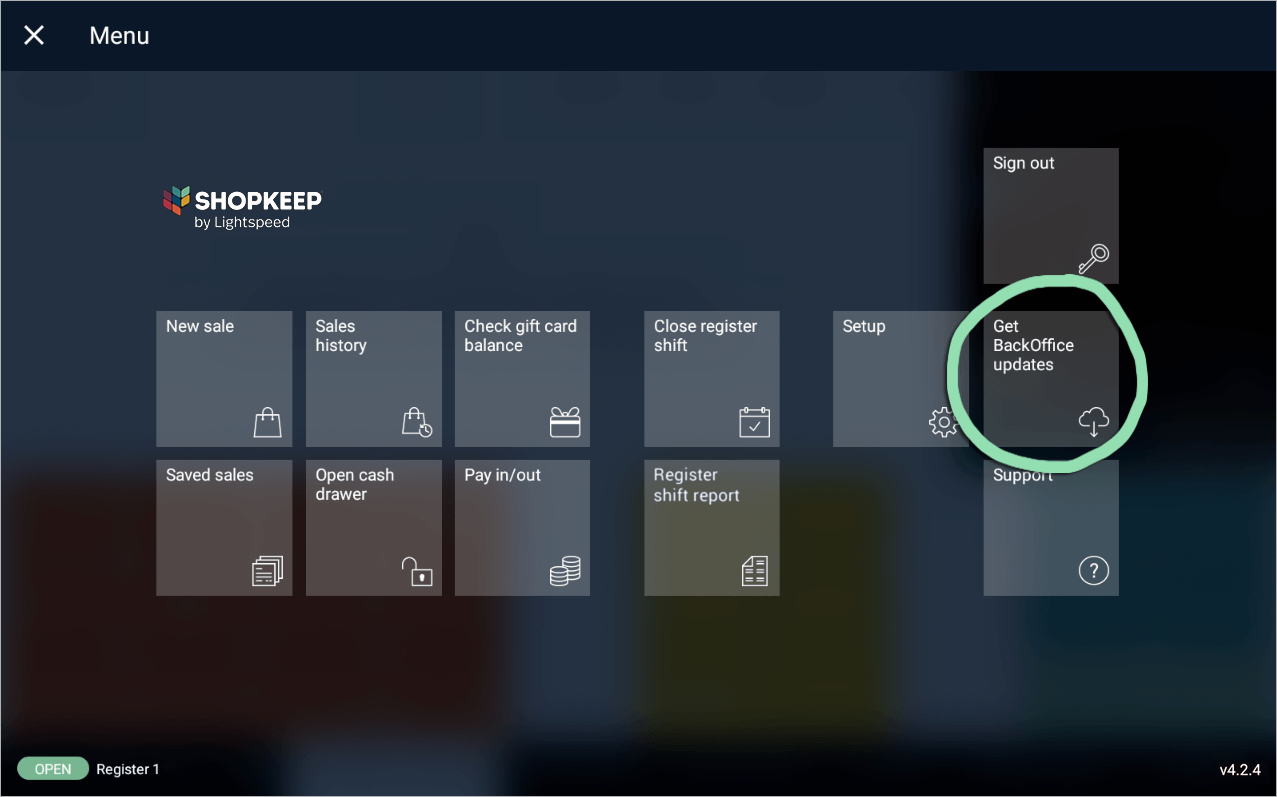
- In the Retail POS (S-Series) app, open the register menu and tap ‘Get BackOffice Updates’.
- From the register menu, tap ‘Setup’.
- Select ‘Card Readers’.

- Toggle the switch next to the card reader to enable it.
The Clover Go is now ready to process credit cards in Lightspeed Retail.

To learn how to charge the Clover Go via the included stand, visit our complete setup article.
Receipt Printer Setup
The Epson TM-m10 USB printer plugs directly into the Sunmi T2 Lite to print customer receipts and employee shift reports. Set up the printer to begin using it at the register.
The receipt printer ships with the following parts:
-
Squeeze the sides of the bottom panel (four rubber feet) and pull it away from the printer to remove it, then remove the other panel.


- Plug the power adapter cable into the round power port.

- Plug the included USB cable into the USB port.
To prevent the USB cable from accidentally disconnecting from the printer, use the optional cable clip. Learn how to attach the clip here.

-
Plug the other end of the USB cable into any available USB port on the Sunmi, either on the bottom or side of the device.USB port on bottom of Sunmi T2 Lite
 USB port on side of Sunmi T2 Lite
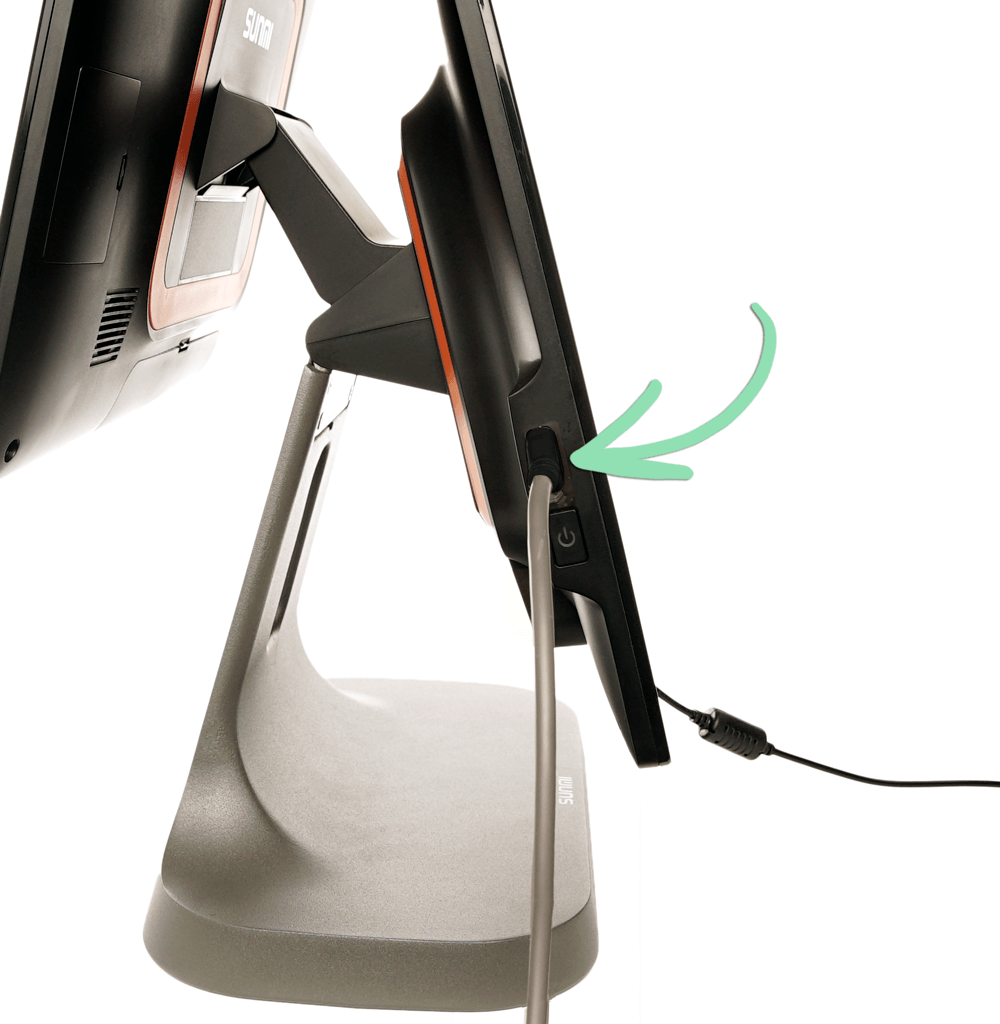
-
Snap the bottom panel back into place on the printer, then reattach the side panel.The panels are interchangeable, so attach them in whichever orientation you prefer.


- Connect the adapter cable to the wall adapter, then plug the wall adapter into a power outlet.

- Press the power button to turn on the printer.
To prevent the printer from being accidentally turned off, use the optional power button cover. Learn how to attach the cover here.

- Lift the gray latch to open the cover, load the paper, and close the cover on the paper.
The paper must feed from the bottom of the roll as shown below.

- Wait for the status light to turn solid blue and for the other lights to turn off.

- (Optional) Follow the steps here to test the connection between the Retail POS (S-Series) app and the printer.
Cash Drawer Setup
Connect a cash drawer to the Sunmi T2 Lite to have the drawer open automatically during cash transactions and whenever a manager taps ‘No Sale’.
- Plug the larger end of the cable included with the cash drawer into the bottom of the drawer.

- Plug the small end of the cash drawer cable into the port next to the power cable on the bottom of the Sunmi T2 Lite.
